Sweet and Spicy Monkey has moved to: www.sweetandspicymonkey.com

Showing posts with label snacks. Show all posts

Sunday, February 21, 2016

No-Bake Granola Bars


Recently I attended a Facebook Q&A (well, I logged onto and submitted a question) for David Lebovitz on Sur La Table's Facebook page. Sur La Table's Q&A gives fans a chance to ask questions to some of their favorite food chefs. And I was lucky enough to see this one for David Lebovitz coming up.

You know where you see something coming up and you get all excited about it? And then the day comes around and you've totally forgotten about it? Yea, that happened to me on this Q&A. Luckily, I still had 10 minutes left in it, so I thought of a quick question to ask.

One that's been on my mind (especially after my Swiss Cake Roll fail x 2, thank you very much) is does he have one recipe that he finds a challenge. So that's the one question I submitted.

And do you know what the answer was for this famous pastry chef and cookbook author? Granola bars! Yes, you read that right, granola bars. A healthy granola bar gives David Lebovitz troubles.


This made me feel good because if you follow me, you know the troubles I've had with the Swiss Cake Roll. Although after the last one, I learned that you have to make the cake by scratch because box cake mixes are more crumble-prone than homemade sponge cakes. Something I was unaware of at the time. I've yet to try it after the last fail because I got so frustrated over it.

But to know that David Lebovitz has troubles with granola bars (of all things) makes me feel good. Sorry. Not Sorry. David.

Which got me thinking of the granola bars I made last year and never got to share with y'all. Yes, I held out a recipe from you. Well, not intentionally, just forgot.

These No-Bake Granola Bars are so yummy, you'll forget they're good for you too! I've packed them full of coconut, chia seeds, cacao nibs, and dried cherries. And to help sweeten them, I used a combination of honey and dates.


The best part is you don't need to bake anything and they're ready to eat immediately. Although, I would let them chill for a few hours so the honey and peanut butter can set since they might be a little crumbly if eaten right away. That's the "glue" that holds them together.

Of course, you can also put chopped peanuts, almonds, or pistachios instead of the chia seeds, but you might want to add a little more honey or peanut butter (1 to 2 Tablespoons extra) because that might throw off the wet to dry ratio.

But don't let the chia seeds throw you off thinking these bars won't have any crunch to them. The chia seeds, along with the cocao nibs, gives a nice crunchy texture to these granola bars.


You can also substitute for the dried cherries, using raisins, dried cranberries or blueberries. It's a very customizable recipe so try what you like and let me know how they turn out.

Now about that Swiss Cake Roll recipe....


No-Bake Granola Bars
Recipe by Julie Murphy @ Sweet and Spicy Monkey
Deliciously healthy & easy to make granola bars for on the go breakfast or snacking.
Prep time: 10 minutes
Total time: 15 minutes
Ingredients
  • 3 cups Old Fashioned Oats, uncooked
  • 1 and 1/2 cups creamy peanut butter
  • 1/2 cup honey
  • 1 cup unsweetened coconut flakes
  • 5 Medjool dates, diced
  • 3/4 to 1 cup dried cherries
  • 1/2 cup cocao nibs
  • 4 Tablespoons chia seeds
Directions
  1. Prepare 8" x 11" pan by wiping down with coconut oil. Wipe any excess off with a clean, dry paper towel. Set aside.
  2. Add all ingredients into a large mixing bowl and stir together, making sure peanut butter and honey coat all ingredients.
  3. Pour mixture into prepared pan and press down firmly with palm of hand.
  4. Cover pan and let chill in refrigerator so peanut butter and honey can set.
  5. Can store in covered pan in refrigerator for up to 1 week. But they won't last that long!
 *Helpful Hints*     
- You can use a smaller pan, but that will make bars thicker. Same goes if you want to use a larger pan, bars will be thinner in size. Bars shown are 1" thick using an 8" x 11" pan.

- You can use semi-sweet or dark chocolate chips instead of cocao nibs in this recipe.

- You can use flaked sweetened coconut instead of unsweetened coconut flakes.

All content and images are property of Sweet and Spicy Monkey. Please do not reprint this content without my permission. If you wish to include this recipe on your site, please re-write in your own words and use your own photographs and link back to this post for original recipe.
Follow Julie's board Sweet and Spicy Monkey on Pinterest.

Sunday, January 3, 2016

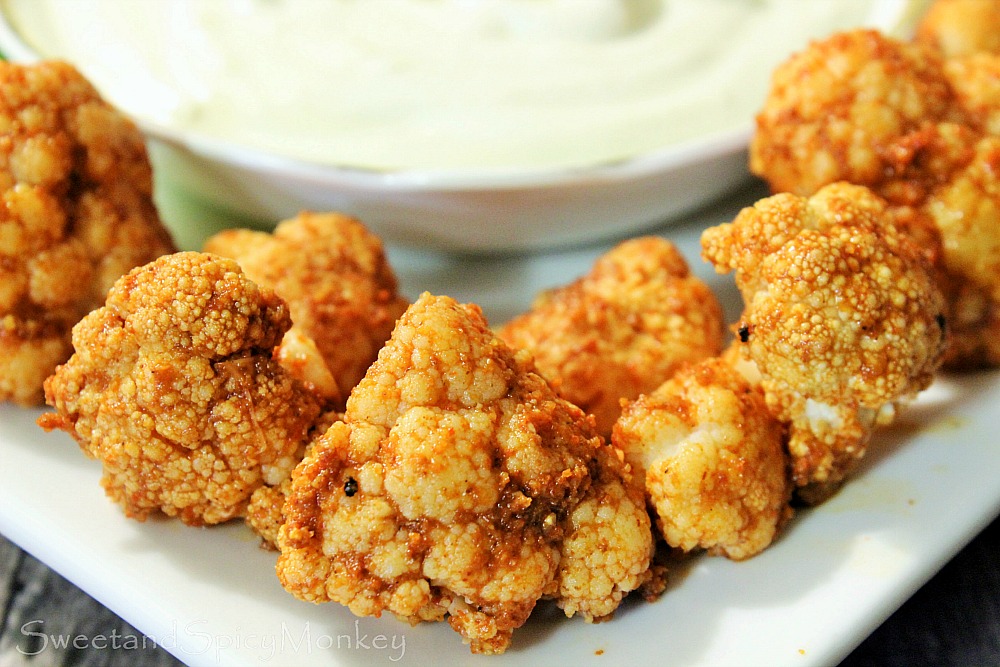
Vegan Buffalo Cauliflower Bites


I'm starting this year off with healthy eats. Let me just say, I've had my share of rich food and sweets during the holidays and I'm finding my pants a little tighter than they were back in November.

So I thought I would start off the new year with these Vegan Buffalo Cauliflower Bites. Only because I had this intense (some might call it crazy) craving for something Buffalo wing tasting. I was on a search for some buffalo wings.

But since I've also had my share of meat over the last couple months (think back Engagement Chicken and a Thanksgiving turkey), I didn't want chicken wings. Or any other kind of meat for that matter. I'm all meated out!

Then I found a recipe for vegan buffalo cauliflower bites and knew I had to try it.

Now I had my doubts when I first saw this recipe, but since cauliflower works in Alfredo sauce, I thought "why not?" And so I did!


You see, cauliflower is a very versatile vegetable in the vegetarian community because it's like a blank sheet of paper. Cauliflower has a very mild taste, if anything, and with a few common spices, it can become any food you want it to.

The one thing I love about this recipe is it tastes so much like the buffalo wings I've had before, but it only uses apple cider vinegar and a few spices. Plus, it doesn't have any preservative filled foods like Ranch dressing or Pete's buffalo wing sauce. Just simple ingredients here.


So you're getting your vegetables with the buffalo wing taste without all the preservatives, fat, and calories. And no meat!

Serve it up with my Greek yogurt blue cheese dressing and you will be in vegan Buffalo wing heaven! Well, I was literally in vegan buffalo wing heaven while munching on these and licking my fingers.


Yep, these Vegan Buffalo Cauliflower Bites are certifiably finger licking good!

And I can't think of a better way to start the new year!

What recipes do you like to use cauliflower in?

Vegan Buffalo Wings

Recipe by Julie Murphy
A vegan dish inspired by the famous tailgating food, Buffalo wings, made with fresh cauliflower and served with a homemade Greek yogurt blue cheese dressing.
Prep time: 20 minutes
Cook time: 10 minutes
Total time: 20 minutes
Yield: Serves 4 to 6
Ingredients
  • 1 head cauliflower
  • 1 Tablespoon garlic powder
  • 2 Tablespoons paprika
  • 3/4 teaspoon smoked paprika
  • 1/4 teaspoon chipotle chile pepper powder
  • 1/4 teaspoon sea salt
  • 1/4 teaspoon cayenne pepper
  • 1/8 teaspoon ground black pepper
  • 1/4 cup apple cider vinegar
  • 1 Tablespoon olive oil (for cookie sheet)
Cooking Directions
  1. Preheat oven to 450F degrees.
  2. Rinse cauliflower well and pat dry. Cut into small florets.
  3. Pour 1 Tablespoon olive oil over a clean cookie sheet, wiping off any excess with a clean, dry paper towel.
  4. Place cauliflower florets on cookie sheet and bake in preheated oven for 10 minutes.
  5. While cauliflower is baking, mix together remaining ingredients in a large bowl.
  6. As soon as cauliflower comes out of the oven, place into large bowl with buffalo sauce and mix well, covering all cauliflower florets with sauce.
  7. Serve immediately with blue cheese dressing and celery sticks.

Inspired by ~ Whole Foods Market.
 
All content and images are property of Sweet and Spicy Monkey. Please do not reprint this content without my permission. If you wish to include this recipe on your site, please re-write in your own words and use your own photographs and link back to this post for original recipe.
Follow Julie's board Sweet and Spicy Monkey on Pinterest.

Saturday, November 14, 2015

Spicy Chipotle Pumpkin Seeds


I wasn't even planning on sharing this recipe with you today. I was just roasting pumpkin seeds for my own personal pleasure after I had roasted a sugar pumpkin where they were residing.

Sharing a roasted pumpkin seed recipe wasn't even on my mind after I've seen them all over the internet since Halloween.

But then I took a bite, just one seed, and I knew I had to share the recipe with y'all. They are just that good! Who knew just one pumpkin seed could pack so much flavor in it? I certainly did not!


It's really amazing how just the right blend of spices can totally transform food! These pumpkin seeds are mildly spicy, not burn your tongue spicy. Just pleasantly spicy where you know you ate something spicy, but you don't need to drink a gallon of milk to kill the burning sensation going on all over your mouth. Yep, we've all been there before!

Did I mention how easy these are to make? Very easy, some might say.....easy peasy.

Oh yes I did, I just said that! But after making these, you'll be saying it too!

Easy. Peasy.


Spicy Chipotle Pumpkin Seeds

Recipe by Julie Murphy
Deliciously lightly spiced chipotle pumpkin seeds.
Prep time: 10 minutes
Cook time: 30 minutes
Total time: 40 minutes
Yield: 1 and 1/2 cups pumpkin seeds
Ingredients
  • pumpkin seeds from one sugar pumpkin
  • 1 teaspoon olive oil
  • 1/2 teaspoon sea salt
  • 1/8 teaspoon ground black pepper
  • 1/8 teaspoon chipotle chile powder
  • 1/8 teaspoon smoked paprika
  • 1/8 teaspoon cayenne pepper
Cooking Directions
  1. Preheat oven to 300F degrees.
  2. Line a cookie sheet with parchment paper. Set aside.
  3. Remove pumpkin seeds from 1 sugar pumpkin, pumpkin guts and all.
  4. Place seeds in a colander.
  5. Running water over the seeds, swish your hands through them to help remove the pumpkin guts.
  6. After guts are removed, pour seeds onto a clean, dry towel. Pat seeds dry. You might have to use another dry towel or paper towel to remove most of the water from the seeds. It's ok if they're a little moist after drying.
  7. You should have about 1 and 1/2 cups of clean pumpkin seeds.
  8. Place dried seeds in a medium bowl. Add olive oil and mix together, coating the seeds with oil.
  9. Add spices in with seeds and mix together, coating all seeds with spices.
  10. Spread coated seeds evenly onto prepared cookie sheet.
  11. Place into oven and bake for 20 to 30 minutes, stirring every 10 minutes so seeds get cooked evenly.
  12. Keep an eye on them during the last 10 minutes so they don't burn.
  13. Seeds should be lightly crisp and a light golden brown in color when done baking.
  14. Remove from oven and let cool.
  15. Store in an airtight container.


All content and images are property of Sweet and Spicy Monkey. Please do not reprint this content without my permission. If you wish to include this recipe on your site, please re-write in your own words and use your own photographs and link back to this post for original recipe.
Follow Julie's board Sweet and Spicy Monkey on Pinterest.