
Since living in the South, I have come to learn how much Southerner’s love their red velvet cake! The captivation of red velvet cake goes back generations for these folks. As long as they can remember, there was always a red velvet cake around during celebrations. For Southerner’s, red velvet cake is a tradition.
Now me being from California, the charm of red velvet cake was appealing to me, I just had to try it and see what everyone was buzzing about. So I tried the infamous red velvet cake and found that it was a little too rich for my liking, which I found quite odd considering I do have a sweet tooth and I do love my chocolate. Maybe it was the cream cheese frosting paired with it, I don’t know.
However, this doesn’t mean I have given up completely on the Southern tradition of red velvet. So, I was really excited when I came across the recipes for red velvet cookies! I do love cookies and there is no cream cheese frosting on this red velvet, so I decided to give red velvet another try.
Now the first time I made these cookies was around Christmas time as I loved their color and thought they would make a great Christmas cookie, being red and all. Needless to say, the first batch of these did not turn out how I hoped they would. Oh, they had a rich red color and tasted quite delicious, better than your normal chocolate chip cookie, but they didn’t turn out fluffy like the pictures I saw of red velvet cookies on Sally’s Baking addiction.
I was disappointed once more with the whole red velvet notion. I was starting to think that one had to be of Southern roots just to make red velvet anything! And Southern California wasn’t part of this clique.
Being the baker I am, I baked on. And during this journey, I have come across a little secret of the baking world. Come a little closer and I will share with you….cornstarch! Yep, that’s the secret ingredient baker’s use to make their cookies F l u f f. Pure, simple cornstarch. Cornstarch helps increase the hydration in the flour, making cookies light and fluffy while cakes seem “lighter”. I have no idea who discovered this, but I have got to thank him or her for their great contribution to my cookie making! Thank You!!!!
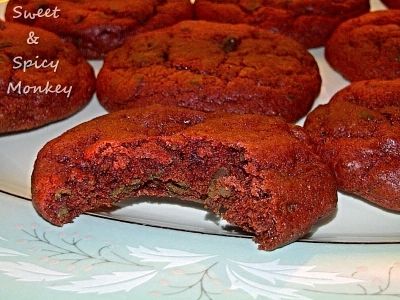
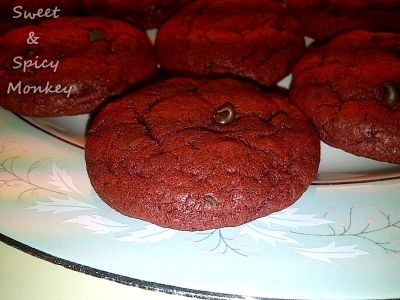
You can see why I was so excited to try this little baker’s secret on the red velvet cookies because all mine needed were a little lift to look as good as they tasted. And I was correct in my calculations, the cornstarch provided the oomph!! The South will rise again!
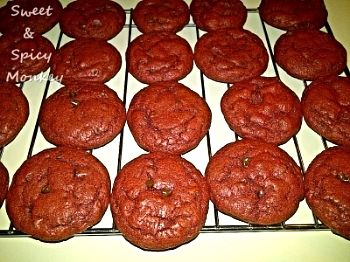
YAY!! I am a true Southerner now!! I have made red velvet cookies successfully! Ta-da!
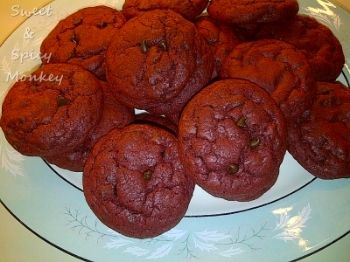
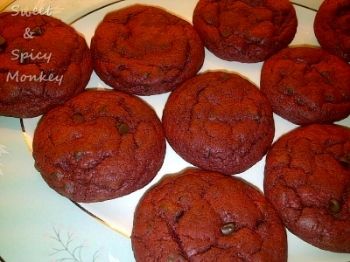
I hope y’all find these red velvet cookies as light and fluffy as mine (finally) turned out! And as tradition holds in the South, these cookies will bring charm to any celebration!
Fluffy Red Velvet Cookies
Ingredients
½ cup unsalted butter, softened to room temperature
¾ cup light brown sugar
¼ cup white (granulated) sugar
1 egg, room temperature
1 Tablespoon almond milk
2 teaspoons Vanilla extract
2.5 teaspoons Red food coloring
1 and ½ cups + 1 Tablespoon all-purpose Flour
1 Tablespoon + 1 teaspoon cornstarch
¼ cup unsweetened cocoa powder
1 teaspoon baking soda
¼ teaspoon salt
1 cup semi-sweet chocolate mini morsels (chips)
Directions
Using a large mixing bowl, add room temperature butter and beat until creamy.
Add in brown and white sugars until blended.
Beat in the egg, almond milk, and vanilla until thoroughly mixed.
Add in food coloring, blending throughout dough mix.
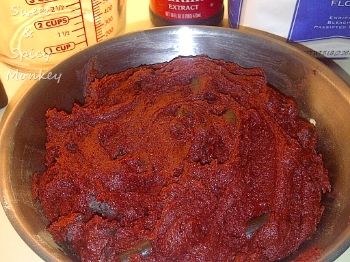
Slowly add in dry ingredients - Flour, cornstarch, cocoa, baking soda, and salt. Blending dry ingredients well throughout wet mixture. Dough will be sticky.
After dry ingredients are blended, add mini morsels to dough mix and blend throughout.
Cover dough mixture and place in refrigerator to chill for 1 hour. *Chilling is necessary and cannot be sped up by placing dough in the freezer.
After 1 hour, preheat oven to 350F degrees.
Line cookie sheets with parchment paper.
Spoon 1 Tablespoon of dough mixture into your hands and shape into a ball.
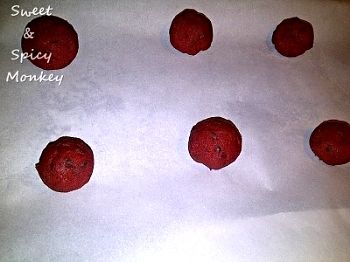
Place balls on lined cookie sheet, leaving room between (I placed 8 dough balls on an 18”x 11 ½” cookie sheet if that helps give you an idea of the spacing).
Place cookie sheet with dough balls in oven and bake for 10-12 minutes. Watch closely as you do not want to burn the cookies.
Remove cookies from oven and let cool for approximately 5 minutes on the cookie sheet.
After 5 minutes, transfer cookies to a wire rack and let cool completely. Enjoy!!
Yields 26 cookies (give or take a few samples while baking)
Prep time – 1 Hour 15 minutes (includes chilling time)
Total time – 1 Hour 40 minutes
Store cookies in an airtight container. Cookies should remain fresh up to 7 days.
Cookie dough may be frozen up to 2 months before baking. Just be sure to thaw overnight before using.
*Helpful Hints:
Let cookie sheets cool down between batches before placing more dough balls on them.
To obtain room temperature butter and egg, simply remove from refrigerator about 1 hour before preparing dough mix. If butter is still a little firm after 1 hour, you can also place butter in microwave for 10 seconds. Keep an eye on it because you do NOT want it to become melted.
Place dough mix in refrigerator between baking batches to keep chilled.
Be careful with what you touch as your hands will turn red after rolling the dough into balls.

All content and images are property of Sweet and Spicy Monkey. Please do not reprint this content without my permission. If you wish to include this recipe on your site, please re-write in your own words and use your own photographs. Or you can link back to this post for the recipe.