Sweet and Spicy Monkey has moved to: www.sweetandspicymonkey.com

Showing posts with label Cookies. Show all posts

Tuesday, February 2, 2016

Scottish Shortbread Cookies


Have you ever just got back from the store after buying all the ingredients for something you had planned for weeks to make, only to discover you bought salted butter instead of unsalted butter? Yep, that happened to me the other day.

I have been eyeballing this recipe for so long now and when I went to make it (finally), when I discovered that I bought salted butter instead of unsalted butter. Funny thing is, I never, let me clear that up, N-E-V-E-R buy salted butter.

Yes, I was wearing my glasses at the time too. I knew you were about to ask that!

How something so bizarre could ever happen, I can only figure I was so excited to be buying the European butter that I accidentally grabbed the salted butter. Oops!

Butter failure.

Ha, that's what I initially thought too! But instead I decided to give it a go with the salted butter and see how it turned out. A baking experiment of sorts, you could say, for inquiring minds. Because I'm sure there's a lot of you out there, besides myself, who have wondered "can I use salted butter instead of unsalted butter in this recipe?".

The answer for me was yes.


Since the recipe called for 1/2 teaspoon of salt, I used the salted butter and added two pinches of salt to make up the difference, which was pure luck in my case.

Recently, Food52 did a post on using salted for unsalted butter in recipes and they actually did the math, (yes, actual math equations) to figure out the amount of salt to use when substituting salted for unsalted butter in recipes. Crazy, right?!?

If you want to do the math, check out Food52's post on the use of salted for unsalted butter or vice versa in recipes here.

Like I said, I just winged it and it worked out fine as my shortbread cookies did not turn out mushy or pasty.

Now I would not recommend using regular butter over European butter because I could just tell by the feel of the European butter how much creamier it is than regular butter. Just think of comparing itchy wool to plush velvet, no comparison at all.

That's the comparison between regular butter and European butter, no comparison.

These cookies are amazing as you can smell the butter in them. And that buttery, melt in your mouth cookie pushes them over the edge. Of course you can always drizzle chocolate or caramel over the top, if that's what you fancy.

But for me, I love them exactly how they are, buttery, melt in your mouth cookies.


Why mess with a good thing?


Scottish Shortbread Cookies

Recipe by Julie Murphy @ Sweet and Spicy Monkey
A subtly sweet, buttery, melt in your mouth shortbread cookie.
Prep time: 5 minutes
Cook time: 35 minutes
Total time: 40 minutes
Yield: 2 dozen shortbread cookies
Ingredients
  • 3 cups All-purpose flour
  • 3/4 cup sugar
  • 2 sticks (1 cup) salted European butter, chilled and sliced into chunks, about Tablespoon size
  • 1 to 2 pinches sea salt
Cooking Directions
  1. Preheat oven to 350F degrees.
  2. Butter one 10" x 9" pan. You can also use two 5" x 9" pans, instead of the one pan. Set aside.
  3. Combine flour, sugar, and salt into the bowl portion of food processor. Pulse to blend.
  4. Add in chunks of butter and mix on High speed for approximately 1 minute. Dough will resemble a sandy texture and clump when squeezed together.
  5. Spoon into prepared pan. If using 2 pans, place half of mixture in each pan.
  6. Press dough mixture down firmly with your hands, flattening it. You can also use the bottom of a glass to get a smooth, even surface.
  7. Using a knife, trace light cuts into surface of dough, about 1" x 2" squares. These will be your "cookie cuts" after baking.
  8. Place into oven and bake for 30-35 minutes, or until shortbread is lightly browned around the edges.
  9. Remove from oven.
  10. Using a sharp knife, immediately cut where you traced lines before baking, cutting the cookies all the way through.
  11. Allow shortbread cookies to cool completely, for at least 1 hour in pan(s).
  12. After cookies have cooled, using a fork or knife, remove cookies from pan and serve. Best served with milk, tea, or coffee.
  13. Can be stored in an airtight container for at least 1 week.

Inspired by ~ Nicole at Baking Bites.

All content and images are property of Sweet and Spicy Monkey. Please do not reprint this content without my permission. If you wish to include this recipe on your site, please re-write in your own words and use your own photographs and link back to this post for original recipe.

Follow Julie's board Sweet and Spicy Monkey on Pinterest.

Saturday, January 30, 2016

Flourless Peanut Butter Oatmeal Chocolate Chip Cookies


You ever have one of those days where you feel like doing absolutely nothing? I have. Well, I did, last Saturday. I didn't feel like doing anything. I mean just going into the kitchen to fill up my glass of water was too strenuous for me that day.

I just wanted to melt into my chair and watch me some football. Thing is, there was no football on last Saturday. I think the broadcasting channels were having the same kind of day I was because there was absolutely nothing on TV last Saturday.

Seriously people, next time snow is expected, put something worth watching on TV. Is that a little too much to ask? I didn't think so either.

And since I didn't have anything to entertain me that required no energy, I immediately thought of making cookies. Why? Well because I'm one of those people who (even though I don't want to do anything) need something to do or else I become fidgety. So making cookies was it!


Not just any cookie, but these Flourless Peanut Butter Oatmeal Chocolate Chip Cookies. Now you can say I made these because I was too lazy to add in the flour, but that's not the case. With my healthier eating diet this year, these cookies were the perfect choice for me.

No white sugar added, no flour (which is great if you're gluten-free), and sugar-free chocolate chips. So you don't feel guilty eating them as you melt into the chair and channel surf.

How could I say no? You're right, I couldn't!


Plus, they're easy to make and you can make them under 30 minutes. BAM!

These are definitely my kind of lazy day cookies! I think you'll agree.


Flourless Peanut Butter Oatmeal Chocolate Chip Cookies

Recipe by Julie Murphy @ Sweet and Spicy Monkey
A healthier flourless and white sugar-free version of the classic peanut butter oatmeal chocolate chip cookie.
Prep time: 10 minutes
Cook time: 20 minutes
Total time: 30 minutes
Yield: 2 dozen cookies
Ingredients
  • 1 cup peanut butter, creamy (can also use chunky)
  • 1 large egg
  • 1 teaspoon vanilla extract
  • 3/4 teaspoon baking soda
  • 1/4 teaspoon sea salt
  • 1/2 cup honey
  • 1 and 1/2 cups old fashioned oats, uncooked
  • 1/2 to 1 cup sugar-free chocolate chips
Cooking Directions
  1. Preheat oven to 350F degrees.
  2. Line cookie sheet with parchment paper. Set aside.
  3. Cream together peanut butter, egg, vanilla, and honey in a large mixing bowl.
  4. Mix in baking soda, salt, oats, and chocolate chips.
  5. Using a cookie scoop, scoop dough onto prepared cookie sheet. You can either leave them as is or press with fork tines to make criss cross design on top of cookie.
  6. Place in oven and bake for 10 minutes or until edges are lightly golden brown.
  7. Remove from oven and let cool for 5-8 minutes on cookie sheet before transferring to a wire rack where they can cool completely.
  8. Can be stored in an airtight container for up to 1 week.

All content and images are property of Sweet and Spicy Monkey. Please do not reprint this content without my permission. If you wish to include this recipe on your site, please re-write in your own words and use your own photographs and link back to this post for original recipe.
Follow Julie's board Sweet and Spicy Monkey on Pinterest.

Wednesday, December 23, 2015

Copycat Lofthouse Sugar Cookies with Peppermint Frosting


I've been wanting to make these cookies for some time now. I prefer homemade cookies to store bought any day (you can blame my mom for that) but I love Lofthouse cookies!

So when I saw that I could make my own Lofthouse style cookies at home, after I did my happy dance, I knew I had to try them.

It's a simple recipe, but these cookies are far from simple! Big, pillowy, soft sugar cookies with lots of frosting, my kind of cookie!

Before frosting, just look how pillowy soft these cookies are!

I dressed them up for the holidays in peppermint frosting, available in pink or white, with candy cane bits sprinkled over the top.


You can find my recipe for Peppermint Cream Cheese Frosting here. For the pink frosting, add a few drops of red food coloring. Or you can use beet powder or beet juice to desired color. I used about 1 teaspoon of beet powder to give my frosting its pink coloring.


Santa will definitely be looking for these cookies when he stops by your house to deliver presents on Christmas Eve.

Just be sure to leave him a big glass of milk to go with them.

Wishing y'all a very, Merry Christmas!

Lofthouse Style Sugar Cookies

Recipe by Julie Murphy
Big, soft sugar cookies made Lofthouse style with a peppermint frosting.
Prep time: 15 minutes
Cook time: 10-12 minutes
Total time: 40 minutes (does not include chilling time)
Yield: 2 dozen cookies
Ingredients
  • 1 cup granulated sugar
  • 1/2 cup (1 stick) unsalted butter, room temperature
  • 2 eggs
  • 1/2 cup plain Greek yogurt
  • 2 teaspoons vanilla extract
  • 3 cups All-purpose flour
  • 1 and 1/2 teaspoons baking powder
  • 1/2 teaspoon baking soda
  • 1/2 teaspoon sea salt
Cooking Directions
  1. In a large mixing bowl, sift together flour, baking powder, baking soda, and salt. Set aside.
  2. In a separate large mixing bowl, cream together butter and sugar.
  3. Beat in eggs with butter mixture.
  4. Add in yogurt and vanilla, mixing well.
  5. Gradually add in dry ingredients, mixing all ingredients together well.
  6. Remove dough from bowl, wrap in plastic wrap, and refrigerate overnight.
  7. After dough has chilled overnight and when you're ready to bake the cookies, preheat oven to 350F degrees.
  8. Line cookie sheets with parchment paper. Set aside.
  9. Remove dough from refrigerator and let sit for 5 minutes. This makes it easier to work with the dough.
  10. On a dry, flat surface, sprinkle flour and spread it around the surface using your hands. Place dough on floured surface and roll dough out. Sprinkling flour as needed under the dough, on top of dough, and on rolling pin to help prevent dough from sticking to surface.
  11. Roll out to desired thickness. Remember, Lofthouse cookies are thicker than normal cookies and will rise a little bit.
  12. Using a round cookie cutter or the rim of a glass, make circle cuts in dough to make cookies. Place on prepared cookie sheets, leaving cookies 2" apart.
  13. Bake for 10 to 12 minutes, or until cookies are firm to the touch. They may appear under baked. You DON'T want cookies to brown.
  14. Remove from oven and let cool on cookie sheet for 5 to 10 minutes before transferring cookies to a wire rack, where they can cool completely.
  15. Repeat with rest of dough, rolling out dough, making circles, and baking until all dough is used up.
  16. After cookies have cooled completely, about 2 hours, its time to frost them.
  17. Apply frosting generously with a butter knife and sprinkle candy cane bits over the tops. Place back on wire rack and let sit for about 10 minutes before covering with plastic wrap or aluminum foil.
  18. Serve with a tall glass of milk.

*Helpful Hints*

- I refrigerated my dough overnight. Some recipes for Lofthouse style cookies say you can cook immediately, some say to refrigerate for a few hours. I was happy with the results after chilling the dough overnight. I cannot guarantee that your cookies will turn out like mine if you do not chill the dough overnight.

- You need to roll out the dough and use a cookie cutter or rim of a glass to cut cookies. Otherwise you will get a round, ball shaped cookie with rough edges not resembling anything close to a Lofthouse cookie.

- If you're rushed for time, you can use store bought frosting and flavor with 1 to 2 teaspoons of peppermint extract.

Inspired by ~ Ashley at Center Cut Cook.

All content and images are property of Sweet and Spicy Monkey. Please do not reprint this content without my permission. If you wish to include this recipe on your site, please re-write in your own words and use your own photographs and link back to this post for original recipe.

Tuesday, December 22, 2015

Gingerbread Cookies


With all the hustle and bustle of the Christmas holiday, who has time to sit down and read right now? Not me.

So I'm keeping it short, sweet, and simple. Just like these Gingerbread cookies.
 
These ginger spice cookies are always a holiday favorite, especially when they're made into little gingerbread man shapes. Or large gingerbread man cookies like this one I made.


You can eat them plain (my favorite way to enjoy them), frost them with royal icing or a simple cookie glaze, or sprinkle powdered sugar over them. They're delicious either way!


And since I know you have so much to do before Christmas, here's my recipe for Gingerbread cookies.

Just do me a favor and enjoy these cookies when you finally get a chance to sit down and relax. You'll thank me when you do.

You're welcome!

Gingerbread Cookies

Recipe by Julie Murphy
Gingerbread cookies are a favorite during the Holidays with their ginger, molasses, and spice flavors.
Prep time: 15 minutes
Cook time: 8-12 minutes
Total time: 1 hour and 15 minutes (does not include refrigeration time)
Yield: 6 dozen or 1 large gingerbread man + 5 dozen regular size cookies
Ingredients
  • 3/4 cup unsalted butter, room temerature
  • 3/4 cup brown sugar, packed
  • 3/4 cup molasses
  • 1/2 teaspoon sea salt
  • 2 teaspoons cinnamon
  • 2 teaspoons ground ginger
  • 1/4 teaspoon ground cloves
  • 1/4 teaspoon ground black pepper
  • 1 teaspoon vanilla extract
  • 1 large egg
  • 1/2 teaspoon baking soda
  • 1 teaspoon baking powder
  • 3 cups + 2 Tablespoons All-purpose flour
Cooking Directions
  1. Add flour, baking soda, baking powder, salt, pepper, and spices together in a large bowl. Using a whisk or fork, stir dry ingredients together. Set aside.
  2. In a separate large mixing bowl, cream together butter, molasses, brown sugar, and vanilla.
  3. Add egg and beat until mixed.
  4. Gradually add in dry ingredients until mixture is combined.
  5. Divide dough in half, wrapping each half in plastic wrap, and refrigerate overnight.
  6. When ready to bake the next morning, remove 1 batch of dough from refrigerator and let sit for 5 minutes so it will be easier to work with.
  7. Prepare cookie sheets by lining with parchment paper. Set aside.
  8. Preheat oven to 350F degrees.
  9. Unwrap dough and on a dry, flat, floured surface, roll dough out. Keep in mind, the thinner the dough, the crisper the cookie. So if you want a chewy cookie, leave dough a little thicker. It doesn't take much thickness to keep the cookies chewy.
  10. Flour under dough, on top of dough, and on rolling pin frequently or dough will stick to surfaces.
  11. Using cookie cutters, cut out shapes and place onto prepared cookie sheets, leaving cookies about 2" apart. Repeat with remaining dough, rolling out and cutting out shapes.
  12. Bake for 8-12 minutes, until cookies feel firm or cookies are a very light brown around the tips.
  13. Remove from oven and let cool for 5-10 minutes on cookie sheet before transferring to a wire rack.
  14. Repeat with remaining dough, rolling out, cutting out shapes, and baking.
  15. Let cookies cool completely before decorating. You can decorate with frosting, royal icing, a simple cookie glaze, or powdered sugar sprinkled over the top (as shown in photos).
  16. Or you can leave them plain, my favorite way to eat them!
  17. Store in an airtight container for up to 1 week.

Cutting out my gingerbread man shapes. 
 
Gingerbread man cookies coming out of the oven.

Gingerbread cookies all done!

All content and images are property of Sweet and Spicy Monkey. Please do not reprint this content without my permission. If you wish to include this recipe on your site, please re-write in your own words and use your own photographs and link back to this post for original recipe.

Wednesday, December 16, 2015

Gingerbread Russian Tea Cookies #fbcookieswap


It's that time of year again! No, not Christmas silly. Well, yes, it is Christmastime, but that's not what I meant.

I meant it's time for the Great Food Blogger Cookie Swap. Where food bloggers get together and share their cookies and recipes with each other all for a good cause, Cookies for Kids Cancer.


This year I received Oatmeal Orange Cranberry cookies from Erica over at Sun and Good Eats, Oatmeal Chocolate Cherry cookies from Anne at Wit Wisdom and Food, and Molasses Chai cookies from Susannah at Feast and West.

And I sent off my Gingerbread Russian Tea cookies to Ashley at Big Flavors from a Tiny Kitchen, Jessica at A Southern Mother, and Ellen from Like Mother, Like Daughter.

It's so fun to meet other food bloggers this way and try some of their creations!

Last year, I sent off my Christmas Russian Tea cookies that I made with red and green candied cherries.

I love Russian Tea Cookies with their melt in your mouth yumminess, plus they ship really well, something I had to keep in mind when baking cookies for the swap. So I wanted to make Russian Tea Cookies again with a Christmas twist.


Since I'm loving everything gingerbread right now, I decided to make my Russian Tea cookies with gingerbread. Luckily, my baking fairy was still around when I made these because they turned out just the way I was hoping on the first batch.

I can't wait until next year to see what yummies I'll be getting from other bloggers. But in the meantime, I'm going to enjoy these Gingerbread Russian Tea cookies, and you can too!

If you want to try my Christmas Russian Tea Cookies from last year, just click on the name.

I will be posting soon where you can link up to see all the food bloggers and the cookie recipes we shared this year at the Great Food Blogger Cookie Swap. And if you're interested in participating next year, you can sign up here.

As always, a big Thank You goes out to Lindsay over at Love & Olive Oil, Julie at The Little Kitchen, Dixie Crystals, OXO, and Land O' Lakes who all help make this event possible to help raise money and awareness for the Cookies for Kids Cancer.


Gingerbread Russian Tea Cookies

Recipe by Julie Murphy
Christmas invades Russian Tea Cookies with this delightful gingerbread flavor.
Prep time: 10 minutes
Cook time: 18 minutes
Total time: 46 minutes
Yield: about 2 dozen cookies
Ingredients
  • 1 cup (2 sticks) unsalted butter, room temperature
  • 1 cup powdered sugar, sifted
  • 2 cups All-purpose flour, sifted
  • 1/2 teaspoon sea salt
  • 1/4 teaspoon nutmeg
  • 1/2 teaspoon ground cloves
  • 1 teaspoon ground ginger
  • 3/4 teaspoon cinnamon
  • 1/4 teaspoon cardamom
  • 1 Tablespoon vanilla extract
  • 2 Tablespoons molasses
  • 4 Tablespoons Paradise candied ginger, chopped into small pieces
  • 1-2 cups pecans, chopped
  • 2 cups powdered sugar in a bowl (for rolling cookies in AFTER baking)
Cooking Directions
  1. Preheat oven to 325F degrees.
  2. Line cookie sheets with parchment paper. Set aside.
  3. In a medium bowl, add sifted flour, salt, and spices. Set aside.
  4. In a large mixing bowl, cream together butter, 1 cup of sifted powdered sugar, vanilla, and molasses.
  5. Gradually add dry ingredients into butter mixture, mixing well.
  6. Fold in candied ginger and pecans. Mixture will appear crumbly but it rolls together nicely when making ball shapes.
  7. Using a cookie scoop or Tablespoon, take 1 scoop of cookie dough and gently roll together into a ball shape. Place on lined cookie sheet.
  8. Repeat leaving about 2" between cookie balls. Dough should maintain round ball shape and not spread during baking.
  9. Place into preheated oven and bake for 15 to 18 minutes. Cookies will be light in color, if not the same color as when uncooked. Do Not allow cookies to brown.
  10. Remove from oven and allow cookies to cool for 5 minutes before transferring to a wire rack, where they can cool completely.
  11. After cookies have cooled completely (see Helpful Hints below*), roll in bowl of powdered sugar, covering entire cookie with powdered sugar, and place back on wire rack. Repeat with remaining cookies.
  12. Store in an airtight container for up to 1 week.

*Helpful Hints*

- If cookies are not cooled off, powdered sugar will melt to cookie, looking smudgy and not powdery. So be sure to give cookies at least 2 hours to cool off before rolling in powdered sugar.

- If shipping cookies, place in a zip lock bag, then place into a protective container (plastic or tin cookie boxes work best), and pad the empty space in the shipping box with packing peanuts, bubble wrap, or bulk paper to protect the cookies from breaking during shipping.


All content and images are property of Sweet and Spicy Monkey. Please do not reprint this content without my permission. If you wish to include this recipe on your site, please re-write in your own words and use your own photographs and link back to this post for original recipe.
Follow Julie's board Sweet and Spicy Monkey on Pinterest.

Friday, December 4, 2015

S’mores Chocolate Chip Graham Cracker Cookie Pie


Today is National Cookie Day and what better way to celebrate than with this S'mores Chocolate Chip Graham Cracker Cookie Pie. You can trust me when I tell you, as soon as you're done baking this, it will be all gone before you even get the name out of your mouth!

I've combined graham crackers to chocolate chip cookie dough, pressed them into a pie pan, and baked. Just before baking is done, I sprinkle miniature marshmallows over the top and bake just enough to get them all toasted and gooey.


The end result is a deliciously chewy, chocolatey, graham cracker cookie in the shape of a pie with ooey gooey marshmallows. Just like S'mores, but in a cookie pie!


Perfect for the days your craving S'mores so you can be reminded of fun times around the campfire with your loved ones.

Or maybe anytime you're craving a combination of chocolate, graham crackers, and marshmallows.


Happy National Cookie Day!

S'mores Chocolate Chip Graham Cracker Cookie Pie

Recipe by Julie Murphy
The flavors of everyone's favorite, S'mores, all in one cookie pie.
Prep time: 15 minutes
Cook time: 30 minutes
Total time: 45 minutes
Yield: 1 cookie pie
Ingredients
  • 1 cup + 2 Tablespoons all-purpose flour
  • 1/2 teaspoon baking soda
  • 1/2 teaspoon sea salt
  • 1/2 cup (1 stick) unsalted butter, softened
  • 6 Tablespoons sugar
  • 6 Tablespoons brown sugar, packed
  • 1/2 teaspon vanilla extract
  • 1 large egg
  • 4 whole graham crackers, crumbled
  • 1 cup semi-sweet chocolate chunks
  • 2 cups miniature marshmallows (for topping)
Cooking Directions
  1. Preheat oven to 350F degrees.
  2. Spray a 9" x 2" pie pan with non-stick cooking spray. Or you can grease with butter or margarine. Set aside.
  3. In a medium bowl, add flour, baking soda, and sea salt. Set aside.
  4. In a large mixing bowl, beat together butter, sugar, brown sugar, and vanilla.
  5. Add egg, beating well.
  6. Gradually add in flour mixture, mixing well.
  7. Fold in graham cracker crumbs and chocolate chunks, blending throughout dough.
  8. Spoon dough mix into prepared pie pan, spreading evenly and pressing down and out, covering entire inside of pie pan.
  9. Place into oven and bake for 20-25 minutes, or until golden brown.
  10. After cookie is done, remove from oven, sprinkle mini marshmallows over the entire top of the cookie pie, and place back into oven for another 5 to 7 minutes, or until marshmallows have a light tan color.
  11. Remove from oven and let cool.
  12. Best served with a tall glass of cold milk.

All content and images are property of Sweet and Spicy Monkey. Please do not reprint this content without my permission. If you wish to include this recipe on your site, please re-write in your own words and use your own photographs and link back to this post for original recipe.
Follow Julie's board Sweet and Spicy Monkey on Pinterest.

Saturday, November 7, 2015

Pumpkin Oatmeal Raisin Bar Cookies


I'm probably the last person to jump on the pumpkin bandwagon, but I've had good reason not to just yet. As I've been experiencing apple love! I can't get enough of their sweet, tart flavors.

However, since it's November, I only thought it appropriate to make a pumpkin recipe (finally!). And this recipe was well worth the wait, Pumpkin Oatmeal Raisin Bar cookies.

Think of an oatmeal raisin cookie and then add pumpkin! I had no idea of the scrumptiousness I would be biting into when I made these cookies.

It's been years since I made pumpkin cookies. Let's just say, I still lived at home with my parents the last time I made pumpkin cookies. Yes, that long!

Why I waited so long to make another batch is beyond me. To make up for lost time, I might start making these cookies every month because they are just that good!


Don't take my word, just look at them! How can you say no to that?

That would be like telling [insert name of your favorite celebrity crush here.] For me, it’s Brad Pitt (if he was single, of course, because we all know he's married to you Angelina) "No, I cannot go out with you tonight Brad because I have to do laundry."

Just. Stupid. Good.

What? Did I just compare Brad Pitt to a cookie?

No, well, maybe. All I'm saying, is if Brad Pitt were a cookie, he might look like and taste like these Pumpkin Oatmeal Raisin Bar cookies because these are some yummy and handsome looking pumpkin cookies!


Oooh! I think I just named a cookie Brad Pitt!

Whatever you call these cookies, I’m sure you will love them to the very. Last. Crumb.

Pumpkin Oatmeal Raisin Bar Cookies

Recipe by Julie Murphy
Deliciously soft Pumpkin Oatmeal Raisin Cookie Bars that are perfect for Halloween and Thanksgiving time.
Prep time: 10 minutes
Cook time: 35 minutes
Total time: 45 minutes
Yield: Approximately 3 dozen bar cookies
Ingredients
  • 2 and 1/2 cups all-purpose flour
  • 2 and 1/2 teaspoons baking powder
  • 1/2 teaspoon sea salt
  • 1 teaspoon pumpkin pie spice
  • 1/2 teaspoon cinnamon
  • 1/4 teaspoon ginger
  • 2 Tablespoons corn starch
  • 3/4 cup (1 and 1/2 sticks) unsalted butter, room temperature
  • 1 and 3/4 cup brown sugar, packed
  • 1 teaspoon vanilla extract
  • 2 large eggs
  • 1/2 cup pure pumpkin puree
  • 1 and 1/2 cups old fashioned oats, uncooked
  • 1 cup raisins
  • 1-10 ounce package pumpkin spice chips
Cooking Directions
  1. Preheat oven to 350F degrees.
  2. Prepare 15" x 10" cookie sheet by greasing with butter, margarine, or a non-stick cooking spray. Set aside.
  3. Add flour, baking powder, sea salt, pumpkin pie spice, cinnamon, ginger, and corn starch into a medium size bowl. Set aside.
  4. In a large mixing bowl, cream together butter, brown sugar, and vanilla.
  5. Add in eggs one at a time.
  6. Blend in pumpkin puree.
  7. Slowly add in dry ingredients until blended throughout dough.
  8. Blend in oats.
  9. By hand, fold in raisins and pumpkin spice chips.
  10. Using a spatula or wooden spoon, evenly spread dough onto prepared cookie sheet.
  11. Place in preheated oven and bake for 25 to 35 minutes.
  12. Remove from oven and let cool for 15 to 20 minutes before cutting into squares. You can cut them any size you desire, big squares or small squares for little hands.
  13. Best stored in an air-tight container.

All content and images are property of Sweet and Spicy Monkey. Please do not reprint this content without my permission. If you wish to include this recipe on your site, please re-write in your own words and use your own photographs and link back to this post for original recipe.
Follow Julie's board Sweet and Spicy Monkey on Pinterest.

Thursday, October 29, 2015

Salted Chocolate Candy Corn Cookies


The time for ghosts, witches, zombies, and ghouls is finally here this weekend! Can you tell I'm excited? I love Halloween!

I love the costumes, the scary movies, and all the Halloween treats. I mean what other time of the year is it considered okay to dress up and go out in public like a zombie or a ninja turtle?

Don't even get me started with the spooky movies. I love Halloween, Friday the 13th, Nightmare on Elm Street, Frankenstein, Bram Stoker's Dracula, and Sleepy Hollow to name a few. I actually start watching scary movies in September so I get my fill of them until next year!

This is the pan version of this recipe. Still soft, chewy & delicious!

And the Halloween treats! Oh, there's just so many cool things you can do with food for Halloween fun. When else can you eat foods that resemble bloodied body parts, brains, eyeballs, and vomit and not make yourself sick?

Today's recipe doesn't resemble any bloodied body parts or vomit. Sorry, maybe next year. Today's recipe is made with Chocolate Sea Salt Candy Corn. Yes, I really think Brach's gets two thumbs up for these candies!


Have you tried them yet? I'm not much of a candy corn person but when I saw these at the store...how could I resist Sea. Salted. Chocolate? Move over salted caramel!

As you can see, I couldn't resist! Add these little candies to cookies and you get a spooktacular result.

Soft and slightly chewy, chocolatey cookies that will wake the dead with their deliciousness!

These cookies make for the perfect snack while you're watching all those scary movies this Halloween. But watch out because they will disappear right before your eyes!


Happy Halloween!

Salted Chocolate Candy Corn Cookies

Recipe by Julie Murphy
Soft and slightly chewy chocolate chip cookies made with Brach's Sea Salt Chocolate Candy Corns that are sprinkled with sea salt for the ultimate sweet and salty combination.
Prep time: 15 minutes
Cook time: 10 minutes
Total time: 1 hour total cooking time
Yield: 5 dozen cookies
Ingredients
  • 2 cups All-purpose flour
  • 1 teaspoon baking soda
  • 1/2 teaspoon sea salt
  • 1 Tablespoon corn starch
  • 1/2 cup unsweetened cocoa powder
  • 1 cup (2 sticks) unsalted butter, room temperature
  • 3/4 cup granulated sugar
  • 3/4 cup brown sugar, packed
  • 1 teaspoon vanilla extract
  • 2 eggs
  • 1 cup Sea salt chocolate candy corn
  • 1 cup miniature chocolate chips
Cooking Directions
  1. Preheat oven to 350F degrees.
  2. Line cookie sheet with parchment paper. Set aside.
  3. In a medium bowl, add flour, baking soda, salt, corn starch, and cocoa powder. Set aside.
  4. In a large mixing bowl, add butter, sugar, brown sugar, and vanilla. Beat together until creamy.
  5. Blend eggs in one at a time until combined.
  6. Gradually add in dry mixture.
  7. By hand, stir in mini chocolate chips and sea salt chocolate candy corns until blended throughout mixture.
  8. Drop about 1 rounded Tablespoon of dough for each cookie onto prepared cookie sheet, leaving 2 inches between cookies.
  9. Place in oven and bake for 10 minutes.
  10. Remove from oven, sprinkle with sea salt, and let cookies cool for 5 minutes before transferring to a wire rack to cool completely.
  11. For the pan cookie variation of these cookies, using a cookie sheet lined with parchment paper, spread cookie dough evenly over cookie sheet.
  12. Bake at 325F degrees for 20 to 25 minutes. Remove from oven, sprinkle with sea salt, and let cool for 20 minutes before cutting into cookies.
  13. Store in an airtight container up to one week.


*Helpful Hints*

- If you're oven runs hotter than most, you might need to lower the baking temperature by 25F degrees so the candy corns won't burn. An example being with a very hot oven, turn the baking temperature down to 325F degrees, instead of 350F degrees, for the cookies and 300F degrees for the pan cookie variation.

All content and images are property of Sweet and Spicy Monkey. Please do not reprint this content without my permission. If you wish to include this recipe on your site, please re-write in your own words and use your own photographs and link back to this post for original recipe.

Monday, June 1, 2015

No Bake Coconut Cookies

There's this commercial I've been searching high and low for on the Internet but cannot find. Mainly because I can't even remember what it's for! Now I know what you're saying, "how can you be looking for something when you don't even know what it is?".

Well, I remember the commercial and the goofy husband in it since that's the part I wanted to show one of my friends because that goofy guy reminds me of a co-worker and I wanted to show him. But I cannot remember for the life of me what the commercial is for.

The commercial in question starts with a pregnant wife and a friend at a baby shower, talking about not knowing the gender of the baby. And she will find out when they cut the cake because it will either be pink for a girl or blue for a boy. And then the goofy husband walks out of the kitchen eating a cupcake and gives this silly grin all covered in blue frosting, totally clueless.

Yes, I remember the commercial clearly and can probably even act it out, but what it's promoting, I have no clue since I got so caught up in how much that goofy guy reminds me of a co-worker. Do you know which commercial I'm talking about? If so, please let me know down below in the comments so I can end this search and show my friend that I'm not making this up.

I did stumble upon something during my search for this commercial, a blog, Renegade Mothering, by Janelle Hanchett, also known as Renegade Mama. The post I read was about how much she despises gender reveal parties. It was totally hilarious and had me rolling on the floor with laughter. If you get a chance, you can link to it here. Be warned, she does use adult language.

But anywho, enough ramblings from me. I'm not making any gender colored cupcakes, cakes, or cake pops today. As a matter of fact, these sweet little treats I'm sharing with you today are neutral in coloring, but don't let that fool you as they are quite flavorful. Of course anything coconut is flavorful to me!


These cookies are a no bake cookie and are dairy free, gluten-free, egg free, and Paleo friendly. All that and easy to make too with no baking involved! How's that for a summer treat?

You can make these cookies under 15 minutes and either start munching right away or you can let them chill for 30 minutes to let them sit up a bit. They're great for a quick breakfast on the run, during your morning commute, between meals, or when you get a craving for sweets and don't want to indulge in something sinful.

Either way, they're easy and quick to make so you have more free time to go shopping or for some more sun time by the pool. Or to help me find that dang commercial!


No Bake Coconut Cookies

Recipe by Julie Murphy
These No Bake protein coconut cookies are gluten free, dairy free, egg free, vegan, and paleo friendly.
Prep time: 15
Cook time: 0
Total time: 45 minutes (including 30 minutes for chilling)
Yield: 1 dozen
Ingredients
  • 1/2 cup oats, ground to flour
  • 1/2 cup cold milled golden flax seed
  • 1 scoop vanilla protein powder
  • 2 Tablespoons coconut butter
  • 1/4 teaspoon vanilla extract
  • 1/4 teaspoon coconut extract
  • 1 Tablespoon coconut flour
  • 2 Tablespoons organic unsweetened coconut flakes
  • Pinch Himalayan pink salt
  • 2 Tablespoons Honey
  • 1/2 cup Silk coconut milk, unsweetened
  • 1/4 cup organic unsweetened coconut flakes for rolling
Directions
  1. Line 1 cookie sheet with parchment paper. Set aside.
  2. Place 1/4 cup of coconut flakes into a small bowl. Set aside.
  3. In a large bowl, combine all ingredients and mix together.
  4. Take about 1 Tablespoonful of dough and roll into a ball between your hands.
  5. Roll ball shaped dough in bowl of coconut flakes.
  6. Place cookie ball on prepared cookie sheet and gently press down with finger tips or palm of your hand.
  7. Repeat process for remaining dough.
  8. Eat immediately or place in refrigerator to let chill so dough can set up.
  9. Store with cookies on parchment paper (to prevent sticking) in an airtight container for up to 1 week.

*Helpful Hints*

- can use sea salt in place of Himalayan pink salt.

- recipe for coconut butter coming soon!

Recipe inspired by ~ Arman's No Bake Vanilla Cake Batter Breakfast Cookies over at The Big Man's World.

All content and images are property of Sweet and Spicy Monkey. Please do not reprint this content without my permission. If you wish to include this recipe on your site, please re-write in your own words and use your own photographs and link back to this post for original recipe.
Follow Julie's board Sweet and Spicy Monkey on Pinterest.

Featured here ~ Savoring Saturdays @ It's a Love/Love Thing
Shared with: Savoring Saturdays

Friday, April 24, 2015

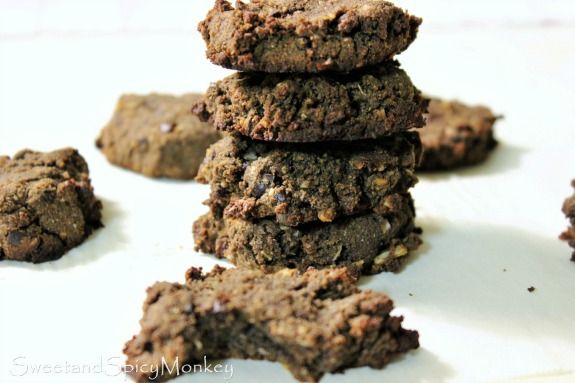
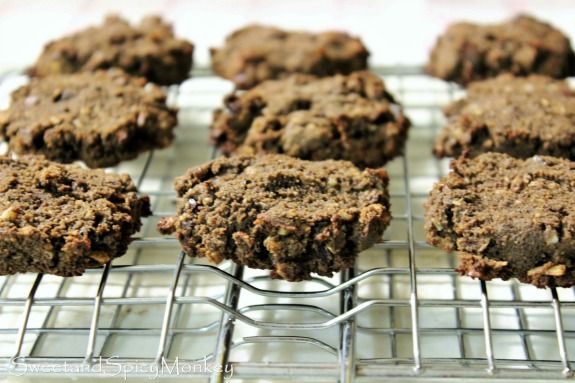
Paleo Chocolate Coconut Chocolate Chip Cookies


You read that right...chocolate coconut chocolate chip cookies that are paleo friendly. Remember the Paleo Coconut Chocolate Chip Cookies I made a few weeks ago? Well these are just a more chocolatey version of those cookies and what a difference a little bit of chocolate makes as they don't even taste like the same cookies!

During my Sugar Crush Challenge last month, I was craving something sweet but I couldn't have any granulated white sugar or brown sugar. So I had to find healthier versions of my all-time favorites. And after making the paleo chocolate chip cookies, I still had a strong hankering for chocolate.


As I was thinking of what could possibly be better than coconut chocolate chip cookies, it became obvious to me that more chocolate was the answer. And that is how I came up with these chocolate coconut chocolate chip cookies that are even more healthier for you than their inspiration, Paleo Coconut Chocolate Chip Cookies.

I say “healthier” because I’ve swapped out the dark chocolate chips for organic cacao nibs which have more nutrients without any added sugars, yet you still get that delicious chocolate flavor. And we all know the benefits of having dark chocolate over milk chocolate, right? Well, if you don’t already know, dark chocolate (unsweetened, not the sugary stuff) is found to:

  • • Contain powerful antioxidants
  • • Improve blood flow which helps lower your blood pressure
  • • Raises HDL and helps protect LDL against oxidation
  • • Lowers your risks of heart disease
  • • Improves brain function

Who’d have thought adding more chocolate to your diet would be better for you? And you thought eating healthy meant cardboard and tasteless foods.


Times are a’changing baby!

By the way for all who are wondering, I've completed my Sugar Crush Challenge. I have to say it opened my eyes to how much sugar is in the everyday foods we eat on a daily basis. And I'm not talking just desserts here. Sugar is in almost everything we eat like ketchup, yogurt, orange juice, milk - dairy milk, almond, cashew, and coconut milk included. Add that together with the other foods you eat and the sugar grams quickly increase for the day.

I lost ten pounds by cutting out sugar from my diet and I feel better too. So after completing the challenge, I'm going to continue watching the sugar content in my diet although I will still be making sweets too, just in moderation now. If you haven't already, I highly advise you to try the Sugar Crush Challenge and let me know if it helps you clean up your diet.

Paleo Chocolate Coconut Chocolate Chip Cookies

Recipe by Julie Murphy
Prep time: 8 minutes
Cook time: 10-15 minutes
Total time: 30 minutes
Yield: 1 dozen cookies
Ingredients
  • 1/3 cup organic coconut flour
  • 1/3 cup organic cacao nibs
  • 1/3 cup pecans, chopped
  • Pinch sea salt
  • 2 eggs
  • 1/4 cup organic cold-pressed, virgin coconut oil, melted
  • 1/4 cup honey
  • 1 teaspoon vanilla extract
  • 1 Tablespoon dark cocoa powder
  • 2 Tablespoons organic unsweetened coconut flakes
Cooking Directions
  1. Preheat oven to 350F degrees.
  2. Line cookie sheet (2 if you have available, otherwise, just use one cookie sheet will do) with parchment paper. Set aside.
  3. In a medium to large mixing bowl, add coconut flour, sea salt, eggs, melted coconut oil, honey, vanilla, and cocoa powder. Mix together until all ingredients are blended. Making sure to scrape the bottom and sides of the bowl with a spatula to get all the coconut flour blended in. Texture will be reminiscent of normal cookie dough. It might take a little longer for the coconut flour to soak in the wet ingredients. If using a stand mixer, about 5 minutes longer. If texture is still runny, add in coconut flour a little at a time until you achieve correct texture.
  4. By hand, fold in coconut flakes, pecans, and cacao nibs.
  5. Using a Tablespoon or pre-set cookie spoon, drop onto prepared cookie sheet, about 2 inches apart.
  6. Gently press down cookie with your fingers or palms, as cookies will not spread out during baking.
  7. Bake for 10 - 15 minutes. You will not be able to see these cookies turn a golden brown in color that is usually a sign to take them out of the oven, so keep a watchful eye on them as you do not want to burn.
  8. Remove from oven and let cool on cookie sheet for 5 minutes before transferring to a wire rack where they can cool completely.
  9. Store in an airtight container for up to 1 week. But trust me, they won't last that long!
  10. Cookies will retain a soft texture during storage.

Benefits of Dark Chocolate found here.
 
All content and images are property of Sweet and Spicy Monkey. Please do not reprint this content without my permission. If you wish to include this recipe on your site, please re-write in your own words and use your own photographs and link back to this post for original recipe.
Follow Julie's board Sweet and Spicy Monkey on Pinterest.

Friday, April 3, 2015

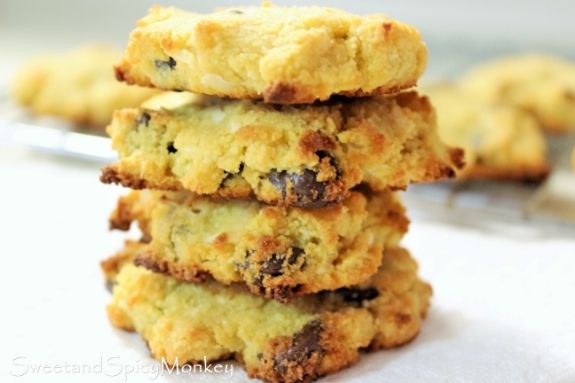
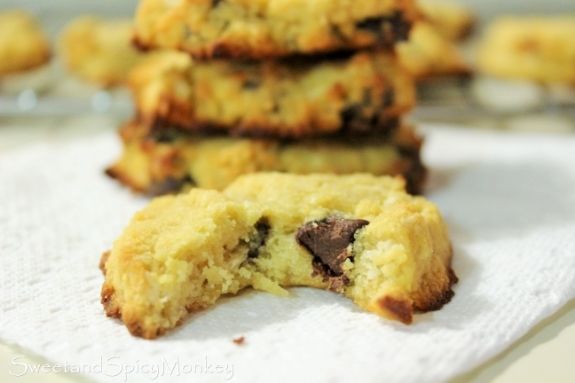
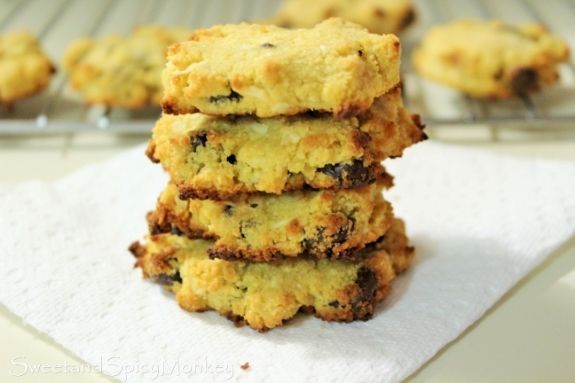
Paleo Coconut Chocolate Chip Cookies


I have only one more week left of my Sugar Crush Challenge and this week has got to be the most difficult. With all the Easter chocolates, Peeps, Cadbury eggs, chocolate bunnies, and all those Easter yummies, I'm finding myself hanging on by a thread here!

H-E-L-P M-E!

And then I came across this recipe by Rebecca at Paleo Hacks, Paleo Coconut Flour Chocolate Chip Cookies! It was like she heard my cry for help and threw me a life raft to keep me afloat during this sugar-filled Holiday.

I was so excited I made them that day but I added my own little twist to them, a little bit more coconut goodness with coconut flakes, unsweetened, of course. Because E-V-E-R-Y-T-H-I-N-G is better with coconut!


Mmmm, these little scrumptious morsels are everything I was hoping they would be...and more!


With the dark chocolate chips and coconut flakes, they remind me of an Easter treat. So I no longer feel left out this year while everyone else is enjoying their sugar-filled sweets.

Look at all the yumminess of these cookies!

So go ahead and throw another sugar-filled Holiday at me, 2015. I will make another healthy recipe to get through it all! {smile}.

-----------------------------------------------------------

Paleo Coconut Chocolate Chip Cookies

Recipe by Julie Murphy
Prep time: 8 minutes
Cook time: 10-15 minutes
Total time: 30 minutes
Yield: 1 dozen cookies
Ingredients
  • 1/3 cup coconut flour
  • 1/3 cup dark chocolate chips
  • Pinch sea salt
  • 2 eggs
  • 1/4 cup organic cold-pressed, virgin coconut oil, melted
  • 1/4 cup honey
  • 1 teaspoon vanilla extract
  • 2 Tablespoons organic unsweetened coconut flakes
Cooking Directions
  1. Preheat oven to 350F degrees.
  2. Line cookie sheet (2 if you have available, otherwise, just one cookie sheet will do) with parchment paper. Set aside.
  3. In a medium to large mixing bowl, add coconut flour, sea salt, eggs, melted coconut oil, honey, and vanilla. Mix together until all ingredients are blended. Making sure to scrape the bottom and sides of the bowl with a spatula to get all the coconut flour blended in. Texture will be reminiscent of normal cookie dough. It might take a little longer for the coconut flour to soak in the wet ingredients. If using a stand mixer, about 5 minutes longer. If texture is still runny, add in coconut flour a little at a time until you achieve correct texture.
  4. By hand, fold in coconut flakes and dark chocolate chips.
  5. Using a Tablespoon or pre-set cookie spoon, drop onto prepared cookie sheet, about 2 inches apart.
  6. Gently press down cookie with your fingers or palms, as cookies will not spread out during baking.
  7. Bake for 10-15 minutes, or until cookies are a light golden brown.
  8. Remove from oven and let cool on cookie sheet for 5 minutes before transferring to a wire rack where they can cool completely.
  9. Store in an airtight container for up to 1 week. But trust me, they won't last that long!
  10. Cookies will retain a soft texture during storage.
           

All content and images are property of Sweet and Spicy Monkey. Please do not reprint this content without my permission. If you wish to include this recipe on your site, please re-write in your own words and use your own photographs and link back to this post for original recipe.
Follow Julie's board Sweet and Spicy Monkey on Pinterest.

Featured at ~ Savoring Saturdays

Shared with: Savoring Saturdays, Munching Mondays #85