

I can’t say I’m much of a cake baker. Don’t get me wrong, I love to eat my cake, but I can’t say I’ve made too many. Let’s just say I can count the number of cakes I’ve made on only one hand {shocked}! And I’m not talking about your easy-bake sheet cake, no Ma’am, I’m talking about your 2 or more layers cake.
But when I saw this cake on Kristan's site, Confession's of a Cookbook Queen, I just knew I had to try and make it! For starters, it’s a coconut cake and I love me some coconut! I can’t remember the last time I even had any foods with coconut in it so this cake really got my craving going. I’ve also been wanting to make something different besides cookies and cupcakes and this cake presented a challenge to me since I rarely make cakes.

It wasn’t really as hard as I thought it would be. The hardest part is not devouring this cake up once you’re all done making it! Ya see, the secret part in the making of this cake is the longer it sits in the refrigerator soaking up the frosting juices, the better it tastes! The flavor and moistness of this cake peaks in three to four days after making it.
You can make this cake in the middle of your week and have it ready for Easter Sunday. Just be sure to hide it well in your refrigerator or you (or someone else) might be tempted by this little cake, seducing you with all its snowy white frosting and coconut! I don't think I will wait so long before making another cake. Cake making to be continued soon.....

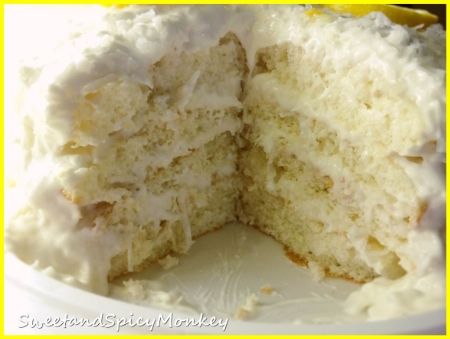
Refrigerator Coconut Cake
Ingredients
1 boxed white cake mix
1 cup Silk coconut milk (found in refrigerated milk section of store)
¾ cup canned coconut milk (I used A Taste of Thai canned coconut milk found by Asian foods)
3 large eggs
2 cups sour cream (approximately 1 - 16 ounce container)
1 and ¾ cup granulated sugar
1 – 8 ounce Cool Whip
3 and ½ to 4 cups sweetened, flaked coconut (approximately 1 – 14 ounce bag)
Directions
Preheat oven to 350F degrees.
Lightly spray three, 9 inch round cake pans with non-stick cooking spray and dust with flour, making sure to coat entire inside of pan with flour. Shake out excess flour. Set aside.
In a large mixing bowl, combine dry cake mix, 1 cup Silk coconut milk, ½ cup canned coconut milk, and eggs. Using a handheld mixer, blend for approximately 2 minutes, making sure to scrape sides of bowl with spatula every now and then. Batter should look well blended.
Spread batter evenly among your 3 prepared cake pans. Approximately 1 and ½ cups batter each pan. Smoothing tops of batter with a spatula in each pan.
Place pans in preheated oven and bake for 19-24 minutes or until tops are lightly browned and toothpick comes out clean.
Remove pans from oven and let cool for 5 minutes. After 5 minutes, run a butter knife around edges of pan to help loosen cakes and turn pan over on wire rack and gently remove cake from pan. You might have to tap the bottom to help loosen cakes from pan.
Let cakes cool on wire rack. After cakes are completely cooled, gently cut one of the cakes into half, using a large serrated blade or a piece of string. So you now have four cake layers.
Prepare your cakes for frosting by applying generous amounts of the remaining canned coconut milk over the tops of the cakes. You can either brush the coconut milk on or use a spoon to place the coconut milk on the cake and spread with bottom of spoon. (I used approximately ¼ to ½ cup coconut milk for this step).
While cakes are absorbing the coconut milk, combine sour cream and sugar in a large mixing bowl and blend. Add in flaked coconut and blend thoroughly.
Gently fold in Cool Whip by hand. Place bowl in refrigerator for 30 minutes to chill. **You will have plenty of frosting mix and it will have a “runny” appearance. This is so it can be absorbed into the cake layers while it sits in the refrigerator.**
To make your cake, place one cake on serving platter, top side up. Generously spread chilled frosting over cake layer on serving platter. Place halved layer over frosting, and apply another generous layer of frosting over cake.
Repeat this process with remaining layers of cake and frosting, frosting the top of cake once assembled and then the sides of the cake.
Cover cake and place in refrigerator. Cake is best after it sits for at least 2 days and longer in the refrigerator while it absorbs the frosting.
*Helpful Hints*
- Cake will bake in oven at 350F degrees.
- Do NOT make cake as directed on box.
- You will not be adding oil.
- Frosting will appear “runny”. It’s that way so the cake layers can absorb the flavors as it sits in the refrigerator.
- This cake must be refrigerated as the frosting will sour and become runnier if left out at room temperature.
- Cake will last up to 1 week in the refrigerator (but it will most likely be gone by then).
- I decorated my cake with some lemon slices. Decoration is optional.


Shared with Craft Thursday Obsessions #15 Link Party, Inspire Us Thursday Link Party #45, Let's Get Real Party #34 , Freedom Fridays with all my Bloggy Friends #23, Friday Link Party #62, Get Him Fed Party #30, Weekend Potluck Link Party #113, Eat Create Party! #18, Super Saturday Afternoon Tea Link Party #9, Strut Your Stuff Saturday Link Party #142, Share it One More Time Link Party, Link it or Lump it Sunday Link Party #34, Sweet and Savoury Sunday # 57, Think Pink Sunday #160, Skip the Housework Saturday 04/12/2014, The Sunday Social Blog Hop April 13, 2014 , Say G'day Saturday Linky Party #82, Monday Motivation Linky Party 04/13/2014, Sunday Soiree Link Party , Marvelous Mondays Share Your Best! 04/13/2014, Munching Mondays #34, Gingham & Roses Link up and Social Media Blog, Wonderful Wednesday Blog Hop #69, Wine'd Down Wednesday #31, Wonderfully Creative Wednesdays #16 , Cast Party Wednesday #136, Time to Sparkle #56, Wednesday Roundup #22, Cake Mix Recipes at Saturday Dishes


All content and images are property of Sweet and Spicy Monkey. Please do not reprint this content without my permission. If you wish to include this recipe on your site, please re-write in your own words and use your own photographs and link back to this post for original recipe.