Sweet and Spicy Monkey has moved to: www.sweetandspicymonkey.com

Showing posts with label Chicken. Show all posts

Tuesday, December 1, 2015

Pumpkin Stuffed Chicken Recipe + Sweese Meat Tenderizer Mallet Review with coupon code


Are you getting tired of turkey leftovers yet? I am. And it's only four days after Thanksgiving!

This recipe is guaranteed to help kick you out of your turkey rut. It's full of flavors like garlic, pumpkin, sage, and blue cheese all mixed in a cream cheese filling and stuffed inside of chicken breasts.

Pour a little pumpkin beer into the pan, drizzle pumpkin spice syrup over the top, bake, and you end up with a deliciously moist chicken that's packed full of flavors to help wake up those taste buds that are in a deep turkey trance.

Plus you get to drink the rest of the pumpkin beer. It's a win-win!

SWEESE MEAT TENDERIZER MALLET REVIEW + COUPON CODE

To help prepare the chicken for this recipe, I used this meat tenderizer mallet by Sweese.


This meat tenderizer mallet works great as it's weighted enough so you don't have to put a lot of strength into it when you use it. (For you numbers people, it weighs 10.5 ounces).


Top photo is chicken breast out of the package.
Bottom photo is chicken breast after using my Sweese Meat Tenderizer Mallet.

The head is made of solid stainless steel with a plastic handle that easily fits in your hand, which is great for me because I have small hands and it's hard to find tools that I can grip easily.

Plus it has two different heads, one with large teeth and the other end with smaller teeth.


It's also dishwasher safe which is great for sanitary purposes after using on meats. Even if you don't have a dishwasher, it cleans up easily.

It's about the same size as a fork.

Even though it might appear small (it's 8 and 3/4 inches long), this is a heavy duty kitchen tool that is durable and multi-functional. You can use it to tenderize meats, crack nuts, crush garlic, crumb cookies, and crush hard candies.

And just in time for Christmas, Sweese is offering the discount coupon code below so you can buy yourself (or someone you know who would love a new kitchen toy) one of these Sweese Meat Tenderizer Mallets.

If you act right now, you can purchase it here at Amazon.com for under $5.00 with this coupon code
------>  SLEECZVR  (coupon code valid for 6 months from date published)
That's a steal!

Which by the way, works great for making my Pumpkin Stuffed Chicken (hint, hint).

RECIPE
Pumpkin Stuffed Chicken

Recipe by Julie Murphy
A delicious & moist chicken stuffed with a pumpkin cream cheese filling
Prep time: 20 minutes
Cook time: 55 minutes
Total time: 1 hour and 15 minutes
Yield: 3 to 4 stuffed chicken breasts
Ingredients
  • 3-4 chicken breasts, skinless & boneless
  • 4 ounces (1/2 pack) cream cheese, softened
  • 1/4 cup pure pumpkin puree
  • 1 Tablespoon fresh sage, chopped
  • 2 cloves garlic, minced
  • 1/8 teaspoon white pepper
  • Dash sea salt
  • Dash ground nutmeg
  • 1/2 teaspoon Bleu cheese crumbles
  • 1/4 cup chopped walnuts
  • 1/4 cup pumpkin beer
  • 2-4 Tablespoons pumpkin spice syrup (you can also use maple syrup)
  • Dash black pepper
  • Dash sea salt
  • Dash ground coriander
  • 9 round toothpicks
Cooking Directions
  1. Cream together cream cheese, pumpkin puree, sage, garlic, pepper, sea salt, and nutmeg in a medium bowl
  2. Mix in bleu cheese crumbles and walnuts. Transfer to an airtight container and place in refrigerator to chill while you prepare chicken breasts.
  3. Preheat oven to 350F degrees.
  4. Prepare baking dish with non-stick cooking spray. Set aside.
  5. To prepare chicken breasts, place one at a time onto a large, clean cutting board.
  6. Using a meat tenderizer mallet, pound the meat from the inside out until you're left with a thinner cut of meat that you can easily roll. Be careful not to over pound the meat because you want to avoid creating weak spots in the meat since we will be rolling it up.
  7. Retrieve the pumpkin cream cheese filling from the refrigerator, spread 2 to 3 Tablespoons (fingers or a butter knife work best) over the chicken meat surface, leaving about 1/2 inch gap from the edges.
  8. Sprinkle 1/4 teaspoon bleu cheese crumbles over the surface.
  9. Roll chicken breast up from thinnest end to thicker end. Secure with a toothpick and place in prepared pan.
  10. Repeat with remaining chicken breasts. You might have some pumpkin cream cheese filling left.
  11. Pour just enough pumpkin beer into the pan to cover the bottom.
  12. Drizzle pumpkin spice syrup over chicken.
  13. Add a dash of black pepper, sea salt, and coriander.
  14. Place into oven and bake uncovered for 45 to 55 minutes, or until golden brown in color.
  15. Remove from oven and let sit for 5 minutes.
  16. Serve with juices in bottom of pan poured over the top.

*Helpful Hints*           

- Don't forget to remove the toothpicks before serving.

Disclaimer ~ This is a sponsored post. I received one Sweese Meat Tenderizer Mallet for use so I could review the product. All opinions, beliefs, and recipes are 100% my own.

All content and images are property of Sweet and Spicy Monkey. Please do not reprint this content without my permission. If you wish to include this recipe on your site, please re-write in your own words and use your own photographs and link back to this post for original recipe.
Follow Julie's board Sweet and Spicy Monkey on Pinterest.

Tuesday, October 6, 2015

Engagement Chicken


Recently as I was skimming through some of my favorite blogs, I came across one for Engagement Chicken. Just the name piqued my curiosity, 'Engagement Chicken'.

Now I've heard of grilled chicken, Bar-B-Q chicken, chicken Marsala, chicken & gravy, lemon chicken, and roasted chicken. You get the hint, pretty much any type of chicken you can make, I've heard of it. Or so I thought.

But I have never heard of Engagement Chicken. What was this chicken? Does it cause engaging conversation? Is it a recipe that marries with another, hence the name 'Engagement Chicken'? I had no idea what this recipe was so I had to google it since the article didn't go into detail what the story was behind the name, ' Engagement Chicken'.

It seems a few years back, an editor at Glamour magazine brought in a recipe to be published for Roasted Chicken. A few days later, one of the girls in the office made this recipe for her boyfriend and a few months later they got engaged. A couple other girls in the office did the same for their boyfriends and a few months later, they too, became engaged.

After this, the recipe got its nickname, Engagement Chicken. In the years that followed, some 70 couples have become engaged after eating this recipe. I don't know what makes this particular recipe of chicken, one that causes men to propose marriage to their girlfriends.

It's a simple recipe that seasons the chicken with lemon juice, salt, and pepper. It does call for three lemons to be placed into the cavity of the chicken for an extra lemony flavor.

All dressed up & ready to go!

All I have to say, is if anyone can shove three lemons into the cavity of a chicken, then you best marry her because she has some organizing and packing skills! Which means when you plan your beach vacation together, she will be able to fit everything from the ice chest, the kids boogie boards, the beach umbrella, the kids, the dog, and you all into your minivan with room to spare.

Much unlike me, who is only able to fit one lemon and half of a quartered onion into the chicken cavity. I will probably be the one in the packed minivan, umbrella hanging out the side window, who leaves you standing on the curb, with your 12 pack of beer, waving as me and the kids take off for the beach together because I couldn't fit everything into the minivan!

Obviously I don't have organizing and packing skills because I cannot fit three lemons into a chicken cavity! However, I can cook and bake and I can make a darn good Engagement Chicken. Even though it is missing two lemons.

Really, how am I supposed to fit 3 whole lemons in there?

By the way, the bright yellow sauce surrounding your chicken is referred to as "marry me juice". It's the sauce that's supposed to "seal the deal". And even though my sauce was lacking two lemons, I'm pretty darn sure it would still seal the deal. Even though my organizing and packing skills need a little more work.

Hmm, could this be why I'm single?


I've got to work on stuffing that chicken with three lemons!

Engagement Chicken

A simple, yet elegant, chicken that will have your man proposing to you.
Prep time: 15 minutes
Cook time: 1 to 2 hours, depending on size of chicken
Total time: 2 hours and 15 minutes
Ingredients
  • 1 whole chicken
  • 3 whole lemons, washed & rinsed well
  • 1/2 yellow onion, quartered
  • 2 sprigs fresh rosemary
  • 2 Tablespoons olive oil
  • 1 cup lemon juice
  • 1 cup chicken broth
  • salt & pepper to taste
Cooking Directions
  1. Position rack on oven to accommodate a whole chicken in a roasting pan.
  2. Preheat oven to 350F degrees.
  3. Remove giblets from the chicken cavity and rinse chicken cavity and outside of chicken with cool water. Place chicken in a colander and let cavity drain for 1 minute.
  4. Place chicken breast side down in a roasting pan large enough to accommodate the whole chicken.
  5. Brush entire outside of chicken with olive oil.
  6. Place chicken back into roasting pan, breast side down.
  7. Make small cuts in the whole lemons. Best way to do this is insert a sharp knife into the lemon, making about 4 to 5 small cuts around the lemon. Cut off stem of lemon.
  8. Shove 3 whole lemons into the cavity of the chicken (there's no better way to describe this step as you will be shoving those lemons in there).
  9. Place quartered onion and 1 sprig of rosemary into the chicken cavity with the lemons.
  10. If you prefer, you can tie the legs of the chicken together. Just be sure to use oven-proof ties or they will burn, melt onto your chicken, or catch fire. Just sayin'
  11. Pour chicken broth and 1 cup lemon juice over chicken.
  12. Season with salt and pepper.
  13. Place a few rosemary leaves over the top of your chicken.
  14. Place into oven for 15 minutes, uncovered.
  15. After 15 minutes, remove chicken from oven and using tongs or two wooden spoons, turn chicken over, breast side up. I covered my chicken at this time because I wanted juicy meat. So you can either cover now for remaining cooking time, or cook as the original recipe states, uncovered.
  16. Depending how large a chicken you are roasting, cooking time can take anywhere from 1 hour and 15 minutes to 2 hours or more. The basic rule is to cook approximately 18 to 20 minutes for every pound, plus an additional 15 minutes.
  17. If you're using a meat thermometer, cook until temperature reaches 180F degrees and juices run clear.
  18. Remove chicken from oven and let sit for 15 minutes so the juices can marry.
  19. Carve and serve with the "marry me juice" poured over the chicken.

Inspired by ~ Joy the Baker's 'Slight Fear of Commitment' Roasted Chicken 
 
All content and images are property of Sweet and Spicy Monkey. Please do not reprint this content without my permission. If you wish to include this recipe on your site, please re-write in your own words and use your own photographs and link back to this post for original recipe.
Follow Julie's board Sweet and Spicy Monkey on Pinterest.

Shared with ~ Savoring Saturdays

Monday, September 14, 2015

Chicken Taco Bowls


I love Mexican food! Although I've been eating it, I know I haven't posted any Mexican food recipes in quite some time. Please don't hate me.

The reason being is sometimes I just don't feel like taking photos before I eat what I make. My hunger overtakes my need for photos. Does that make me a bad food blogger?

So when The Daily Meal and Perdue asked me to create a recipe with chicken, my first thought was this Chicken Taco Bowl. What better way to enjoy chicken than in Mexican food. And what better way to promote Perdue's "farm to family meals" than with this healthy Chicken Taco Bowl!
Chicken, quinoa, fresh tomatoes, avocados, and onions make this one delicious meal in a bowl.

Another reason why I love Perdue chicken!
And this is so easy to make. You cook the chicken in the crockpot so all you have to do when you get home is cook the quinoa and chop the avocado, onion, and tomatoes. Throw it all in a bowl and serve with tortilla chips, sour cream, and cheese.


It's also great for when you want to watch the game in the TV room or eat outside without all the mess of tacos. It's my favorite go to dinner these days when I'm craving Mexican food.

And the kids will never know its good for you too with quinoa, chicken, and fresh vegetables. I'll keep your secret!


I promise I won't wait so long before my next Mexican food recipe. Pinky promise.

The best part about this? You can get a coupon for Perdue chicken here. Just click on the link I just gave you and go to Perdue's page, scroll down, and there is a coupon for $1.50 off your next two Perdue products. It's a winner, winner, chicken dinner!


Chicken Taco Bowls

Recipe by Julie Murphy
A convenient way to enjoy chicken tacos in a bowl without all the mess.
Prep time: 15 minutes
Cook time: 4 to 6 hours (for chicken)
Total time: 6 hours and 20 minutes (includes crockpot cooking time for chicken)
Yield: 4 chicken taco bowls
Ingredients
  • 6 cups organic quinoa, cooked
  • 1 lb. chicken breast, skinless & boneless
  • 1 large can (28 ounces) red enchilada sauce, mild
  • 1 can (15.25 ounces) sweet corn, drained
  • 1 small can (2.25 ounces) sliced olives
  • 1 can (16 ounces) dark red kidney beans, drained
  • 2 tomato, diced
  • 1 red onion, diced
  • 2 avocados, halved and diced
  • 1 bag tortilla chips
  • Top with plain Greek yogurt or sour cream
  • cilantro
Cooking Directions
  1. Lightly wipe inside of crockpot with olive oil, wiping off any excess with a clean, dry paper towel.
  2. Remove chicken from package and place chicken breast in bottom of crockpot.
  3. Pour enchilada sauce over chicken. Stir with a wooden spoon to cover bottom of chicken with sauce.
  4. Set to Low setting and cover. Cook 4 to 6 hours at Low setting.
  5. After chicken is cooked all the way through, remove from crockpot and place on a clean plate. Using 2 forks, shred chicken. Place shredded chicken back into the crockpot. Place on warming setting.
  6. Stir in corn and olives with shredded chicken. Cover.
  7. Prepare quinoa as directed on package.
  8. After quinoa is ready, mix with drained kidney beans. Add 1 and 1/2 cups into each bowl.
  9. Place tortilla chips around the entire edge of the bowls, with triangle points sticking out as shown in photo.
  10. Layer 3/4 to 1 cup shredded chicken mix over top of quinoa.
  11. Layer 1/2 avocado over quinoa in each bowl.
  12. Layer desired amount of tomato and onion over top of quinoa.
  13. Top with cheese cubes (as shown) or shredded cheese, plain Greek yogurt or sour cream, and cilantro.
  14. Serve with tortilla chips.

*Helpful Hints*
 
- You can use red or black quinoa or a mix of them for a more colorful bowl. I used regular and red quinoa.

- If you don't like quinoa, you can always use rice.

Disclaimer ~ This is a product post for @PerdueChicken. I was not paid for this post. All ideas and opinions are my own.
 
All content and images are property of Sweet and Spicy Monkey. Please do not reprint this content without my permission. If you wish to include this recipe on your site, please re-write in your own words and use your own photographs and link back to this post for original recipe.

Follow Julie's board Sweet and Spicy Monkey on Pinterest.

Shared with: Savoring Saturdays

Thursday, March 12, 2015

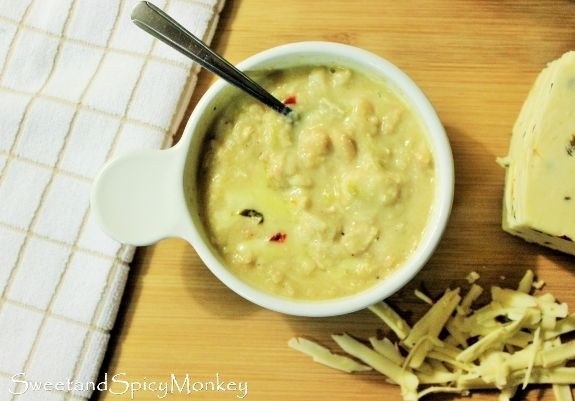
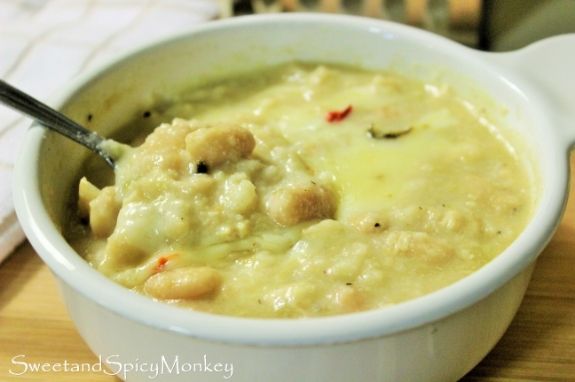
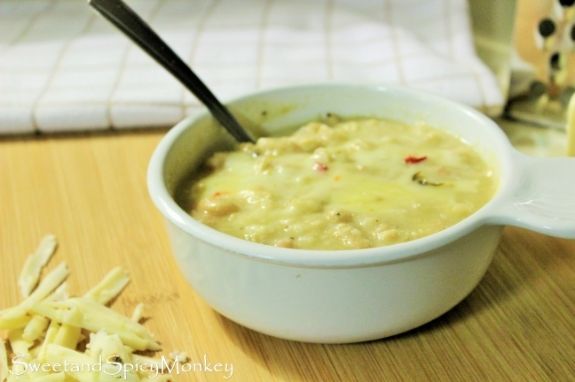
Crockpot White Chicken Chili


In honor of Throwback Thursday, I thought I would repost one of my favorite recipes that I made when I first started blogging, my Crockpot White Bean and Chicken Chili.

I first posted this recipe after just starting Sweet and Spicy Monkey, and I was using my mobile phone camera, which at that time was a Blackberry Curve. I know, it seems like eons ago doesn't it...Blackberry. Do they even make phones anymore?

When I made this recipe again last week, I decided to snap a few shots before chowing down so you can see just how delicious this chili really is, since the Blackberry didn't do this recipe any justice.

And since I was revamping, I figured why not rename it too, shortening the name from Crockpot White Bean and Chicken Chili to Crockpot White Chicken Chili. A new and improved recipe. Ok, not really improved, but the photos have been improved, at least I think so {smile}.


So without any further rambles from me, here's my Throwback Thursday recipe for Crockpot White Chicken Chili aka Crockpot White Bean and Chicken Chili.


A new name and new photos for a delicious chili anytime that's also easy to make and perfect for this chilly weather.


Crockpot White Chicken Chili

Serves 6


Ingredients

1 lb. skinless, boneless chicken breasts

3 - 15.5 ounce cans Cannellini beans, rinsed and drained (or white beans)

8 ounces shredded Pepper Jack cheese or Monterey cheese (approximately 1 and ¾ cup)

1 – 7 ounce can diced green chilies

2 – 32 ounce boxes Chicken broth (can use low-sodium)

2 – cups coarsely crushed tortilla chips

Tortilla chips


Directions

Bring out crockpot or slow cooker and spray inside with olive oil. Wipe out excess oil with paper towel. This helps the chili from sticking to the sides, even though there will be some sticking.

Pour in one box of chicken broth and turn crockpot to Low setting.

Place unthawed chicken breast in crockpot.

Add ½ of the 7-ounce can of chilies, placing other ½ of chilies aside until one hour before dinnertime.

Let cook on Low temperature for about 5-6 hours. Enjoy your day at work or go run some errands as you’re good for the rest of the day until you return.

*If you forgot to take the chicken out of the freezer and chicken is still frozen when you start making this and you’ll be home or able to return in 2 hours, you can place the frozen chicken in the crockpot and put the setting on High temperature for 2 hours. Then return and turn the setting back to Low. Then you’re good until about 1 hour before dinner. *

You can either add the beans in the chili in the morning with chicken breasts and broth or about one hour before serving dinner, since they are already cooked, whichever you find easiest. I prefer mine to cook all day.

About 1 hour before dinnertime, remove chicken breasts and place onto a plate. Shredding meat with two forks as meat will be hot to the touch. Add shredded chicken back into broth.

Add other ½ of chilies.

Grate pepper jack cheese and stir in with shredded chicken, chilies, and broth.

Coarsely crush 2 cups of the tortilla chips. I find it easy to place tortilla chips in large mixing bowl and crush with bottom of a cup until I have 2 cups. Add crushed chips into crockpot, stirring throughout.

Turn crockpot temperature back to High setting and let cook for remaining hour.

5 minutes before serving dinner, preheat oven to 405F degrees.

Take remaining tortilla chips and place on an ungreased cookie sheet or a parchment paper lined cookie sheet, sprinkle with grated pepper jack cheese.

Place in oven until cheese is melted, approximately 5 minutes, give or take.

Remove from oven and serve with chili. Enjoy!

*Helpful tips*

- You can prep remaining ingredients (grated cheese, crushed chips) the night beforehand or in the morning if you will be away all day, to help make it easier for you when you return back home.

- I add ½ of the chilies in the beginning with chicken to help get their flavor. And since cooking all day will lessen some of their flavor, I add remaining chilies during the last cooking hour. You can add all in beginning or all during the last hour if you choose.

-  If you find chili too thick after adding crushed chips, you can add more broth. Chili will thicken up as it cooks. If too watery, add more crushed chips.

Cover and refrigerate any leftovers. Can be stored in refrigerator for up to 1 week.

All content and images are property of Sweet and Spicy Monkey. Please do not reprint this content without my permission. If you wish to include this recipe on your site, please re-write in your own words and use your own photographs and link back to this post for original recipe.
Follow Julie's board Sweet and Spicy Monkey on Pinterest.

Thursday, January 29, 2015

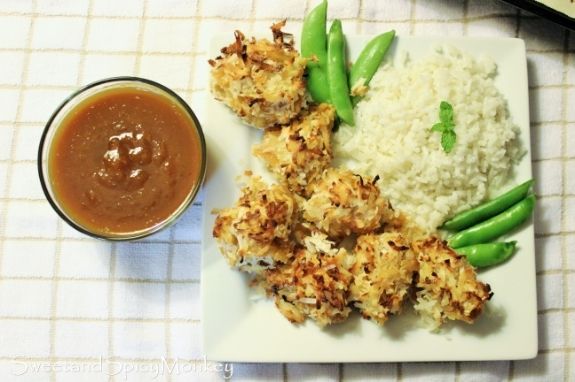
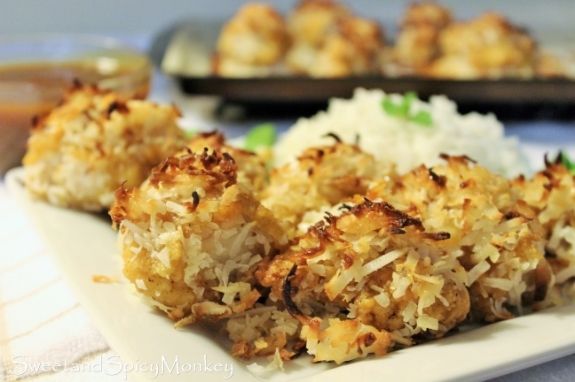
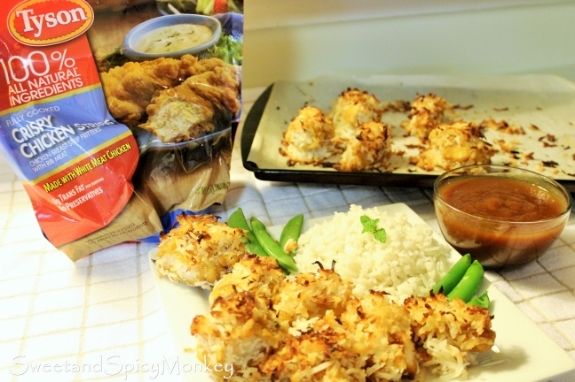
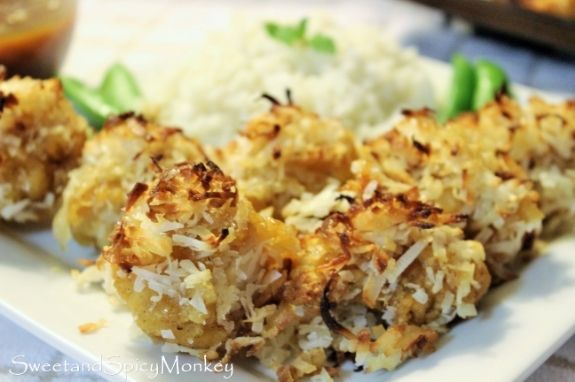
Crispy Coconut Chicken Strips with Pineapple Ginger Sauce and Coconut Rice

 
*Disclaimer - This is a sponsored post by Tyson and The Daily Meal. Recipes and opinions are 100% my own.*

Baby its cold outside! And what do we do when it gets cold and dreary out? We start daydreaming of sunny days, sandy beaches, warm blue waters, and start planning our summer vacations.

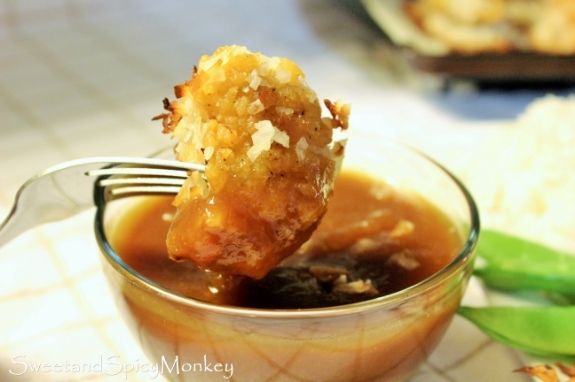
But I have a quicker and much tastier escape from these cold winter days that doesn't cost as much but reminds you of summer. I’m sharing with you my recipe for Crispy Coconut Chicken Strips with a Pineapple Ginger sauce for dipping and Coconut Rice.


You know how I L-O-V-E my coconut and I especially love it when I get to use it in new ways.

The creamy coconut and juicy pineapple flavors will whisk you away to the tropics, making you wish summer would hurry up and get here already. Especially those of you who live in the northeast corner of the country that’s blanketed with snow.


I simplified this recipe by using Tyson Crispy Chicken Strips instead of raw chicken. Tyson Crispy Chicken Strips are not only made with 100% all natural ingredients but they’re also fully cooked when you buy them to help simplify your time in the kitchen. Not only do they make a quick and healthy meal for the family, but they also make for easy and nutritious after school snacks for the kids.

And let’s not forget about this weekend’s Superbowl party, where you can serve them with any type of dipping sauce from Ranch, barbeque, to my Pineapple Ginger sauce to satisfy any manly craving.


Anywho, back to the recipes I'm sharing with you, no matter what the weather is like outside, these Crispy Coconut Chicken Strips with Pineapple Ginger sauce will whisk you and your family away to the tropics with just one scrumptious bite.


 Reminding you again, that summer days are just a few months away.

Crispy Coconut Chicken Strips

Ingredients for Crispy Coconut Chicken Strips

1 package Tyson’s Crispy Chicken Strips

1 – 14 ounce bag flaked, sweetened coconut

Egg whites, 1 egg per 2 pieces of chicken strips

Honey for drizzling, at least 6 ounces

Directions for making Crispy Coconut Chicken Strips

Preheat oven to 400F degrees.

Line 2 cookie sheets with parchment paper.

Place chicken strips on prepared cookie sheets and cook for 20 minutes at 400F degrees.

Remove from oven.

Place egg whites in a small mug. Set aside.

Pour flaked coconut onto a clean plate.

After removing chicken strips from oven (be careful not to burn your fingers) cut strips into 2 to 3 inch pieces.

Grab a chicken piece and gently brush entire strip with egg white.

Drizzle a little honey over sides of chicken strip.

Roll coated chicken strip in flaked coconut until strip is covered.

Place back on cookie sheet with parchment paper.

Place back into the oven for 10-14 minutes, turning strips over halfway through after 5-7 minutes, so the bottoms can brown.

Remove from oven after 10-14 minutes or until coconut flakes are lightly browned.

Let cool for 5 minutes before serving. Remove from sheet with flat spatula.

Best served with pineapple ginger dipping sauce and Coconut rice.


Pineapple Ginger Sauce

Makes 4 servings

Ingredients for Pineapple Ginger Sauce

1 and 1/2 cups pineapple chunks with juice

Juice of 2 limes

4 Tablespoons brown sugar, packed

2 teaspoons ground ginger

4 Tablespoons pineapple jam

2 Tablespoons molasses

Dash of red crushed peppers (optional)*

Directions for Pineapple Ginger Sauce

Place pineapple + juice, lime juice, brown sugar, and ginger into a blender and puree until all ingredients are blended. Pour into a small saucepan.

Add in pineapple jam, molasses, and red pepper flakes*

Over medium heat, bring to a boil. Once boiling turn heat down to low and simmer for another 15-20 minutes, stirring occasionally.

Pour into small bowls for dipping.

Coconut Rice

Makes 6 servings

Ingredients for Coconut Rice

1 and ½ cups Jasmine rice

1 – 15 ounce can coconut milk

1 cup water

3 fresh basil leaves, washed and coarsely chopped

1 clove garlic, minced

½ teaspoon sea salt

Directions for Coconut Rice

Add all ingredients into a medium saucepan. Stir together over medium heat. Bring to a boil.

Turn heat down to low, cover, and simmer for 30 minutes.

After 30 minutes, remove from heat and let sit for 15 minutes, still covered, before stirring.

Serve warm.

All content and images are property of Sweet and Spicy Monkey. Please do not reprint this content without my permission. If you wish to include this recipe on your site, please re-write in your own words and use your own photographs and link back to this post for original recipe.
Follow Julie's board Sweet and Spicy Monkey on Pinterest.

Shared with: Savoring Saturdays #47, Sweet and Savoury Sundays #98

Friday, October 10, 2014

Chicken Pot Pie


I’m loving these cool, brisk nights of October. And when the weather starts cooling down like this, I find it’s the perfect time to break out my crockpot. Ah, yes my beloved crockpot, maker of many delicious soups and chile.

One of my favorite cool weather meals when I was growing up, and still, is Marie Callender’s chicken pot pie. Oh, how I love it! The flaky pie crust with chicken and vegetables in a deliciously thick, golden sauce. Mmmm…


But the one thing I don’t like about them, is that no matter how long you’ve cooked the pies, the bottom crust remains partially uncooked. I usually put foil around the edges of the pies so I can get the bottom crust cooked all the way through because I like a golden colored crust, more on the lighter side, not burnt. But this usually takes about 90 minutes. And who wants to wait that long for dinner when the directions state "ready in 45-60 minutes"? Not this girl!

So this year, I decided to try and make my own chicken pot pie. After all, how hard can it be? Come to find out, not very hard at all. Pretty easy if you ask me {smile}.

Of course, I cheated a little by using a store bought crust. But if you’re into that whole “I like making my own crust” thing, then feel free to go ahead and do that for your crust. But for now, I’m using store bought crust as it’s much easier and not as messy or time consuming.


As for the “filling” for my chicken pot pie, I was inspired by Pillsbury's Classic Chicken pot pie recipe. I tweaked the recipe to my own liking, making this recipe more like Marie Callender’s classic chicken pot pies.

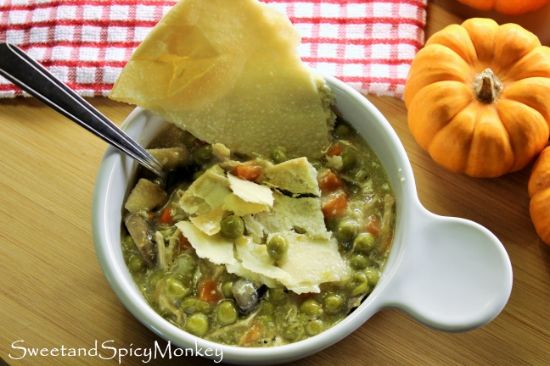
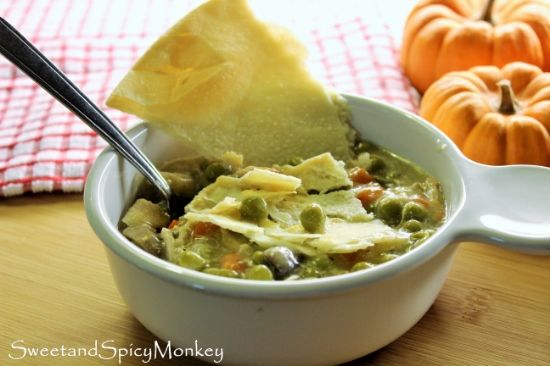
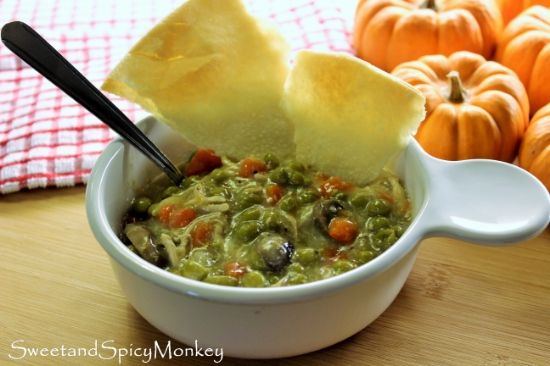
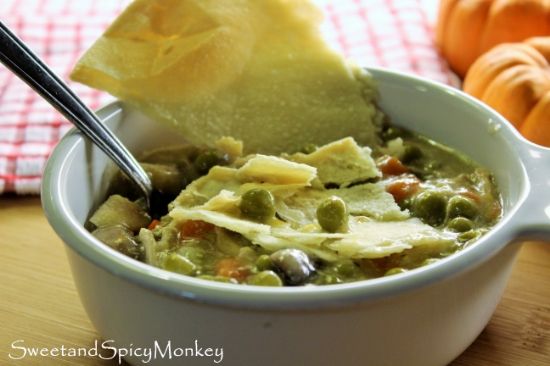
And the crust, well, I decided to try something a little different by literally thinking outside the box. You see, I was going to make this like the classic pot pies but then I remembered how the bottom crust would always be undercooked. So I thought, why not just make the “filling” and serve it like a soup with your crust on the side. So you end up with a delicious golden, flaky crust every time!

Look at that flaky crust!

It might not look as pretty as a classic pot pie in the pie shell, but your taste buds will tell you differently. As it tastes as good as, if not better, than Marie Callender’s classic chicken pot pies!

Ingredients

2 skinless, boneless chicken breasts (about 1 and ½ lbs.)

1 – 32 ounce carton of Chicken Broth

1/3 cup butter

½ cup sweet, yellow onion, chopped and diced (about ½ of a whole onion)

1 teaspoon sea salt

½ teaspoon ground black pepper

1 cup milk

¾ cup flour

1 package whole, fresh mushrooms, washed and sliced

1 Large package frozen peas

1 – 12 ounce package frozen peas and carrots (or mixed frozen vegetables)

1 box refrigerated pie crust – cook as directed on the box label.

Directions

Place chicken breast, broth, butter, onion, salt and pepper into crockpot and place on Low setting. Cook for 4 hours.

After 4 hours, remove chicken breasts with fork and place on a clean plate. Shred chicken with 2 forks, as it will be hot to the touch. Place shredded chicken back into crockpot.

Add remaining ingredients and cook for another 1-2 hours on Low setting.

About 20 minutes before chicken & vegetable broth is complete, cook pie crust as directed on box label.

Season chicken and vegetable broth to taste with additional salt & pepper, if needed.

Serve up in bowls and place pie crust on the side or crumble over the top. Enjoy!

You can also serve without pie crust as it makes for a delicious chicken vegetable soup.


*Helpful Hints*

- I don’t care for corn in the mixed vegetables, so I used peas and carrots. You can use any frozen vegetable you and your family like.

- You can buy the sliced mushrooms to save you time.

- You can make your own pie crust.

- You can use less or more flour to make the soup base thin or thicker.

- All measurements are US

All content and images are property of Sweet and Spicy Monkey. Please do not reprint this content without my permission. If you wish to include this recipe on your site, please re-write in your own words and use your own photographs and link back to this post for original recipe.
Follow Julie's board Sweet and Spicy Monkey on Pinterest.

Shared with: Tasty Tuesday Recipe Link Up, Simple Supper Tuesday #84, Savoring Saturdays #37