Sweet and Spicy Monkey has moved to: www.sweetandspicymonkey.com

Showing posts with label Dinner. Show all posts

Tuesday, October 6, 2015

Engagement Chicken


Recently as I was skimming through some of my favorite blogs, I came across one for Engagement Chicken. Just the name piqued my curiosity, 'Engagement Chicken'.

Now I've heard of grilled chicken, Bar-B-Q chicken, chicken Marsala, chicken & gravy, lemon chicken, and roasted chicken. You get the hint, pretty much any type of chicken you can make, I've heard of it. Or so I thought.

But I have never heard of Engagement Chicken. What was this chicken? Does it cause engaging conversation? Is it a recipe that marries with another, hence the name 'Engagement Chicken'? I had no idea what this recipe was so I had to google it since the article didn't go into detail what the story was behind the name, ' Engagement Chicken'.

It seems a few years back, an editor at Glamour magazine brought in a recipe to be published for Roasted Chicken. A few days later, one of the girls in the office made this recipe for her boyfriend and a few months later they got engaged. A couple other girls in the office did the same for their boyfriends and a few months later, they too, became engaged.

After this, the recipe got its nickname, Engagement Chicken. In the years that followed, some 70 couples have become engaged after eating this recipe. I don't know what makes this particular recipe of chicken, one that causes men to propose marriage to their girlfriends.

It's a simple recipe that seasons the chicken with lemon juice, salt, and pepper. It does call for three lemons to be placed into the cavity of the chicken for an extra lemony flavor.

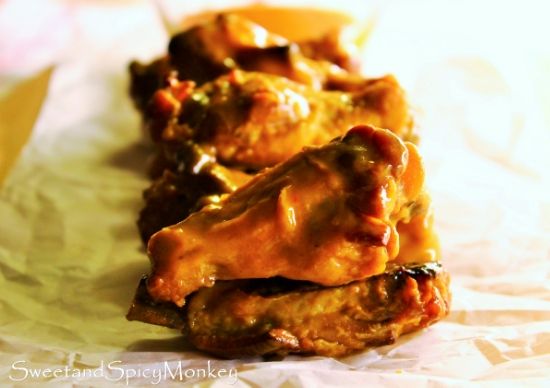
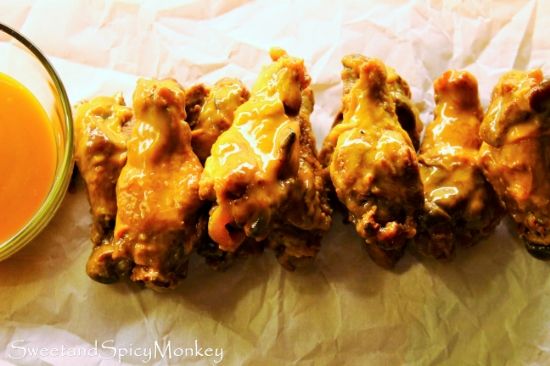
All dressed up & ready to go!

All I have to say, is if anyone can shove three lemons into the cavity of a chicken, then you best marry her because she has some organizing and packing skills! Which means when you plan your beach vacation together, she will be able to fit everything from the ice chest, the kids boogie boards, the beach umbrella, the kids, the dog, and you all into your minivan with room to spare.

Much unlike me, who is only able to fit one lemon and half of a quartered onion into the chicken cavity. I will probably be the one in the packed minivan, umbrella hanging out the side window, who leaves you standing on the curb, with your 12 pack of beer, waving as me and the kids take off for the beach together because I couldn't fit everything into the minivan!

Obviously I don't have organizing and packing skills because I cannot fit three lemons into a chicken cavity! However, I can cook and bake and I can make a darn good Engagement Chicken. Even though it is missing two lemons.

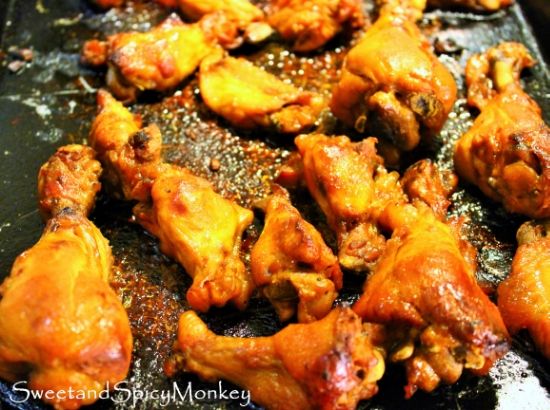
Really, how am I supposed to fit 3 whole lemons in there?

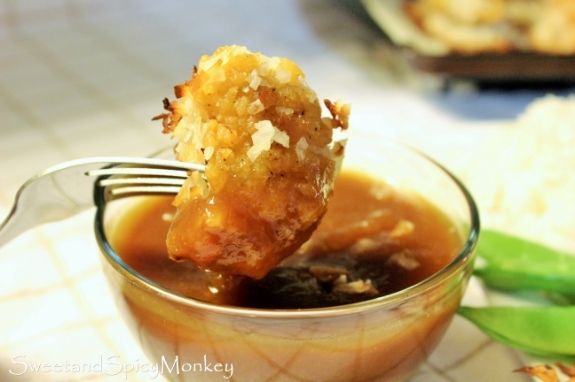
By the way, the bright yellow sauce surrounding your chicken is referred to as "marry me juice". It's the sauce that's supposed to "seal the deal". And even though my sauce was lacking two lemons, I'm pretty darn sure it would still seal the deal. Even though my organizing and packing skills need a little more work.

Hmm, could this be why I'm single?


I've got to work on stuffing that chicken with three lemons!

Engagement Chicken

A simple, yet elegant, chicken that will have your man proposing to you.
Prep time: 15 minutes
Cook time: 1 to 2 hours, depending on size of chicken
Total time: 2 hours and 15 minutes
Ingredients
  • 1 whole chicken
  • 3 whole lemons, washed & rinsed well
  • 1/2 yellow onion, quartered
  • 2 sprigs fresh rosemary
  • 2 Tablespoons olive oil
  • 1 cup lemon juice
  • 1 cup chicken broth
  • salt & pepper to taste
Cooking Directions
  1. Position rack on oven to accommodate a whole chicken in a roasting pan.
  2. Preheat oven to 350F degrees.
  3. Remove giblets from the chicken cavity and rinse chicken cavity and outside of chicken with cool water. Place chicken in a colander and let cavity drain for 1 minute.
  4. Place chicken breast side down in a roasting pan large enough to accommodate the whole chicken.
  5. Brush entire outside of chicken with olive oil.
  6. Place chicken back into roasting pan, breast side down.
  7. Make small cuts in the whole lemons. Best way to do this is insert a sharp knife into the lemon, making about 4 to 5 small cuts around the lemon. Cut off stem of lemon.
  8. Shove 3 whole lemons into the cavity of the chicken (there's no better way to describe this step as you will be shoving those lemons in there).
  9. Place quartered onion and 1 sprig of rosemary into the chicken cavity with the lemons.
  10. If you prefer, you can tie the legs of the chicken together. Just be sure to use oven-proof ties or they will burn, melt onto your chicken, or catch fire. Just sayin'
  11. Pour chicken broth and 1 cup lemon juice over chicken.
  12. Season with salt and pepper.
  13. Place a few rosemary leaves over the top of your chicken.
  14. Place into oven for 15 minutes, uncovered.
  15. After 15 minutes, remove chicken from oven and using tongs or two wooden spoons, turn chicken over, breast side up. I covered my chicken at this time because I wanted juicy meat. So you can either cover now for remaining cooking time, or cook as the original recipe states, uncovered.
  16. Depending how large a chicken you are roasting, cooking time can take anywhere from 1 hour and 15 minutes to 2 hours or more. The basic rule is to cook approximately 18 to 20 minutes for every pound, plus an additional 15 minutes.
  17. If you're using a meat thermometer, cook until temperature reaches 180F degrees and juices run clear.
  18. Remove chicken from oven and let sit for 15 minutes so the juices can marry.
  19. Carve and serve with the "marry me juice" poured over the chicken.

Inspired by ~ Joy the Baker's 'Slight Fear of Commitment' Roasted Chicken 
 
All content and images are property of Sweet and Spicy Monkey. Please do not reprint this content without my permission. If you wish to include this recipe on your site, please re-write in your own words and use your own photographs and link back to this post for original recipe.
Follow Julie's board Sweet and Spicy Monkey on Pinterest.

Shared with ~ Savoring Saturdays

Monday, September 14, 2015

Chicken Taco Bowls


I love Mexican food! Although I've been eating it, I know I haven't posted any Mexican food recipes in quite some time. Please don't hate me.

The reason being is sometimes I just don't feel like taking photos before I eat what I make. My hunger overtakes my need for photos. Does that make me a bad food blogger?

So when The Daily Meal and Perdue asked me to create a recipe with chicken, my first thought was this Chicken Taco Bowl. What better way to enjoy chicken than in Mexican food. And what better way to promote Perdue's "farm to family meals" than with this healthy Chicken Taco Bowl!
Chicken, quinoa, fresh tomatoes, avocados, and onions make this one delicious meal in a bowl.

Another reason why I love Perdue chicken!
And this is so easy to make. You cook the chicken in the crockpot so all you have to do when you get home is cook the quinoa and chop the avocado, onion, and tomatoes. Throw it all in a bowl and serve with tortilla chips, sour cream, and cheese.


It's also great for when you want to watch the game in the TV room or eat outside without all the mess of tacos. It's my favorite go to dinner these days when I'm craving Mexican food.

And the kids will never know its good for you too with quinoa, chicken, and fresh vegetables. I'll keep your secret!


I promise I won't wait so long before my next Mexican food recipe. Pinky promise.

The best part about this? You can get a coupon for Perdue chicken here. Just click on the link I just gave you and go to Perdue's page, scroll down, and there is a coupon for $1.50 off your next two Perdue products. It's a winner, winner, chicken dinner!


Chicken Taco Bowls

Recipe by Julie Murphy
A convenient way to enjoy chicken tacos in a bowl without all the mess.
Prep time: 15 minutes
Cook time: 4 to 6 hours (for chicken)
Total time: 6 hours and 20 minutes (includes crockpot cooking time for chicken)
Yield: 4 chicken taco bowls
Ingredients
  • 6 cups organic quinoa, cooked
  • 1 lb. chicken breast, skinless & boneless
  • 1 large can (28 ounces) red enchilada sauce, mild
  • 1 can (15.25 ounces) sweet corn, drained
  • 1 small can (2.25 ounces) sliced olives
  • 1 can (16 ounces) dark red kidney beans, drained
  • 2 tomato, diced
  • 1 red onion, diced
  • 2 avocados, halved and diced
  • 1 bag tortilla chips
  • Top with plain Greek yogurt or sour cream
  • cilantro
Cooking Directions
  1. Lightly wipe inside of crockpot with olive oil, wiping off any excess with a clean, dry paper towel.
  2. Remove chicken from package and place chicken breast in bottom of crockpot.
  3. Pour enchilada sauce over chicken. Stir with a wooden spoon to cover bottom of chicken with sauce.
  4. Set to Low setting and cover. Cook 4 to 6 hours at Low setting.
  5. After chicken is cooked all the way through, remove from crockpot and place on a clean plate. Using 2 forks, shred chicken. Place shredded chicken back into the crockpot. Place on warming setting.
  6. Stir in corn and olives with shredded chicken. Cover.
  7. Prepare quinoa as directed on package.
  8. After quinoa is ready, mix with drained kidney beans. Add 1 and 1/2 cups into each bowl.
  9. Place tortilla chips around the entire edge of the bowls, with triangle points sticking out as shown in photo.
  10. Layer 3/4 to 1 cup shredded chicken mix over top of quinoa.
  11. Layer 1/2 avocado over quinoa in each bowl.
  12. Layer desired amount of tomato and onion over top of quinoa.
  13. Top with cheese cubes (as shown) or shredded cheese, plain Greek yogurt or sour cream, and cilantro.
  14. Serve with tortilla chips.

*Helpful Hints*
 
- You can use red or black quinoa or a mix of them for a more colorful bowl. I used regular and red quinoa.

- If you don't like quinoa, you can always use rice.

Disclaimer ~ This is a product post for @PerdueChicken. I was not paid for this post. All ideas and opinions are my own.
 
All content and images are property of Sweet and Spicy Monkey. Please do not reprint this content without my permission. If you wish to include this recipe on your site, please re-write in your own words and use your own photographs and link back to this post for original recipe.

Follow Julie's board Sweet and Spicy Monkey on Pinterest.

Shared with: Savoring Saturdays

Thursday, August 6, 2015

Grilled Spanakopita Sandwiches with Tzatziki Sauce


When it's hot outside, I usually don't like a big filling meal for supper like in the winter months. I usually opt for something light, yet filling. But not like Chinese food where your starving 3 hours later. You know what I'm talking about!

Why is it every time you eat Chinese food, you're ravenously hungry an hour later, no matter how much you eat? It's one of those questions that remains a mystery.

Well, you won't be hungry after eating this recipe I'm about to share with you. It's a spin off of a Greek spanakopita, which is also known as a spinach pie.

Traditionally, spanakopita has all the Mediterranean foods like feta cheese, onions, egg whites, and spinach layered between crispy, flaky crusts.

I was introduced to spanakopita after trying Helen of Scrummy Lane's version of Greek spanakopita quesadillas with Tzatziki sauce. I was hooked!

Now I changed it up a bit with the addition of mozzarella and bleu cheeses, walnuts, and Naan bread. And I used lime juice instead of lemon juice in the Tzatziki sauce because I thought the flavor of the limes enhanced the dill and garlic flavors.


Or maybe it was just because I was enjoying my Brazilian lemonade at the time I made this, I don't know!

I think the Naan bread gives it a little more texture and blends well with all the ingredients. The mozzarella cheese reminds me of a pizza, while the sprinkling of blue cheese crumbles and chopped walnuts gives it an even more delicious flavor. Place it on the grill and the results are amazing!

A healthy, filling dish that's packed full of flavor and can be eaten anytime of the day. Besides my favorite dinner at this time, you can also eat this for a quick, nutritious breakfast, lunch, or an afternoon snack. With all of its fresh ingredients, you can see why I'm loving this!

Of course after it cools down here in Georgia, I will be making this with phyllo pastry as it is traditionally made. I cannot wait!


But in the meantime, heat up your grills and sink your teeth into this.

Grilled Spanakopita Sandwiches

Recipe by Julie Murphy
A grilled sandwich version of the traditional Greek Spanakopita.
Prep time: 15 minutes
Cook time: 8 minutes
Total time: 23 minutes
Yield: 2 Naan sandwiches
Ingredients
  • 8 ounces fresh spinach
  • 2 green onions, diced
  • 3 ounces feta cheese, crumbled
  • 1/2 cup sun dried tomatoes, diced
  • 1/2 cup walnuts, coarsley chopped
  • 1 cup mozzerella cheese, shredded
  • 2 Tablespoons Bleu cheese crumbles
  • 4 egg whites
  • Dash sea salt & pepper to taste
  • 4 pieces (2 packages) Naan bread
Cooking Directions
  1. Wash spinach and place into a microwavable bowl.
  2. Add 1 Tablespoon water, cover with paper towel, and place into microwave for about 2-3 minutes on High setting. Set aside as is while you prepare the rest of the ingredients.
  3. Combine green onions, feta and mozzarella cheeses, walnuts, bleu cheese, sun dried tomatoes, salt & pepper in a large bowl. Mix ingredients together with a wooden spoon. Set aside.
  4. Drain excess water out of spinach. I found it helps to use paper towels to dab up most of the water while draining. Be careful as water will be hot.
  5. After draining off water, cut spinach up. Large chunks are ok. Set aside.
  6. Spray large skillet with nonstick spray. If you prefer, you can use butter or olive oil.
  7. Heat skillet and add in egg whites and 1/2 of warmed cut spinach. Cook until done.
  8. On one side of Naan bread, add egg whites spinach mix and remaining spinach.
  9. Place onto grill, sprinkle remaining ingredients over egg whites and spinach. Cover with other slice of Naan bread, so it resembles a sandwich.
  10. Grill until cheeses are melted. About 5 minutes max.
  11. Remove from grill, cut into strips or triangles, and serve with Tzatziki sauce.

Originally, this Tzatziki sauce recipe calls for the juice of two lemons. But I found limes really bring out the taste of the dill and garlic much better.

Tzatziki Sauce

Ingredients
  • 1 cup Greek yogurt
  • 1/2 English cucumber, diced
  • 1 teaspoon fresh dill, chopped
  • 1/2 clove garlic, diced
  • Juice of 2 lime wedges
  • Dash of sea salt and pepper
  • Drizzle olive oil over the top before serving
Directions
  1. Add all ingredients except the olive oil into a medium bowl and mix together.
  2. Drizzle olive oil over the top and serve.

*Helpful Hints*
 
- You can grill this using a George Forman grill, Panini grill, or outside grill.
 
- Make sure you use Greek yogurt for the Tzatziki sauce as regular yogurt is too thin.

- You can also use mini Naan breads for this recipe as shown in the photos.

- You can substitute scallions or spring onions for the green onions.
 
All content and images are property of Sweet and Spicy Monkey. Please do not reprint this content without my permission. If you wish to include this recipe on your site, please re-write in your own words and use your own photographs and link back to this post for original recipe.
Follow Julie's board Sweet and Spicy Monkey on Pinterest.

Thursday, March 12, 2015

Crockpot White Chicken Chili


In honor of Throwback Thursday, I thought I would repost one of my favorite recipes that I made when I first started blogging, my Crockpot White Bean and Chicken Chili.

I first posted this recipe after just starting Sweet and Spicy Monkey, and I was using my mobile phone camera, which at that time was a Blackberry Curve. I know, it seems like eons ago doesn't it...Blackberry. Do they even make phones anymore?

When I made this recipe again last week, I decided to snap a few shots before chowing down so you can see just how delicious this chili really is, since the Blackberry didn't do this recipe any justice.

And since I was revamping, I figured why not rename it too, shortening the name from Crockpot White Bean and Chicken Chili to Crockpot White Chicken Chili. A new and improved recipe. Ok, not really improved, but the photos have been improved, at least I think so {smile}.


So without any further rambles from me, here's my Throwback Thursday recipe for Crockpot White Chicken Chili aka Crockpot White Bean and Chicken Chili.


A new name and new photos for a delicious chili anytime that's also easy to make and perfect for this chilly weather.


Crockpot White Chicken Chili

Serves 6


Ingredients

1 lb. skinless, boneless chicken breasts

3 - 15.5 ounce cans Cannellini beans, rinsed and drained (or white beans)

8 ounces shredded Pepper Jack cheese or Monterey cheese (approximately 1 and ¾ cup)

1 – 7 ounce can diced green chilies

2 – 32 ounce boxes Chicken broth (can use low-sodium)

2 – cups coarsely crushed tortilla chips

Tortilla chips


Directions

Bring out crockpot or slow cooker and spray inside with olive oil. Wipe out excess oil with paper towel. This helps the chili from sticking to the sides, even though there will be some sticking.

Pour in one box of chicken broth and turn crockpot to Low setting.

Place unthawed chicken breast in crockpot.

Add ½ of the 7-ounce can of chilies, placing other ½ of chilies aside until one hour before dinnertime.

Let cook on Low temperature for about 5-6 hours. Enjoy your day at work or go run some errands as you’re good for the rest of the day until you return.

*If you forgot to take the chicken out of the freezer and chicken is still frozen when you start making this and you’ll be home or able to return in 2 hours, you can place the frozen chicken in the crockpot and put the setting on High temperature for 2 hours. Then return and turn the setting back to Low. Then you’re good until about 1 hour before dinner. *

You can either add the beans in the chili in the morning with chicken breasts and broth or about one hour before serving dinner, since they are already cooked, whichever you find easiest. I prefer mine to cook all day.

About 1 hour before dinnertime, remove chicken breasts and place onto a plate. Shredding meat with two forks as meat will be hot to the touch. Add shredded chicken back into broth.

Add other ½ of chilies.

Grate pepper jack cheese and stir in with shredded chicken, chilies, and broth.

Coarsely crush 2 cups of the tortilla chips. I find it easy to place tortilla chips in large mixing bowl and crush with bottom of a cup until I have 2 cups. Add crushed chips into crockpot, stirring throughout.

Turn crockpot temperature back to High setting and let cook for remaining hour.

5 minutes before serving dinner, preheat oven to 405F degrees.

Take remaining tortilla chips and place on an ungreased cookie sheet or a parchment paper lined cookie sheet, sprinkle with grated pepper jack cheese.

Place in oven until cheese is melted, approximately 5 minutes, give or take.

Remove from oven and serve with chili. Enjoy!

*Helpful tips*

- You can prep remaining ingredients (grated cheese, crushed chips) the night beforehand or in the morning if you will be away all day, to help make it easier for you when you return back home.

- I add ½ of the chilies in the beginning with chicken to help get their flavor. And since cooking all day will lessen some of their flavor, I add remaining chilies during the last cooking hour. You can add all in beginning or all during the last hour if you choose.

-  If you find chili too thick after adding crushed chips, you can add more broth. Chili will thicken up as it cooks. If too watery, add more crushed chips.

Cover and refrigerate any leftovers. Can be stored in refrigerator for up to 1 week.

All content and images are property of Sweet and Spicy Monkey. Please do not reprint this content without my permission. If you wish to include this recipe on your site, please re-write in your own words and use your own photographs and link back to this post for original recipe.
Follow Julie's board Sweet and Spicy Monkey on Pinterest.

Thursday, January 29, 2015

Crispy Coconut Chicken Strips with Pineapple Ginger Sauce and Coconut Rice

 
*Disclaimer - This is a sponsored post by Tyson and The Daily Meal. Recipes and opinions are 100% my own.*

Baby its cold outside! And what do we do when it gets cold and dreary out? We start daydreaming of sunny days, sandy beaches, warm blue waters, and start planning our summer vacations.

But I have a quicker and much tastier escape from these cold winter days that doesn't cost as much but reminds you of summer. I’m sharing with you my recipe for Crispy Coconut Chicken Strips with a Pineapple Ginger sauce for dipping and Coconut Rice.


You know how I L-O-V-E my coconut and I especially love it when I get to use it in new ways.

The creamy coconut and juicy pineapple flavors will whisk you away to the tropics, making you wish summer would hurry up and get here already. Especially those of you who live in the northeast corner of the country that’s blanketed with snow.


I simplified this recipe by using Tyson Crispy Chicken Strips instead of raw chicken. Tyson Crispy Chicken Strips are not only made with 100% all natural ingredients but they’re also fully cooked when you buy them to help simplify your time in the kitchen. Not only do they make a quick and healthy meal for the family, but they also make for easy and nutritious after school snacks for the kids.

And let’s not forget about this weekend’s Superbowl party, where you can serve them with any type of dipping sauce from Ranch, barbeque, to my Pineapple Ginger sauce to satisfy any manly craving.


Anywho, back to the recipes I'm sharing with you, no matter what the weather is like outside, these Crispy Coconut Chicken Strips with Pineapple Ginger sauce will whisk you and your family away to the tropics with just one scrumptious bite.


 Reminding you again, that summer days are just a few months away.

Crispy Coconut Chicken Strips

Ingredients for Crispy Coconut Chicken Strips

1 package Tyson’s Crispy Chicken Strips

1 – 14 ounce bag flaked, sweetened coconut

Egg whites, 1 egg per 2 pieces of chicken strips

Honey for drizzling, at least 6 ounces

Directions for making Crispy Coconut Chicken Strips

Preheat oven to 400F degrees.

Line 2 cookie sheets with parchment paper.

Place chicken strips on prepared cookie sheets and cook for 20 minutes at 400F degrees.

Remove from oven.

Place egg whites in a small mug. Set aside.

Pour flaked coconut onto a clean plate.

After removing chicken strips from oven (be careful not to burn your fingers) cut strips into 2 to 3 inch pieces.

Grab a chicken piece and gently brush entire strip with egg white.

Drizzle a little honey over sides of chicken strip.

Roll coated chicken strip in flaked coconut until strip is covered.

Place back on cookie sheet with parchment paper.

Place back into the oven for 10-14 minutes, turning strips over halfway through after 5-7 minutes, so the bottoms can brown.

Remove from oven after 10-14 minutes or until coconut flakes are lightly browned.

Let cool for 5 minutes before serving. Remove from sheet with flat spatula.

Best served with pineapple ginger dipping sauce and Coconut rice.


Pineapple Ginger Sauce

Makes 4 servings

Ingredients for Pineapple Ginger Sauce

1 and 1/2 cups pineapple chunks with juice

Juice of 2 limes

4 Tablespoons brown sugar, packed

2 teaspoons ground ginger

4 Tablespoons pineapple jam

2 Tablespoons molasses

Dash of red crushed peppers (optional)*

Directions for Pineapple Ginger Sauce

Place pineapple + juice, lime juice, brown sugar, and ginger into a blender and puree until all ingredients are blended. Pour into a small saucepan.

Add in pineapple jam, molasses, and red pepper flakes*

Over medium heat, bring to a boil. Once boiling turn heat down to low and simmer for another 15-20 minutes, stirring occasionally.

Pour into small bowls for dipping.

Coconut Rice

Makes 6 servings

Ingredients for Coconut Rice

1 and ½ cups Jasmine rice

1 – 15 ounce can coconut milk

1 cup water

3 fresh basil leaves, washed and coarsely chopped

1 clove garlic, minced

½ teaspoon sea salt

Directions for Coconut Rice

Add all ingredients into a medium saucepan. Stir together over medium heat. Bring to a boil.

Turn heat down to low, cover, and simmer for 30 minutes.

After 30 minutes, remove from heat and let sit for 15 minutes, still covered, before stirring.

Serve warm.

All content and images are property of Sweet and Spicy Monkey. Please do not reprint this content without my permission. If you wish to include this recipe on your site, please re-write in your own words and use your own photographs and link back to this post for original recipe.
Follow Julie's board Sweet and Spicy Monkey on Pinterest.

Shared with: Savoring Saturdays #47, Sweet and Savoury Sundays #98

Friday, January 23, 2015

The Perfect Macaroni and Cheese


Over the years, macaroni and cheese or as many of you know it, mac n' cheese, has been my golden unicorn. In Sweet and Spicy Monkey language a Golden unicorn is something that I strive to accomplish yet it remains out of my reach.

I don't understand it, I can bake anything from apple pies to lemon meringue pies (I will share with you one day when I get in a pie mood) to making fudge, baking cakes and cookies, and whipping up some delicious dinners like chili, soups, and even a turkey for Thanksgiving.

Yet I cannot make a decent mac n' cheese. Yes, something as simple as mac n' cheese remains my golden unicorn.

Oh, I can whip up a mean dish of Kraft macaroni and cheese, even adding some of my favorites to it like crushed red chile peppers or pepper jack cheese. I'm a mac n' cheese wizard when it comes to Kraft, but when it comes to homemade, I just can't get it right.

And I've tried some of the best recipes for mac n' cheese, yet mine just don't turn out the same. They always come out dry and mealy. None of that long, stringy cheese like you see in the magazine photos.

I was starting to give up all hope on ever being able to make homemade mac n' cheese.

That is, until I came across this recipe for the perfect macaroni and cheese by Martha Stewart. I figured if I couldn't make this, then I could finally hang up my pots and pans and call it a day.

Or challenge Martha Stewart to come show me what I'm doing wrong and teach me how to finally make homemade mac n' cheese. I figured if anyone could teach me, it would have to be Martha herself.

So I decided to give it one last hoorah and try to make Martha’s recipe for macaroni and cheese.

I have to say, even though my kitchen looked like a bomb exploded in it, this is an easy recipe to follow and it turned out deliciously cheesy! And the toasted buttered bread on top gives it that little crunch that sends this mac n' cheese over the top.

Now when I saw nutmeg as one of the ingredients it caught my interest. Nutmeg in macaroni and cheese? I don’t remember Kraft having nutmeg in their mac n’ cheese. Needless to say, the nutmeg pairs well with the cheeses, almost giving it an addictive flavoring.

The cheese sauce is like none I’ve ever had before, perfectly creamy and not at all greasy. A two thumbs up from me Martha on perfecting this cheese sauce.


Oh Martha, will you ever forgive me for not coming to you when I first began this long journey for the perfect bowl of homemade mac n' cheese? Thank you for finally letting me capture my golden unicorn with your recipe for the perfect macaroni and cheese.

Excuse me now as I go ride my golden unicorn on the sandy beaches while eating a big bowl of Martha's mac n' cheese. To be continued soon....

In the meantime, I hope you get a chance to make this recipe soon, as it makes for the perfect comfort food on these cold winter nights.

Martha Stewarts - The Perfect Macaroni and Cheese

Serves 12

Ingredients

6 slices of English Toasting sandwich bread, cut into small pieces with crusts removed

½ cup unsalted butter (1 stick)

5 and ½ cups whole milk

½ cup all-purpose flour

2 teaspoons sea salt

¼ teaspoon ground nutmeg

¼ teaspoon black pepper

¼ teaspoon cayenne pepper

4 and ½ cups sharp white cheddar cheese, grated

2 cups Gruyere, grated OR 1 and ¼ cup Pecorino Romano, grated

1 lb. elbow macaroni

Directions

Preheat oven to 375F degrees

Prepare a 3 quart casserole dish with non-stick cooking spray or you can use butter.

In a small bowl, add together sea salt, nutmeg, pepper, and cayenne. Set Aside.

Grate cheeses and place in separate bowls. Set aside.

Cook macaroni as directed on box. Remove from heat while macaroni is al dente (undercooked). Rinse under cold running water to stop the cooking process and remove any lingering starches. Rinse well as the starches are what cause the mealy texture to your cheese sauce. And the macaroni will cook completely when you place your finished product into the oven.

For now, leave macaroni in colander, draining, until we’re ready to add it back in.

Place bread pieces into a medium bowl. Set aside.

Melt 2 Tablespoons of butter and pour over the bread pieces, mixing well. Set aside.

In a large saucepan, heat milk over low to medium heat, stirring constantly so it does not boil.

In a small saucepan, melt remaining 6 Tablespoons of butter. When butter starts boiling, add in flour and stir well. Remove from heat.

Add a small amount of heated milk, about 1 cup, to butter and flour mixture. Whisk until blended.

Slowly add in milk and butter mixture into pan of heated milk, whisking constantly, until all ingredients become smooth in texture and mixture boils. Mixture will become thicker as it heats.

Remove pan from heat and add in spices and 3 cups grated white cheddar, 1 and ½ cups grated Gruyere cheese OR 1 cup grated Pecorino Romano cheese, if using instead of Gruyere cheese. Blend well until mixture is smooth.

Add macaroni to cheese sauce, mixing well so all macaroni is covered in sauce.


Pour into prepared casserole dish.

Sprinkle remaining 1 and ½ cups grated white cheddar and ½ cup grated Gruyere OR ¼ cup grated pecorino Romano cheese.

Place in preheated oven for 10 minutes. After 10 minutes, remove dish from oven and sprinkle prepared bread crumbs over the top.

Place dish back into the oven and continue cooking for 20 minutes or until bread crumbs are a golden brown.

Remove dish from oven and let sit for 5 minutes before serving.

Recipe from ~ Martha Stewart

All content and images are property of Sweet and Spicy Monkey. Please do not reprint this content without my permission. If you wish to include this recipe on your site, please re-write in your own words and use your own photographs and link back to this post for original recipe.
Follow Julie's board Sweet and Spicy Monkey on Pinterest.

Friday, September 19, 2014

Tangy Peach Mustard Wings


Ok, so this weekend I plan on getting stuff done that got put off from last weekend’s mayhem. Willy is resting back home comfortably, I’m off for the next few days (doing my happy dance), and its time for some football!

I love Fall weekends as they are perfect for some cooking, baking, and watching the games. Y’all noticed I said games, as in multiple. Yep, I’m a football fan of both college and NFL. I do have to say, I love me some college football better because those guys play with heart. They’re not in it for the money. And don’t even get me started about them trying to pay college students for playing football. A game that they received their scholarships for to their school of choice. I think y’all can tell where I stand on that matter.

Anywho, I’m just a little passionate about my football {smile}. And what’s the best type of food to eat while watching the game? That’s right, wings. Mmmm, meat falling off the bones, juicy, little finger food wings.


I never cooked a batch of wings until this year. I guess I was a little intimidated by them, all tiny and having to be just right. But really, they are so easy to make. Especially the way I’m going to share with y’all today. And believe it or not, this is the first time I’ve cooked wings like this and this is only my second batch of wings. Ever.


Now y’all know I love cooking with my crockpot since you can throw everything in and it’s done by the time dinner rolls around. So for these wings, I got an idea. Why not throw them all into the crockpot and they’ll be ready by the time the game is on. Easy peasy, Right?

Not that easy. I had to add another step into the cooking process. One that is still easy and makes these little wings even more mouthwatering. I just tossed the little wings onto a prepared cookie sheet, slathered a little sauce on them, and baked them for about 20 minutes.

Low and behold, what emerged from my oven were the most tender and juiciest little wings I’ve ever had! The crockpot step is a must as it takes the meat to the point of almost falling off the bone and then cooking them in the oven adds a little crispiness to them.

These wings might be little in size, but boy, do they deliver in flavor! They were so good, I made another batch!


They’ll make you forget your favorite team just lost to South Carolina {angry face}. Oh well, there’s always next week and another batch of wings!

Tangy Peach Mustard Wings

Ingredients

2 lbs. wings

¾ cup Cattlemen’s Carolina Tangy Gold BBQ sauce

¾ cup peach preserves

2 Tablespoons apple cider vinegar

¼ cup spicy brown mustard

¼ cup teriyaki glaze

1 teaspoon yellow mustard

¼ teaspoon smoked paprika

½ cup sweet yellow onion, diced

1 garlic clove, diced

Salt & ground black pepper to taste

Ingredients for basting sauce for oven cooking

½ cup Cattlemen’s Carolina Tangy Gold BBQ sauce

½ cup peach preserves

Directions

Toss all ingredients into your crockpot and cook on the Low setting for about 4-5 hours. After 4 hours, check. The meat should still be on the bone, but to the point of almost falling off. They should be tender, yet still hold their shape.

After 4 hours and wings look like above description, preheat oven to 375F degrees.

Prepare cookie sheet by spraying with a non-stick spray. Or for easy clean up afterwards, you can cover cookie sheet with aluminum foil and spray with a non-stick spray.

Gently place wings on cookie sheet, leaving space between the wings so they can get a little crispy in the oven.

With a basting brush, gently brush tops with mixture of ½ cup Cattlemen’s Carolina Tangy Gold BBQ sauce and ½ cup peach preserves.

Place sheet with wings into the oven and cook for about 20 minutes. Depending on your oven, check them at 15 minutes.

Keep a close eye on them as you don’t want them to burn. They should come out golden and juicy.


Serve with a side of Cattlemen’s Carolina Tangy Gold BBQ sauce, warmed in the microwave.

Can also be served with a side of celery and carrots and Ranch dressing.

Now you’re ready for some football!!

*Helpful Hints*

- All measurements are US

Disclaimer ~ I was not paid for use of Cattlemen’s Carolina Tangy Gold BBQ sauce in this recipe nor am I a spokesperson for Cattlemen’s and/or French’s. I just love the unique flavoring this sauce brings to my wings.

All content and images are property of Sweet and Spicy Monkey. Please do not reprint this content without my permission. If you wish to include this recipe on your site, please re-write in your own words and use your own photographs and link back to this post for original recipe.
Follow Julie's board Sweet and Spicy Monkey on Pinterest.

Shared with: The Wednesday Roundup #46, Share it Sunday {49}, Wine'd Down Wednesday 57

Thursday, August 7, 2014

Tomato and Cheese Crostata


I’ve always dreamed of going to Italy. And next year, I was planning on finally making my dream vacation come true. But sadly, life got in the way and unless something changes, I won’t be going to Italy next year {sad face}.


Milano Naviglio Pavese by Emanuele Pinna
This doesn’t mean I’m giving up on my dream vacation, it just means it’s on hold for now. So at least I can save up more money to spend for shopping when I finally do get to go!

And if I can’t go to Italy, I might as well eat like I’m in Italy! And what better represents a little taste of Italy than a tomato and cheese crostata.


This pie inspired dish is made with authentic Italian ingredients that include Roma tomatoes, olive oil, fresh basil, feta cheese, and mozzarella enveloped within a flaky pastry dough.


A deliciously light and savoury pie-dish to enjoy for lunch or dinner with a glass of wine so you can close your eyes and imagine that you’re dining in Italy. At least for one night {smile}....

Tomato and Cheese Crostata

Ingredients

1 ready-made pie crust, room temperature

3 Roma tomatoes, sliced

2 Tablespoons Feta cheese

1 Tablespoon mozzarella cheese, grated

3 Tablespoons olive oil

3 Tablespoons fresh basil, chopped

2 garlic cloves, minced

Pinch of sea salt

Pinch of ground black pepper

Directions

Preheat oven to 425F degrees.

Place a sheet of parchment paper onto a baking sheet. Roll out pie crust dough onto lined baking sheet. Set aside.

In a small bowl, combine olive oil, basil, garlic cloves, salt & pepper. Spoon half over pie crust dough, spreading evenly and keeping about 1 inch from edges oil free.

Arrange sliced tomatoes evenly around pie crust dough, leaving about 1 inch from the edges so you will have enough to fold over. Crumble feta cheese over tomatoes.


 Pour remaining oil mixture over tomatoes and cheeses, keeping 1 inch of edges oil free.


Gently fold the dough edges up and over the tomatoes so it lays flat. The center will be dough free so it gives you a beautiful view of the cooked tomatoes and cheeses when done.


Sprinkle mozzarella over the open area of tomatoes and feta, making sure not to cover the edges.

Bake for 20-30 minutes or until edges of pie crust are golden.

Remove from oven and let sit for 10 minutes before serving. Can be served warm or at room temperature.

*Helpful Hints*

- All measurements are US

Inspired by ~ Kellie at The Suburban Soapbox

All content and images are property of Sweet and Spicy Monkey. Please do not reprint this content without my permission. If you wish to include this recipe on your site, please re-write in your own words and use your own photographs and link back to this post for original recipe.
Follow Julie's board Sweet and Spicy Monkey on Pinterest. Follow on Bloglovin Instagram

Featured at ~ Sweet and Savoury Sunday #78


Shared with ~ Savoring Saturdays #27, Foodie Friends Friday Recipes Linky Party #110, Anything Goes Linky #169, Skip the Housework Link Party, Say G'day Linky Party {102}, Share it One More Time #3, Sweet and Savoury Sunday #77, Share it Sunday {43}, Inspiration Monday ~ Giveaway Week, Snickerdoodle Sunday #44, Munching Mondays #54, Mix it up Monday!, Simple Supper Tuesday #77, The Southern Special ~ Week 22, Tickle My Tastebuds Tuesday #16, Wine'd Down Wednesday 51, Tasty Tuesday Link Up, Lou Lou Girls Fabulous Party #22, Wonderfully Creative Wednesdays Link Party, Wake Up Wednesday "Linky" #32, Great Idea Thursdays 65, The Wednesday Roundup #42, On Display Thursday #10 , Let's Get Real Friday Party #55, Freedom Fridays with All My Bloggy Friends #44, Pin it Thursday, Pin Junkie Pin Party #83, Pinworthy Projects Link Party #32, Pretty Pintastic Party #19, City of Links #35, Inspire Us Thursday Link Party #66

Thursday, July 31, 2014

World's Best Refried Beans - Crockpot Style

 
I am finally off work for a few days! For the past few years, I’ve been going back home to California but since Thor got diagnosed with diabetes earlier this year, I had to change my plans. It’s still time away from work and that makes me a happy girl!

Since I’m staying home this year, I decided to use this time to get some things done at home like plant some flowers, mulch for the Fall, steam clean the carpets, wash my car (yeah, the fun stuff), plus cook, bake, and create some yummy foods in the kitchen so I can share with you!


With all these chores on my To Do list, I don’t want to spend a lot of time in the kitchen right now. So I needed to make a meal that is not only satisfying, but allows me time to work on my list while still letting me share a delicious recipe with you. And after searching my Pinterest boards, my virtual cookbook, I found the perfect recipe for letting me do all this.


These are hands down the best crockpot refried beans you will ever have! I know what you’re thinking, “world’s best”? I didn’t quite believe the title myself until I tried them and they are the BEST refried beans I’ve ever had. Ever. In. My. Lifetime. Best. Beans. Period.


Let’s just say, they are so dang good that I didn’t even make them into refried beans. They're just that good!


So here’s the recipe and you let me know if you don’t also think these refried beans are the best you’ve ever had too!

World’s Best Refried Beans – Crockpot Style

Needed to make ~ 6-7 quart crockpot is needed for full recipe (2 lbs. beans) unless you half the recipe, then you can use a smaller crockpot.

Ingredients

2 pounds dried pinto beans, sorted and rinsed

2 Tablespoons apple cider vinegar

1 yellow onion, diced

10 garlic cloves, diced

2 teaspoons oregano

1 and ½ teaspoons ground cumin

½ teaspoon ground black pepper

3 cups vegetable broth (can also use chicken or beef)

3 cups water

4 and ½ teaspoons sea salt

1-2 jalapenos, seeded and diced *optional*

Directions

After sorting and rinsing dried beans, place in a large mixing bowl. Fill the bowl until it covers the beans, approximately ½ inch from the top. Add 2 Tablespoons of apple cider in with the beans and cover to let soak overnight.

In the morning, pour the beans into a colander to drain and rinse with fresh water. After rinsing the beans, add them with all other ingredients into your crockpot.

Cook on HIGH for 7-8 hours or LOW for 8-12 hours.

When beans are done they should be soft enough to easily squish between your fingers.

For refried beans

Place cooked beans in a food processor or immersion blender and blend to your desired consistency. Note beans will become thicker as they cool.

If you love them as I do, straight from the crockpot, place in a bowl, top with your favorite topping of onions, cheese, sour cream, or hot sauce. Serve and enjoy!

Recipe source ~ Allergy Free Alaska by Megan

*Helpful Hints*

- if you don’t want the beans spicy, you can leave out the jalapenos or adjust to you and your family’s taste.

- All measurements are US

All content and images are property of Sweet and Spicy Monkey. Please do not reprint this content without my permission. If you wish to include this recipe on your site, please re-write in your own words and use your own photographs and link back to this post and Allergy Free Alaska for the original recipe.
Follow Julie's board Sweet and Spicy Monkey on Pinterest. Follow on Bloglovin Instagram

Featured at ~ Simple Supper Linky Party #24 with Moore or Less Cooking Food Blog, On Display Thursday Linky Party #9

 
and 

detours in life

Shared with: #glutenfreefridays#103, Busy Monday 126, Munching Mondays #51, Foodie Friends Friday Recipes Linky Party, Anything Goes Linky #167 & Features, GetHimFed Fridays {No. 48}, Share it Sunday {41}, Skip the Housework Link Party, Sweet and Savoury Sunday #75, Say G'day Saturday #100 Linky Party, Lou Lou Girls Fabulous Party #20, The Southern Special #20, Tickle My Tastebuds Tuesday #14, Simple Supper Tuesday #75, Tasty Tuesday Recipe Link Up!, Wine'd Down Wednesday 49, Wonderfully Creative Wednesdays, The Wednesday Roundup #40, Wake Up Wednesday "Linky" #30, Great Idea Thursdays 64, Inspire Us Thursday Link Party #64, On Display Thursday Linky Party #8, Pin It Thursday, Pin Junkie Pin Party #81, Pretty Pintastic Party #17, Pinworthy Projects Link Party #30, City of Links #33, Freedom Fridays with All My Bloggy Friends #42, Snickerdoodle Sunday #43, Let's Get Real Friday Party #54