Sweet and Spicy Monkey has moved to: www.sweetandspicymonkey.com

Showing posts with label cake. Show all posts

Thursday, May 7, 2015

Lemon Blackberry Cake #whenwebake


Disclaimer ~ I was provided a coupon for a free Country Crock spread for this recipe. All thoughts and opinions are my own. #whenwebake

I was asked by my friends at The Daily Meal and Country Crock  to create a recipe for Mother's Day. And since my mom is the one who inspired me to cook and bake, this sounded like such a great idea to me. I could not pass it up!

I grew up with Country Crock spread when my mom decided it was time for us to eat healthier and not use so much butter. Country Crock is still my go-to butter substitute because it tastes so much like real butter, but easier to spread and not as many calories or fat. Did you know that Country Crock has 65% less saturated fat and 20% less calories than butter? That’s right, Country Crock has 80 calories and 8 grams of fat, with 2.5 grams being from saturated fat. Compared to butter, which has 100 calories and 11 grams of fat, with 7 grams of saturated fat per serving. And Country Crock still has the buttery rich flavor of butter and spreads easily, even when cold.


Believe it or not, my mom also loves the sweet, tangy taste of lemon treats (I guess I really am my mom's daughter {smile}). And with my lemon love back and going strong, this cake was a no-brainer recipe for a Mother’s Day brunch. I mean what better way for my mom to celebrate her Mother's Day than with some sort of lemony treat. That's why this Lemon Blackberry Cake is perfect for her upcoming special day.

Now my mom resides in California while I'm over here in Georgia and she won't be able to enjoy this cake with me. However, with the miracle of the Internet, she can make her own cake with my recipe here, as you can too.

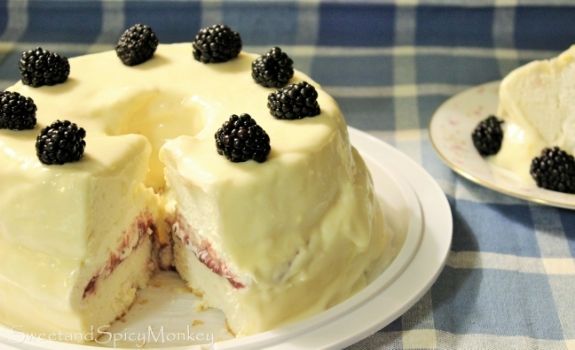
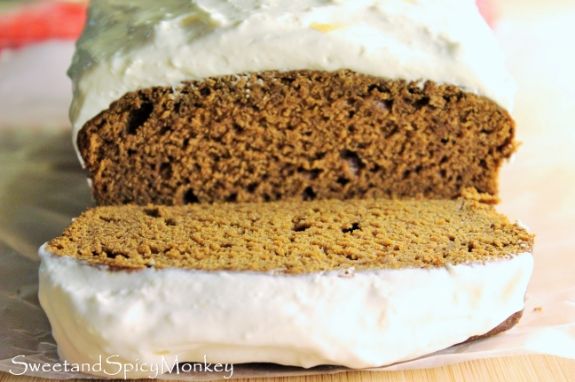
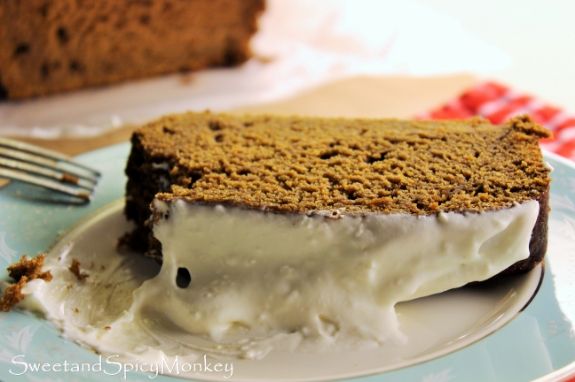
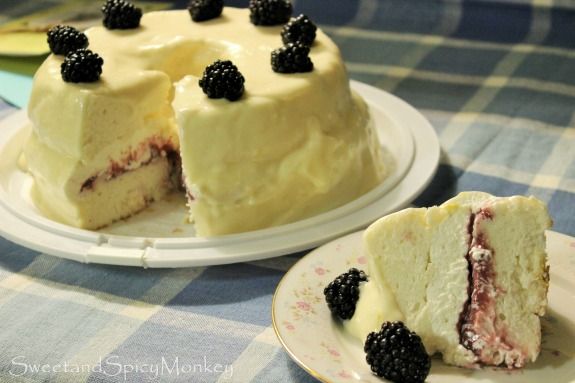
I've combined lemon whipped cream and a homemade blackberry curd sandwiched between two slices of Angel food cake, covered with a lemon cream cheese buttercream frosting and topped with fresh blackberries. The blackberries compliment the lemon flavors.

This cake is so easy to make. Especially since I used liquid egg whites instead of separating the egg yolks from the whites, which can be messy and leave you with twelve egg yolks. I was also surprised with how nice the liquid egg whites whipped up with stiff peaks! And you can even make the cake a day ahead or use a store bought Angel food cake if you're crunched for time.

I know my mom is going to love a big slice of this Lemon Blackberry Cake on Mother's Day.


This cake is also perfect for any Spring or Summer get together with its fresh fruity flavors that are reminiscent of sunny days.

Homemade Angel Food Cake

Recipe by Julie Murphy
A light and fluffy homemade Angel food cake made with liquid egg whites so you can save time and less mess in the kitchen from trying to separate the eggs yourself.
Prep time: 10
Cook time: 35
Total time: 2 hours (including cooling time for cake)
Ingredients
  • 1 and 1/3 cups granulated sugar
  • 1 cup cake flour
  • 1/4 teaspoon sea salt
  • 2 and 1/4 cups liquid egg whites
  • 1/3 cup warm water
  • 1 teaspoon vanilla extract
  • 1 and 1/2 teaspoons cream of tartar
Cooking Directions
  1. Preheat oven to 350F degrees.
  2. Spray Angel food cake pan or Bundt pan with non-stick cooking spray. Set aside.
  3. Place sugar into a food processor and blend until fine. Set aside.
  4. In a medium bowl, sift together cake flour, salt, and half of fine sugar. Set aside.
  5. In a large bowl, egg whites, warm water, vanilla, and cream of tartar. Using a hand whisk, gently mix together until blended. Attach bowl to stand mixer and using the whisk attachment, whip ingredients together while slowly adding in remaining half of sugar. Beat until egg white mixture starts to form medium peaks.
  6. Sprinkle a small amount of cake flour blend over the top of egg whites and blend on low speed. Continue to add in flour mixture, a little at a time, while gently whipping egg white mixture, making sure all of cake flour blend is evenly combined with egg white mixture.
  7. Using a spatula, gently pour into prepared pan.
  8. Place into preheated oven and bake for 35 minutes or until top is golden brown. Also make sure cake is evenly baked throughout by inserting a clean, sharp knife into the center and pulling back out. Knife should come out clean.
  9. To cool cake, invert over wire rack and cool upside down.
  10. Once cake is completely cooled, gently run a clean knife around the edges (without scraping cake pan) to help loosen cake, and remove pan.
  11. To make the cake, slice in half with a large, sharp knife so you have a top and a bottom layer. Remove the top and set aside.
  12. Layer bottom half of cake generously with blackberry curd. Gently layer lemon whipped cream over the blackberry curd. Place top half gently over the lemon whipped cream.
  13. Generously apply lemon cream cheese buttercream frosting over cake, covering all exposed sides and top. It's ok if it starts to drip down the sides. Place fresh blackberries on top.
  14. Cover and refrigerate until ready to serve. Store covered in the refrigerator for up to 1 week.

Recipe for Lemon Whipped Cream, and Lemon Cream Cheese Buttercream Frosting below. Link for Blackberry Curd recipe below.


Lemon Whipped Cream

Recipe by Julie Murphy
A deliciously light and fluffy lemon whipped cream.
Prep time: 5
Cook time: 0
Total time: 15
Yield: 8 ounces
Ingredients
  • 1 cup heavy cream
  • 8 Tablespoons powdered sugar
  • 3 Tablespoons lemon juice, freshly squeezed
Directions
  1. Add all ingredients into large bowl of stand mixer and whip with whisk attachment until stiff peaks form, about 8 - 10 minutes.
  2. Using a spatula, pour into an 8 ounce container, cover, and refrigerate until ready to use.


Lemon Cream Cheese Buttercream Frosting

Recipe by Julie Murphy
A deliciously lemon cream cheese buttercream frosting.
Prep time: 5
Cook time: 0
Total time: 10
Ingredients
  • 1 - 8 ounce package cream cheese, room temperature
  • 1/4 cup Country Crock spread
  • 4 Tablespoons lemon juice, freshly squeezed
  • Zest from 1 lemon
  • 1 teaspoon vanilla extract
  • 1 teaspoon lemon extract
  • 5 cups powdered sugar
Cooking Directions
  1. Place cream cheese and Country Crock spread into a large bowl of stand mixer. Gently blend together until mixed.
  2. Add in lemon juice, lemon zest, vanilla, and lemon extract. Beat until smooth and fluffy.
  3. Blend in powdered sugar in 2 separate additions. Beat until creamy.
  4. Pour into a bowl and cover. If not using immediately, refrigerate until ready to use.
  5. After refrigerating, let frosting warm to room temperature before frosting cake so it spreads easily without tearing cake.
  6. Can store any leftover frosting in a covered container in the refrigerator up to 2 weeks.


Recipe for Blackberry Curd can be found here.

Additional recipes from Country Crock #whenwebake can also be found on Facebook, Twitter, and Pinterest.
Country Crock information obtained from - Country Crock's website

All content and images are property of Sweet and Spicy Monkey. Please do not reprint this content without my permission. If you wish to include this recipe on your site, please re-write in your own words and use your own photographs and link back to this post for original recipe.
Follow Julie's board Sweet and Spicy Monkey on Pinterest.

Shared with: Crafty and Delicious Party, Foodie Friends Friday Linky Party #146, Munching Mondays #90

Wednesday, January 14, 2015

Gingerbread Cake with Orange Cream Cheese Frosting


Just because the Holidays are over, doesn't mean you've seen the last of gingerbread recipes, no ma’am (or sir). After all, if foods were only allowed to be made during certain times of the year, we would all get pretty bored with eating.

And after you get a taste of this gingerbread cake, you'll agree with me.


I added a secret ingredient to this gingerbread cake to keep it moist. Well, not really a secret because I’m about to tell y’all right now…{whispering}…pumpkin. Yep, you heard right, pumpkin is my secret ingredient to help keeping this gingerbread cake moist.

Along with this scrumptious orange cream cheese frosting and a touch of candied ginger to top it all off, Oh My! You won’t ever think that gingerbread is only for December again.


The orange cream cheese frosting is light and pairs well with the gingerbread. While the candied ginger adds an extra zing to top it off.

Each of the flavors are delicious all by themselves, but layer them upon each other and it becomes a flavor party for your taste buds!


This gingerbread cake will soon become a favorite of yours, no matter what time of year it is!

Gingerbread Cake

Makes 1 and ½ loafs or one 9” x 9” cake

Ingredients

2 and 1/3 cups all-purpose flour, sifted

1 and ½ teaspoons baking soda

½ teaspoon baking powder

½ teaspoon sea salt

2 teaspoons ground ginger

1 and ½ teaspoons cinnamon

¾ teaspoon nutmeg

¼ teaspoon ground cloves

1/8 teaspoon allspice

2 large eggs

1 cup pure pumpkin puree

¾ cup light brown sugar

¼ cup coconut sugar

¾ cup molasses

¾ cup unsalted butter, melted

1 cup ginger infused hot water*

Directions

Preheat oven to 325F degrees.

Grease 9 ½” x 5 ½” x 3” loaf pan and a 5 ½” x 5 ½” x 2” dish with butter or a non-stick spray. Can also line pans with parchment paper. Or you can use a 9” x 9” square pan. Set aside.

In a medium mixing bowl, add the sifted flour, baking soda, baking powder, salt, ginger, cinnamon, nutmeg, cloves, and allspice. Set aside.

Combine eggs, pumpkin puree, brown sugar, coconut sugar, molasses, and butter into a large mixing bowl. Blend together until smooth.

Mix in ginger infused hot water.

Slowly add in dry ingredients, blending thoroughly.

Pour mixture into prepared pans. Leaving about ½” to 1” from the top.

Place into preheated oven and bake for 60-70 minutes for loaf pans, or until knife inserted into middle comes out clean.

Remove from oven and let cool for 15 minutes. After 15 minutes, remove loaf from pan and cool thoroughly on wire rack before frosting.

*For 9” x 9” square pan, bake for 35-40 minutes at 325F degrees and let cool in dish before frosting.

How to make Ginger Infused Water

Ingredients

2 and ½ cups water

2 ounces fresh ginger, peeled and sliced

Directions

Add water and prepared ginger to a small saucepan. Bring to a boil and continue boiling for another 15-20 minutes, or until ginger softens.

Remove saucepan from heat and set aside.

Orange Cream Cheese Frosting

Ingredients

1/4 cup ginger infused water

1/4 cup orange juice

4-5 cup powdered sugar

2 cups heavy whipping cream

1/2 teaspoon ground ginger

8 ounces cream cheese, softened to room temperature

1 teaspoon vanilla extract

3/4 teaspoon orange extract

Directions

Add all ingredients into a large mixing bowl and using your whip attachment, whip until mixture gets soft to firm peaks. Refrigerate until gingerbread cake is thoroughly cooled.

Once cake is cooled, spread over top of loaf and serve.

*Helpful Hints*

- Recipe for how to make your own candied ginger at home is coming later this week.

- Orange Cream Cheese frosting can also be served as a dollop over individual gingerbread cake slices before serving.

Inspired by ~ Old Fashioned Gingerbread Cake.

All content and images are property of Sweet and Spicy Monkey. Please do not reprint this content without my permission. If you wish to include this recipe on your site, please re-write in your own words and use your own photographs and link back to this post for original recipe.
Follow Julie's board Sweet and Spicy Monkey on Pinterest.


 Shared with: Foodie Friends Friday Linky Party #131, Sweet and Savoury Sundays #97

Monday, December 15, 2014

Christmas Russian Tea Cakes #fbcookieswap


This year I participated in the Annual Great Food Blogger Cookie Swap co-organized by Julie at The Little Kitchen and Lindsay at Love & Olive Oil. In order to participate, we submit an application and when you're accepted, you receive three names of other bloggers that are participating and you have a deadline to make one dozen cookies for each person and mail the cookies off to them.

Not only do you get to try some delicious cookies from other bloggers, but it's also for a good cause. When we submit our application, each participant donates a small sum which goes to Cookies for kids' Cancer. And the brand partners, OXO, Dixie CrystalsCalifornia Olive Ranch, and Brownie Brittle, will each match the donations, up to $3000. That's a lot so a big Thank You to all brand partners!


This is the first year I participated and it won't be my last as it was so much fun! I'm such a procrastinator and meeting a deadline always makes me turn up the juice. But having to meet a deadline when I have to figure in my work schedule kind of made me less of a procrastinator, which was a good thing because I was ahead of the curve. Well, maybe just by a day or two {smile}.

The bloggers who sent me cookies were Laura at Main Line Feast , Janelle at F-Chem 101 , and Kristi from Inspiration Kitchen.  Laura sent me Spiked Chocolate Pecan Pie bites that were so delicious! They were all buttery, nutty, and chocolatey. Janelle sent me Chocolate Coconut Icebox Cookies and y'all know how much I love coconut! While Kristi sent me Mexican Wedding Cookies, which were just scrumptious.

Everybody who participated will be posting our recipes today on each of our blogs, so head on over and check out the other girls' cookie recipes too. You can also search #fbcookieswap and see all the photos related to current and past cookie swaps. And if you missed this years deadline and are thinking about joining next year, you can receive notifications and sign up now for next years Great Food Blogger Cookie Swap here.

The bloggers who received my Christmas Russian Tea Cakes were Alison at Fridgg, Sara from Sara Ran Away With the Spoon, and Brett at Green Thumb White Apron. And now I'm sharing my recipe with y'all.


The original recipe came from my mom and is a Christmas tradition in our family. My mom has made these cookies every Christmas for as long as I can remember. Growing up, I knew them as Butterball cookies but they're also known as Russian Tea Cakes, Snowballs, Mexican Wedding Cookies, and Italian Wedding Cookies.

To make them more Christmassy, I added a little hint of red and green color with the candied cherries. And since I changed the recipe, I've renamed these Christmas Russian Tea Cakes.

The result, as described by Allison, is magical. But don't just take her word for it, make them yourself and taste a little Christmas magic.


Christmas Russian Tea Cakes

Makes about 3 dozen cookies

Ingredients

1 cup unsalted butter, room temperature

1 cup powdered sugar, sifted

1/2 teaspoon sea salt

1 Tablespoon minus 1/4 teaspoon of vanilla extract*

1/4 teaspoon almond extract

1 and 1/2 cups walnuts, finely chopped

1/4 cup red candied cherries, chopped

1/4 cup green candied cherries, chopped

2 cups all-purpose flour, sifted

2 cups powdered sugar in a small bowl for rolling cookies in after baking

Directions

Preheat oven to 325F degrees.

Line 2 cookie sheets with parchment paper. Set aside.

Chop walnuts and place in a small bowl. Set aside.

Chop candied cherries and place in a small bowl. Set aside.

In a large mixing bowl, add butter, sifted powdered sugar, salt, and vanilla. Mix until creamy.

Blend in walnuts and candied cherries.

Slowly add in sifted flour and mix until all ingredients are blended. Mixture will be crumbly but it rolls together nicely when making balls.

Take about 1 Tablespoon of cookie dough between your hands and roll into a ball. Place 2" apart onto prepared cookie sheet. They should maintain their round shape after baking and should not spread.

Place into preheated oven and bake for 15-18 minutes. Cookies should have similar color as when uncooked and should not be allowed to brown.

Remove from oven and let cool for about 5 minutes on cookie sheet before placing onto a wire rack to cool completely.

Place a sheet of parchment paper or wax paper under wire cookie rack before you start rolling cookies in powdered sugar.

After cookies have cooled, roll each cookie in a small bowl of powdered sugar, covering entire cookie, and place back on wire cookie rack. You can also sift powdered sugar over the tops before storing for an extra layer of dusting.

Can be stored in an air tight container for up to 1 week. Trust me, they won't be around that long!

*Helpful Hints*

- * The vanilla and almond extract will equal 1 Tablespoon together.

- You can use more candied cherries, if you like.

- You can also make these with pecans instead of walnuts. I prefer walnuts because they taste more buttery to me.

- If you don't have parchment paper available, you can also place cookies on an ungreased cookie sheet. Just watch them carefully. I think the parchment paper helps prevent the bottom of the cookies from browning, so that is my preference. My mom has always made these cookies on ungreased cookie sheets.

All content and images are property of Sweet and Spicy Monkey. Please do not reprint this content without my permission. If you wish to include this recipe on your site, please re-write in your own words and use your own photographs and link back to this post for original recipe.

Follow Julie's board Sweet and Spicy Monkey on Pinterest.

Shared with: The Southern Special Week 37, The Wednesday Roundup #55, Inspire Us Thursday Link Party #79, Crafty and Delicious Party, On Display Thursday Week 24, Sweet and Savoury Sundays #93, Busy Monday 145, Lou Lou Girls Fabulous Party #38

Tuesday, August 12, 2014

GF Chocolate Chai Latte Pound Cake


Today is the last day of my vacation and I didn’t get to do everything that I wanted to this time around. Ya know, all that fun stuff I had planned such as steam clean the carpets, wash my car, wash the dogs, visit the botanical gardens. Ok, going to the botanical gardens would have been fun if it didn’t rain the entire day I was planning on going.

Instead, I spent the day baking. Yes, baking! I actually turned on my oven again this summer! And the one thing I love about baking is how your entire house permeates with the smell of what you’re baking in the oven. Today, my home smelled of chocolate. Yummy, sweet, cho –co- late. You can’t bottle that fragrance Febreze!


That’s right, I made something chocolatey! Just like an old friend, even though you go off and hang out with others, for me it was lemon and coconut, you always come back to something familiar, chocolate.


I mean who does not like love chocolate? If you’re out there, you are few and far between all of us chocolate lovers. And this recipe is not for you.

And if you do love chocolate, then you’re going to love this chocolate chai latte pound cake! It's chocolate with a little spice thrown in with it, but not too much, just enough to enhance the essence of the chocolate.

And if you think the cake sounds delicious, then you’re going to flip over the glaze I created just for this cake. Yep, it’s a chocolate chai latte glaze!


All topped off with a sprinkle of powdered sugar mixed with allspice. Are y’all still with me? Or have you run off to your local stores to find Tazo’s chocolate chai latte? Because this product is the secret ingredient behind this recipe.

 No, I am not a spokesperson nor did I receive any monies for this recipe or post. Although, I think it would be great to have Tazo feature this recipe….Hello, anyone out there from Tazo, are you listening?


Actually what happened is someone brought this product to work and nobody else wanted it so I brought it home because I love chai tea and I knew I could make something delicious with it. And it expires in a month so I have been trying to use it in recipes before it all goes bad. So that is the story behind my chocolate chai latte recipes.


Back to the pound cake, it’s a deliciously moist and chocolatey cake that you can eat warm or cold and all alone or with a cup of coffee, tea….or some chocolate chai latte {smile}.

Chocolate Chai Latte Pound Cake

Ingredients for cake

1 cup unsalted butter, room temperature (2 sticks)

½ cup unsweetened cocoa powder + 1 Tablespoon for dusting pan

3 cups granulated sugar

5 eggs + 1 egg yolk

2 and ¾ cup flour of choice (I used Betty Crocker’s GF blend)

¾ teaspoon sea salt

½ teaspoon baking powder

¼ teaspoon ground cinnamon

1/8 teaspoon ground ginger

1/8 teaspoon ground cloves

¾ cup Tazo’s Chocolate Chai Latte

 ¾ cup buttermilk

2 teaspoons vanilla extract

Allspice for dusting pan and topping

Directions for cake

Preheat oven to 350F degrees.

Using an 8 and ½ X 4 and ½ X 2 and ½ inch loaf pan or a 10 inch Bundt pan, spray with non-stick spray or you can use butter or coconut oil to grease pan.

Dust pan with about 1 Tablespoon cocoa powder and a sprinkle of allspice. Set aside.

In a large bowl, add butter and sugar. Beat until blended and fluffy. Add in eggs, one at a time, beating well after each egg. Blend in vanilla.

In a separate bowl, whisk together flour, cocoa, sea salt, baking powder, cinnamon, ginger, and cloves. Set aside.

Pour together the chocolate chai latte mix and buttermilk into a small bowl. Gently mix with a fork. Set aside.

On low speed, add dry ingredients to butter and egg mixture, alternating between dry ingredients and buttermilk mixture, ending with dry ingredients in last.

Pour batter into your prepared loaf or Bundt pan. If making a loaf pan, leave about 1 inch from the top edge of pan for expansion while baking.

Bake for 1 hour and 10 minutes or until inserted toothpick or knife comes out clean.

Let cool in pan on a wire rack before turning over onto a serving plate.

Pour glaze over top while still warm and dust with powdered sugar and allspice mix.

Ingredients for Chocolate Chai Latte glaze

½ to 1 cup powdered sugar

2 Tablespoons Tazo Chocolate Chai Latte

2 Tablespoons unsweetened coconut milk

Directions for Chocolate Chai Latte glaze

Add all ingredients into a small mixing bowl, whisk together until smooth. If you want a thicker glaze, use more powdered sugar. If you want a thinner glaze, add more of either Chocolate Chai Latte or coconut milk.

10 minutes after cake has been removed from oven and is still warm, drizzle glaze over top of cake and sprinkle powdered sugar and allspice mix over the top.

Directions for powdered sugar and allspice mix

In a small bowl, add together about ½ Tablespoon powdered sugar and a couple dashes of Allspice.

Whisk with a fork and sprinkle over top of cake after cooling. If using a glaze over cake, sprinkle after glaze has been drizzled over the top.

  *Helpful Hints*

- I only used 1/2 cup powdered sugar for glaze but make to your liking.

- serve with Tazo Chocolate Chai Latte drink, either hot or cold.

- makes for a wonderful dish with a cup of coffee or tea.

- can also be served up with Chocolate Chai Latte ice cream.

- All measurements are US

All content and images are property of Sweet and Spicy Monkey. Please do not reprint this content without my permission. If you wish to include this recipe on your site, please re-write in your own words and use your own photographs and link back to this post for original recipe.
Follow Julie's board Sweet and Spicy Monkey on Pinterest. Follow on Bloglovin Instagram

Featured at ~ Savoring Saturdays #30, Foodie Friends Friday Recipes Linky Party #113


Shared with ~ Savoring Saturdays #29, #glutenfreefridays #107, Wake Up Wednesday "Linky" #33, The Wednesday Roundup #43, Wine'd Down Wednesday 52, Wonderfully Creative Wednesdays Link Party, Lou Lou Girls Fabulous Party #23, Foodie Friends Friday Recipes Linky Party #112, Say G'day Linky Party {104}, Share it Sunday {45}, Sweet and Savoury Sunday #79, Munching Mondays #56, Mix it up Monday!, Busy Monday 130, Inspiration Monday, Share It One More Time #5, City of Links #36, Tasty Tuesday , Inspire Us Thursday Link Party #67, On Display Thursday Linky Party #12, Great Idea Thursdays 66, Freedom Fridays with All My Bloggy Friends #46, Pin Junkie Pin Party #85, Pretty Pintastic Party #21, Pinworthy Projects Link Party #34, Anything Goes Linky #172, Skip the Housework Link Party, Simple Supper Tuesday #80, The Southern Special Week #25, Tickle My Tastebuds Tuesday {19}

Thursday, July 24, 2014

Coconut Pound Cake


The weather has finally cooled down here in Georgia and I’m taking advantage of it while I can. My oven is on and I’m ready to bake!

Ever since I got into my coconut craze, there has been one recipe that I’ve been wanting to try! Ok, there’s been more than one, but this one tops my baking list, a coconut pound cake.


There are many recipes for coconut pound cake out there in cyber space that people are sharing these days. However, after checking out a few of them, they weren’t truly a coconut pound cake. Oh, they tossed in a few flakes of sweetened coconut or added coconut extract and called it a coconut pound cake, but in essence, they were not a coconut pound cake to me.

I wanted an authentic coconut pound cake, meaning I wanted some coconut milk in my pound cake so I went to a knowledgeable source on coconut milk, A Taste of Thai. And ya know what, I found my recipe for a coconut pound cake that has coconut milk as one of the ingredients {happy dance}.


No, I am not a spokesperson nor am I being endorsed for this recipe, I just love their coconut milk. And now, I love their recipe for coconut pound cake too. It’s moist and coconutty delicious! Ha, coconutty, yes a word in Sweet and Spicy Monkey’s kitchen {smile}…you really should know better now than to ask me a silly question like that.

Back to this pound cake…it really is quite simple to make and only takes about 20 minutes to whip up. Baking time is about one hour and you can half the recipe if you want. I only made one loaf as I thought two loaves would be too much. Boy that was stupid of me because this cake is so yummylicious you’ll be baking up another one right away…just sayin’.


The only changes I made to this recipe include using a gluten-free rice flour blend, adding toasted coconut to the batter, and topping with a coconut glaze, again with coconut milk. And the finale...sprinkling toasted coconut over the top. Which makes this a triple threat coconut pound cake!

If you love coconut, then you’re gonna absolutely swoon over this pound cake because it’s just that good…and coconutty {smile}!


Coconut Pound Cake

Makes 2 loaves or 1 Bundt cake

Ingredients

1 and ½ cups butter, unsalted & softened (3 sticks butter)

2 cups granulated sugar

1 cup brown sugar, packed firmly

6 eggs, room temperature

2 teaspoons coconut extract

½ teaspoon almond extract

3 cups gluten-free rice flour blend (can use regular flour)

½ teaspoon baking powder

1 cup unsweetened coconut milk

1 and ¼ cup toasted coconut (1/4 cup will be for sprinkling on top)

Directions

Preheat oven to 325F degrees.

Grease and flour two 8” x 4” loaf pans or one 10” bundt pan. Set aside.

Add flour blend and baking powder together in a medium mixing bowl. Set aside.

In a large mixing bowl, cream together butter and sugars until smooth.

Beat in eggs, one at a time, until fluffy. Mix in coconut extract and almond extract.

Gradually add in flour mix to sugar mixture, alternating with coconut milk and flour mix into sugar mix until mixture is combined.

Gently fold in 1 cup of toasted coconut until thoroughly mixed.

Pour into prepared loaf pans or bundt pan.

Mixture should be no more than ¾ full in loaf pans.

Bake for approximately 65-70 minutes. Bundt pans may require a longer baking time with an additional 5 to 10 minutes. To ensure loaves are cooked, insert a clean toothpick and pull it out. If thoroughly cooked, it will come out clean, besides the few crumbs. You don’t want it to come out with batter on it.


Coconut Glaze

Ingredients for coconut glaze

4 Tablespoons unsweetened coconut milk

1 teaspoon coconut extract

1 - 1 and ½ cups powdered sugar

Directions for coconut glaze

Add all ingredients into a small mixing bowl, whisk together until smooth. If you want a thicker glaze, use more powdered sugar. If you want a thinner glaze, add more coconut milk.

10 minutes after cake has been removed from oven and is still warm, drizzle glaze over top of cake and sprinkle remaining toasted coconut over the top.

Can be served warm or cold.

Source for coconut glaze ~ Kathryn at Dramatic Pancake.

  *Helpful Hints*

- recipe for Toasted coconut can be found here.

- I used coconut oil to coat my pans

- in keeping with the gluten-free, I used GF rice flour blend to flour my pans.

- can be made with white flour

- both recipes are for 2 loaves or 1 bundt cake. If you only want to make one loaf, then cut recipe for both coconut pound cake and coconut glaze by half.

- All measurements are US

All content and images are property of Sweet and Spicy Monkey. Please do not reprint this content without my permission. If you wish to include this recipe on your site, please re-write in your own words and use your own photographs and link back to this post for original recipe.
Follow Julie's board Sweet and Spicy Monkey on Pinterest. Follow on Bloglovin Instagram

Featured at ~ Savoring Saturdays #25


I was featured at #GetHimFed Fridays

Shared with: #glutenfreefridays #101, Savoring Saturdays #24, Pin Junkie Pin Party #79, Freedom Fridays with All My Bloggy Friends #40, #GetHimFed Fridays {No. 47}, Foodie Friends Friday Recipes Linky Party #106, Anything Goes Linky #166 and Features, Pretty Pintastic #15, City of Links #31, The Pinworthy Projects Link Party #28, Skip the Housework Link Party, Share It One More Time Party and Features, Share it Sunday {40}, Sweet and Savoury Sunday #74, Snickerdoodle Sunday #41, Inspiration Monday Party, Say G'day Saturday Linky Party {99}, Mix it up Monday!, Busy Monday 126, Munching Mondays #51, Tasty Tuesday Link Up, The Southern Special Week 19, Tickle My Tastebuds #13, Lou Lou Girls Fabulous Party #19, Wine'd Down Wednesday 48, Wonderfully Creative Wednesdays, The Wednesday Roundup Week 38 :: A Link Party, Wake Up Wednesday "Linky" #29, On Display Thursday Week #7, Simple Supper Tuesday #75

Friday, May 16, 2014

Gluten-free Lemon Pound Cake


Since I’m lovin’ all things lemon these days, this recipe really caught my eye…Lemon glazed pound cake…Oh My! When I first saw this recipe by Food.com member Kerfuffle-Upon-Wincle, my mouth started watering, my tummy rumbled, and I knew I just had to make this sweet lemony delight!

Actually this recipe is a first for me as I’ve never made a pound cake before. Yes, another first! So ya see, this whole lemon loving thing is really a blessing in disguise as I’m trying new recipes I never would have made before but I am making now because they encompass the quintessence of lemon flavoring. There you have it, a win-win for everybody!!


And lemon desserts are great for spring and summer as they are refreshingly light and sweetly citrusy, reminding you of summers past!

The only modification I made to the pound cake was using a rice flour blend so the cake itself is gluten-free. I also substituted my Myer's lemon syrup for drizzling over the pound cake instead of the lemon glaze as listed in the original recipe. Only because I just love the sweet, lemony taste of my lemon syrup and I knew it would be delicious drizzled all over this pound cake. And I was right! {smile}.

What’s best about this cake is that you can enjoy it no matter what time of day it is - in the morning when you’re enjoying a cup of coffee or tea, as a mid-day sweet snack, for an after dinner dessert, or you can have some just because. This lemon pound cake is just that good!


Gluten-free Lemon Pound Cake

Ingredients

1 and ½ cups Betty Crocker’s all-purpose gluten-free rice flour blend

1 teaspoon baking powder

½ teaspoon sea salt

1 cup butter, unsalted and softened to room temperature

1 cup granulated sugar

4 large eggs

2 teaspoons vanilla extract

Lemon zest from 1 lemon

¼ cup freshly squeezed lemon juice

**Ingredients and Directions on how to make my recipe for Myer's Lemon Syrup found here. **

Directions

If using a metal pan, preheat the oven to 350F degrees. If using a glass pan or stoneware, preheat the oven to 325F degrees.

Using an 8 ½ x  4 ½  x  2  ½ inch loaf pan, spray with non-stick cooking spray and line with parchment paper (Make sure you have some paper hanging over the edges as you will be lifting the cake from the pan after cooling). Set aside.

In a medium mixing bowl, combine dry ingredients - rice flour blend, baking powder, and salt. Set aside.

In a large mixing bowl, add softened butter, sugar, lemon zest, lemon juice and blend until thoroughly mixed.

With mixer at low speed, add eggs in one at a time until creamy.

Add in vanilla extract.

Slowly add in dry ingredients until mixture is smoothly blended.

Pour mixture into prepared pan.

Bake for 50-60 minutes. Depending on your oven and type of pan used. Check cake at 45 minutes.

Bake until tester inserted into middle of cake comes out dry and clean (a few crumbs is ok).

Remove cake from oven.

Let cool in pan for 15 minutes.

After 15 minutes, lift cake out of pan with edges of parchment paper and place top down on a wire rack.

Gently peel off parchment paper and turn cake over so it can now cool completely (top up).

While cake is cooling, prepare my recipe for Myer’s lemon syrup found here.

Before serving, drizzle Myer’s lemon syrup over sliced cake pieces and enjoy!


Featured at Great Idea Thursdays #56 and Great Idea Thursdays #57

Shared with:#glutenfreefridays #91 , Share it One More Time Party 05/17/2014 , Anything Goes Linky #154@Bacon Time, The Makers No.18, Time to Sparkle #61, The Southern Special #8, Simple Supper Tuesday #63, Wine'd Down Wednesday #36, Wonderful Wednesday Blog Hop #74, Inspire Us Thursday Link Party #51, Pin it Thursday , Great Idea Thursdays #56, Wake Up Wednesday "Linky" #17, The Wednesday Roundup #26, Wonderfully Creative Wednesdays #21, Lets Get Real Party #40, Freedom Fridays with All My Bloggy Friends #29, Pretty Pintastic Party #4, Friday Link Party #68, Pinworthy Projects Link Party #19, Foodie Friends Friday Recipes Linky Party #96, Savoring Saturdays #16, Skip the Housework Party #20, Recipe Sharing Monday #96 + Features, Inspiration Monday Party 05/25/2014, Munching Mondays #40, Busy Monday #115


All content and images are property of Sweet and Spicy Monkey. Please do not reprint this content without my permission. If you wish to include this recipe on your site, please re-write in your own words and use your own photographs and link back to this post for original recipe.

Saturday, May 10, 2014

Lemon Coconut Refrigerator Cake


You had to have known that it was only a matter of time before I combined two of my favorite latest cravings, lemon and coconut. And what better way to combine them than to make a lemon coconut refrigerator cake where the two flavors can mingle with each other over time.


This cake is similar, yet it differs from my last coconut cake. Yes, it’s a refrigerator cake, but I used lemon cake mix along with my homemade lemon pudding...YUM! I also switched the granulated sugar in the frosting to a powdered sugar, which doesn’t make it as runny as the original frosting. The result is a deliciously moist lemony cake with a light and creamy coconut frosting that will have you asking for seconds....and maybe thirds....and fourths!


As before, the cake gets better the longer it sits in the refrigerator. With its flavors peaking on the third day and becoming even more so delicious by the fifth and sixth day (if you can keep from eating it all by then).

If you thought the refrigerator coconut cake from last month was amazing, you ain’t had nuthin’ yet until you try my Lemon Coconut Refrigerator cake! As they say in the South, this cake tastes so good it'll make you wanna slap your momma!


Lemon Coconut Refrigerator Cake

Cake Ingredients

1 – boxed Lemon cake mix

3 large eggs

½ cup cream of coconut (found in the drink mixer aisle)

1 and ½ cups canned coconut milk

¼ cup fresh lemon juice

Frosting Ingredients

1 – 16 ounce container sour cream (approximately 2 cups)

1 – 8 ounce container Cool Whip

1 cup powdered sugar (confectionary)

½ teaspoon coconut extract

3 and ½ to 4 cups flaked, sweetened coconut

Click here for my Homemade Lemon Pudding recipe.

Directions

Make lemon pudding at least 3 hours ahead of time so the pudding can thicken up while its chilling.

Preheat oven to 350F degrees.

Lightly spray three, 9 inch round cake pans with non-stick cooking spray and dust with flour, making sure to coat entire inside of pan with flour. Shake out excess flour. Set aside.

In a large mixing bowl, combine dry cake mix, cream of coconut, 1 and ½ cups of coconut milk, lemon juice, and eggs. Using a handheld mixer, blend for approximately 2 minutes, making sure to scrape sides of bowl with spatula every now and then. Batter should look well blended.

Spread batter evenly among your 3 prepared cake pans. Approximately 1 and ½ cups batter each pan. Smoothing tops of batter with a spatula in each pan.

Place pans in preheated oven and bake for 19-24 minutes or until tops are lightly browned and toothpick comes out clean.

Remove pans from oven and let cool for 5 minutes. After 5 minutes, run a butter knife around edges of pan to help loosen cakes and turn pan over on wire rack and gently remove cake from pan. You might have to tap the bottom to help loosen cakes from pan.

Let cakes cool completely on wire rack. After cakes are completely cooled, gently cut the cakes into half, using a large serrated blade or a piece of string. Leaving you with 6 layers of cake.

Prepare your cakes for frosting by applying generous amounts of the Cream of coconut over the tops of the cakes. You can either brush it on or use a spoon to place the Cream of coconut on the cake and spread with bottom of spoon. (I used approximately ¾ cup to 1 cup of the Cream of coconut for this step).

While cakes are absorbing the Cream of coconut, gently fold powdered sugar into the sour cream in a large mixing bowl.

Add in flaked coconut and blend thoroughly. Gently fold in Cool Whip.

Place bowl in refrigerator for 15 minutes to chill. **You will have plenty of frosting mix and it will have a “runny” appearance. This is so it can be absorbed into the cake layers while it sits in the refrigerator.**

To make your cake, place one cake on serving platter, top side up. Generously spread chilled lemon pudding over cake layer on serving platter, followed by a layer of frosting. Place halved cake layer over frosting, and apply another generous layer of pudding, followed with frosting over cake. Repeat this process with remaining layers of cake, pudding, and frosting. Frosting the top of cake once assembled and then the sides of the cake.

Cover cake and place in refrigerator.

Cake is best after it sits for at least 2 days and longer in the refrigerator while it absorbs the frosting.


*Helpful Hints*

- Cake will bake in oven at 350F degrees.

- Do NOT make cake as directed on box. Cream of Coconut is replacement for the cooking oil.

- Pour contents of cream of coconut into a small mixing bowl and stir before using. This helps to combine all canned ingredients better since it separates while in the can.

- Frosting will appear “runny”. It’s that way so the cake layers can absorb the flavors as it sits in the refrigerator.

- This cake must be refrigerated as the frosting will sour and become runnier if left out at room temperature.

- Cake will last up to 1 week in the refrigerator (but it will most likely be gone by then).

- You can soak some lemon slices in Myer's lemon syrup while making the cake and place on top while it sits in the refrigerator. This gives a sweet lemon taste to the top frosted layer.

Featured week of 05/25/2014 at:

Featured week of 05/21/2014 at: Wonderful Wednesday #74 at Flavors by Four       
Shared with: Share it One More Time Party 05/10/2014, Share it Sunday {27}, Snickerdoodle Sunday 05/11/2014, Mix it up Monday!, Lou Lou Girls Fabulous Party #6, Wine'd Down Wednesday #35, A Wonderful Wednesday Blog Hop , Anything Goes Linky #153, Wonderfully Creative Wednesdays 05/14/2014, Foodie Friends Friday Recipes Linky Party, Lets Get Real Link Party #39, Friday Link Party #67, Pin it Thursday 05/14/2014, Pretty Pintastic Party #3, Freedom Fridays with all my Bloggy Friends #28, Skip the Housework Link Party 05/17/2014, Munching Mondays #39, Inspiration Monday 05/19/2014, Busy Monday #114, Marvelous Mondays 99, Recipe Sharing Monday #95 + Features, The Southern Special #8, Party On the Porch 05/20/2014, Happiness is Homemade Link Party #21, Tasty Tuesday - Mexican Lasagna Link Party


All content and images are property of Sweet and Spicy Monkey. Please do not reprint this content without my permission. If you wish to include this recipe on your site, please re-write in your own words and use your own photographs and link back to this post for original recipe.
Follow on Bloglovin