Sweet and Spicy Monkey has moved to: www.sweetandspicymonkey.com

Showing posts with label Coconut. Show all posts

Saturday, June 13, 2015

Coconut Sorbet


This week’s #letsgetfoodiechallenge from Amanda is all about alcohol. She chose this because English Wine week is May 23rd through May 31st and World Gin day is June 13th.

So what better way to celebrate both than to have week 3 of our #letsgetfoodiechallenge to involve alcoholic recipes. Amanda made Malibu Rainbow cookies with Malibu Rum. If you want to check out that recipe you can find it on her site here.


I had a couple ideas for this challenge but I think this one is best with the hot weather. Oh who am I fooling, coconut won this choice, hands down!

Because y'all know how much I love (some might say obsessed with) my coconut! That and the creamy coolness of this sorbet.

Perfect for eating straight out of the container (a bowl for you people with manners), or you can even serve it on top of a slice of cake, brownies, or fruit.


Whatever way you serve it up, you will swoon over this coconut sorbet!

Coconut Sorbet

Recipe by Julie Murphy
A refreshingly cool, tropical frozen treat you can make at home.
Prep time: 5 minutes
Cook time: 0
Total time: 8 hours and 5 minutes (includes freezing time)
Ingredients
  • 1 cup organic unsweetened coconut flakes
  • 2 cups (1 can) coconut milk
  • 3/4 cup coconut water
  • 1/2 cup honey
  • 1/4 cup coconut vodka*
  • pinch sea salt
Directions
  1. Add coconut flakes to a blender or food processor and blend on High until flakes are smaller. Don't completely liquefy the flakes, but make them almost pureed. You want a little texture for the sorbet.
  2. Add remaining ingredients into blender with flakes and pulse until all ingredients are combined.
  3. Pour into a freezer safe container and cover.
  4. Place into the freezer overnight or for at least 6 to 8 hours so it can set up.

*Helpful Hints*

- *If you prefer non-alcoholic Coconut Sorbet, leave out the coconut vodka and increase coconut water to 1 cup.

- *If you want it a little more boozy (which I'm going to try next time I make this) you can always increase to a 1/2 cup of coconut vodka.

All content and images are property of Sweet and Spicy Monkey. Please do not reprint this content without my permission. If you wish to include this recipe on your site, please re-write in your own words and use your own photographs and link back to this post for original recipe.
Follow Julie's board Sweet and Spicy Monkey on Pinterest.

Shared with: Savoring Saturdays, The Wednesday Roundup #83

Monday, June 1, 2015

No Bake Coconut Cookies

There's this commercial I've been searching high and low for on the Internet but cannot find. Mainly because I can't even remember what it's for! Now I know what you're saying, "how can you be looking for something when you don't even know what it is?".

Well, I remember the commercial and the goofy husband in it since that's the part I wanted to show one of my friends because that goofy guy reminds me of a co-worker and I wanted to show him. But I cannot remember for the life of me what the commercial is for.

The commercial in question starts with a pregnant wife and a friend at a baby shower, talking about not knowing the gender of the baby. And she will find out when they cut the cake because it will either be pink for a girl or blue for a boy. And then the goofy husband walks out of the kitchen eating a cupcake and gives this silly grin all covered in blue frosting, totally clueless.

Yes, I remember the commercial clearly and can probably even act it out, but what it's promoting, I have no clue since I got so caught up in how much that goofy guy reminds me of a co-worker. Do you know which commercial I'm talking about? If so, please let me know down below in the comments so I can end this search and show my friend that I'm not making this up.

I did stumble upon something during my search for this commercial, a blog, Renegade Mothering, by Janelle Hanchett, also known as Renegade Mama. The post I read was about how much she despises gender reveal parties. It was totally hilarious and had me rolling on the floor with laughter. If you get a chance, you can link to it here. Be warned, she does use adult language.

But anywho, enough ramblings from me. I'm not making any gender colored cupcakes, cakes, or cake pops today. As a matter of fact, these sweet little treats I'm sharing with you today are neutral in coloring, but don't let that fool you as they are quite flavorful. Of course anything coconut is flavorful to me!


These cookies are a no bake cookie and are dairy free, gluten-free, egg free, and Paleo friendly. All that and easy to make too with no baking involved! How's that for a summer treat?

You can make these cookies under 15 minutes and either start munching right away or you can let them chill for 30 minutes to let them sit up a bit. They're great for a quick breakfast on the run, during your morning commute, between meals, or when you get a craving for sweets and don't want to indulge in something sinful.

Either way, they're easy and quick to make so you have more free time to go shopping or for some more sun time by the pool. Or to help me find that dang commercial!


No Bake Coconut Cookies

Recipe by Julie Murphy
These No Bake protein coconut cookies are gluten free, dairy free, egg free, vegan, and paleo friendly.
Prep time: 15
Cook time: 0
Total time: 45 minutes (including 30 minutes for chilling)
Yield: 1 dozen
Ingredients
  • 1/2 cup oats, ground to flour
  • 1/2 cup cold milled golden flax seed
  • 1 scoop vanilla protein powder
  • 2 Tablespoons coconut butter
  • 1/4 teaspoon vanilla extract
  • 1/4 teaspoon coconut extract
  • 1 Tablespoon coconut flour
  • 2 Tablespoons organic unsweetened coconut flakes
  • Pinch Himalayan pink salt
  • 2 Tablespoons Honey
  • 1/2 cup Silk coconut milk, unsweetened
  • 1/4 cup organic unsweetened coconut flakes for rolling
Directions
  1. Line 1 cookie sheet with parchment paper. Set aside.
  2. Place 1/4 cup of coconut flakes into a small bowl. Set aside.
  3. In a large bowl, combine all ingredients and mix together.
  4. Take about 1 Tablespoonful of dough and roll into a ball between your hands.
  5. Roll ball shaped dough in bowl of coconut flakes.
  6. Place cookie ball on prepared cookie sheet and gently press down with finger tips or palm of your hand.
  7. Repeat process for remaining dough.
  8. Eat immediately or place in refrigerator to let chill so dough can set up.
  9. Store with cookies on parchment paper (to prevent sticking) in an airtight container for up to 1 week.

*Helpful Hints*

- can use sea salt in place of Himalayan pink salt.

- recipe for coconut butter coming soon!

Recipe inspired by ~ Arman's No Bake Vanilla Cake Batter Breakfast Cookies over at The Big Man's World.

All content and images are property of Sweet and Spicy Monkey. Please do not reprint this content without my permission. If you wish to include this recipe on your site, please re-write in your own words and use your own photographs and link back to this post for original recipe.
Follow Julie's board Sweet and Spicy Monkey on Pinterest.

Featured here ~ Savoring Saturdays @ It's a Love/Love Thing
Shared with: Savoring Saturdays

Tuesday, May 12, 2015

Coconut Cream Truffles


I've done it again. I've put myself up for another food challenge. However, unlike my last challenge, the Sugar Crush Challenge, this current one is specific to me challenging myself to create a food from one of my fellow foodies, Amanda Bootes, food picks. And this week Amanda has challenged us to creating a recipe with chocolate.

Amanda chose chocolate to start off our challenge because she cares about raising awareness for the Sick Children'sTrust, who hosts a Big Chocolate Tea Party each year to help raise awareness, monies, and support for their charity.

 If you're interested in raising awareness for the Sick Children's Trust, you can also host a party, either online or through an organization such as schools or your workplace. Just go to their website here and check it out. It's a great way to give back to those in need of help.
Yes, that's a strawberry you see in the back there. With the leftover chocolate, I made chocolate dipped strawberries.
 
So in honor of the chocolate food challenge this week, I made a recipe I've had my eye on for some time now, Coconut Cream Truffles covered in dark chocolate.
A creamy coconut filling surrounded by a thin layer of dark chocolate. They remind me of a Mounds bar. So if you love Mounds bars, you're going to love these scrumptious little coconut bites.

And the best part is that I made them a little more healthy so you don't have to feel so guilty about eating them! I substituted coconut oil for the butter and pure coconut cream for the sugar laden cream of coconut. Plus I used organic unsweetened coconut flakes instead of the ones covered in sugar. And we all know dark chocolate is much better for you than milk chocolate.
 

The result is a sweet, creamy coconut center with a thin chocolate shell that satisfies any sweet tooth. If I never told you, you would never have guessed the ingredients I substituted to make these truffles good for you.
Stay updated to my blog for more food challenges this month from Amanda's  #letsgetfoodiechallenge.
 
 
Coconut Cream Truffles

Recipe by Julie Murphy
Scrumptious bites of creamy coconut covered in dark chocolate.
Prep time: 15
Total time: 25
Yield: 1 dozen
Ingredients
  • 1/4 cup organic coconut oil, softened
  • 2 Tablespoons coconut cream (separated from coconut milk)
  • 1/2 teaspoon coconut extract
  • 1/2 teaspoon vanilla extract*
  • pinch sea salt
  • 1 cup organic unsweetened flaked coconut
  • 1 and 1/2 cups powdered sugar
  • 6-8 ounces dark chocolate melting wafers
Cooking Directions
  1. Line a cookie sheet with wax paper. Set aside.
  2. In a medium to large bowl, beat together coconut oil and coconut cream until smooth.
  3. Blend in coconut extract, vanilla, and salt.
  4. Gradually add in powdered sugar until thoroughly blended.
  5. Fold in coconut flakes, making sure everything is mixed together.
  6. Take Tablespoon size balls and roll between your palms until mixture is made into a uniform ball shape.
  7. Place onto wax paper and repeat.
  8. Once all of coconut mixture is shaped into balls, place cookie sheet into freezer for at least 1 hour so balls can set up. Can even leave in freezer overnight.
  9. When you're ready to dip ball shapes, prepare melting wafers as directed on package.
  10. Have 2-3 clean forks, a large spoon, and toothpicks available nearby.
  11. Place chilled ball into prepared dark chocolate. Leaving the ball in one place, take spoon and gently drip chocolate over the ball.
  12. Once ball is covered with chocolate, place ball onto spoon, lift out of dipping chocolate, gently transfer chocolate covered ball over to fork. Tap off excess chocolate using edge of bowl or two fingers from your free hand. Swipe fork on edge of bowl and repeat tap, swipe at least 2-3 times. You do this to remove excess chocolate so the chocolate doesn't overpower the coconut cream filling of your truffle.
  13. Once this process has been repeated 2-3 times, take truffle ball on fork over prepared cookie sheet with wax paper, place toothpick at bottom of truffle ball and gently swipe off of fork using the toothpick. Immediately sprinkle with coconut flakes or candy sprinkles if desired.
  14. After all truffles have been dipped in chocolate, place cookie sheet into refrigerator and chill for at least 1 hour to let chocolate set.
  15. Best served at room temperature.
 
*Helpful Hints*
 
- Watch me and learn how to dip your truffles here.

- I used Madagascar Vanilla extract, which is also known as bourbon vanilla.

-  As in the directions above, I state to have a few clean forks available while dipping your truffles. This is because you want a clean fork for dipping the truffles. Sometimes the truffle filling will get stuck between the tines. If this happens, just grab a clean fork that is nearby or wipe fork off clean with a towel.

Recipe inspired by ~ Dorothy at Crazy for Crust.
 
All content and images are property of Sweet and Spicy Monkey. Please do not reprint this content without my permission. If you wish to include this recipe on your site, please re-write in your own words and use your own photographs and link back to this post for original recipe.

Thursday, January 29, 2015

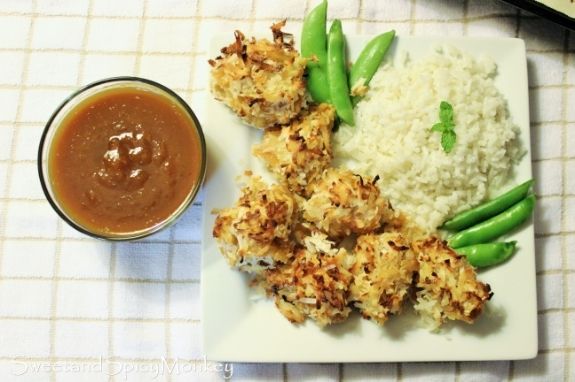
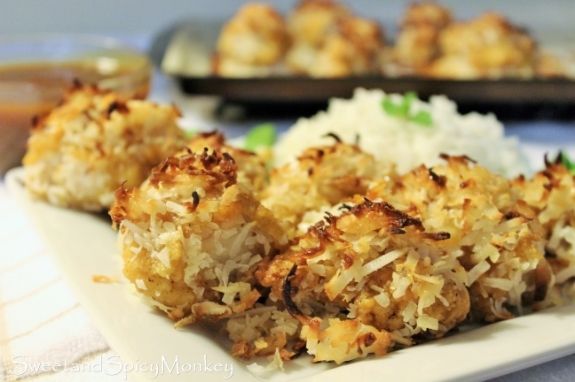
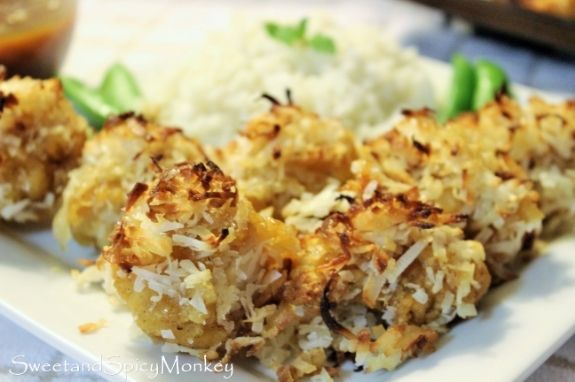
Crispy Coconut Chicken Strips with Pineapple Ginger Sauce and Coconut Rice

 
*Disclaimer - This is a sponsored post by Tyson and The Daily Meal. Recipes and opinions are 100% my own.*

Baby its cold outside! And what do we do when it gets cold and dreary out? We start daydreaming of sunny days, sandy beaches, warm blue waters, and start planning our summer vacations.

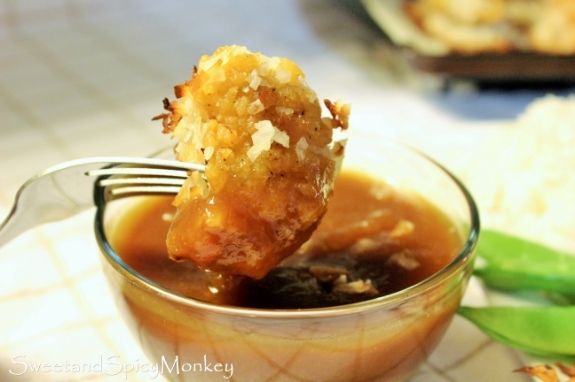
But I have a quicker and much tastier escape from these cold winter days that doesn't cost as much but reminds you of summer. I’m sharing with you my recipe for Crispy Coconut Chicken Strips with a Pineapple Ginger sauce for dipping and Coconut Rice.


You know how I L-O-V-E my coconut and I especially love it when I get to use it in new ways.

The creamy coconut and juicy pineapple flavors will whisk you away to the tropics, making you wish summer would hurry up and get here already. Especially those of you who live in the northeast corner of the country that’s blanketed with snow.


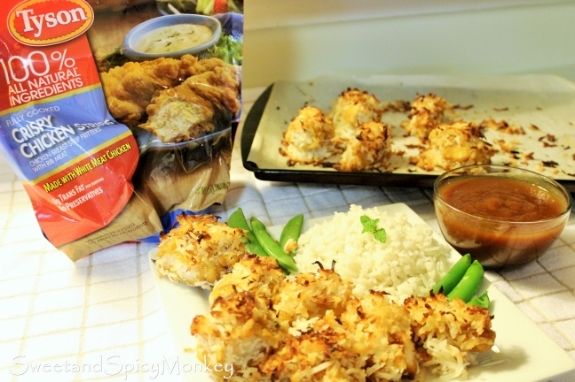
I simplified this recipe by using Tyson Crispy Chicken Strips instead of raw chicken. Tyson Crispy Chicken Strips are not only made with 100% all natural ingredients but they’re also fully cooked when you buy them to help simplify your time in the kitchen. Not only do they make a quick and healthy meal for the family, but they also make for easy and nutritious after school snacks for the kids.

And let’s not forget about this weekend’s Superbowl party, where you can serve them with any type of dipping sauce from Ranch, barbeque, to my Pineapple Ginger sauce to satisfy any manly craving.


Anywho, back to the recipes I'm sharing with you, no matter what the weather is like outside, these Crispy Coconut Chicken Strips with Pineapple Ginger sauce will whisk you and your family away to the tropics with just one scrumptious bite.


 Reminding you again, that summer days are just a few months away.

Crispy Coconut Chicken Strips

Ingredients for Crispy Coconut Chicken Strips

1 package Tyson’s Crispy Chicken Strips

1 – 14 ounce bag flaked, sweetened coconut

Egg whites, 1 egg per 2 pieces of chicken strips

Honey for drizzling, at least 6 ounces

Directions for making Crispy Coconut Chicken Strips

Preheat oven to 400F degrees.

Line 2 cookie sheets with parchment paper.

Place chicken strips on prepared cookie sheets and cook for 20 minutes at 400F degrees.

Remove from oven.

Place egg whites in a small mug. Set aside.

Pour flaked coconut onto a clean plate.

After removing chicken strips from oven (be careful not to burn your fingers) cut strips into 2 to 3 inch pieces.

Grab a chicken piece and gently brush entire strip with egg white.

Drizzle a little honey over sides of chicken strip.

Roll coated chicken strip in flaked coconut until strip is covered.

Place back on cookie sheet with parchment paper.

Place back into the oven for 10-14 minutes, turning strips over halfway through after 5-7 minutes, so the bottoms can brown.

Remove from oven after 10-14 minutes or until coconut flakes are lightly browned.

Let cool for 5 minutes before serving. Remove from sheet with flat spatula.

Best served with pineapple ginger dipping sauce and Coconut rice.


Pineapple Ginger Sauce

Makes 4 servings

Ingredients for Pineapple Ginger Sauce

1 and 1/2 cups pineapple chunks with juice

Juice of 2 limes

4 Tablespoons brown sugar, packed

2 teaspoons ground ginger

4 Tablespoons pineapple jam

2 Tablespoons molasses

Dash of red crushed peppers (optional)*

Directions for Pineapple Ginger Sauce

Place pineapple + juice, lime juice, brown sugar, and ginger into a blender and puree until all ingredients are blended. Pour into a small saucepan.

Add in pineapple jam, molasses, and red pepper flakes*

Over medium heat, bring to a boil. Once boiling turn heat down to low and simmer for another 15-20 minutes, stirring occasionally.

Pour into small bowls for dipping.

Coconut Rice

Makes 6 servings

Ingredients for Coconut Rice

1 and ½ cups Jasmine rice

1 – 15 ounce can coconut milk

1 cup water

3 fresh basil leaves, washed and coarsely chopped

1 clove garlic, minced

½ teaspoon sea salt

Directions for Coconut Rice

Add all ingredients into a medium saucepan. Stir together over medium heat. Bring to a boil.

Turn heat down to low, cover, and simmer for 30 minutes.

After 30 minutes, remove from heat and let sit for 15 minutes, still covered, before stirring.

Serve warm.

All content and images are property of Sweet and Spicy Monkey. Please do not reprint this content without my permission. If you wish to include this recipe on your site, please re-write in your own words and use your own photographs and link back to this post for original recipe.
Follow Julie's board Sweet and Spicy Monkey on Pinterest.

Shared with: Savoring Saturdays #47, Sweet and Savoury Sundays #98

Tuesday, December 30, 2014

Your Favorite Recipes of 2014

As 2014 comes to a close, what better way to spend some of these last days, than looking back at some of your favorite recipes here at Sweet and Spicy Monkey. I say “Your” favorite because if it was up to me, they would all be listed. I might be just a little bias {smile}.

Beginning with January, here are some of your favorite recipes from 2014…

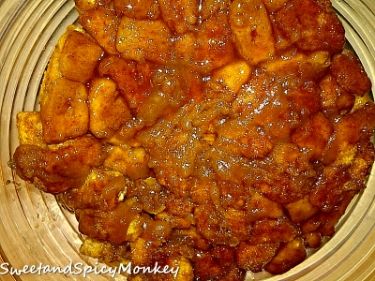
Sweet and Spicy Monkey Bread. What better way to remember January 2014 than with a sweet treat that just so happens to have my blog name it, “Sweet and Spicy Monkey” Bread!


February had your chocolate cravings satisfied, at least for a little while, with my version of The Ultimate Chocolate Lover’s Breakfast. I can’t say I blame ya, after all, who can resist all this chocolatey yumminess of chocolate pancakes with chocolate syrup drizzled all over.


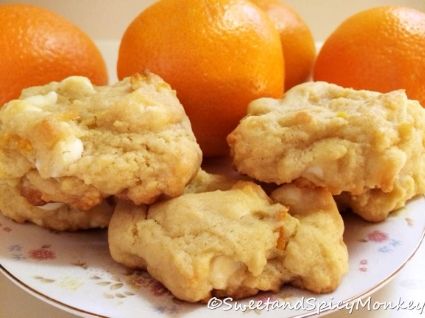
March was a month of indecision as there was a tie between two of March’s recipes. It seems y’all couldn’t decide between something sweet, with Orange Creamsicle Cookies


or something crunchy like my Homemade Tortilla Chips. So they both win for March!


April’s winner, hands down, was my recipe for Gluten Free Lemon Crepes with Lemon Cream Cheese Filling. What a delicious way to welcome Spring!


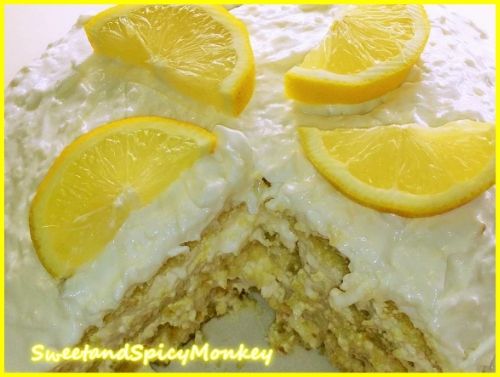
And you let me know that y’all love your lemon treats by making my Lemon Coconut Refrigerator Cake your favorite for May.


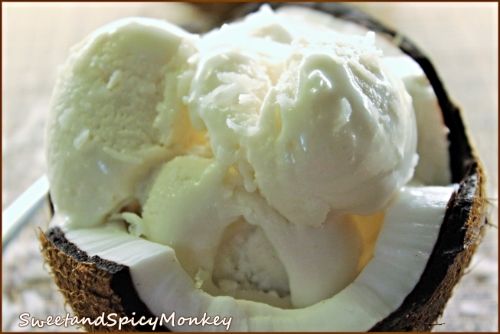
Ah, June ~ summertime chilling with sun, sandy beaches, and palm trees. And what better way to enjoy those long summer days than eating my Homemade Coconut Ice Cream. Not only is this ice cream gluten free, but it’s also dairy free and no churn needed.


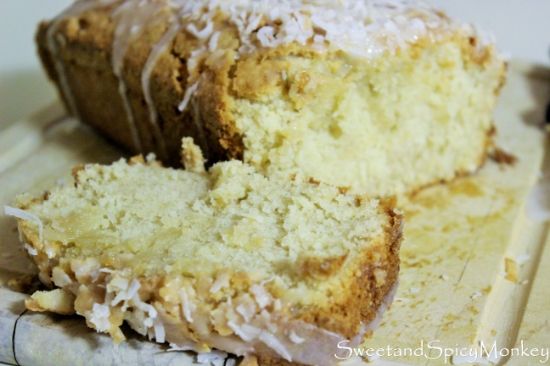
Your tropical taste buds were just getting warmed up (or should I say cooled down) in June with my Homemade Coconut ice cream because I woke all of your island taste buds up this summer with my Coconut Pound Cake.

A triple threat dose of coconut to whisk you away to your tropical island paradise. My most popular recipe by far since starting Sweet and Spicy Monkey. It also got Thor's stamp of approval!


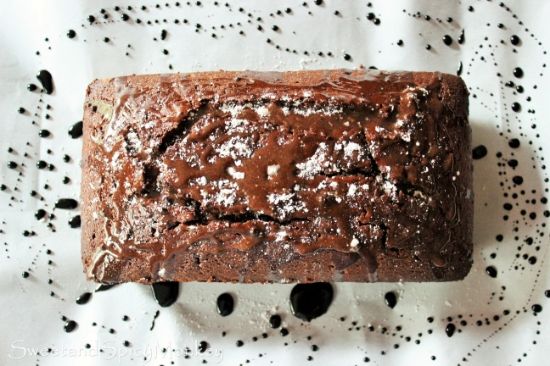
August had you craving chocolate once again (it has been awhile, since February to be exact) with my recipe for Gluten Free Chocolate Chai Latte pound Cake.


September showed me you needed something to munch on while watching all those football games. What better way to enjoy the games than with my Tangy Peach Mustard Wings that simmer in the crockpot while you watch the game and into the oven they go to get all crispy before the next game starts.
 

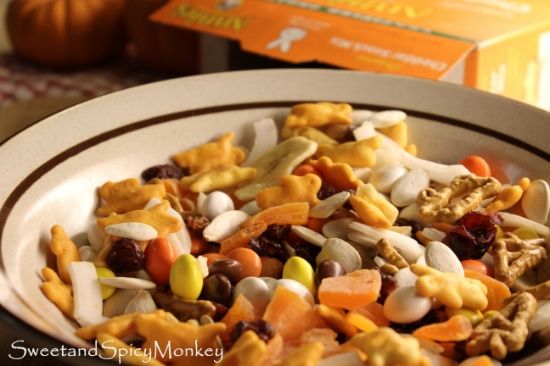
You were still craving munchies for the games in October when y’all reached for my Sweet & Salty Snack Mix made with Annie’s Homegrown cheddar bunnies. The games are so much better when you’re munching on cheddar bunnies!


I could tell y’all were looking for something to help keep you warm with a taste of the season with my Crockpot Pumpkin Turkey Chili. What better way to warm up on a cool Fall night than with a big bowl of chili!


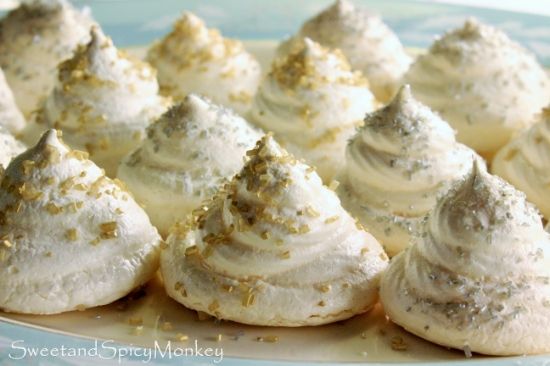
December’s favorite is my Peppermint Meringue Cookies. Puffy clouds of white fluff with a kiss of peppermint, sprinkled with silver and gold, perfect for all your Holiday parties. What a delicious way to end the year 2014!


I want to take this time to say thank you to all who stop by my little corner of this World Wide Web to read, comment, pin, tweet, or just hang out and see what I've been up to. Because without all of you, there would be no me. So Thank you, Thank you, Thank you!!

And if you enjoy what you see here, please leave me a comment as I love to hear from y'all, even if it's just to say Hello.

Wishing y'all the best eats in the upcoming New Year of 2015!

All content and images are property of Sweet and Spicy Monkey. Please do not reprint this content without my permission. If you wish to include this recipe on your site, please re-write in your own words and use your own photographs and link back to this post for original recipe.
Follow Julie's board Sweet and Spicy Monkey on Pinterest.

Shared with: MunchingMondays #71, Wine'd Down Wednesday 67, The Wednesday Roundup #56, Crafty and Delicious Party, Freedom Fridays with All My Bloggy Friends #61, Foodie Friends Friday Linky Party #128, City of Links #52, Sweet and Savoury Sundays #94, Tasty Tuesday Recipe Link Up, Skip the Housework Link Party #50, Inspire Us Thursday Link Party #80, Snickerdoodle Sunday #63

Saturday, December 13, 2014

Coquito ~ Puerto Rican Eggnog


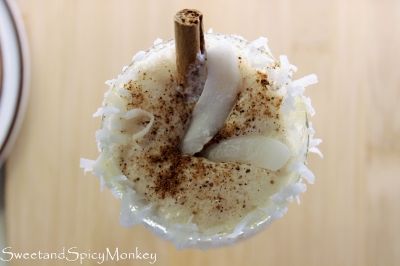
‘Tis the season for eggnog and I’m not talking about just any eggnog, No M’aam! I’m talking about eggnog with a tropical twist, Coquito, or also known as, Puerto Rican Eggnog.

I was reminded of this recipe after passing all the eggnog in the milk section at my local store today. I can’t believe I haven’t remembered this version of eggnog, especially after going through my coconut phase.

Ok, some might want to call it more of an obsession, but what can I say? I absolutely L-O-V-E the tropical, nutty flavor of this island nut. And obsession is such a strong word {chuckle}.

Back to this Puerto Rican eggnog, which is still a thick and creamy drink like the traditional eggnog, yet it has no eggs. That’s right, this is an eggless eggnog. Quite an oxymoron there, wouldn’t ya say? Egg-less Eggnog {smile}.

I might have had a sip or two of this drink before sitting down to write this post or it might just be sitting in a glass beside me, on the table, half full. Hey, somebody has to try these recipes before they get to you and if that is the selfless sacrifice I have to make, then count me in {wink}.


Like your traditional eggnog, you don’t have to serve this drink with alcohol (but what fun is that). Seriously now, you can leave out the alcohol for those that don’t drink and it’s just as yummy.

So if you love coconut like I do or maybe you just want to try an eggless eggnog, try my version of Coquito for a tropical twist on your Holiday season.

Coquito – Puerto Rican Eggnog

Ingredients

Makes 48 ounces
4 cups coconut canned milk, unsweetened

2 cup heavy cream

½ cup powdered sugar

1 teaspoon ground cinnamon

½ teaspoon ground nutmeg

Honey for glass preparation – at least 4 ounces

½ cup sweetened, flaked coconut

4-6 coconut strips

Dash of nutmeg for topping

Cinnamon sticks, 1 per glass

For alcoholic version ~ Rum to your own tasting

Directions

Place coconut milk, heavy cream, powdered sugar, cinnamon, and nutmeg into a blender. Blend until all ingredients are thoroughly mixed.

Pour into a small pitcher, cover, and refrigerate until chilled. Overnight is best so the flavors can mingle.

Prepare the glasses when ready to serve.

Pour about 3 Tablespoons of honey onto a flat plate for every 2 glasses to prepare. Place flaked coconut on same plate as honey, keeping them separate.

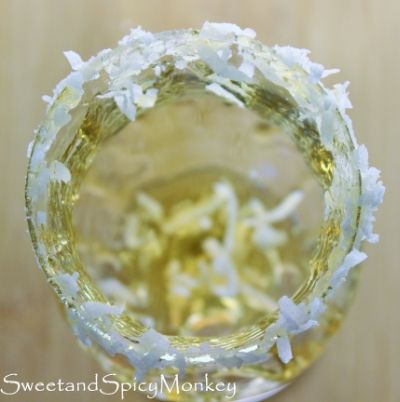
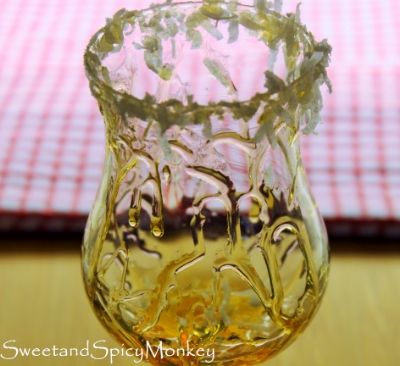
Roll the rim of the glass around in the honey so it covers the entire rim. Gently repeat same process in flaked coconut so rim of glass is covered with honey and coconut.


Place glass on counter and drizzle honey into the inside of the glass. You can use as much as you like here, keeping in mind it will sweeten your drinks. A little bit of honey for a mild sweet flavor. More honey for sweeter drinks.


For alcoholic versions, pour in desired amount of rum.

Pour in chilled coconut milk mix.

Sprinkle with a dash of ground nutmeg over the top, place either 1 to 2 coconut strips or a pinch of sweetened, flaked coconut on top.

Garnish with a cinnamon stick. Serve and enjoy!

Watch me make this here on Simmer.

Remember to drink responsibly this Holiday season.

All content and images are property of Sweet and Spicy Monkey. Please do not reprint this content without my permission. If you wish to include this recipe on your site, please re-write in your own words and use your own photographs and link back to this post for original recipe.
Follow Julie's board Sweet and Spicy Monkey on Pinterest.

Shared with: Busy Monday 144, Wake Up Wednesday "Linky" Party #47, Inspire Us Thursday Link Party #79, Crafty and Delicious Party, On Display Thursday Week 24, Foodie Friends Fridays Recipes, Crafts, DIY Linky Party #126, Freedom Fridays with All My Bloggy Friends #59, Pretty Pintastic Party #34, Sweet and Savoury Sundays #93, Munching Mondays #70, Mix it up Monday!, Crafty and Delicious Party

Wednesday, December 3, 2014

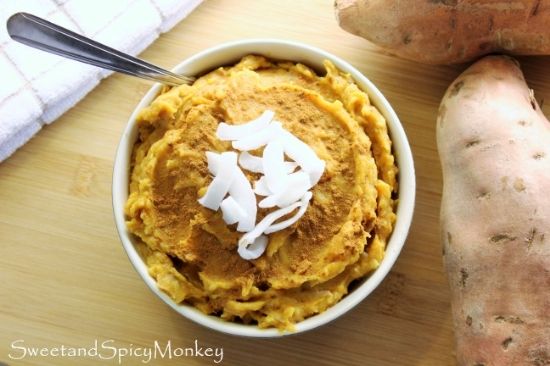
Coconut Sweet Potatoes


I know I'm a little late for Thanksgiving with this recipe but sweet potatoes are still in season. And I'm hoping Thanksgiving isn't the only time you eat these awkwardly shaped orange delights because they are so good and good for you.

Remember over the summer when I couldn't get enough coconut? Well, I still love the stuff and I've found a way to bring the taste of the tropics to my Fall and Winter menu. I've added coconut to my sweet potatoes! Oh. Yes. I. Did!


When I saw FOOD52 making mashed sweet potatoes using coconut milk, it gave me an idea. On Thanksgiving, I added shredded coconut to my sweet potato and liked it. But it needed a little something else to moisten it up, which is when I remembered the coconut milk.


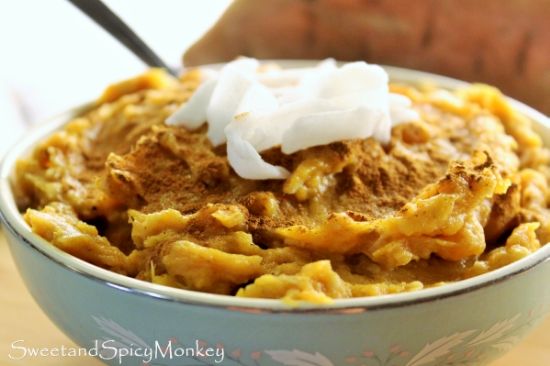
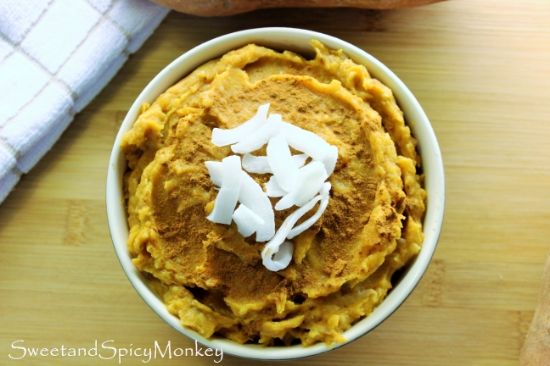
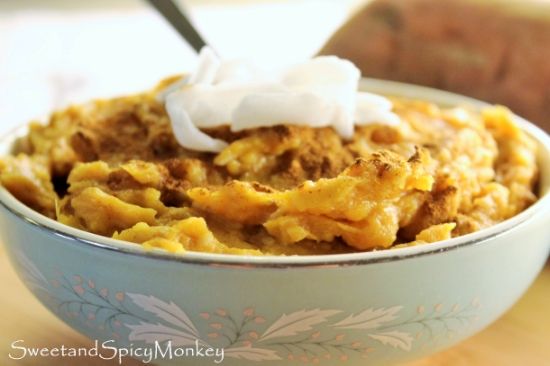
So the next time I cooked a couple sweet potatoes, I removed the skin, whipped them up, added brown sugar, coconut milk to help make them creamy and add a little coconut flavor, just a dab of butter, cinnamon, and shredded coconut flakes. The result was A-M-A-Z-I-N-G!


If you love coconut, then you'll absolutely flip for these sweet potatoes! They're sweet and creamy, and I love the texture the coconut flakes bring to them. It's like a little taste of the islands brought to your table during these long cold winter months.

Watch me make this recipe on Simmer here.

Coconut Sweet Potatoes

Serves 4


Ingredients


2 medium sweet potatoes - cooked, skinned, and quartered

1 Tablespoon unsalted butter (can also use margarine)


½ cup + 1 Tablespoon coconut milk, canned

6 Tablespoons brown sugar, packed


1 cup flaked coconut, unsweetened

1 teaspoon ground cinnamon

Dash of cinnamon for topping


Coconut strips for topping
 
Directions

If cooking in the oven, preheat oven to 325F degrees.

Line a cookie sheet with parchment paper and set aside.


Clean sweet potatoes under running water and scrub with a vegetable brush until clean. Dry.

Make a few holes in potatoes with a sharp knife and wrap in aluminum foil.
Place on a cookie sheet lined with parchment paper and cook for about 1 hour and 20 minutes or until sweet potato is tender. You should be able to easily insert a sharp knife or fork into the middle of the sweet potato flesh.
Remove from oven and unwrap to cool.
After cooling for about 10 minutes, move sweet potatoes to a cutting board and cut in half. Be careful as sweet potato will still be hot. You should be able to gently remove the skin with a knife and fork without touching the flesh with your fingers.
Cut into quarters and toss into a large mixing bowl. 
Whip potatoes for about 1-2 minutes, or until potatoes are no longer solid.
Blend in butter and coconut milk until potatoes become creamier in texture.

Mix in brown sugar, flaked coconut, and cinnamon until all ingredients are blended.

Pour into a serving bowl. May have to heat in the microwave for a minute or two before serving if they have cooled off too much.  

Top with a dash of cinnamon and a few coconut strips on top and serve.

*Helpful Hints*
- I prefer sweet potatoes cooked in the oven as to boiled in water since they retain more of their nutrients when cooked in the oven.
- I found parchment paper helped in not burning the bottom of my sweet potatoes as they cooked. If you don't have parchment paper, you can always turn them over through half of the cooking time.
- You can always add a little more coconut milk if you like a thinner texture to your potatoes.

 All content and images are property of Sweet and Spicy Monkey. Please do not reprint this content without my permission. If you wish to include this recipe on your site, please re-write in your own words and use your own photographs and link back to this post for original recipe.


Follow Julie's board Sweet and Spicy Monkey on Pinterest.

Shared with: On Display Thursday #22 , Foodie Friends Friday Linky Party, Freedom Fridays with All My Bloggy Friends #58, Skip the Housework #45 Link Party, Mix it Up Monday!, Crafty and Delicious Party

Wednesday, September 10, 2014

Salted Caramel Coconut Sauce


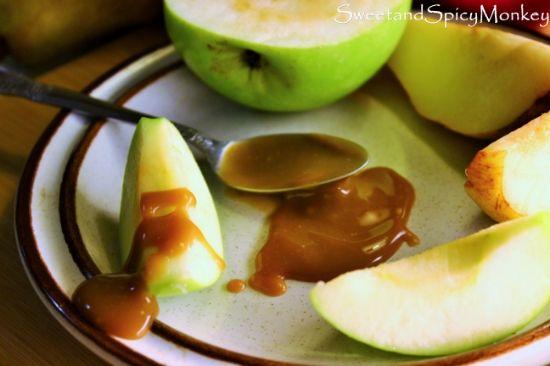
This recipe really ought to be called ‘Awesome sauce’ as it really is the most awesome tasting caramel sauce I’ve ever had! Ever. And it’s made with coconut milk!


Y’all know how much I love my coconut and when I came upon this recipe by Faith at An Edible Mosaic for salted caramel sauce made with, of all things, coconut milk, I totally flipped! I knew had to try it right away to see if it really did taste like caramel sauce.


Guess what? This caramel sauce has all the buttery velvetiness and deep, rich caramel flavoring that (I thought) only caramel could have. You can only imagine my surprise when I took that first bite…and a second bite, just to verify my findings, of course….and maybe a third….and fourth! Ok, there were a few lot of bites involved as I could not believe my taste buds! And you’ll be surprised too with the delicious caramel flavoring of this sauce.


No heavy cream or refined sugars were used in the making of this caramel sauce. Really, there wasn’t! It’s made with the goodness of coconut milk, organic coconut sugar, honey, vanilla extract, sea salt, and only one tablespoon of butter. Simple ingredients for a wickedly delicious caramel sauce.


The best part about it (other than the taste), is that it’s homemade so you control what goes into it. So no preservatives, artificial coloring, excess sodium, or refined sugars are in this caramel sauce, No M’aam! Plus, it’s Paleo friendly.

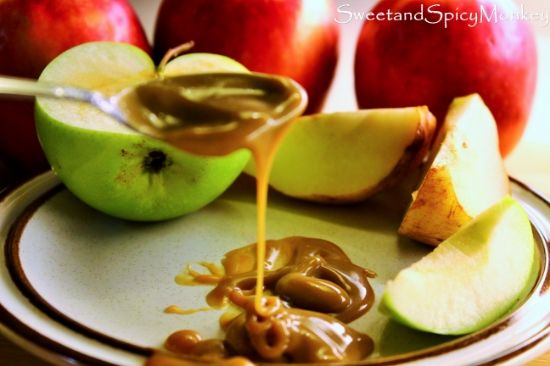
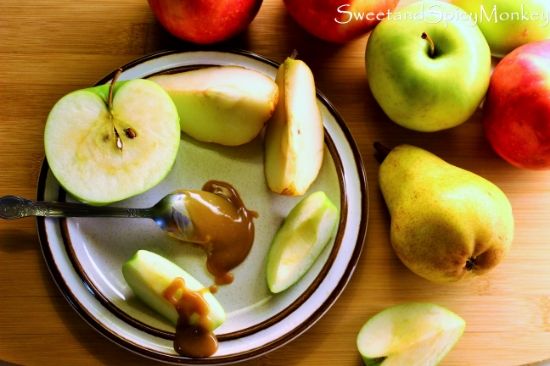
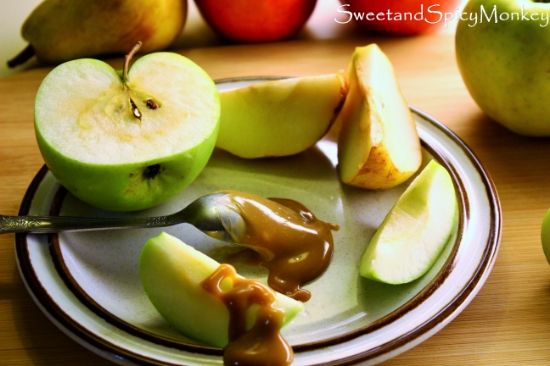
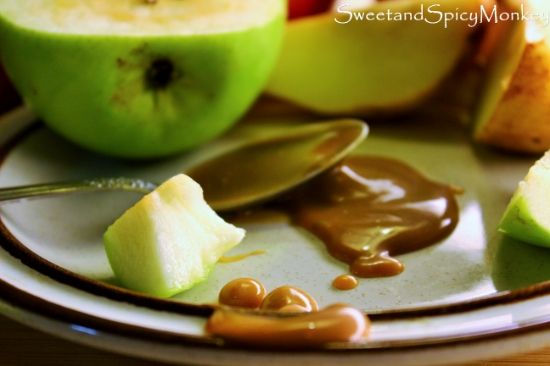
I’m so glad I found this recipe to share with y’all just in time for fall, football parties, and apple season! It’s the perfect dip for apples or pears, not to mention the other uses you can find for this sauce. Like drizzling over ice cream, cakes, grandma’s apple pie, and popcorn. Plus, my personal favorite, just dipping your spoon into the jar {smile}. 

The subtle saltiness combined with the sweet, rich, caramel flavoring makes possibilities for this caramel sauce endless.


And you wonder why I love coconut so much??!!

Salted Caramel Coconut Sauce (Awesome Sauce)

Ingredients

1 can unsweetened coconut milk

¼ cup honey

¼ cup organic coconut sugar (will be tan in color)

1 teaspoon vanilla extract

½ teaspoon sea salt

1 Tablespoon unsalted butter

Directions

In a medium sauce pan, add coconut milk, honey, and coconut sugar. Bring to boil over medium heat, stirring constantly with a whisk.

Bring to a rolling boil while you continue to whisk mixture. Let mixture continue to boil but decrease heat a little bit so it will not boil over. Continue to whisk mixture so it will not burn.

Mixture will become darker and thicker as you continue to cook it. When it becomes dark amber in color and amount of mixture looks like about 1 and ½ cups (this takes about 20-45 minutes) remove from heat and whisk in remaining ingredients of vanilla, sea salt, and butter until mixture is smooth.

Let cool before serving.

Makes for a delicious dip for apples and pears. Can be served over ice cream, cakes, pies, popcorn, cookies, pancakes, waffles, and French toast.

Can be stored in an air tight container for up to 3 weeks in the refrigerator.

*Helpful Hints*

- All measurements are US

- Why don't you stop on by Faith's site, An Edible Mosaic, and show her a little love. She has many more delicious recipes with beautiful photography.

All content and images are property of Sweet and Spicy Monkey. Please do not reprint this content without my permission. If you wish to include this recipe on your site, please re-write in your own words and use your own photographs and link back to this post for original recipe.
Follow Julie's board Sweet and Spicy Monkey on Pinterest.


Saturday, July 26, 2014

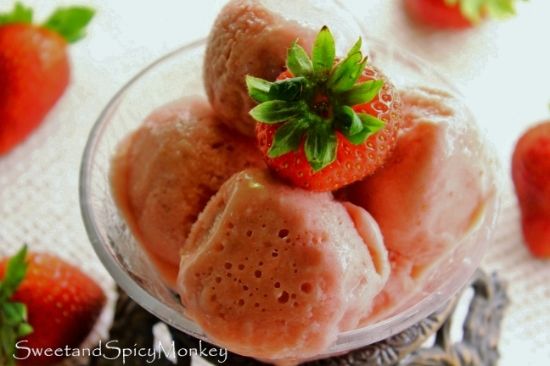
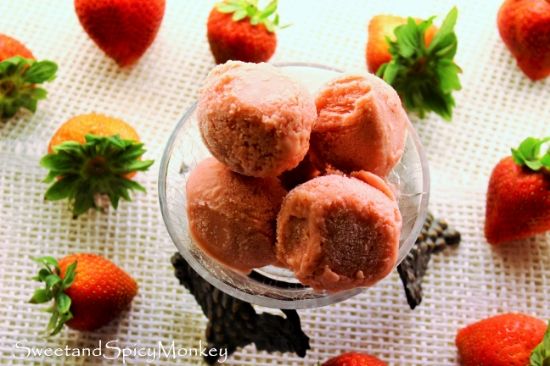
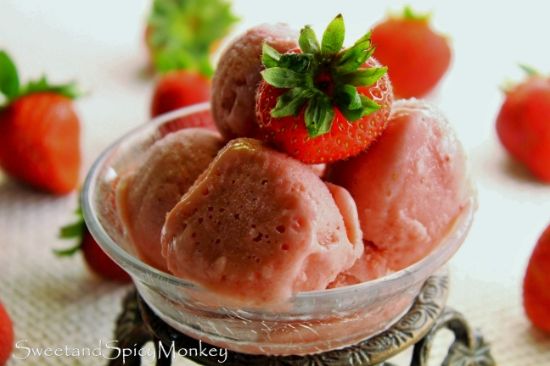
Strawberry Coconut Sorbet


You didn’t really think I would forget to share an ice cream recipe with you this week, did you? After all, we will be wrapping up July here soon and nothings better on a hot summer day than a cold frozen treat to help you forget about this heat…at least for a little while {smile}.

And what better way to enjoy yourself than with a combination of summer’s two favorite flavors, strawberries and coconut.


Those sweet, red, juicy berries that only make their presence during spring and summer are being mixed here with the tropical nutty flavor of coconut. And why not bring in just a little flavoring of Amaretto to top this yumminess off!

Yep, I have created in my lab kitchen a Strawberry Coconut Sorbet that will tickle your taste buds while helping you cool down.


Just like my other ice cream recipes, no churn is needed. And this ice cream is dairy free, soy free, and no added granulated sugar as I used honey instead, giving it a deliciously smooth, sweet taste.

Now if you’re making this for the kids, leave out the Amaretto. Or you can substitute Amaretto extract, which I did not. Even though it’s just a small amount, I really think the Amaretto adds a delicious essence to the strawberry and coconut flavoring.


And I’m just going to say this, if you are over 21 years of age and use Amaretto (the alcoholic version), my PSA for this recipe is Do Not Eat and Drive. Even though it’s a small amount, please stay responsible.

Strawberry Coconut Sorbet

Ingredients

2 cups whole strawberries, washed and topped

1 cup coconut milk

1 cup cream of coconut

1 teaspoon Amaretto (can substitute Amaretto extract)

½ teaspoon vanilla extract

¼ teaspoon coconut extract

2 Tablespoons honey

Directions

Place all ingredients into a blender and puree until thoroughly mixed.

Pour into a freezer safe dish and place in freezer overnight.

*Helpful Hints*

- can also be made first thing in the morning so you can enjoy it later that evening.

 - All measurements are US

All content and images are property of Sweet and Spicy Monkey. Please do not reprint this content without my permission. If you wish to include this recipe on your site, please re-write in your own words and use your own photographs and link back to this post for original recipe.
Follow Julie's board Sweet and Spicy Monkey on Pinterest. Follow on Bloglovin Instagram

Shared with ~ #glutenfreefridays#102, Say G'day Saturday Linky Party {98}, The Wednesday Roundup #38, Pin it Thursday, Inspire Us Thursday Link Party #62, Share It One More Time Party and Features, Tasty Tuesday Link Up, Wonderfully Creative Wednesdays, Wine'd Down Wednesday 48, Foodie Friends Friday Recipes Linky Party , Anything Goes Linky #167 & Features, #GetHimFed Fridays {No. 48}, Freedom Fridays with All My Bloggy Friends #41, Pretty Pintastic Party #16, Pin Junkie Pin Party #80, City of Links #32, Pinworthy Projects Link Party #29, Share it Sunday {41}, Snickerdoodle Sunday #42, Sweet and Savoury Sunday #75, Munching Mondays #52, The Southern Special #20, Busy Monday 127, Mix it up Monday!