Sweet and Spicy Monkey has moved to: www.sweetandspicymonkey.com

Showing posts with label Christmas. Show all posts

Wednesday, December 23, 2015

Copycat Lofthouse Sugar Cookies with Peppermint Frosting


I've been wanting to make these cookies for some time now. I prefer homemade cookies to store bought any day (you can blame my mom for that) but I love Lofthouse cookies!

So when I saw that I could make my own Lofthouse style cookies at home, after I did my happy dance, I knew I had to try them.

It's a simple recipe, but these cookies are far from simple! Big, pillowy, soft sugar cookies with lots of frosting, my kind of cookie!

Before frosting, just look how pillowy soft these cookies are!

I dressed them up for the holidays in peppermint frosting, available in pink or white, with candy cane bits sprinkled over the top.


You can find my recipe for Peppermint Cream Cheese Frosting here. For the pink frosting, add a few drops of red food coloring. Or you can use beet powder or beet juice to desired color. I used about 1 teaspoon of beet powder to give my frosting its pink coloring.


Santa will definitely be looking for these cookies when he stops by your house to deliver presents on Christmas Eve.

Just be sure to leave him a big glass of milk to go with them.

Wishing y'all a very, Merry Christmas!

Lofthouse Style Sugar Cookies

Recipe by Julie Murphy
Big, soft sugar cookies made Lofthouse style with a peppermint frosting.
Prep time: 15 minutes
Cook time: 10-12 minutes
Total time: 40 minutes (does not include chilling time)
Yield: 2 dozen cookies
Ingredients
  • 1 cup granulated sugar
  • 1/2 cup (1 stick) unsalted butter, room temperature
  • 2 eggs
  • 1/2 cup plain Greek yogurt
  • 2 teaspoons vanilla extract
  • 3 cups All-purpose flour
  • 1 and 1/2 teaspoons baking powder
  • 1/2 teaspoon baking soda
  • 1/2 teaspoon sea salt
Cooking Directions
  1. In a large mixing bowl, sift together flour, baking powder, baking soda, and salt. Set aside.
  2. In a separate large mixing bowl, cream together butter and sugar.
  3. Beat in eggs with butter mixture.
  4. Add in yogurt and vanilla, mixing well.
  5. Gradually add in dry ingredients, mixing all ingredients together well.
  6. Remove dough from bowl, wrap in plastic wrap, and refrigerate overnight.
  7. After dough has chilled overnight and when you're ready to bake the cookies, preheat oven to 350F degrees.
  8. Line cookie sheets with parchment paper. Set aside.
  9. Remove dough from refrigerator and let sit for 5 minutes. This makes it easier to work with the dough.
  10. On a dry, flat surface, sprinkle flour and spread it around the surface using your hands. Place dough on floured surface and roll dough out. Sprinkling flour as needed under the dough, on top of dough, and on rolling pin to help prevent dough from sticking to surface.
  11. Roll out to desired thickness. Remember, Lofthouse cookies are thicker than normal cookies and will rise a little bit.
  12. Using a round cookie cutter or the rim of a glass, make circle cuts in dough to make cookies. Place on prepared cookie sheets, leaving cookies 2" apart.
  13. Bake for 10 to 12 minutes, or until cookies are firm to the touch. They may appear under baked. You DON'T want cookies to brown.
  14. Remove from oven and let cool on cookie sheet for 5 to 10 minutes before transferring cookies to a wire rack, where they can cool completely.
  15. Repeat with rest of dough, rolling out dough, making circles, and baking until all dough is used up.
  16. After cookies have cooled completely, about 2 hours, its time to frost them.
  17. Apply frosting generously with a butter knife and sprinkle candy cane bits over the tops. Place back on wire rack and let sit for about 10 minutes before covering with plastic wrap or aluminum foil.
  18. Serve with a tall glass of milk.

*Helpful Hints*

- I refrigerated my dough overnight. Some recipes for Lofthouse style cookies say you can cook immediately, some say to refrigerate for a few hours. I was happy with the results after chilling the dough overnight. I cannot guarantee that your cookies will turn out like mine if you do not chill the dough overnight.

- You need to roll out the dough and use a cookie cutter or rim of a glass to cut cookies. Otherwise you will get a round, ball shaped cookie with rough edges not resembling anything close to a Lofthouse cookie.

- If you're rushed for time, you can use store bought frosting and flavor with 1 to 2 teaspoons of peppermint extract.

Inspired by ~ Ashley at Center Cut Cook.

All content and images are property of Sweet and Spicy Monkey. Please do not reprint this content without my permission. If you wish to include this recipe on your site, please re-write in your own words and use your own photographs and link back to this post for original recipe.

Wednesday, December 16, 2015

Gingerbread Russian Tea Cookies #fbcookieswap


It's that time of year again! No, not Christmas silly. Well, yes, it is Christmastime, but that's not what I meant.

I meant it's time for the Great Food Blogger Cookie Swap. Where food bloggers get together and share their cookies and recipes with each other all for a good cause, Cookies for Kids Cancer.


This year I received Oatmeal Orange Cranberry cookies from Erica over at Sun and Good Eats, Oatmeal Chocolate Cherry cookies from Anne at Wit Wisdom and Food, and Molasses Chai cookies from Susannah at Feast and West.

And I sent off my Gingerbread Russian Tea cookies to Ashley at Big Flavors from a Tiny Kitchen, Jessica at A Southern Mother, and Ellen from Like Mother, Like Daughter.

It's so fun to meet other food bloggers this way and try some of their creations!

Last year, I sent off my Christmas Russian Tea cookies that I made with red and green candied cherries.

I love Russian Tea Cookies with their melt in your mouth yumminess, plus they ship really well, something I had to keep in mind when baking cookies for the swap. So I wanted to make Russian Tea Cookies again with a Christmas twist.


Since I'm loving everything gingerbread right now, I decided to make my Russian Tea cookies with gingerbread. Luckily, my baking fairy was still around when I made these because they turned out just the way I was hoping on the first batch.

I can't wait until next year to see what yummies I'll be getting from other bloggers. But in the meantime, I'm going to enjoy these Gingerbread Russian Tea cookies, and you can too!

If you want to try my Christmas Russian Tea Cookies from last year, just click on the name.

I will be posting soon where you can link up to see all the food bloggers and the cookie recipes we shared this year at the Great Food Blogger Cookie Swap. And if you're interested in participating next year, you can sign up here.

As always, a big Thank You goes out to Lindsay over at Love & Olive Oil, Julie at The Little Kitchen, Dixie Crystals, OXO, and Land O' Lakes who all help make this event possible to help raise money and awareness for the Cookies for Kids Cancer.


Gingerbread Russian Tea Cookies

Recipe by Julie Murphy
Christmas invades Russian Tea Cookies with this delightful gingerbread flavor.
Prep time: 10 minutes
Cook time: 18 minutes
Total time: 46 minutes
Yield: about 2 dozen cookies
Ingredients
  • 1 cup (2 sticks) unsalted butter, room temperature
  • 1 cup powdered sugar, sifted
  • 2 cups All-purpose flour, sifted
  • 1/2 teaspoon sea salt
  • 1/4 teaspoon nutmeg
  • 1/2 teaspoon ground cloves
  • 1 teaspoon ground ginger
  • 3/4 teaspoon cinnamon
  • 1/4 teaspoon cardamom
  • 1 Tablespoon vanilla extract
  • 2 Tablespoons molasses
  • 4 Tablespoons Paradise candied ginger, chopped into small pieces
  • 1-2 cups pecans, chopped
  • 2 cups powdered sugar in a bowl (for rolling cookies in AFTER baking)
Cooking Directions
  1. Preheat oven to 325F degrees.
  2. Line cookie sheets with parchment paper. Set aside.
  3. In a medium bowl, add sifted flour, salt, and spices. Set aside.
  4. In a large mixing bowl, cream together butter, 1 cup of sifted powdered sugar, vanilla, and molasses.
  5. Gradually add dry ingredients into butter mixture, mixing well.
  6. Fold in candied ginger and pecans. Mixture will appear crumbly but it rolls together nicely when making ball shapes.
  7. Using a cookie scoop or Tablespoon, take 1 scoop of cookie dough and gently roll together into a ball shape. Place on lined cookie sheet.
  8. Repeat leaving about 2" between cookie balls. Dough should maintain round ball shape and not spread during baking.
  9. Place into preheated oven and bake for 15 to 18 minutes. Cookies will be light in color, if not the same color as when uncooked. Do Not allow cookies to brown.
  10. Remove from oven and allow cookies to cool for 5 minutes before transferring to a wire rack, where they can cool completely.
  11. After cookies have cooled completely (see Helpful Hints below*), roll in bowl of powdered sugar, covering entire cookie with powdered sugar, and place back on wire rack. Repeat with remaining cookies.
  12. Store in an airtight container for up to 1 week.

*Helpful Hints*

- If cookies are not cooled off, powdered sugar will melt to cookie, looking smudgy and not powdery. So be sure to give cookies at least 2 hours to cool off before rolling in powdered sugar.

- If shipping cookies, place in a zip lock bag, then place into a protective container (plastic or tin cookie boxes work best), and pad the empty space in the shipping box with packing peanuts, bubble wrap, or bulk paper to protect the cookies from breaking during shipping.


All content and images are property of Sweet and Spicy Monkey. Please do not reprint this content without my permission. If you wish to include this recipe on your site, please re-write in your own words and use your own photographs and link back to this post for original recipe.
Follow Julie's board Sweet and Spicy Monkey on Pinterest.

Sunday, December 21, 2014

Chocolate Peppermint Cookies


I get the exhilarating feeling of a cool wind rushing by my face as I ski down the snowy slopes of the Swiss Alps on a cold, winter morning.

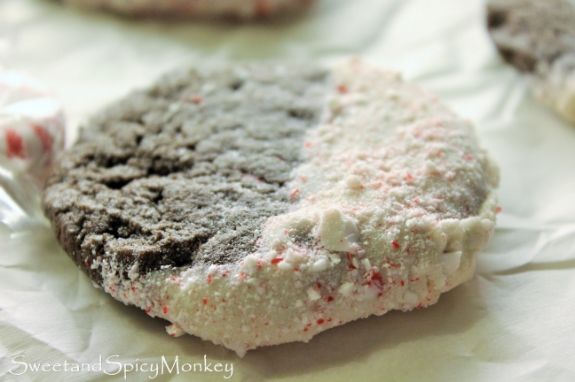
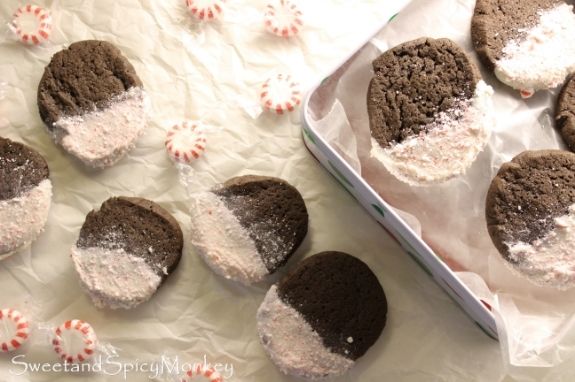
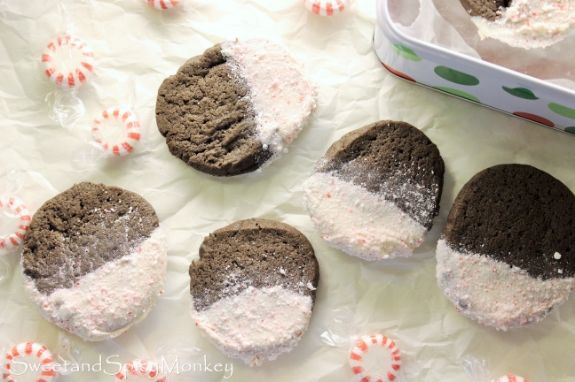
Remember those ads from York Peppermint Patties? Well, that is the exact feeling you get when you bite into one of these Chocolate Peppermint cookies, a cool, minty flavor paired with a chocolate cookie....Mmmmm!


My first intention when making these was to add peppermint extract to the white chocolate and cover with the crushed peppermint candies. But after taking a bite of the first cookie, I realized I didn't need to add the peppermint extract. I was surprised, and pleased, with how much flavor the crushed peppermint candies brought to the cookie. It was a win-win {smile}.


See, there is an advantage to having a food blog as you get to taste test the food before the recipe goes to print!

Chocolate Peppermint Cookies

Makes 4 dozen cookies

Ingredients

1 and ¼ cup (2 and ½ sticks) unsalted butter, room temperature

2 cups granulated sugar

2 large eggs

1 Tablespoon vanilla extract (that's not a typo)

½ cup cocoa powder

¼ cup Dark cocoa powder

2 cups all-purpose flour

1 teaspoon baking soda

1 Tablespoon corn starch

¼ teaspoon sea salt

Directions

In a medium bowl, add both cocoa powders, flour, baking soda, corn starch, and salt. Set aside.

In a large mixing bowl, blend together butter and sugar until creamy.

Add eggs and vanilla to butter mix.

Slowly add dry ingredients to butter & sugar mix until all ingredients are mixed completely.

Place 2 sheets of waxed paper on the counter.

Place 1/2 of cookie dough onto one sheet of wax paper and gently roll the dough with your hands into a long roll, like a tootsie roll shape, about 2 inches high and 12 inches long. Or you can make the cookies as large or small as you like here. Once you get your shape, roll up into the wax paper and refrigerate for at least 3 hours, or you can freeze to make at a later date.

Repeat with other 1/2 dough mix.

Preheat oven to 350F degrees.

Remove cookie roll from refrigerator, unroll wax paper, cut into 1/4 to 1/2 inch slices and place on parchment paper about 3 inches apart, as cookies will spread.

Bake for 10-12 minutes.

Remove cookie sheet from oven and let sit for 3-5 minutes before placing on a wire rack to let cool completely before dipping in white chocolate.

Ingredients for dipping

2 cup white chocolate chips

1 Tablespoon shortening (helps thin the white chocolate so it doesn't go on so thick)

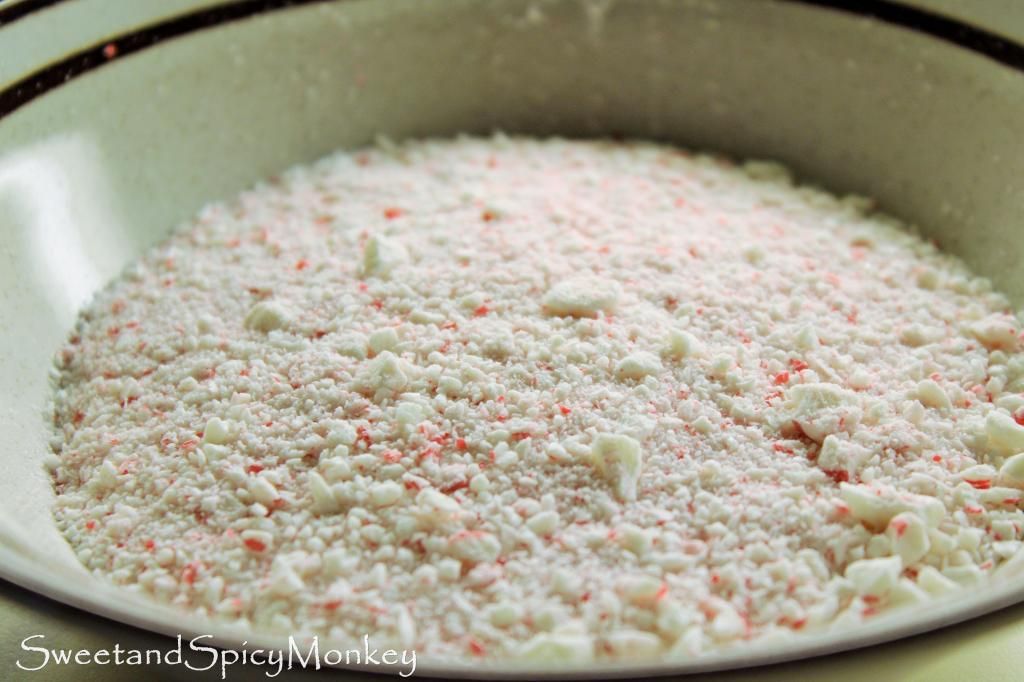
1 cup crushed peppermint candy like in the photo below. (I used my Ninja blender for making these and it worked great, not even sticking inside the blender).


Directions for making white chocolate dip and decorating cookies

Pour chips and shortening into a microwave proof bowl. Place in a microwave on defrost or low temperature to melt chips.

Stir every 15-30 seconds until chips are melted. Just remember they will maintain their shape until stirred and you do not want to burn them.

Once your white chocolate is completely melted, dip cookie in white chocolate. You can be the judge here of how much you want covered in white chocolate, play around and see what you like best.

After you dip cookies, spoon crushed peppermint candies over the white chocolate and place on wax paper to cool.

After cookies have cooled off and dried, store in an airtight container for up to 1 week.

If you live in a hot climate, store in refrigerator so the white chocolate does not melt.


All content and images are property of Sweet and Spicy Monkey. Please do not reprint this content without my permission. If you wish to include this recipe on your site, please re-write in your own words and use your own photographs and link back to this post for original recipe.
Follow Julie's board Sweet and Spicy Monkey on Pinterest.

Shared with: Foodie Friends Friday Linky Party #127, Inspire Us Thursday Link Party #80

Monday, December 15, 2014

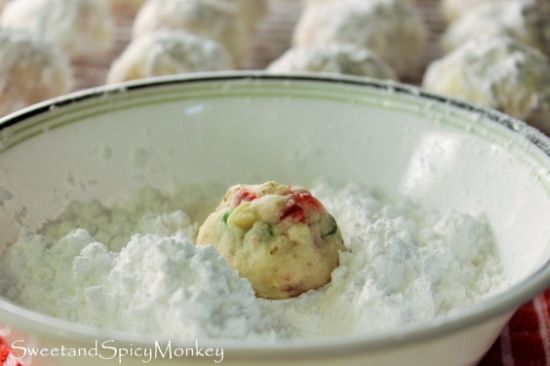
Christmas Russian Tea Cakes #fbcookieswap


This year I participated in the Annual Great Food Blogger Cookie Swap co-organized by Julie at The Little Kitchen and Lindsay at Love & Olive Oil. In order to participate, we submit an application and when you're accepted, you receive three names of other bloggers that are participating and you have a deadline to make one dozen cookies for each person and mail the cookies off to them.

Not only do you get to try some delicious cookies from other bloggers, but it's also for a good cause. When we submit our application, each participant donates a small sum which goes to Cookies for kids' Cancer. And the brand partners, OXO, Dixie CrystalsCalifornia Olive Ranch, and Brownie Brittle, will each match the donations, up to $3000. That's a lot so a big Thank You to all brand partners!


This is the first year I participated and it won't be my last as it was so much fun! I'm such a procrastinator and meeting a deadline always makes me turn up the juice. But having to meet a deadline when I have to figure in my work schedule kind of made me less of a procrastinator, which was a good thing because I was ahead of the curve. Well, maybe just by a day or two {smile}.

The bloggers who sent me cookies were Laura at Main Line Feast , Janelle at F-Chem 101 , and Kristi from Inspiration Kitchen.  Laura sent me Spiked Chocolate Pecan Pie bites that were so delicious! They were all buttery, nutty, and chocolatey. Janelle sent me Chocolate Coconut Icebox Cookies and y'all know how much I love coconut! While Kristi sent me Mexican Wedding Cookies, which were just scrumptious.

Everybody who participated will be posting our recipes today on each of our blogs, so head on over and check out the other girls' cookie recipes too. You can also search #fbcookieswap and see all the photos related to current and past cookie swaps. And if you missed this years deadline and are thinking about joining next year, you can receive notifications and sign up now for next years Great Food Blogger Cookie Swap here.

The bloggers who received my Christmas Russian Tea Cakes were Alison at Fridgg, Sara from Sara Ran Away With the Spoon, and Brett at Green Thumb White Apron. And now I'm sharing my recipe with y'all.


The original recipe came from my mom and is a Christmas tradition in our family. My mom has made these cookies every Christmas for as long as I can remember. Growing up, I knew them as Butterball cookies but they're also known as Russian Tea Cakes, Snowballs, Mexican Wedding Cookies, and Italian Wedding Cookies.

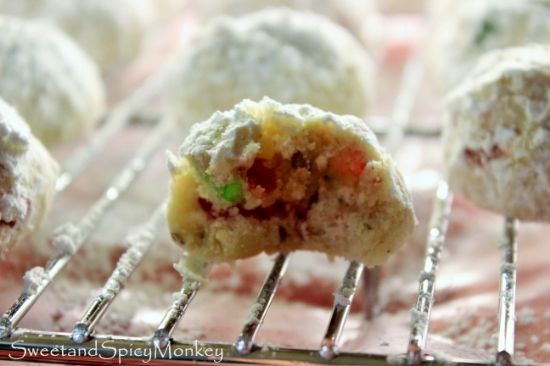
To make them more Christmassy, I added a little hint of red and green color with the candied cherries. And since I changed the recipe, I've renamed these Christmas Russian Tea Cakes.

The result, as described by Allison, is magical. But don't just take her word for it, make them yourself and taste a little Christmas magic.


Christmas Russian Tea Cakes

Makes about 3 dozen cookies

Ingredients

1 cup unsalted butter, room temperature

1 cup powdered sugar, sifted

1/2 teaspoon sea salt

1 Tablespoon minus 1/4 teaspoon of vanilla extract*

1/4 teaspoon almond extract

1 and 1/2 cups walnuts, finely chopped

1/4 cup red candied cherries, chopped

1/4 cup green candied cherries, chopped

2 cups all-purpose flour, sifted

2 cups powdered sugar in a small bowl for rolling cookies in after baking

Directions

Preheat oven to 325F degrees.

Line 2 cookie sheets with parchment paper. Set aside.

Chop walnuts and place in a small bowl. Set aside.

Chop candied cherries and place in a small bowl. Set aside.

In a large mixing bowl, add butter, sifted powdered sugar, salt, and vanilla. Mix until creamy.

Blend in walnuts and candied cherries.

Slowly add in sifted flour and mix until all ingredients are blended. Mixture will be crumbly but it rolls together nicely when making balls.

Take about 1 Tablespoon of cookie dough between your hands and roll into a ball. Place 2" apart onto prepared cookie sheet. They should maintain their round shape after baking and should not spread.

Place into preheated oven and bake for 15-18 minutes. Cookies should have similar color as when uncooked and should not be allowed to brown.

Remove from oven and let cool for about 5 minutes on cookie sheet before placing onto a wire rack to cool completely.

Place a sheet of parchment paper or wax paper under wire cookie rack before you start rolling cookies in powdered sugar.

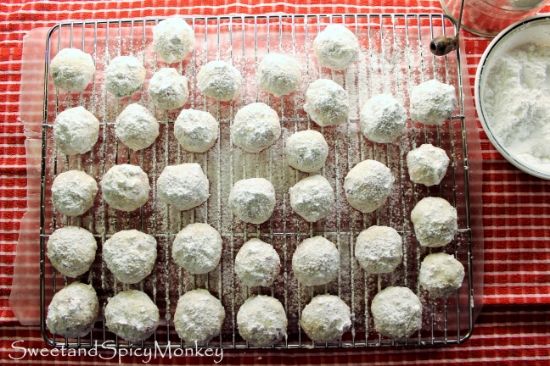
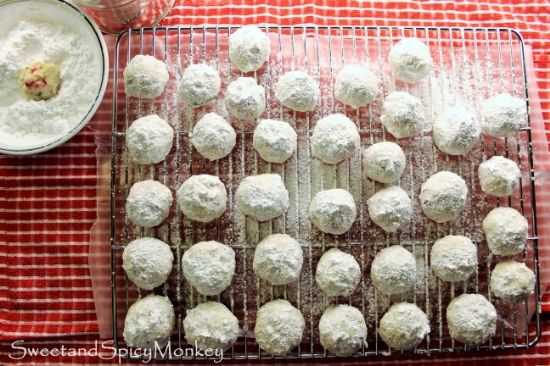
After cookies have cooled, roll each cookie in a small bowl of powdered sugar, covering entire cookie, and place back on wire cookie rack. You can also sift powdered sugar over the tops before storing for an extra layer of dusting.

Can be stored in an air tight container for up to 1 week. Trust me, they won't be around that long!

*Helpful Hints*

- * The vanilla and almond extract will equal 1 Tablespoon together.

- You can use more candied cherries, if you like.

- You can also make these with pecans instead of walnuts. I prefer walnuts because they taste more buttery to me.

- If you don't have parchment paper available, you can also place cookies on an ungreased cookie sheet. Just watch them carefully. I think the parchment paper helps prevent the bottom of the cookies from browning, so that is my preference. My mom has always made these cookies on ungreased cookie sheets.

All content and images are property of Sweet and Spicy Monkey. Please do not reprint this content without my permission. If you wish to include this recipe on your site, please re-write in your own words and use your own photographs and link back to this post for original recipe.

Follow Julie's board Sweet and Spicy Monkey on Pinterest.

Shared with: The Southern Special Week 37, The Wednesday Roundup #55, Inspire Us Thursday Link Party #79, Crafty and Delicious Party, On Display Thursday Week 24, Sweet and Savoury Sundays #93, Busy Monday 145, Lou Lou Girls Fabulous Party #38

Saturday, December 13, 2014

Coquito ~ Puerto Rican Eggnog


‘Tis the season for eggnog and I’m not talking about just any eggnog, No M’aam! I’m talking about eggnog with a tropical twist, Coquito, or also known as, Puerto Rican Eggnog.

I was reminded of this recipe after passing all the eggnog in the milk section at my local store today. I can’t believe I haven’t remembered this version of eggnog, especially after going through my coconut phase.

Ok, some might want to call it more of an obsession, but what can I say? I absolutely L-O-V-E the tropical, nutty flavor of this island nut. And obsession is such a strong word {chuckle}.

Back to this Puerto Rican eggnog, which is still a thick and creamy drink like the traditional eggnog, yet it has no eggs. That’s right, this is an eggless eggnog. Quite an oxymoron there, wouldn’t ya say? Egg-less Eggnog {smile}.

I might have had a sip or two of this drink before sitting down to write this post or it might just be sitting in a glass beside me, on the table, half full. Hey, somebody has to try these recipes before they get to you and if that is the selfless sacrifice I have to make, then count me in {wink}.


Like your traditional eggnog, you don’t have to serve this drink with alcohol (but what fun is that). Seriously now, you can leave out the alcohol for those that don’t drink and it’s just as yummy.

So if you love coconut like I do or maybe you just want to try an eggless eggnog, try my version of Coquito for a tropical twist on your Holiday season.

Coquito – Puerto Rican Eggnog

Ingredients

Makes 48 ounces

4 cups coconut canned milk, unsweetened

2 cup heavy cream

½ cup powdered sugar

1 teaspoon ground cinnamon

½ teaspoon ground nutmeg

Honey for glass preparation – at least 4 ounces

½ cup sweetened, flaked coconut

4-6 coconut strips

Dash of nutmeg for topping

Cinnamon sticks, 1 per glass

For alcoholic version ~ Rum to your own tasting

Directions

Place coconut milk, heavy cream, powdered sugar, cinnamon, and nutmeg into a blender. Blend until all ingredients are thoroughly mixed.

Pour into a small pitcher, cover, and refrigerate until chilled. Overnight is best so the flavors can mingle.

Prepare the glasses when ready to serve.

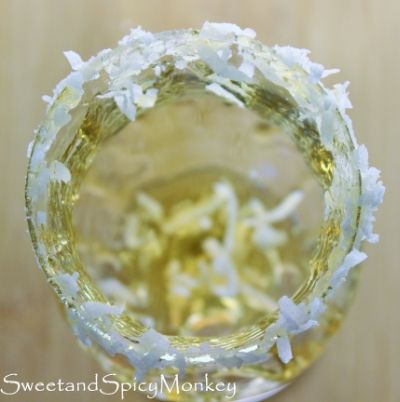
Pour about 3 Tablespoons of honey onto a flat plate for every 2 glasses to prepare. Place flaked coconut on same plate as honey, keeping them separate.

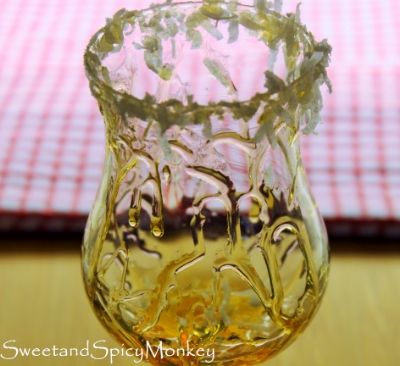
Roll the rim of the glass around in the honey so it covers the entire rim. Gently repeat same process in flaked coconut so rim of glass is covered with honey and coconut.


Place glass on counter and drizzle honey into the inside of the glass. You can use as much as you like here, keeping in mind it will sweeten your drinks. A little bit of honey for a mild sweet flavor. More honey for sweeter drinks.


For alcoholic versions, pour in desired amount of rum.

Pour in chilled coconut milk mix.

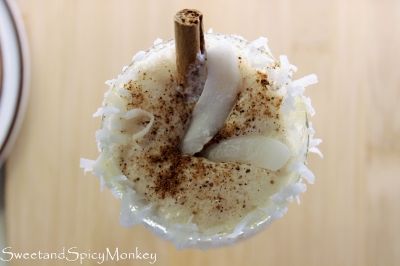
Sprinkle with a dash of ground nutmeg over the top, place either 1 to 2 coconut strips or a pinch of sweetened, flaked coconut on top.

Garnish with a cinnamon stick. Serve and enjoy!

Watch me make this here on Simmer.

Remember to drink responsibly this Holiday season.

All content and images are property of Sweet and Spicy Monkey. Please do not reprint this content without my permission. If you wish to include this recipe on your site, please re-write in your own words and use your own photographs and link back to this post for original recipe.
Follow Julie's board Sweet and Spicy Monkey on Pinterest.

Shared with: Busy Monday 144, Wake Up Wednesday "Linky" Party #47, Inspire Us Thursday Link Party #79, Crafty and Delicious Party, On Display Thursday Week 24, Foodie Friends Fridays Recipes, Crafts, DIY Linky Party #126, Freedom Fridays with All My Bloggy Friends #59, Pretty Pintastic Party #34, Sweet and Savoury Sundays #93, Munching Mondays #70, Mix it up Monday!, Crafty and Delicious Party

Saturday, December 6, 2014

Peppermint Meringue Cookies


Can you believe its December? And you know what that means, don’t you? Yep, cookie making season is officially here!

I love baking cookies, especially Christmas cookies. There are so many different kinds, flavors, textures…I think you get my hint. There are just so darn many Christmas cookies to make that one month is not enough time to bake them all in!

And in my…umm, let’s just say older years, there are still some I’ve never made before. Yes, it’s true, I have not baked all of the different kinds of Christmas cookies out there. I know, I can’t believe it myself.

So far this year, I’ve made two different kinds of Christmas cookies that I’ve never attempted to bake before. One being these meringue cookies I'm sharing with you today and the other is the Christmas cookies I made for the cookie swap, that I will be sharing with you on December 15th.


I don't know why I've never made these cookies before. After all, they're light, airy, and fat free. Yes, fat free since their main ingredients are egg whites and sugar. That means gluten-free too!

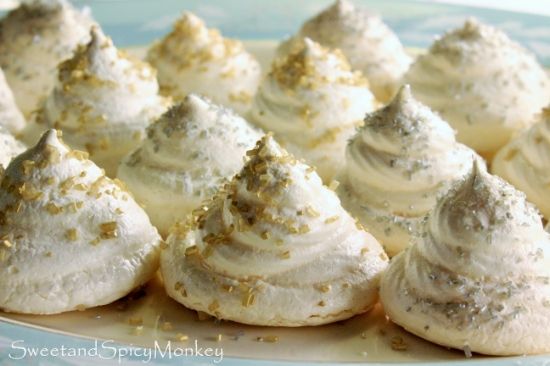
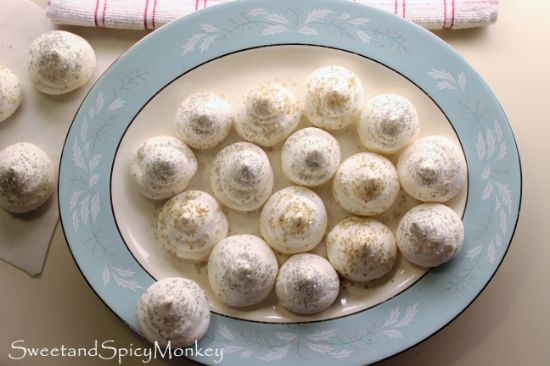
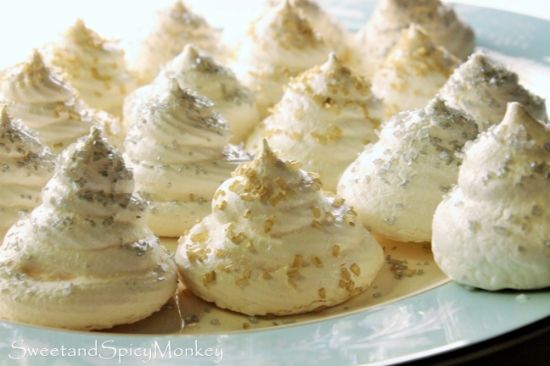
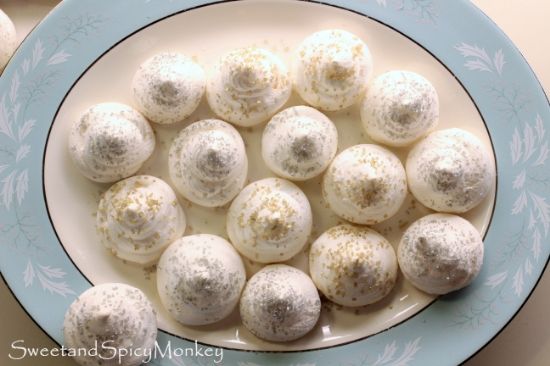
Even though these were a little messy for me to make (anything that involves piping stuff is messy for me), the end result are these beautiful snowy white meringue cookies sprinkled with silver and gold with a kiss of peppermint flavoring. The perfect cookie for any Holiday party.


I kept singing the Christmas song from Rudolph the red-nosed reindeer, "Silver and Gold" while I was making these cookies. You too can listen to it right here ~

    .
Now that you’re in the mood, here’s the recipe for my Peppermint Meringue Cookies so you can enjoy them at your home too, while singing "Silver and Gold" {smile}.

Peppermint Meringue Cookies

Ingredients

4 egg whites

1 cup sugar

2 pinches Cream of Tartar

¼ teaspoon peppermint extract

1/8 teaspoon vanilla extract

Gold decorating cupcake gems (found in the baking aisle)

Silver decorating cupcake gems

Directions

Preheat oven to 195F degrees.

Line cookie sheets with parchment paper. Making sure to fit the parchment paper on the cookie sheet by cutting off any overhang. I found it easier to crinkle the parchment paper when placing it on the cookie sheet so it stays in place and won’t roll everywhere with its natural shape from being on the tube. Set aside.

Fill a large saucepan halfway with water. Heat until boiling. Turn down heat after it begins to boil.

In a large metal mixing bowl, combine egg whites, sugar, and cream of tartar. Using a small hand whisk, whisk together for about 10 seconds, until all ingredients are combined.

Place over heated water and whisk until sugar dissolves. This should only take a couple minutes. Remove from heated water.

Using either a hand or a stand mixer, whip mixture on High speed until peaks start to form.

Add in vanilla and peppermint extract. Continue to whip until stiff peaks start to form. You can tell this when you remove the wire whip away from the mixture and it remains peaked.

Now it’s time to make the cookies. Using a pastry bag and an open star tip, carefully make round circles going wide then narrowing as they go up in height. Making about 2 inches in height and placing 2 inches apart on the cookie sheet. Or you can make any design you wish.

Sprinkle with your gold and silver decorating cupcake gems {Feel free to sing during this time}.

Bake for 90–120 minutes. That’s one hour and a half to two hours baking time. You don’t want them to brown, so keep an eye on them after 90 minutes if they need to cook a little longer. They should have a crispy outer shell when tapped.

After meringues have baked, leave them in the oven, turn off the heat, prop the oven door open about 3 inches to let the cookies cool and crisp up a little more. Leave like this for 2 hours.

After 2 hours, remove cookies from the oven.

To remove the cookies from the parchment paper, either gently twist off the cookies or gently pull parchment paper away from the cookies. They should come off clean.

There might be a little sticky going on and that’s where the gentle pulling of the parchment paper away from the cookie works best. Be careful not to squish the cookies between your fingers while trying to remove them from the parchment paper.

Store in an airtight container for up to one month. In high humidity climates, they will keep for 2-3 weeks in storage.

*Helpful Hints*

- I didn’t find this out until after I made my cookies which I made on a rainy day but meringue is best made on a day without humidity. Because the humidity causes soft and muted peaks instead of stiff and sharp peaks.

- You can also add any flavoring or coloring you like to these cookies.

- Keep a damp towel nearby when making these because you will get it on your hands. Unless, of course, you’re a professional, but for those like me, it will get on your hands {smile}.

Disclaimer - "Silver and Gold" is from the classic 1964 CBS Special "Rudolph the Red-Nosed Reindeer", sung by Burl Ives. Video uploaded from YouTube.*

All content and images (excluding video "Silver and Gold")* are property of Sweet and Spicy Monkey. Please do not reprint this content without my permission. If you wish to include this recipe on your site, please re-write in your own words and use your own photographs and link back to this post for original recipe.
Follow Julie's board Sweet and Spicy Monkey on Pinterest.

Featured here ~ Sweet and Savoury Sundays #93, Gluten- Free Holiday Drinks & Cookies, Savoring Saturdays


Shared with: The Wednesday Roundup #54, Wake Up Wednesday Linky Party, On Display Thursday #23, Pinworthy Projects Link Party #46, City of Links #49, Savoring Saturdays Party, Snickerdoodle Sunday #59, Sweet and Savoury Sunday #92, Wine'd Down Wednesday 66, Simple Supper Tuesday #19, The Southern Special Week 37, Tickle My Tastebuds Link Party, Foodie Friends Friday Recipes, Crafts, DIY Linky Party #126