Sweet and Spicy Monkey has moved to: www.sweetandspicymonkey.com

Showing posts with label Bread. Show all posts

Sunday, February 28, 2016

Buttermilk Biscuits


I've been searching for a buttermilk biscuit recipe to make and haven't really found any that I like.

For starters, they add sugar to the recipe. Not good for someone trying to cut their sugar intake. And I don't ever remember eating a sweetened buttermilk biscuit.

Then I tried a recipe that I saw on Pinterest for buttermilk biscuits. I was supposed to "swoon" over these tall flaky biscuits with buttery layers.

Not.

It turned out to be more work than needed for flaky buttermilk biscuits because you were supposed to fold over layers, roll out, fold, roll out, fold, roll out, and cut. Not to mention, they were nothing near tall and flaky, more like short and flat.

Very disappointing and I did not "swoon" over them, as promised.

I was about to give up my quest for a flaky buttermilk biscuit before I realized I had a recipe for buttermilk biscuits in...wait for it...of all things, a cookbook. A real life paper and cover cookbook!


Needless to say, this cookbook has been in my family since I was a teenager, when I bought it for my mom. This cookbook has been with me since I moved out of my mom & dad's home. Let's just say, a long time.


The cookbook, "The Encyclopedia of Creative Cooking", has a recipe for anything and everything food. One of the reasons I bought it for my mom. It reminds me of Pinterest, if Pinterest were a book.

As you can see, this is a well loved cookbook of mine.


I can't tell you how long it's been since I've actually cracked open a cookbook with Pinterest and the Internet. So when I opened the book and looked up biscuits, I was happy to see a recipe.


The original recipe calls for Crisco and whole milk. Since I don't cook with Crisco, I substituted butter and I used buttermilk for the whole milk because I wanted my buttermilk biscuits.

No folding over layers and rolling out over and over here. Nope, just your old fashioned mix up ingredients, knead a few times by hand, lightly roll to a flat dough, cut and bake.

To my surprise, beautiful flaky buttermilk biscuits!


I might have even "swooned" over them! Yes, I think I did swoon!


Buttermilk Biscuits

Recipe by Julie Murphy @ Sweet and Spicy Monkey
Light and fluffy buttermilk biscuits with a soft & flaky inside.
Prep time: 10 minutes
Cook time: 12 to 15 minutes
Total time: 25 minutes
Yield: 8 biscuits
Ingredients
  • 2 cups All-purpose flour
  • 1 Tablespoon baking powder
  • 1 teaspoon sea salt
  • 1/3 cup (5 Tablespoons and 1/3 Tablespoon) unsalted butter, chilled
  • 1 and 1/4 cups buttermilk
Cooking Directions
  1. Preheat oven to 450F degrees.
  2. Line cookie sheet with parchment paper. Set aside.
  3. Cut butter into small pieces. Set aside.
  4. Place dough attachment on stand mixer.
  5. In a large mixing bowl, add dry ingredients. Mix together with a fork, about 3 times.
  6. Mix butter throughout flour mixture, about 1 minute.
  7. Pour buttermilk into flour mixture and knead until dough is soft and slightly sticky. If dough is too dry, add in buttermilk, 1 Tablespoon at a time, until dough becomes more pliable to work with. If dough is too sticky, don't worry because as we roll out dough on floured surface, it will take some of that flour into the dough, making it soft and easier to work with.
  8. Remove dough from bowl and place on a clean, dry, flat, lightly floured surface.
  9. Knead dough gently 10 to 12 times with your hands.
  10. Gently roll dough until its about 1/2" to 3/4" thick.
  11. Using a lightly floured biscuit cutter, cut biscuits and place onto prepared cookie sheet. Repeat until all dough is used.
  12. Bake for 12 to 15 minutes or until biscuits are a light, golden brown on top.
  13. Serve immediately with butter.

All content and images are property of Sweet and Spicy Monkey. Please do not reprint this content without my permission. If you wish to include this recipe on your site, please re-write in your own words and use your own photographs and link back to this post for original recipe.

Follow Julie's board Sweet and Spicy Monkey on Pinterest.

Monday, January 25, 2016

English Muffin Skillet Bread


No more "no carb" diets for this girl. Well, I wasn't actually on a "no carb" diet, but I did cut down on breads in my diet.

However, I found myself eating carbs by munching on crackers and pretzels (yes, I'm guilty of this) because my body needs carbs. Actually, we all need carbs in our diets, just not an enormous amount and not the processed foods like we've become accustomed to, like store bought crackers, pretzels, or chips.

By cleaning up my diet, I'm going to start making my own breads and maybe soft pretzels, because those are another baking bucket list food for me, so I can control how much sodium, salt, or sugar goes in my foods without all those preservatives.

Ok, I had my say and I'll step down from my soapbox now. Please forgive me, I can be really passionate about my food.

Now don't y'all be holding me to this on all my sweets! I will make some healthy dessert recipes, but I'm not guaranteeing all of them will be healthy. A girl's gotta live some!


Lately I've been experimenting with making homemade breads and this recipe is one of them. I love English muffins! With their crispy crusts and soft texture.

So you can only imagine how happy I was when I saw this recipe for English muffin bread by Merissa at Little House Living. I couldn't wait to make it!

And while I was making it, a fleeting thought crossed my mind as I was moving my skillet, "what if I made this in my  skillet?". I broke out in a happy dance right there! English Muffin Skillet Bread!

If you've been keeping up with me, you know how much I've been cooking with my iron skillet! Rosemary and Sun Dried Tomato Whole Wheat Focaccia Bread, along with last week's Vegetable Frittata to name a few. And now this English Muffin Skillet Bread.

It's soft and airy inside with a crisp crust that's reminiscent of the beloved English muffin. It's perfect with just butter and jam, or you can serve it with soups, or make sandwiches with it. Really you can use it like you would any other bread, it's just that good.


And it's easy to make so don't let the yeast scare you from making this bread. This is one of the easiest breads I've made with little kneading. No kneading if you own a stand mixer because it does all the work!

And keeping true to what I mentioned earlier, I used honey instead of white sugar in this recipe. Yes, honey works just the same as sugar to help activate the yeast.

If you notice, I don't add in the salt until after the yeast is initially activated. This is because salt slows down yeast activation. That's a little tip I learned along the way in my journey of making homemade bread.

Just remember, the milk and water for this recipe need to be between 90 and 110F degrees to activate the yeast. A food or candy thermometer will help you get the right temperature.

I know you're going to absolutely love it as much as I do because there's nothing like homemade bread!

Let me know how you like this English Muffin Skillet Bread and what you eat it with.


English Muffin Skillet Bread

Recipe by Julie Murphy @ Sweet and Spicy Monkey
An easy English muffin bread baked in your iron cast skillet.
Prep time: 30 minutes (includes rising time for dough)
Cook time: 40 minutes
Total time: 1 hour and 10 minutes
Yield: 1 loaf skillet bread
Ingredients
  • 5 cups All-purpose flour
  • 2 packets active dry yeast
  • 1 Tablespoon honey
  • 1 teaspoon sea salt
  • 2 cups warm milk
  • 1/2 cup warm water
  • 1/4 cup cornmeal
Cooking Directions
  1. In a large mixing bowl, add warm milk, water, and honey. Sprinkle both packets of yeast over the top and mix together with a fork. Cover with a dish towel and let sit for 10-15 minutes as yeast activates.
  2. After 10-15 minutes, mix in by hand 2 and 1/2 cups of flour. Cover with towel and let sit for 10 minutes.
  3. While yeast is activating, you can preheat oven to 375F degrees and prepare skillet.
  4. Prepare 12" skillet by greasing with shortening or olive oil and sprinkling about 2 Tablespoons of cornmeal on bottom of skillet. Set aside.
  5. Using a stand mixer, mix in remaining flour and salt to yeast mixture, about 5 minutes. Dough will be sticky.
  6. Shape dough into a ball and place into skillet. Spread dough out to cover bottom of skillet.
  7. Cover with a clean, dry dish towel and place in a warm, draft-free area for 1 hour or until dough doubles in size.
  8. Once dough has doubled in size, remove towel and sprinkle about 2 Tablespoons of cornmeal over the top.
  9. Bake for 35-40 minutes or until top is lightly browned.
  10. Remove from oven and serve warm with butter and jam.

All content and images are property of Sweet and Spicy Monkey. Please do not reprint this content without my permission. If you wish to include this recipe on your site, please re-write in your own words and use your own photographs and link back to this post for original recipe.
Follow Julie's board Sweet and Spicy Monkey on Pinterest.

Tuesday, January 12, 2016

Rosemary and Sun Dried Tomato Whole Wheat Focaccia Bread


I have been on a bread making kick. First, I made dinner rolls for Thanksgiving. Then I made a French Brioche loaf around Christmas time. Remember my Overnight Cranberry Lemon Eggnog French Toast? That was my very own French Brioche loaf I used in that!

And now I've made focaccia bread. I love focaccia bread with its soft texture and delicate flavors. So when I found a recipe to make skillet focaccia, I was doing my happy dance because I've been craving focaccia bread!

It's quite easy to make for a yeast bread and you can virtually do no wrong when making it. Unless your yeast is too old, your water is too hot or not hot enough, or you added too much flour.


You see, yeast is a living organism and if you add too hot of water, you can kill the yeast. The optimum temperature for dissolving the yeast needs to be between 90 and 110F degrees. On the other end of the spectrum, if the water isn't warm enough, it won't activate the yeast.

Proper measurement of flour is important when making bread because adding too much flour, weighs dough down, making it heavy, which makes it difficult to work with and hinders the rising process.

It's no wonder why so many people shy away from making their own bread after just going over those three tips. To say the least, bread making can be a little overwhelming. But this recipe is easy peasy! Yes, I just said that, Easy Peasy!

If you want to learn how to become a better bread maker, check out King Arthur Flour's pages for some awesome tips. They have you covered on bread making!

Let me be clear, I’m not sponsored by nor am I endorsing King Arthur Flour. I’m just sharing a great site for learning how to become a better bread maker and it also has a trouble shooting page so you can figure out what happened to your bread.

It’s like sharing information with a girlfriend, there’s just some things you need to share and I feel like sharing this great site with y’all! Plus, I find every time I visit their site, I learn something new! How can I keep that all to myself?


Anywho, back to this focaccia bread. You don't have to be a master bread maker to make it. Just follow the tips and you'll have this focaccia bread on your table tonight!


Rosemary and Sun Dried Tomato Whole Wheat Focaccia Bread

Recipe by Julie Murphy
Rosemary and sun dried tomatoes add a delicate Italian flavoring to this soft focaccia bread.
Prep time: 1 hour and 30 minutes (includes dough rising time)
Cook time: 25 minutes
Total time: 2 hours
Yield: One 12" loaf or two 6" loafs
Ingredients
  • 2 cups 100% whole grain whole wheat flour
  • 1 cup all-purpose flour
  • 1 teaspoon sea salt
  • 1 package yeast
  • 2 Tablespoons olive oil
  • 1 to 1 and 1/2 cups warm water
  • 1/4 cup fresh rosemary, removed from the stem
  • 1/4 cup sun-dried tomatoes, julienne cut
  • sprinkling of sea salt
Cooking Directions
  1. Prepare 12" skillet by generously coating inside with olive oil. You can also use two 6" skillets for 2 focaccia breads instead of the one. Set aside.
  2. In a large mixing bowl, combine water and yeast. Stir together with a fork to dissolve.
  3. Add 1 cup of wheat flour and 1/2 cup of AP flour to the yeast mixture.
  4. Using Low speed on your stand mixer, mix together for about 3 minutes until all flour is mixed. Cover with a towel and let rise in a warm place for 30 minutes.
  5. After 30 minutes, mix in olive oil, sea salt, sun dried tomatoes, and 2 Tablespoons of rosemary.
  6. Mix in remaining cup of wheat flour and 3/4 cup of AP flour on Low speed for 4-5 minutes. If dough is difficult to work with, add warm water, 1 Tablespoon at a time, until dough is more pliable. If dough is too sticky, gradually add in small amounts of AP flour until dough becomes more pliable. Dough should be soft, not hard and wrapping itself around the dough attachment.
  7. Sprinkle a small amount of AP flour on a clean, hard, dry surface. Remove dough from bowl and place on floured surface.
  8. Gently knead dough into a ball and place into prepared skillet. If using 2 skillets, cut ball in half and place each half into prepared skillets.
  9. Gently press dough down so it fills up the bottom of the skillet.
  10. Cover with a towel and let rise in a warm place for 30-45 minutes. At this time, you can preheat oven to 400F degrees.
  11. Remove towel and brush olive oil over the top of the dough.
  12. Using a sharp knife, make diagonal cuts into the top of the dough.
  13. Sprinkle sea salt and remaining rosemary over the top.
  14. Bake in preheated oven for 25 minutes or until top is lightly browned.
  15. Remove from oven, sprinkle sea salt over the top, and serve with warmed olive oil.

Inspired by Gerry at Foodness Gracious.

All content and images are property of Sweet and Spicy Monkey. Please do not reprint this content without my permission. If you wish to include this recipe on your site, please re-write in your own words and use your own photographs and link back to this post for original recipe.
Follow Julie's board Sweet and Spicy Monkey on Pinterest.

Friday, November 13, 2015

Banana Bread made with Olive oil


I promised you I wouldn't bombard you with pumpkin recipes this Fall (although I have so many I'm wanting to share with you right now!). But I promised I wouldn't, so I will sneak them in, one by one, so you won't even know it happened!

One of my favorite breads to make in the Fall is banana bread. Really it's one of my favorite breads to make, but fall is when I can go back into the kitchen and get things heated up by turning on my oven after its long hibernation through the summer months. So it has become a Fall favorite.

This banana bread has a twist. Did you really expect me to share something ordinary? I used olive oil in this recipe instead of butter.


I know what you're thinking, ICK! Olive oil? Yes, olive oil. Believe it or not, you can substitute olive oil for butter in many recipes like this one or even lemon curd! And I thought the same thing when one of my foodie friends used olive oil in a cake.

But actually, olive oil is a healthier option than butter and it makes this bread just moist enough to make it scrumptious! And you can't even taste the olive oil!


I dare you to make this banana bread recipe with olive oil and then make another loaf, using butter, and set both loafs out this Thanksgiving to see which your guests prefer, if they can tell the difference.

It will keep the conversation fun and you get to show off your awesome baking skills! Plus, it doesn’t have one single pumpkin ingredient!

Banana Bread made with Olive oil

Recipe by Julie Murphy
A deliciously moist banana bread made with olive oil.
Prep time: 15 minutes
Cook time: 60 minutes
Total time: 75 minutes
Yield: 1 loaf
Ingredients
  • 2 cups All-purpose flour
  • 1 teaspoon baking soda
  • 1 teaspoon baking powder
  • 1 teaspoon sea salt
  • 1 teaspoon cinnamon
  • 1 cup granulated sugar
  • 3 very ripe bananas, mashed
  • 3 large eggs
  • 1 teaspoon banana extract
  • 1/2 teaspoon vanilla extract
  • 1 Tablespoon coconut milk
  • 8 Tablespoons olive oil
Cooking Directions
  1. Preheat oven to 350F degrees.
  2. Prepare a 9" x 5" loaf pan by wiping down with olive oil and a clean, dry paper towel or you can use a non-stick cooking spray. You can also line the loaf pan with parchment paper instead of oils. Set aside.
  3. In a medium bowl, add flour, baking soda, baking powder, sea salt, and cinnamon. Set aside.
  4. In a large mixing bowl, cream together sugar, mashed bananas, and eggs.
  5. Combine banana extract, vanilla, coconut milk, and olive oil to sugar mixture.
  6. Gradually add in dry ingredients until all are combined, with no dry pockets of flour.
  7. Pour into prepared loaf pan and bake in preheated oven for 50 to 60 minutes, or until inserted knife comes out clean.
  8. Remove from oven and let cool for 15 minutes.
  9. Run a clean butter knife along the edges of the loaf pan, this helps to loosen the loaf from the pan before flipping over.
  10. Placing a wire rack over top of loaf pan, invert rack and pan. Loaf should come out nicely onto the wire rack where it can cool completely. If your loaf sticks to the pan, give a few light taps to the bottom of the loaf pan with the blunt end of the butter knife.
  11. Best served warm. Butter or margarine is optional.

All content and images are property of Sweet and Spicy Monkey. Please do not reprint this content without my permission. If you wish to include this recipe on your site, please re-write in your own words and use your own photographs and link back to this post for original recipe.
Follow Julie's board Sweet and Spicy Monkey on Pinterest.

Wednesday, September 30, 2015

Citron Dansk Kage - Lemon Danish Cake (Pastry)


I love October! The reasons I love October are the cooler temperatures, the leaves changing colors, football season, and Halloween is this month, which means scary movie marathons!

I always love watching old time classic horror movies like Bride of Frankenstein, Frankenstein, Dracula, Nosferatu. Bella Lugosi is one of the best actors to portray Dracula to this day.

I was also lucky enough to grow up with the original Halloween movies like Friday the 13th, Halloween, Nightmare on Elm Street, and The Shining.

Oh sure, there's been a few good ones since, the remake of Texas Chainsaw Massacre, The Ring, Blair Witch Project, and Paranormal Activity.

But anymore their either corny or just too predictable. Maybe it's because I'm not a teenager anymore and I can see the stupid decisions they're always making. Like going out to the garage by yourself at night when you know the serial killer is on the loose. Or leaving the party at midnight by yourself and walking through the graveyard.


I mean, Hello, what are you thinking? Have a little common sense here people. Sigh. Does this mean I've finally grown up? Nah, can't be that!

What better way to honor the king of horror himself, Vincent Price, than to make a recipe this month from his cookbook, "A Treasury of Great Recipes". In celebration of its 50th anniversary, this wonderful cookbook has been recently re-released.

And my friends over at The Daily Meal came up with an idea for us to recreate one of three recipes (out of many) that Vincent Price and his wife, Mary, put together for this cookbook.

The three recipes we could choose from are:
  1. Guacamole
  2. Spaghetti alla Bolgnese
  3. Dansk Kage (Danish pastry)
I challenged myself and made the Dansk Kage, which is a Danish pastry. Kage translates into cake, but it is a pastry. I have never attempted to make a Danish pastry before, let alone any type of pastry, so I was going into uncharted territory with this recipe.


Especially since I didn't have a photo or YouTube video to follow as I made this. Technology can make things so much easier sometimes!

I mean, what's the worst that could happen? After all, if it's a scary looking Danish then that kind of captures the whole scary movie/horror mood, right?

Lucky for you, they turned out amazing. Flaky, buttery dough that has a hint of lemon and almond flavors with a lemon glaze icing and a sprinkling of candied lemons over the top...Mmm!


The lemon flavoring with the glaze icing and the candied lemons on top are my own touch to this delicious Danish pastry.

These lemon Danish pastries are great for breakfast, especially Sunday brunches. They bring that personal touch to your brunch.

They also make for great snacks while watching all the upcoming scary movie marathons!

Citron Dansk Kage - Lemon Danish Cake (Pastry)

Prep time: 2 and 1/2 hours (includes dough rising and chilling time)
Cook time: 10 to 15 minutes
Total time: 3 hours
Ingredients
  • 4 cups + more for rolling out dough All-Purpose flour, sifted
  • 1 teaspoon sea salt
  • 1 cup granulated sugar
  • 1 package Active dry yeast
  • 1/4 cup lukewarm water
  • 1 egg, beaten
  • 1 cup milk
  • 1/2 teaspoon ground nutmeg
  • 1/2 teaspoon lemon extract
  • 1/2 teaspoon almond extract
  • 2 cups (4 sticks) butter, softened
  • 1/2 cup ground almonds
  • 1 egg white, beaten
  • 2 Tablespoons chopped almonds
  • 1 Tablespoon sugar, for sprinkling on top
  • 2 Tablespoons candied lemons, for sprinkling on top after icing
Directions
  1. In a large mixing bowl, add 4 cups sifted flour, salt, and 1/4 cup sugar. Mix with a wire whisk. Set aside.
  2. In a small glass or bowl, mix together lukewarm water and package of active dry yeast until yeast is dissolved. Pour yeast mix into dry ingredients and blend together.
  3. Using the dough attachment for your stand mixer, combine 1 beaten egg, warm milk, nutmeg, lemon extract, and almond extract into bowl with other ingredients. Mix together until dough becomes soft and pliable.
  4. Remove dough from bowl and place onto a flat, floured surface. Shape into a ball.
  5. Place dough into a warm, buttered bowl. Lightly brush melted butter over the top to help prevent cracking. Cover with a small towel and place in a warm area with no drafts, for 30 to 45 minutes, to allow dough to rise. Dough should double in size.
  6. After this time, remove dough from bowl and place on a flat, floured surface. Roll out dough into a square shape, until its 1/2 inch thick.
  7. Place 2 cups butter into a microwavable dish (a large measuring cup works great for this) and place into microwave until butter becomes melted, about 45 seconds to 1 minute. Stir after removing from microwave.
  8. With a pastry brush, lavishly brush on butter over 2/3 of the dough surface, leaving 1/3 unbuttered.
  9. Fold the unbuttered portion over once, fold the buttered portion of dough on top of it, so there are 3 layers of dough.
  10. Roll dough out to a square shape, until its about 3/4 inch thick, and repeat buttering and folding dough on top of itself 2 more times.
  11. Place the dough as is, back into the buttered bowl, covering with a small towel and place into refrigerator (or a cold place) for 30 minutes.
  12. While dough is in refrigerator, mix together 1/4 cup sugar and 1/4 cup melted butter in a small bowl. Cover and set aside.
  13. In a separate bowl, mix together 1/2 cup melted butter, 1/2 cup sugar, and 1/2 cup ground almonds to make almond paste. Cover and set aside.
  14. After 30 minutes, remove dough from refrigerator and roll out on a flat, floured surface until dough is 1/4 inch thick.
  15. Lavishly brush melted butter and sugar mixture over the top of the dough.
  16. Using a sharp knife, cut dough into squares measuring 4 inches.
  17. Place 1/2 to 1 teaspoon of almond paste down the center of each square. Fold over dough and seal edges together using a fork. Using the tip of a sharp knife, make 3 cuts in center of dough.
  18. Gently move Danishes onto a cookie sheet lined with parchment paper.
  19. At this time, preheat oven to 450F degrees.
  20. Place the Danish tray into your refrigerator for 20 minutes.
  21. While completed Danishes are chilling, add 1 egg white to a small bowl or cup and whip for 30 seconds.
  22. If you don't have any leftover ground almonds, chop 2 Tablespoons almonds and place into a small bowl.
  23. After Danishes have chilled for 20 minutes, remove from refrigerator, brush tops of Danish with egg white, sprinkle sugar and chopped almonds over the top.
  24. Place into oven and bake for 10 to 15 minutes, or until tops are golden brown.
  25. Remove from oven, transfer to a wire rack, and let cool completely.

Lemon Glaze Icing

A subtle, lemon glaze icing that's wonderful over, Danishes, breads, cookies, or cakes.
Prep time: 5 minutes
Ingredients
  • 1 cup powdered (confectioner's) sugar
  • 1 and 1/2 Tablespoons lemon juice
  • 1/4 teaspoon vanilla extract
  • 2 teaspoons water
  • 2 teaspoons milk
  • 1 Tablespoon butter, melted
Directions
  1. Mix together all ingredients in a small mixing bowl.
  2. Using a spoon, drizzle icing over Danishes in a back and forth motion until you achieve desired look.
  3. Sprinkle with candied lemons.
  4. Best served warm with coffee or tea.


I would like to thank Paradise Fruit Company for the candied lemon peels used in this recipe.
 
All content and images are property of Sweet and Spicy Monkey. Please do not reprint this content without my permission. If you wish to include this recipe on your site, please re-write in your own words and use your own photographs and link back to this post for original recipe.
Follow Julie's board Sweet and Spicy Monkey on Pinterest.

Monday, March 30, 2015

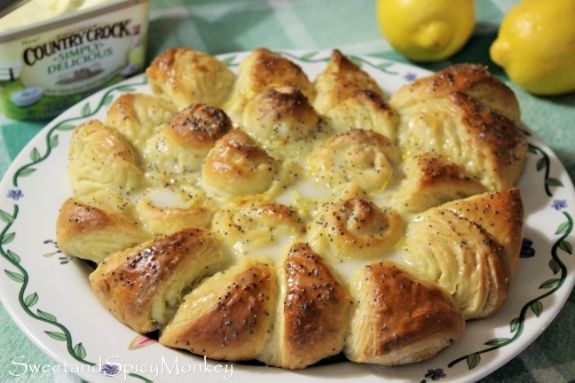
Lemon Poppy Seed Easter Bread


When some friends over at The Daily Meal and Country Crock teamed up and invited me to create a special Easter baked-goods recipe that includes Country Crock,
1.) I was honored
and
2.) I wanted to create something that tastes of Spring and was different than anything else I have ever made.
Plus I wanted something that not only incorporated Country Crock spread as one of the ingredients, but could also be served with Country Crock spread. And since I've been on a bread kick here lately, I knew it had to be some type of Easter bread.


So I searched and found this beautifully made bread by Eva Toneva. It was like something I had never seen before and after reading through the instructions, really quite simple to make.


I added my own personal touch to flavor this bread with the sweet taste of Spring by adding a little sugar, lemon juice and lemon zest in the dough, generously brushing lemon butter over the bread after baking, and then drizzling a sweet lemon glaze over the top with a sprinkling of lemon zest to finish it off. I don't think it's possible to get any more lemon in this bread! And the pop of color the poppy seeds bring is fashionably bold. Yes, if bread can be fashionable, it would wear poppy seeds!


You can even get the kids involved by having them help with making the bread by rolling out the dough, creating the shapes with the dough, and arranging the dough in the pans. The looks on their little faces when the bread comes out of the oven is priceless. 


A delightfully light and flaky, sweet lemon, pull apart bread that is sure to be your family's favorite this Easter.
-----------------------------------------------------------

Lemon Poppy Seed Easter Bread

Makes 3 mini breads
(I made 1 mini and 1 medium bread)
-----------------------------------------------------------

Ingredients for bread
-----------------------------------------------------------
2 teaspoons dry instant yeast

1 Tablespoon honey or granulated sugar

6 and ½ Tablespoons milk, warmed

3 and ¾ cups all-purpose flour, sifted (+ more for rolling out and shaping bread)

1 teaspoon sea salt

2 eggs, lightly beaten

10 Tablespoons milk, warmed (extra)

2 Tablespoons coconut oil, melted

2 teaspoons lemon juice

2 teaspoons vanilla extract

½ teaspoon lemon extract

½ cup granulated sugar

Zest of 3 lemons

2 Tablespoons poppy seeds (+ a little extra for sprinkling over the top before baking)

6 and ½ Tablespoons Country Crock spread, melted and cooled

*Ingredients and directions for making Egg Glaze, Lemon Butter, and Lemon Glaze below directions for making bread*
------------------------------------------------------------

Directions for making bread

Preheat oven to 355F degrees.

Line 2 to 3 large baking dishes with parchment paper. Set aside.

Spray a large mixing bowl with non-stick spray. Can also wipe down with olive oil or coconut oil. Set aside. This is the bowl you will be using for letting your dough rise.

In a medium bowl (since yeast will expand as it warms), dissolve yeast and honey (or sugar) in 6 and ½ Tablespoons of warm milk. Cover with a cloth or paper towel and let sit in a warm place for 10 to 15 minutes.

In a large mixing bowl, sift together flour and salt. Mix in sugar, lemon zest of 2 lemons, and poppy seeds. Blending throughout flour mix.

Make a small well in the center and add eggs, remaining 10 Tablespoons of warm milk, coconut oil, lemon juice, and yeast mixture.

Using the bread attachment for your stand mixer, mix all ingredients together until dough becomes soft and pliable. Use a plastic spatula to help scrape sides.

Remove dough from bowl and place on a floured surface. Knead with your hands for another minute or two. Place dough in prepared bowl, cover with a cloth towel, and let rise in a warm place for 60 to 90 minutes. Dough should double in size.

After dough has doubled in size, lightly punch down dough with your fist, remove from bowl, and place on a floured surface.

Divide dough into 2 equal parts.

Divide these 2 parts into 4 pieces. You should now have 8 pieces of dough.

Roll each piece of dough into a roughly shaped rectangle with a thickness of 3-5 mm. Brush four of the rectangle shapes with melted Country Crock.

 
Layer with another rectangular shape of dough
 
 
Brush with melted Country Crock. If you have extra, set aside and use for Lemon Butter after baking.

 Roll up like a cylinder. You should have 4 cylinder dough shapes.


Taking one of the cylinder dough shapes, cut off both ends, about 1 to 1 ½ inches. Set the ends aside.


With the middle dough, cut four triangular shapes like above. Set triangles aside. Repeat same for next three cylindrical dough shapes.

In the middle of your prepared tray, arrange the end pieces of dough into a circle, placing the cut sides down.

Arrange the triangles around the middle circle, like the petals of a flower.


Cover with a cloth towel and let rise in a warm place for 30 to 40 minutes.

After 30-40 minutes, mix together egg yolk and milk (Egg Glaze recipe below) and lightly brush over dough. You can sprinkle extra poppy seeds over the breads at this time.

After 30-40 minutes, dough rises a little more

Brush with egg glaze and add poppy seeds

Bake bread for 10 minutes at 355F degrees. After 10 minutes, reduce oven temperature to 320F degrees and continue baking for another 15 to 20 minutes or until top is golden brown.

Brush with Lemon butter and let cool after removing from the oven

As soon as bread comes out of the oven, brush with melted lemon butter (recipe below).

Let cool for about 1 hour before drizzling lemon glaze (recipe below) over the top of bread. Sprinkle zest of one lemon over the top.

Serve with Country Crock spread and enjoy!


------------------------------------------------------------

Ingredients for Egg Glaze before baking

1 egg yolk
2 Tablespoons milk

Directions for Egg Glaze

In a small bowl or mug, add egg yolk and milk. Whisk with a small wire whisk or fork until fluffy. Brush generously over bread right before putting into the oven to bake.
----------------------------------------------
Ingredients for Lemon butter after baking

2 Tablespoons Country Crock spread
1 teaspoon lemon juice

Directions for lemon butter

In a small bowl or mug, melt butter in microwave. Cooking time depends on your microwave but it shouldn’t take more than 1 minute. Remove from microwave and add lemon juice. Mix together and brush over top of bread after baking.
------------------------------------------------------------
Ingredients for Lemon Glaze

2 Tablespoons lemon juice
½ cup powdered sugar

Directions for lemon glaze

Add lemon juice and powdered sugar together in medium mixing bowl. Using a handheld mixer, whip together until smooth. Drizzle over finished breads.

And for all of you wondering, yes, I did have a piece (or two) of this bread for quality assurance, of course. I am still on my Sugar Crush Challenge and I know this bread has sugar in it, but not a lot of sugar. I actually ended up taking this to work since I didn't want to be tempted anymore and they all loved it! So in all, it worked out because I got non- biased reviews from my co-workers! And since I had a few pieces of this yummy Lemon Poppy Seed Easter Bread, I'm thinking I will extend my challenge for an extra week {smile}.

*Disclaimer - This is a sponsored post by Country Crock and The Daily Meal. Recipes and opinions are 100% my own.*

All content and images are property of Sweet and Spicy Monkey. Please do not reprint this content without my permission. If you wish to include this recipe on your site, please re-write in your own words and use your own photographs and link back to this post for original recipe.
Follow Julie's board Sweet and Spicy Monkey on Pinterest.

Shared with: Totally Terrific Tuesday Link Party #26, Lou Lou Girls Fabulous Party #52, Wine'd Down Wednesday 80, On Display Thursday #37, Crafty and Delicious Party , Foodie Friends Friday Linky Party #141, Sweet and Savoury Sundays #107

Sunday, March 22, 2015

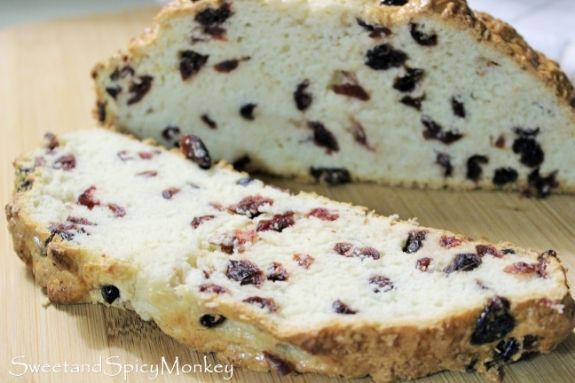
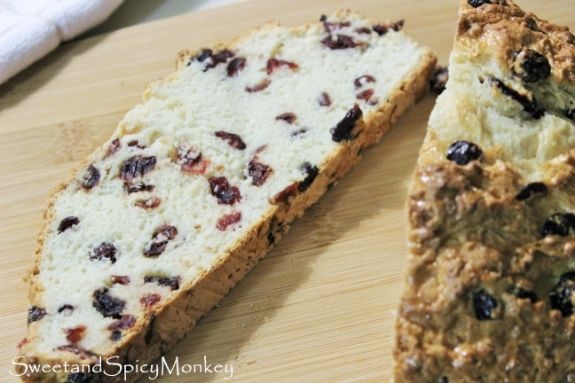
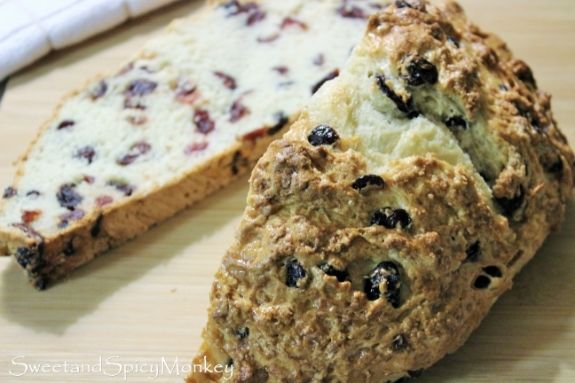
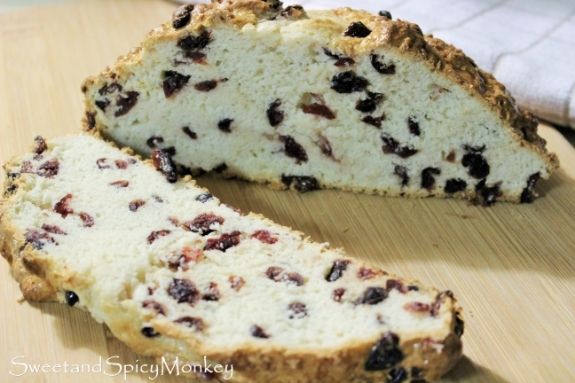
Soda Bread with Cranberries


Ever since I made my mom's Irish Soda Bread last week for St. Patrick's Day, I've been wondering what it would taste like with cranberries instead of raisins. I know, it sounds so yummy, doesn't it?

Since there are only mere crumbs left of the last loaf, I made another one. Well, ok, I'm on my third loaf now, I really do love this bread!


This last time I made it a little more healthy by using organic flour, Splenda, a sugar substitute, since I'm still on my Sugar Crush Challenge, and I added Craisins, dried cranberries, instead of raisins. It was even more scrumptious than I imagined as the cranberries added a little tartness to the sweetness of this bread. D-E-L-I-C-I-O-U-S!

And the amazing thing about this recipe, is you can not only make it for St. Patrick's Day too, but it will compliment your Thanksgiving meal too with the cranberries.


With its sweet, crispy crust and soft, moist center, this bread is sure to be your family's favorite no matter what time of year you serve it up.
________________________________________

Soda Bread with Cranberries

Makes 1 loaf
________________________________________

Ingredients

3 cups all-purpose flour, sifted (I used organic flour for this loaf)

3 teaspoons baking powder

½ teaspoon baking soda

½ teaspoon sea salt

3 Tablespoons Splenda (Stevia or plain granulated sugar)

1 and ½ cups Craisins (dried cranberries)

1 and 1/3 cups buttermilk
________________________________________

Directions

Preheat oven to 375F degrees.

Line cookie sheet with parchment paper or you can use an ungreased cookie sheet. Set aside.

In a large mixing bowl, add all dry ingredients – sifted flour, baking powder, baking soda, sea salt, and sugar.

Mix Craisins with flour mixture, making sure all Craisins are covered with flour mixture and Craisins are not clumped together.

Add in buttermilk.

Using a bread attachment on your stand mixer, blend all ingredients together until all flour is mixed.

If mixing by hand, place dough on a flour covered surface and knead about 10 times.

Dough should be sticky.

Place on prepared cookie sheet and place into oven for 45 minutes.

After 45 minutes, remove from oven and brush with hot sugar water, brushing all exposed surfaces.

Place back into oven for 10 minutes, or until bread is a golden brown. Check after 5 minutes to be sure it doesn’t burn.

Remove from oven and let cool for 10 minutes before serving.

Best served with margarine or butter.

Ingredients for Glaze

2 Tablespoons Splenda (Stevia or plain granulated sugar)

2 Tablespoons hot water

Directions for glaze In a small bowl, add hot water and sugar. Mix together and brush over bread. Return to steps above.


*Helpful Hints*

- If you find you run out of buttermilk or don't have any on hand when you want to make this bread, for 1 cup of buttermilk, you can substitute 1 cup of milk with either 1 Tablespoon of white vinegar or lemon juice, letting it sit for 5 minutes before using it in the recipe.

- Or you can substitute 1 cup plain yogurt for 1 cup of buttermilk.

- If bread is not sticky after mixing all the ingredients together, add a little buttermilk at a time until dough is sticky. Or you can use any of the above buttermilk substitutes.


All content and images are property of Sweet and Spicy Monkey. Please do not reprint this content without my permission. If you wish to include this recipe on your site, please re-write in your own words and use your own photographs and link back to this post for original recipe.
Follow Julie's board Sweet and Spicy Monkey on Pinterest.

Shared with: Sweet and Savoury Sunday #105, Munching Mondays #83