Sweet and Spicy Monkey has moved to: www.sweetandspicymonkey.com

Showing posts with label Homemade. Show all posts

Sunday, February 28, 2016

Buttermilk Biscuits


I've been searching for a buttermilk biscuit recipe to make and haven't really found any that I like.

For starters, they add sugar to the recipe. Not good for someone trying to cut their sugar intake. And I don't ever remember eating a sweetened buttermilk biscuit.

Then I tried a recipe that I saw on Pinterest for buttermilk biscuits. I was supposed to "swoon" over these tall flaky biscuits with buttery layers.

Not.

It turned out to be more work than needed for flaky buttermilk biscuits because you were supposed to fold over layers, roll out, fold, roll out, fold, roll out, and cut. Not to mention, they were nothing near tall and flaky, more like short and flat.

Very disappointing and I did not "swoon" over them, as promised.

I was about to give up my quest for a flaky buttermilk biscuit before I realized I had a recipe for buttermilk biscuits in...wait for it...of all things, a cookbook. A real life paper and cover cookbook!


Needless to say, this cookbook has been in my family since I was a teenager, when I bought it for my mom. This cookbook has been with me since I moved out of my mom & dad's home. Let's just say, a long time.


The cookbook, "The Encyclopedia of Creative Cooking", has a recipe for anything and everything food. One of the reasons I bought it for my mom. It reminds me of Pinterest, if Pinterest were a book.

As you can see, this is a well loved cookbook of mine.


I can't tell you how long it's been since I've actually cracked open a cookbook with Pinterest and the Internet. So when I opened the book and looked up biscuits, I was happy to see a recipe.


The original recipe calls for Crisco and whole milk. Since I don't cook with Crisco, I substituted butter and I used buttermilk for the whole milk because I wanted my buttermilk biscuits.

No folding over layers and rolling out over and over here. Nope, just your old fashioned mix up ingredients, knead a few times by hand, lightly roll to a flat dough, cut and bake.

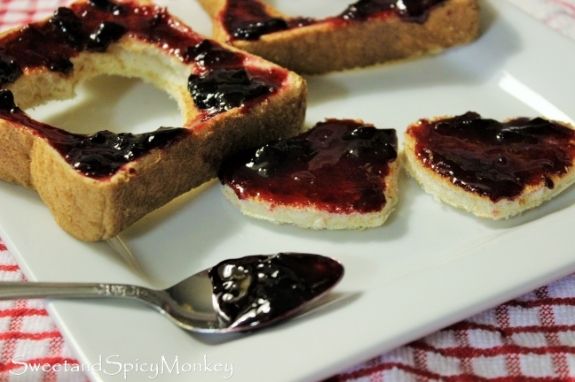
To my surprise, beautiful flaky buttermilk biscuits!


I might have even "swooned" over them! Yes, I think I did swoon!


Buttermilk Biscuits

Recipe by Julie Murphy @ Sweet and Spicy Monkey
Light and fluffy buttermilk biscuits with a soft & flaky inside.
Prep time: 10 minutes
Cook time: 12 to 15 minutes
Total time: 25 minutes
Yield: 8 biscuits
Ingredients
  • 2 cups All-purpose flour
  • 1 Tablespoon baking powder
  • 1 teaspoon sea salt
  • 1/3 cup (5 Tablespoons and 1/3 Tablespoon) unsalted butter, chilled
  • 1 and 1/4 cups buttermilk
Cooking Directions
  1. Preheat oven to 450F degrees.
  2. Line cookie sheet with parchment paper. Set aside.
  3. Cut butter into small pieces. Set aside.
  4. Place dough attachment on stand mixer.
  5. In a large mixing bowl, add dry ingredients. Mix together with a fork, about 3 times.
  6. Mix butter throughout flour mixture, about 1 minute.
  7. Pour buttermilk into flour mixture and knead until dough is soft and slightly sticky. If dough is too dry, add in buttermilk, 1 Tablespoon at a time, until dough becomes more pliable to work with. If dough is too sticky, don't worry because as we roll out dough on floured surface, it will take some of that flour into the dough, making it soft and easier to work with.
  8. Remove dough from bowl and place on a clean, dry, flat, lightly floured surface.
  9. Knead dough gently 10 to 12 times with your hands.
  10. Gently roll dough until its about 1/2" to 3/4" thick.
  11. Using a lightly floured biscuit cutter, cut biscuits and place onto prepared cookie sheet. Repeat until all dough is used.
  12. Bake for 12 to 15 minutes or until biscuits are a light, golden brown on top.
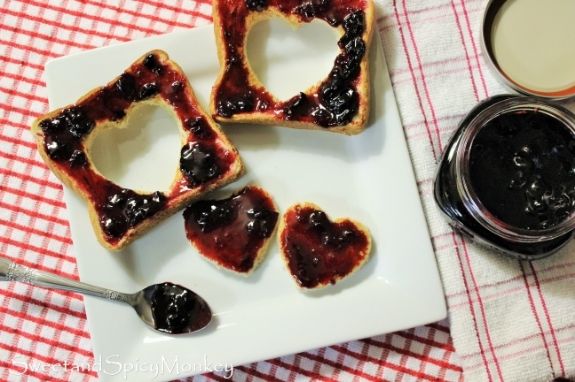
  13. Serve immediately with butter.

All content and images are property of Sweet and Spicy Monkey. Please do not reprint this content without my permission. If you wish to include this recipe on your site, please re-write in your own words and use your own photographs and link back to this post for original recipe.

Follow Julie's board Sweet and Spicy Monkey on Pinterest.

Monday, January 25, 2016

English Muffin Skillet Bread


No more "no carb" diets for this girl. Well, I wasn't actually on a "no carb" diet, but I did cut down on breads in my diet.

However, I found myself eating carbs by munching on crackers and pretzels (yes, I'm guilty of this) because my body needs carbs. Actually, we all need carbs in our diets, just not an enormous amount and not the processed foods like we've become accustomed to, like store bought crackers, pretzels, or chips.

By cleaning up my diet, I'm going to start making my own breads and maybe soft pretzels, because those are another baking bucket list food for me, so I can control how much sodium, salt, or sugar goes in my foods without all those preservatives.

Ok, I had my say and I'll step down from my soapbox now. Please forgive me, I can be really passionate about my food.

Now don't y'all be holding me to this on all my sweets! I will make some healthy dessert recipes, but I'm not guaranteeing all of them will be healthy. A girl's gotta live some!


Lately I've been experimenting with making homemade breads and this recipe is one of them. I love English muffins! With their crispy crusts and soft texture.

So you can only imagine how happy I was when I saw this recipe for English muffin bread by Merissa at Little House Living. I couldn't wait to make it!

And while I was making it, a fleeting thought crossed my mind as I was moving my skillet, "what if I made this in my  skillet?". I broke out in a happy dance right there! English Muffin Skillet Bread!

If you've been keeping up with me, you know how much I've been cooking with my iron skillet! Rosemary and Sun Dried Tomato Whole Wheat Focaccia Bread, along with last week's Vegetable Frittata to name a few. And now this English Muffin Skillet Bread.

It's soft and airy inside with a crisp crust that's reminiscent of the beloved English muffin. It's perfect with just butter and jam, or you can serve it with soups, or make sandwiches with it. Really you can use it like you would any other bread, it's just that good.


And it's easy to make so don't let the yeast scare you from making this bread. This is one of the easiest breads I've made with little kneading. No kneading if you own a stand mixer because it does all the work!

And keeping true to what I mentioned earlier, I used honey instead of white sugar in this recipe. Yes, honey works just the same as sugar to help activate the yeast.

If you notice, I don't add in the salt until after the yeast is initially activated. This is because salt slows down yeast activation. That's a little tip I learned along the way in my journey of making homemade bread.

Just remember, the milk and water for this recipe need to be between 90 and 110F degrees to activate the yeast. A food or candy thermometer will help you get the right temperature.

I know you're going to absolutely love it as much as I do because there's nothing like homemade bread!

Let me know how you like this English Muffin Skillet Bread and what you eat it with.


English Muffin Skillet Bread

Recipe by Julie Murphy @ Sweet and Spicy Monkey
An easy English muffin bread baked in your iron cast skillet.
Prep time: 30 minutes (includes rising time for dough)
Cook time: 40 minutes
Total time: 1 hour and 10 minutes
Yield: 1 loaf skillet bread
Ingredients
  • 5 cups All-purpose flour
  • 2 packets active dry yeast
  • 1 Tablespoon honey
  • 1 teaspoon sea salt
  • 2 cups warm milk
  • 1/2 cup warm water
  • 1/4 cup cornmeal
Cooking Directions
  1. In a large mixing bowl, add warm milk, water, and honey. Sprinkle both packets of yeast over the top and mix together with a fork. Cover with a dish towel and let sit for 10-15 minutes as yeast activates.
  2. After 10-15 minutes, mix in by hand 2 and 1/2 cups of flour. Cover with towel and let sit for 10 minutes.
  3. While yeast is activating, you can preheat oven to 375F degrees and prepare skillet.
  4. Prepare 12" skillet by greasing with shortening or olive oil and sprinkling about 2 Tablespoons of cornmeal on bottom of skillet. Set aside.
  5. Using a stand mixer, mix in remaining flour and salt to yeast mixture, about 5 minutes. Dough will be sticky.
  6. Shape dough into a ball and place into skillet. Spread dough out to cover bottom of skillet.
  7. Cover with a clean, dry dish towel and place in a warm, draft-free area for 1 hour or until dough doubles in size.
  8. Once dough has doubled in size, remove towel and sprinkle about 2 Tablespoons of cornmeal over the top.
  9. Bake for 35-40 minutes or until top is lightly browned.
  10. Remove from oven and serve warm with butter and jam.

All content and images are property of Sweet and Spicy Monkey. Please do not reprint this content without my permission. If you wish to include this recipe on your site, please re-write in your own words and use your own photographs and link back to this post for original recipe.
Follow Julie's board Sweet and Spicy Monkey on Pinterest.

Tuesday, January 12, 2016

Rosemary and Sun Dried Tomato Whole Wheat Focaccia Bread


I have been on a bread making kick. First, I made dinner rolls for Thanksgiving. Then I made a French Brioche loaf around Christmas time. Remember my Overnight Cranberry Lemon Eggnog French Toast? That was my very own French Brioche loaf I used in that!

And now I've made focaccia bread. I love focaccia bread with its soft texture and delicate flavors. So when I found a recipe to make skillet focaccia, I was doing my happy dance because I've been craving focaccia bread!

It's quite easy to make for a yeast bread and you can virtually do no wrong when making it. Unless your yeast is too old, your water is too hot or not hot enough, or you added too much flour.


You see, yeast is a living organism and if you add too hot of water, you can kill the yeast. The optimum temperature for dissolving the yeast needs to be between 90 and 110F degrees. On the other end of the spectrum, if the water isn't warm enough, it won't activate the yeast.

Proper measurement of flour is important when making bread because adding too much flour, weighs dough down, making it heavy, which makes it difficult to work with and hinders the rising process.

It's no wonder why so many people shy away from making their own bread after just going over those three tips. To say the least, bread making can be a little overwhelming. But this recipe is easy peasy! Yes, I just said that, Easy Peasy!

If you want to learn how to become a better bread maker, check out King Arthur Flour's pages for some awesome tips. They have you covered on bread making!

Let me be clear, I’m not sponsored by nor am I endorsing King Arthur Flour. I’m just sharing a great site for learning how to become a better bread maker and it also has a trouble shooting page so you can figure out what happened to your bread.

It’s like sharing information with a girlfriend, there’s just some things you need to share and I feel like sharing this great site with y’all! Plus, I find every time I visit their site, I learn something new! How can I keep that all to myself?


Anywho, back to this focaccia bread. You don't have to be a master bread maker to make it. Just follow the tips and you'll have this focaccia bread on your table tonight!


Rosemary and Sun Dried Tomato Whole Wheat Focaccia Bread

Recipe by Julie Murphy
Rosemary and sun dried tomatoes add a delicate Italian flavoring to this soft focaccia bread.
Prep time: 1 hour and 30 minutes (includes dough rising time)
Cook time: 25 minutes
Total time: 2 hours
Yield: One 12" loaf or two 6" loafs
Ingredients
  • 2 cups 100% whole grain whole wheat flour
  • 1 cup all-purpose flour
  • 1 teaspoon sea salt
  • 1 package yeast
  • 2 Tablespoons olive oil
  • 1 to 1 and 1/2 cups warm water
  • 1/4 cup fresh rosemary, removed from the stem
  • 1/4 cup sun-dried tomatoes, julienne cut
  • sprinkling of sea salt
Cooking Directions
  1. Prepare 12" skillet by generously coating inside with olive oil. You can also use two 6" skillets for 2 focaccia breads instead of the one. Set aside.
  2. In a large mixing bowl, combine water and yeast. Stir together with a fork to dissolve.
  3. Add 1 cup of wheat flour and 1/2 cup of AP flour to the yeast mixture.
  4. Using Low speed on your stand mixer, mix together for about 3 minutes until all flour is mixed. Cover with a towel and let rise in a warm place for 30 minutes.
  5. After 30 minutes, mix in olive oil, sea salt, sun dried tomatoes, and 2 Tablespoons of rosemary.
  6. Mix in remaining cup of wheat flour and 3/4 cup of AP flour on Low speed for 4-5 minutes. If dough is difficult to work with, add warm water, 1 Tablespoon at a time, until dough is more pliable. If dough is too sticky, gradually add in small amounts of AP flour until dough becomes more pliable. Dough should be soft, not hard and wrapping itself around the dough attachment.
  7. Sprinkle a small amount of AP flour on a clean, hard, dry surface. Remove dough from bowl and place on floured surface.
  8. Gently knead dough into a ball and place into prepared skillet. If using 2 skillets, cut ball in half and place each half into prepared skillets.
  9. Gently press dough down so it fills up the bottom of the skillet.
  10. Cover with a towel and let rise in a warm place for 30-45 minutes. At this time, you can preheat oven to 400F degrees.
  11. Remove towel and brush olive oil over the top of the dough.
  12. Using a sharp knife, make diagonal cuts into the top of the dough.
  13. Sprinkle sea salt and remaining rosemary over the top.
  14. Bake in preheated oven for 25 minutes or until top is lightly browned.
  15. Remove from oven, sprinkle sea salt over the top, and serve with warmed olive oil.

Inspired by Gerry at Foodness Gracious.

All content and images are property of Sweet and Spicy Monkey. Please do not reprint this content without my permission. If you wish to include this recipe on your site, please re-write in your own words and use your own photographs and link back to this post for original recipe.
Follow Julie's board Sweet and Spicy Monkey on Pinterest.

Monday, September 21, 2015

Hibiscus Syrup


I think I'm falling in love. Or maybe it's just an obsession for me. I don't know which it is, but whatever it is, I'm loving it!

I'm talking about hibiscus. Remember when I made my Peach Hibiscus ice cream a few weeks back? And it had that luscious red syrup dripping down the ice cream? Well, that was hibiscus syrup.

I've been meaning to share it with y'all after I did that post but I forgot and one thing led to another. Kind of like when you go into a room looking for your car keys and you notice clean clothes you still haven't folded sitting in the basket. So you start folding them and by the time the clean laundry is folded, you've forgotten all about the keys. You know what I'm talking about!


Anyways, before I forget again, let's get to this hibiscus syrup. It's not like other syrups I've made. This syrup is sweet, thick and with a beautiful red coloring.

You can use it for anything you like too. Pancakes, waffles, ice cream, drinks, anything you want. Even right out of the jar on a spoon.


Yes it's just that good!

Just like with my other hibiscus recipes, use only organic hibiscus. As with any food, herb, or plant, please use hibiscus with caution. Or if you are nursing or pregnant, then this recipe is not intended for you, as it is not recommended due to adverse effects.


Hibiscus Syrup

Recipe by Julie Murphy
A delicious simple syrup flavored with hibiscus flowers.
Prep time: 5 minutes
Cook time: 50 minutes
Total time: approximately 1 hour
Yield: 1 and 1/2 cups
Ingredients
  • 4 Tablespoons organic dried Hibiscus flowers
  • 2 cups water
  • 1 cup granulated sugar
  • 1 lime wedge, juice of
Cooking Directions
  1. Add dried hibiscus flowers and water to a small sauce pan. Bring to a boil over medium heat, stirring occasionally.
  2. Turn off heat and let sit for 45 minutes to 1 hour.
  3. After hibiscus water has been allowed to sit and deepen in color, pour hibiscus water through fine mesh strainer seated over a large pan. Press hibiscus flowers down with a wooden spoon to extract most of the water.
  4. Place pan containing strained hibiscus water on stove top.
  5. Add in sugar and juice of 1 lime wedge.
  6. Cook over medium to low heat until mixture starts to thicken, stirring constantly so sugar doesn't burn. This should take about 20 to 30 minutes.
  7. If it starts to boil vigorously, turn heat down to low. You want to maintain a mild boil while stirring constantly.
  8. After mixture starts to thicken, remove from heat and let cool to room temperature.
  9. Pour into a glass jar and refrigerate.
  10. Can be stored up to 4 weeks in the refrigerator.
  11. You can use hibiscus syrup as a topping to ice creams or cakes, to flavor drinks, or over pancakes and waffles.

All content and images are property of Sweet and Spicy Monkey. Please do not reprint this content without my permission. If you wish to include this recipe on your site, please re-write in your own words and use your own photographs and link back to this post for original recipe.
Follow Julie's board Sweet and Spicy Monkey on Pinterest.

Shared with: Savoring Saturdays

Friday, August 28, 2015

Matcha Quinoa Granola


As the end of August nears, days start getting shorter, and the kids go back to school, it's only obvious that Fall is just around the corner. Wow, where did this year go? It feels like only yesterday when we were expecting snow and freezing temperatures.

Have I mentioned how much I love fall? If you didn't know yet, I absolutely L-O-V-E fall. I love everything about it. The cooler days, football season, the smell of spices like cinnamon, nutmeg, and cloves permeating from the kitchen. And most of all, the freedom to bake! Yes, actually being able to bake anytime I want without worrying about heating up the house. Baking freedom! Can I get a Woot! Woot!

This recipe I'm sharing with y'all is perfect for fall too. And it makes for a healthy start to your day as I've combined Matcha powder, quinoa, and chia seeds in my granola. Yes, quinoa in my granola.


I got the idea from a store bought granola I recently purchased. The quinoa gives the granola an extra little crunch.

A delicious and lightly sweetened homemade granola that's so much better tasting than the store bought types with their heavy sugar content. And you can always personalize it by adding dried fruit, chocolate chips, or sunflower seeds. Your imagination is the limit!

You and your family will also love the way your home smells when you make this granola. If you didn't know it already, baking smells have such a relaxing effect on people.


So go release some stress by getting busy in the kitchen with this easy homemade granola recipe. It will bring a smile to your face with that first bite. But not just because you know you're eating something healthy that you made, but because it also taste better than any granola you've ever brought home from the store.

Matcha Quinoa Granola

Recipe by Julie Murphy
An easy and healthy granola with Matcha powder, quinoa, and chia seeds for breakfast or snacking.
Prep time: 5 minutes
Cook time: 25 miinutes
Yield: 3 1/2 cups
Ingredients
  • 3 cups Old Fashioned oats
  • 2 Tablespoons organic brown sugar
  • 1/2 teaspoon cinnamon
  • 1/4 cup coconut oil
  • 1/2 cup cooked quinoa
  • 2 teaspoons Matcha powder
  • 1/4 cup pure Maple syrup
  • 2 Tablespoons chia seeds
  • dash pink Himalayan salt
  • 1/2 cup organic coconut flakes, unsweetened
  • 1/2 cup chopped pecans
Cooking Directions
  1. Preheat oven to 325F degrees.
  2. Prepare a cookie sheet by wiping down with a small amount of (your choice) coconut oil, sunflower oil, butter, or non-stick cooking spray. Wipe off any excess oil with a clean, dry paper towel. Doing this will help decrease any chance of burning your granola. Set prepared cookie sheet aside.
  3. In a large mixing bowl, combine oats, brown sugar, cinnamon, coconut oil, quinoa, Matcha powder, maple syrup, chia seeds, and salt. Mix well.
  4. Spread granola evenly over cookie sheet.
  5. Place into oven and bake for 20 to 25 minutes, stirring granola every 5 minutes. It's very important to stir granola every 5 minutes, otherwise you will end up with burnt granola (just sayin, not like it happened to me or anything).
  6. Remove from oven.
  7. Stir in chopped pecans and coconut. Allow to let cool completely, approximately 1 hour.
  8. Store in an airtight container.
  9. Can be used for breakfast cereal, mixed in with pancake mix, snacking, or as a topping for yogurt, ice cream, or fruit cobblers.

*Helpful Hints*

- Always add dried fruits, nuts, and seeds after granola comes out of the oven.

- You can always use sweetened coconut flakes, brown sugar, or sea salt instead of organic and unsweetened ingredients.

- You can leave out the chia seeds if you don’t like them.


All content and images are property of Sweet and Spicy Monkey. Please do not reprint this content without my permission. If you wish to include this recipe on your site, please re-write in your own words and use your own photographs and link back to this post for original recipe.


Thursday, July 23, 2015

No-Fry Fried Ice Cream


Some recipes are just so easy, I can't believe I'm sharing them with y'all. Don't get me wrong, it doesn't mean I'm not sharing them because if I never heard of them then obviously there are others who have never heard of them either. So I, as a food blogger, am obligated to share them with you.

Today I'm sharing an easy No-fry Fried Ice Cream. Yes, you can have the crispness of fried without the frying.

As I said, this recipe is so easy and is great when you forget to pick up dessert for your neighbors party or when you get an impromptu drop in from your bestie. Plus its fun to make!


All you need is ice cream (your choice of flavor), Honey Bunches of Oats cereal, and granola. And optional are the whipped cream, chocolate or caramel sauce, cinnamon sugar, bananas, cherries, or sprinkles. You can even make your own little serving bowls out of tortillas or cookies to serve these up in!

Usually I see this recipe with vanilla ice cream. I happened to have vanilla ice cream, chocolate gelato, and sea salt caramel gelato in my freezer at the time, so I decided to try this with all these flavors. I have to say the sea salt caramel gelato with the cereal coating and caramel sauce were out of this world! I also thought the caramel gelato molded into ice cream balls the best.

And just because this recipe is easy, doesn't mean it has to be simple. This crunchy ice cream can become the star in your banana split.

So take your ice cream to a whole new level with this "fried" ice cream, you're taste buds will thank you {smile}.


No-Fry Fried Ice Cream

Easy "fried" ice cream without the frying and all the empty calories from frying.
Prep time: 10
Cook time: 0
Total time: 10
Ingredients
  • 1 box Honey Bunches of Oats cereal
  • 1 carton ice cream (your choice of flavor)
  • 1/4 cup granola cereal
  • caramel sauce
  • chocolate sauce
  • sprinkles
  • whipped cream
  • 1 cupcake pan
  • 1 large ice cream scoop
Directions
  1. Using a large ice cream scoop, scoop ice cream and if needed, while ice cream is still in the scooper, mold with your hands to make a ball shape. Add more ice cream to ice cream ball if needed.
  2. Place each ice cream ball into a separate mold on a cupcake pan.
  3. Place cupcake pan into freezer and freeze for about 30 minutes to let ice cream balls set.
  4. While ice cream balls are setting, add granola and about 2 cups Honey Bunches of Oats cereal.
  5. Either using your hands or bottom of a glass, press down on cereal to break it into small pieces. Continue doing until you get desired size.
  6. Remove cupcake pan from freezer, use a spoon to loosen and remove ice cream balls from pan.
  7. Place ice cream ball into bowl with cereal, gently press cereal pieces into ice cream ball, making sure to coat entire ice cream ball.
  8. Place "fried" ice cream ball into a separate bowl and place into freezer as you continue to coat the rest of the ice cream balls with cereal. Placing finished "fried" ice cream balls into bowl already in the freezer.
  9. After all ice cream balls are coated with cereal, place into serving bowls, and top with your choice of caramel sauce, chocolate sauce, sprinkles, and/or whipped cream. You can also pour the remaining crushed cereal over your fried ice cream for extra crunch.
  10. Serve and be prepared to have a party for your taste buds!


All content and images are property of Sweet and Spicy Monkey. Please do not reprint this content without my permission. If you wish to include this recipe on your site, please re-write in your own words and use your own photographs and link back to this post for original recipe.
Follow Julie's board Sweet and Spicy Monkey on Pinterest.

Tuesday, July 14, 2015

Skinny Lemonade


It's hot out here in Georgia. Now I know out West, y'all think 95 degrees here in Georgia is nothing compared to your hot summer days of 112 and up. However, you have to remember that we have this thing called humidity out here. And add that humidity factor in and our measly 95 degrees shoots up another 5 to 10 degrees.

It's like opening your door and walking into an outdoor sauna. Those clean dry clothes you put on for work 5 minutes ago are now finding themselves drenched with sweat, sticking to your now wet body, and you feel like you can't breathe because of the stifling heat. And we're supposed to get up to 100 degrees this week!

So when Mother Nature decides to turn up the heat, I find myself reaching for this Skinny lemonade. It's a sip of refreshment on a hot summer day, without all the sugar calories.


Lemonade is such a simple drink to make with freshly squeezed lemons, water, and Splenda. That's it! And you can vary the Splenda and water depending upon you're taste. If you like your lemonade a little tart, add less Splenda. If you prefer your lemonade a little sweeter, add a little more water and Splenda.

You can add a little pulp to your lemonade like I do. Or you can add other fruit juices to your lemonade like cherry, orange, or watermelon. It's so easy to customize this drink to your individual taste.

And the best part about it, is the Splenda doesn't sink to the bottom like sugar, so you're guaranteed with a sweet lemon taste in every sip. Ahhh, refreshing!

I'm going to go change into some dry clothes now...

Skinny Lemonade

Recipe by Julie Murphy
A refreshingly sweet sugar-free alternative to the classic lemonade drink.
Prep time: 5 minutes
Cook time: 2 minutes
Total time: 7 minutes
Yield: 3 and 1/2 quarts
Ingredients
  • 10 cups water
  • 3 cups lemon juice, freshly squeezed
  • 2 and 1/2 cups Splenda (you can add 1/2 cup more if you like it sweeter)
Directions
  1. In a glass measuring cup, add 2 cups of water.
  2. Place in the microwave and heat for 1 to 2 minutes.
  3. Remove from microwave and stir in Splenda.
  4. In a large pitcher, add remaining water and heated Splenda water. Mix together.
  5. Add in lemon juice and stir.
  6. Let chill in the refrigerator for at least 4 hours and serve in a tall glass, with or without ice cubes.
  7. Garnish with lemon slices or mint leaves.

All content and images are property of Sweet and Spicy Monkey. Please do not reprint this content without my permission. If you wish to include this recipe on your site, please re-write in your own words and use your own photographs and link back to this post for original recipe.
Follow Julie's board Sweet and Spicy Monkey on Pinterest.

Shared with ~ Freedom Fridays with All My Bloggy Friends #89

Sunday, June 14, 2015

Homemade Ice Cream Sandwiches


Sometimes you just need to give in. Throw out all the must Do's and just give in to your inner child. That's how I felt when I came across the idea of these homemade ice cream sandwiches.

I have been so good with cutting out refined sugars and using agave, honey, or coconut sugar since I completed the Sugar Crush challenge in April. But when I saw this idea in a magazine, I just had to give in and make these!


I mean how could I say No to ice cream and cookies scrunched together to make these "homemade" ice cream sandwiches? I know, right?

Now you can use any store bought cookies and ice cream to make these with, but when I saw these lemon chocolate chip cookies...need I say anymore? Y'all know my weakness for lemon (and if you don't, just scroll through my recipes. You'll notice I also L-O-V-E coconut).


Pair these cookies with some frozen yogurt (I tried to keep it healthy) and YUM! I felt like a kid again with the ice cream, er, frozen yogurt dripping all over my hands as I tried to eat my ice cream sandwich!

As you can see, I also tried this recipe with sugar cookies that I rolled into shapes with a mint chocolate gelato. I was surprised with how the sugar cookies held up after rolling the dough out flat. I thought I had made them too thin, but they held together until the very. Last. Bite. Not even crumbling apart in my hands!


Not only are these homemade ice cream sandwiches fun to eat, but they're also fun to make. If you have kids, they will love helping you make these on a hot summer day. They'll also love helping you eat them!

And you don't have to be a whiz in the kitchen to make them either. Just as long as you know how to turn on the oven, watch a timer, and scrunch ice cream between two cookies then you can make these homemade ice cream sandwiches.

Leaving you more "me" time.

Homemade Ice Cream Sandwiches

Easy ice cream sandwiches you can make at home.
Prep time: 5 minutes
Cook time: 10 to 12 minutes
Total time: 1 hour and 17 minutes (includes cooling time for cookies)
Ingredients
  • 1 package store bought cookie dough
  • 1 carton ice cream
Directions
  1. Bake cookies as directed on package.
  2. If using sugar cookies and you want to create different shapes, roll out on a floured surface with a floured rolling pin. Cut shapes with a sharp knife or a pizza cutter. A pizza cutter works great for this! Bake as directed on package.
  3. Remove cookies from oven and let cool for at least 1 hour before assembling ice cream sandwiches.
  4. To make ice cream sandwiches, drop 1 scoop of ice cream onto a cookie and press another cookie on top.
  5. Serve and enjoy!

Inspired by Better Homes and Gardens 2013 Cookbook recipe - Tropical Treat Ice Cream Sandwiches.
 
All content and images are property of Sweet and Spicy Monkey. Please do not reprint this content without my permission. If you wish to include this recipe on your site, please re-write in your own words and use your own photographs and link back to this post for original recipe.
Follow Julie's board Sweet and Spicy Monkey on Pinterest.

Tuesday, May 5, 2015

Homemade Pineapple Salsa


Today is Cinco de Mayo, one of my favorite Holidays of the year because it gives me an excuse to eat Mexican food! Not that I need an excuse to eat Mexican food because I just love it...but I have a reason today! {smile}

Now I didn't think I was going to be able to share this recipe with you today as I just made this delicious pineapple salsa this morning. And I still had to write out the recipe, take photos, edit, and double edit all myself.

Whew, that sounds like so much to do before the celebrations start this evening! So I'm going to get right to the recipe so you still have time to run to the store, pick up your ingredients, and whip up this salsa before your guests arrive...or the family comes home for dinner.


Whichever one it is, they're going to love this salsa made with all natural ingredients. Yep, no bottled salsa here. This is made with fresh tomatoes, onions, jalapeños, cilantro, garlic, with both lemon and lime juice. Plus you can make it depending on your tastes, mild, medium, or hot. And it’s so easy to make.

Now the pineapple was a last minute addition, and I only had a few chunks of fresh pineapple on hand, so I used canned pineapple chunks too. But the flavoring is so much better with the fresh pineapple chunks. Whichever you have available to you, the pineapple really makes this salsa!


Ok, enough from me, onto the recipe. With that said, I raise my chip to you (full of fresh pineapple salsa, of course) and wish you a Happy Cinco de Mayo!


Homemade Pineapple Salsa

Recipe by Julie Murphy
A delicious homemade pineapple salsa
Prep time: 20
Cook time: 0
Total time: 30
Yield: 1 and 1/2 Liters
Ingredients
  • 6 tomatoes
  • 2 cups fresh pineapple chunks (or 1 - 20 ounce can of pineapple chunks, drained)
  • 2 jalapenos, seeded
  • 1 sweet yellow onion
  • 1 small red onion (or 1/2 of a large one)
  • 1 cup fresh cilantro
  • 6 garlic cloves
  • 2-3 Tablespoons fresh lime juice
  • Juice of 1 lemon
  • 1 teaspoon agave nectar
  • 1 Tablespoon Cumin
  • 1 teaspoon chili powder
  • 1/2 to 1 teaspoon sea salt
  • Pinch paprika
  • 2-3 dashes ground black pepper
Directions
  1. If you like a chunky salsa (like me) leave a couple of the tomatoes and 1/2 of the sweet onion out and chop by hand. Adding into large pitcher and setting aside.
  2. While you place all other ingredients into a food processor or blender and pulse until you get desired texture and add into pitcher.
  3. Stir together well, making sure to blend ingredients on bottom of pitcher into mixture. A wooden spoon works well for this.
  4. Serve immediately or you can cover and refrigerate until serving.
  5. Best served with tortilla chips, nachos, tacos, eggs, or any Mexican dish.
  6. Refrigerate in a covered container for up to 1 week.


*Helpful Hints*

- Wear gloves when cutting and seeding the jalapenos.

- If you like a Hot salsa, leave the seeds in the jalapenos.

- For a milder salsa, you can leave out the jalapenos.

- Remember, its much easier to add salt than fix a too salty dish, so add little salt at a time to taste.


All content and images are property of Sweet and Spicy Monkey. Please do not reprint this content without my permission. If you wish to include this recipe on your site, please re-write in your own words and use your own photographs and link back to this post for original recipe.
Follow Julie's board Sweet and Spicy Monkey on Pinterest.

Sunday, March 22, 2015

Soda Bread with Cranberries


Ever since I made my mom's Irish Soda Bread last week for St. Patrick's Day, I've been wondering what it would taste like with cranberries instead of raisins. I know, it sounds so yummy, doesn't it?

Since there are only mere crumbs left of the last loaf, I made another one. Well, ok, I'm on my third loaf now, I really do love this bread!


This last time I made it a little more healthy by using organic flour, Splenda, a sugar substitute, since I'm still on my Sugar Crush Challenge, and I added Craisins, dried cranberries, instead of raisins. It was even more scrumptious than I imagined as the cranberries added a little tartness to the sweetness of this bread. D-E-L-I-C-I-O-U-S!

And the amazing thing about this recipe, is you can not only make it for St. Patrick's Day too, but it will compliment your Thanksgiving meal too with the cranberries.


With its sweet, crispy crust and soft, moist center, this bread is sure to be your family's favorite no matter what time of year you serve it up.
________________________________________

Soda Bread with Cranberries

Makes 1 loaf
________________________________________

Ingredients

3 cups all-purpose flour, sifted (I used organic flour for this loaf)

3 teaspoons baking powder

½ teaspoon baking soda

½ teaspoon sea salt

3 Tablespoons Splenda (Stevia or plain granulated sugar)

1 and ½ cups Craisins (dried cranberries)

1 and 1/3 cups buttermilk
________________________________________

Directions

Preheat oven to 375F degrees.

Line cookie sheet with parchment paper or you can use an ungreased cookie sheet. Set aside.

In a large mixing bowl, add all dry ingredients – sifted flour, baking powder, baking soda, sea salt, and sugar.

Mix Craisins with flour mixture, making sure all Craisins are covered with flour mixture and Craisins are not clumped together.

Add in buttermilk.

Using a bread attachment on your stand mixer, blend all ingredients together until all flour is mixed.

If mixing by hand, place dough on a flour covered surface and knead about 10 times.

Dough should be sticky.

Place on prepared cookie sheet and place into oven for 45 minutes.

After 45 minutes, remove from oven and brush with hot sugar water, brushing all exposed surfaces.

Place back into oven for 10 minutes, or until bread is a golden brown. Check after 5 minutes to be sure it doesn’t burn.

Remove from oven and let cool for 10 minutes before serving.

Best served with margarine or butter.

Ingredients for Glaze

2 Tablespoons Splenda (Stevia or plain granulated sugar)

2 Tablespoons hot water

Directions for glaze In a small bowl, add hot water and sugar. Mix together and brush over bread. Return to steps above.


*Helpful Hints*

- If you find you run out of buttermilk or don't have any on hand when you want to make this bread, for 1 cup of buttermilk, you can substitute 1 cup of milk with either 1 Tablespoon of white vinegar or lemon juice, letting it sit for 5 minutes before using it in the recipe.

- Or you can substitute 1 cup plain yogurt for 1 cup of buttermilk.

- If bread is not sticky after mixing all the ingredients together, add a little buttermilk at a time until dough is sticky. Or you can use any of the above buttermilk substitutes.


All content and images are property of Sweet and Spicy Monkey. Please do not reprint this content without my permission. If you wish to include this recipe on your site, please re-write in your own words and use your own photographs and link back to this post for original recipe.
Follow Julie's board Sweet and Spicy Monkey on Pinterest.

Shared with: Sweet and Savoury Sunday #105, Munching Mondays #83

Friday, February 27, 2015

Easy Homemade Hot Chocolate


My kitchen has been closed this week. Not because of the snow, but because I have a head cold. Yes, the dreaded head cold. All week long I've felt like a fire breathing dragon. Every breath I took in and out, my nose and throat felt like they were on fire.

And the only thought I had all week was "how do I put this fire out?"

I went for the fighting fire with fire option. Yep, everything I put in my mouth was hot. Well, not hot HOT because that would burn my mouth, but warm hot. I drank coffee (because no matter how sick I am, I still need my coffee, only coffee lovers can understand this {smile}), hot tea, Theraflu, hot water and lime (because that's all I found in the fridge at work), chicken broth, and hot chocolate.

The only foods I really prepared were the grilled cheese sandwiches to go with my chicken broth. Yep, comfort food for the head cold, hot liquids and grilled cheese sandwiches.

So that's the reason I literally shut down this week. I didn't even feel good enough to get on social media. Oh, I might have dabbled a little to still feel alive and connected, but not like I normally do.

Today is the first day I have felt like doing anything. My nose has stopped running, the fire in the back of my throat is only smoldering, and I can actually think. Yes, a head cold to me is like a government shutdown.

I have to say there was one good thing that came of this. And that was making homemade hot chocolate. Since I was drinking all these hot liquids and it was freezing outside, I started craving me some hot chocolate. Lucky for me I had some chocolate syrup, milk, and cream in the fridge because I sure didn't feel like getting dressed and driving anywhere.

So I made this quick version of hot chocolate. And what goes best on top of hot chocolate? Whipped cream. So I whipped up a batch of whipped cream for my hot chocolate.

I really do think this is what cured me. The cool, creamy whipped cream and the warm chocolatiness running over my scorched throat helped put out the fires of this nasty head cold and brought me back to the world of the living.

It’s good to be back {smile}.

Easy Homemade Hot Chocolate

Serves 2

Ingredients

2 cups milk

5-6 Tablespoons chocolate syrup (recipe for homemade chocolate syrup here)*

Directions

In a small saucepan, add milk and chocolate syrup.

Heat over medium heat for about 10-15 minutes, stirring constantly. Don't let it boil as you don't want the milk to burn.

Once milk warms up, pour into mugs and enjoy.

Best served with whipped cream or marshmallows.

*Helpful Hints*

- Recipe for making your own chocolate syrup is here.

All content and images are property of Sweet and Spicy Monkey. Please do not reprint this content without my permission. If you wish to include this recipe on your site, please re-write in your own words and use your own photographs and link back to this post for original recipe.
Follow Julie's board Sweet and Spicy Monkey on Pinterest.

Shared with: Totally Terrific Tuesday Link Party #23, Foodie Friends Friday Linky Party #137

Friday, February 13, 2015

Sweet Dark Cherry Jam

 
They say, "Life is like a bowl of cherries", but in my kitchen this week, "Life is like a jar of cherry jam".

Don't be acting surprised, I told warned y'all that I had been craving cherries and I'm just getting warmed up over here.


This cherry jam is everything you expect it to be, a taste of sweet, dark summer cherries. Who said you have to wait until summer to have cherries? Certainly not me! As I'm sharing with you today this recipe to make your own Sweet Dark Cherry Jam... in the middle of winter. Sweet. Dark. Cherry. Jam. On your table. Today.


And since its winter and cherries aren't in season, I made this with frozen cherries, the next best thing to fresh. Plus, they've already been pitted...yaaaay!

Just think of all the things you can put this cherry jam on - biscuits, French toast, pancakes, waffles, PB & jelly sandwiches, your morning English muffin, toast, or bagel....and that's just a few!


Bring this Sweet Dark Cherry jam to your table today and see how many smiles it brings.

Sweet Dark Cherry Jam

Makes about 3 - 8 ounce jars

Ingredients

1 cup Sweet Dark cherries, frozen

1 cup water

1 cup granulated sugar

Juice of 2 limes

Directions

In a medium saucepan with a heavy bottom, add frozen cherries, water, sugar, and lime juice. Over medium to low heat, cook while stirring occasionally, until mixture starts to boil.

Once boiling, turn heat down to low and continue cooking over a low simmer, uncovered and stirring occasionally until mixture starts to thicken, about 1 to 2 hours, give or take, depending on how thick you want your jam. Keep in mind, jam will thicken as it cools.

After cooking, spoon into sterilized jars, wiping off the rims after filling, and place on lids. As the jam cools, the lids will pop and seal.

Store in the refrigerator for up to 3 months.

All content and images are property of Sweet and Spicy Monkey. Please do not reprint this content without my permission. If you wish to include this recipe on your site, please re-write in your own words and use your own photographs and link back to this post for original recipe.
Follow Julie's board Sweet and Spicy Monkey on Pinterest.

Shared with: Savoring Saturdays #49