Sweet and Spicy Monkey has moved to: www.sweetandspicymonkey.com

Showing posts with label Halloween. Show all posts

Thursday, October 29, 2015

Salted Chocolate Candy Corn Cookies


The time for ghosts, witches, zombies, and ghouls is finally here this weekend! Can you tell I'm excited? I love Halloween!

I love the costumes, the scary movies, and all the Halloween treats. I mean what other time of the year is it considered okay to dress up and go out in public like a zombie or a ninja turtle?

Don't even get me started with the spooky movies. I love Halloween, Friday the 13th, Nightmare on Elm Street, Frankenstein, Bram Stoker's Dracula, and Sleepy Hollow to name a few. I actually start watching scary movies in September so I get my fill of them until next year!

This is the pan version of this recipe. Still soft, chewy & delicious!

And the Halloween treats! Oh, there's just so many cool things you can do with food for Halloween fun. When else can you eat foods that resemble bloodied body parts, brains, eyeballs, and vomit and not make yourself sick?

Today's recipe doesn't resemble any bloodied body parts or vomit. Sorry, maybe next year. Today's recipe is made with Chocolate Sea Salt Candy Corn. Yes, I really think Brach's gets two thumbs up for these candies!


Have you tried them yet? I'm not much of a candy corn person but when I saw these at the store...how could I resist Sea. Salted. Chocolate? Move over salted caramel!

As you can see, I couldn't resist! Add these little candies to cookies and you get a spooktacular result.

Soft and slightly chewy, chocolatey cookies that will wake the dead with their deliciousness!

These cookies make for the perfect snack while you're watching all those scary movies this Halloween. But watch out because they will disappear right before your eyes!


Happy Halloween!

Salted Chocolate Candy Corn Cookies

Recipe by Julie Murphy
Soft and slightly chewy chocolate chip cookies made with Brach's Sea Salt Chocolate Candy Corns that are sprinkled with sea salt for the ultimate sweet and salty combination.
Prep time: 15 minutes
Cook time: 10 minutes
Total time: 1 hour total cooking time
Yield: 5 dozen cookies
Ingredients
  • 2 cups All-purpose flour
  • 1 teaspoon baking soda
  • 1/2 teaspoon sea salt
  • 1 Tablespoon corn starch
  • 1/2 cup unsweetened cocoa powder
  • 1 cup (2 sticks) unsalted butter, room temperature
  • 3/4 cup granulated sugar
  • 3/4 cup brown sugar, packed
  • 1 teaspoon vanilla extract
  • 2 eggs
  • 1 cup Sea salt chocolate candy corn
  • 1 cup miniature chocolate chips
Cooking Directions
  1. Preheat oven to 350F degrees.
  2. Line cookie sheet with parchment paper. Set aside.
  3. In a medium bowl, add flour, baking soda, salt, corn starch, and cocoa powder. Set aside.
  4. In a large mixing bowl, add butter, sugar, brown sugar, and vanilla. Beat together until creamy.
  5. Blend eggs in one at a time until combined.
  6. Gradually add in dry mixture.
  7. By hand, stir in mini chocolate chips and sea salt chocolate candy corns until blended throughout mixture.
  8. Drop about 1 rounded Tablespoon of dough for each cookie onto prepared cookie sheet, leaving 2 inches between cookies.
  9. Place in oven and bake for 10 minutes.
  10. Remove from oven, sprinkle with sea salt, and let cookies cool for 5 minutes before transferring to a wire rack to cool completely.
  11. For the pan cookie variation of these cookies, using a cookie sheet lined with parchment paper, spread cookie dough evenly over cookie sheet.
  12. Bake at 325F degrees for 20 to 25 minutes. Remove from oven, sprinkle with sea salt, and let cool for 20 minutes before cutting into cookies.
  13. Store in an airtight container up to one week.


*Helpful Hints*

- If you're oven runs hotter than most, you might need to lower the baking temperature by 25F degrees so the candy corns won't burn. An example being with a very hot oven, turn the baking temperature down to 325F degrees, instead of 350F degrees, for the cookies and 300F degrees for the pan cookie variation.

All content and images are property of Sweet and Spicy Monkey. Please do not reprint this content without my permission. If you wish to include this recipe on your site, please re-write in your own words and use your own photographs and link back to this post for original recipe.

Monday, October 26, 2015

Halloween Apples

 
I'm so excited to be sharing today’s recipe, Halloween Apples, and just in time for Halloween! I know it doesn't sound like anything special, but think of melted candy, Halloween sprinkles, and apples.
 

It's like a cupcake, but with apples, and without the cake. So it's healthy for you, right?
 
I love these tombstone sprinkles!

I have to confess, I had so much fun making these because it's, well, so FUN to do! Or maybe I just really get into making my food!
 

Let's just say Thor was looking at me and shaking his little feline head. Really all I needed was a witch’s hat and a giant cauldron to set the scene in my kitchen the day I made these!
 

And the best part about making these (other than eating them) is you don't have to have any cooking skills. Well, okay, it wouldn't hurt to know how to operate a microwave.

But that's the extent of cooking skills needed. If you can operate a microwave oven, then you can make these Halloween Apples.

Plus you can decorate 12 apples in under 20 minutes. How's that for time management?

And they're the healthier choice for Halloween treats! Yes, I believe if I tell myself that enough times, then it’s true. They ARE healthy!


Halloween Apples

Recipe by Julie Murphy
Halloween inspired apples for a healthier Halloween treat!
Prep time: 5 minutes
Cook time: 2 to 3 minutes
Total time: 20 minutes
Yield: 3 lbs. Halloween apples
Ingredients
  • 3 lbs. mini Granny Smith apples, washed well, rinsed, and dried
  • 2 - 12 ounces white candy melts
  • 1 packet (30 count) Bamboo lollipop sticks
  • 2-3 small bottles Halloween cupcake sprinkles
Directions
  1. After apples have been washed, rinsed, and dried, remove the stems.
  2. Insert lollipop sticks, about 1 inch, into center of apples where stem once was. Set apples with sticks aside.
  3. Line a cookie sheet with wax paper. Set aside.
  4. Place 3 small bowls on counter where you will be decorating apples. If no shaker top is on your sprinkle bottle, pour sprinkles into separate small bowls.
  5. Place 1 clean spoon near sprinkle bowls.
  6. In a medium to large microwave-proof bowl, pour in 1 bag of candy melts. (I found it easier to use 1 bag of candy melts at a time when making my Halloween Apples.)
  7. Place into microwave oven and microwave on High for 2 to 3 minutes, stirring with a wooden spoon every 20 to 30 seconds until all candy melts are melted. Keep in mind, candy melts will not look melted until you stir them and stirring every 20-30 seconds helps prevent burning the candy melts.
  8. After candy melts are melted, its time to start dipping the apples.
  9. Grabbing apples by the lollipop sticks, insert the apple into the melted candy and spin around the bowl, coating the apple with melted candy. You can use a spatula to cover the area around the stick and cover up any bare spots on the apple.
  10. After apples are coated with candy melts, sprinkle with Halloween sprinkles by either sprinkling over the apple or spooning sprinkles over the apple while holding the apple over the bowl.
  11. Place candy coated apples on wax paper. Repeat process with remaining apples.
  12. Place into the refrigerator to help set the candy coating.
  13. Serve at room temperature.


Cinnamon coated apples
I had some remaining apples so I made Cinnamon Coated Apples just for fun! I hope you love these too!


Cinnamon Coated Apples

Recipe by Julie Murphy
Cinnamon coated apples that are a deliciously sweet treat for Halloween and Thanksgiving holidays.
Prep time: 5 minutes
Cook time: 2 minutes
Total time: 10 minutes
Yield: 5 cinnamon coated apples
Ingredients
  • 5 mini Granny Smith apples
  • 1/2 to 3/4 cup white candy melts
  • 1/2 cup cinnamon chips
  • 1/4 cup sugar
  • 1 to 2 teaspoons ground cinnamon


Directions
  1. After apples have been washed, rinsed, and dried, remove the stems.
  2. Insert lollipop sticks, about 1 inch, into center of apples where stem once was. Set apples with sticks aside.
  3. Line a cookie sheet with wax paper. Set aside.
  4. Mix sugar and cinnamon together in a small bowl. Place on counter where you will be decorating apples.
  5. Place 1 clean spoon near bowl.
  6. In a medium to large microwave-proof bowl, pour in cinnamon chips and candy melts.
  7. Place into microwave oven and microwave on High for 1 to 2 minutes, stirring with a wooden spoon every 20 to 30 seconds until all candy is melted. Keep in mind, candy will not look melted until you stir them and stirring every 20-30 seconds helps prevent burning the candy.
  8. After candy is melted, its time to start dipping the apples.
  9. Grabbing apples by the lollipop sticks, insert the apple into the melted candy and spin around the bowl, coating the apple with melted candy. You can use a spatula to cover the area around the stick and cover up any bare spots on the apple.
  10. After apples are coated with melted cinnamon, sprinkle with cinnamon sugar by spooning cinnamon sugar over the apple while holding the apple over the bowl.
  11. Place candy coated apples on wax paper. Repeat process with remaining apples.
  12. Place into the refrigerator to help set the candy coating.
  13. Serve at room temperature.        
*Helpful Hints*
 
- You can use white chocolate chips mixed with vegetable or coconut oil instead of candy melts. Use 1 teaspoon of oil to 1 cup white chocolate chips.
 
All content and images are property of Sweet and Spicy Monkey. Please do not reprint this content without my permission. If you wish to include this recipe on your site, please re-write in your own words and use your own photographs and link back to this post for original recipe.
Follow Julie's board Sweet and Spicy Monkey on Pinterest.

Shared with: Savoring Saturdays

Tuesday, October 20, 2015

Pumpkin Marshmallow Popcorn Balls


Fall is finally here and Halloween is just around the corner. And I can't let October slip away without making some Halloween inspired treats. After all, what kind of food blogger would I be if I left y'all hanging like that?

Don't worry your pretty little heads because I have a special treat for you today, Pumpkin Marshmallow Popcorn Balls.

Yes, I have slipped into the dark side and (finally) made a pumpkin flavored treat! But these are nothing like your ordinary pumpkin treats. These are ooey, gooey marshmallow combined with lightly salted popcorn for a sweet & salty snack attack!


Not only are they all that, but they're made to resemble small pumpkins for a festive Halloween or Thanksgiving treat.

I have to say I was excited as a little kid on Christmas morning when I found this recipe. Just the thought of marshmallowey goodness and popcorn made me shiver with excitement! I mean who can resist having their hands covered with gooey marshmallow, right?

What's more fun is the kids can help you make these too! Just be sure the cat and dog are nowhere to be found during the making process or you will have little hands stuck on Fido's hair!


I'm hoping these Pumpkin Marshmallow Popcorn Balls bring out the kid in you too!

Pumpkin Marshmallow Popcorn Balls

Pumpkin marshmallow popcorn balls are both sweet & salty, crunchy & gooey. Perfect for both Halloween and Thanksgiving!
Prep time: 5 minutes
Cook time: 10 minutes
Total time: 35 minutes
Yield: 1 dozen popcorn balls
Ingredients
  • 2 - 3.2 ounce bags lightly salted, light butter microwave popcorn, uncooked
  • 1- 16 ounce bag miniature marshmallows
  • 1/2 cup + 1 Tablespoon butter or margarine
  • 1 teaspoon pumpkin pie spice extract
  • 1 teaspoon vanilla extract
  • 2 to 3 drops red & yellow food coloring
  • green writing gel or frosting
  • Honey Wheat braided pretzel twists
  • parchment paper
Directions
  1. Line cookie sheet with parchment paper. Place in refrigerator or freezer to chill until ready to use.
  2. Cook microwave popcorn as directed on box. Remove from microwave and open bags. Set aside.
  3. Add 1/2 cup butter to a large sauce pan over low to medium heat. Melt butter while stirring constantly to help prevent burning.
  4. Once butter is melted, add marshmallows. Continue stirring marshmallow butter mixture over heat until all marshmallows are melted, about 10 minutes. When all marshmallows are melted, remove pan from heat.
  5. Stir in pumpkin pie spice extract and vanilla.
  6. Add a couple drops of red and yellow food coloring to melted marshmallows until you get desired orange coloring. 2 to 3 drops for a light orange coloring, more for a deeper orange color.
  7. Combine 5 and 1/2 cups of cooked popcorn with orange marshmallows, stirring well to get all popcorn covered with marshmallow. If it looks like there is still a lot of marshmallow in the pan, add more popcorn.
  8. With the 1 Tablespoon of butter or margarine, rub between your hands, leaving your hands lightly buttered. You won't be using all of it at once, you will be buttering up your hands between shaping each popcorn ball.
  9. Grab some marshmallow covered popcorn and shape into a ball, compress tightly. Once ball shape is formed, place onto chilled parchment lined cookie sheet.
  10. Repeat with remaining marshmallow covered popcorn. You can make any size balls you like. I found the small popcorn balls hold their shape best.
  11. To make stem of popcorn balls, break braided pretzel twist in half and insert into top of popcorn balls. Press popcorn around pretzel to hold in place.
  12. Decorate with green writing gel or frosting to make leaves or vines. Use your imagination!
  13. Place into your refrigerator to chill.
  14. Store covered up to 1 week in the refrigerator.

*Helpful Hints*

- Wash your hands with soap & water and slather butter on them before shaping each ball. Otherwise your hands will stay sticky, making it hard to shape the marshmallow popcorn into balls.
 
- I've seen where some recipes say to use non-stick cooking spray instead of butter or margarine to use on your hands before shaping the balls. I tried it and it did not work for me. I found butter or margarine works best to keep everything from sticking to your hands.
 
- If watching your sodium intake, use plain popcorn.
 
- To keep these gluten-free, use GF pretzel twist.

- You can use ground pumpkin pie spice if you don't have the extract.
  
Inspired by ~ Mom On Time Out
 
All content and images are property of Sweet and Spicy Monkey. Please do not reprint this content without my permission. If you wish to include this recipe on your site, please re-write in your own words and use your own photographs and link back to this post for original recipe.

Thursday, October 23, 2014

S'mores Candy Corn Marshmallow Treats (aka Marshmallow Gremlins)


I can’t remember the last time I made rice crispy treats, that sticky, crispy, sweet marshmallowey (yep, that is a word in my kitchen {smile}) goodness I loved when I was a kid. So when I saw these candy corn marshmallows at my local grocery store, I just knew I had to make some.

Since it had been years from the last time I made marshmallow treats, I forgot how messy the whole making process was! Melted marshmallow sticks to E-V-E-R-Y-T-H-I-N-G! Even the pot and spoons I used to make it. Yes, I used two spoons because the marshmallow was a big blob on one spoon and the other spoon was used to help get the marshmallow off the other spoon, which really wasn’t much help at all! So there I was in my kitchen, laughing like some crazy lady with two spoons full of marshmallow treats!


I really wish you could have been there because you would have been laughing at me! Sorry, no photos of that as my hands were also covered in marshmallow treats. Now I know why kids love making these!

After I got all the marshmallow off my hands and the spoons and into the pan, I finally got smart and sprayed my hands with a little bit of nonstick coconut spray. This worked great as I used my hands to help flatten the top of the marshmallow treats into the pan. I might remember this little trick for the spoons when I make these again {wink}.*


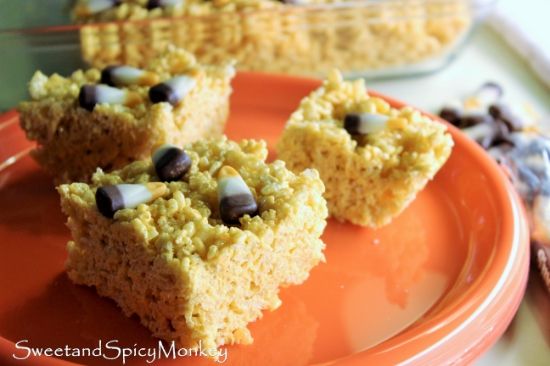
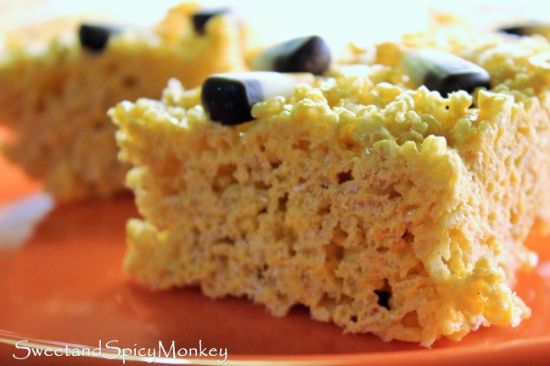
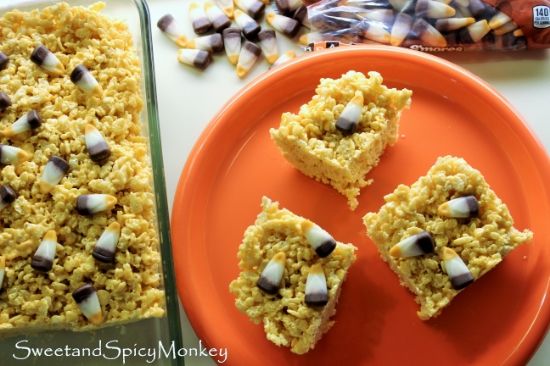
The result are these beautiful orange marshmallow treats sprinkled with S’mores candy corn. Don’t they just look spooktacular!


I like to refer to them as marshmallow gremlins, after the scene in my kitchen when I was creating them {smile}.

S’mores Candy Corn Marshmallow Treats (aka Marshmallow Gremlins)

Ingredients

3 Tablespoons butter

1- 14 ounce package of Candy Corn Marshmallows

6 cups crispy rice cereal

1 package S’mores candy corns

Directions

Prepare 11" x 8" pan by spraying with nonstick cooking spray and wiping off excess with clean paper towel. You can also use butter or margarine if preferred. Set aside.

Over low heat, melt butter in a large sauce pan. 

After butter has melted, add marshmallows and cook over Low heat until thoroughly melted.

Remove from heat and stir in crispy rice cereal. Making sure all cereal is covered with marshmallow.

Place in prepared pan and press down with hands. * See above for tips.*

Sprinkle S’mores candy corns over the top.

Let cool before serving.

Cut into squares and enjoy!

Store in airtight container.

Original recipe ~ The Original Rice Crispies Treats

*Helpful Hints*

- You might want to spray nonstick cooking spray on utensils used after the cooking process. Of course, you won't have as much fun as I did when making them!

- These would also be great for Thanksgiving treats with their orange coloring and the S'mores candy corns.

- All measurements are US

Disclaimer - This post may contain affiliate links.

All content and images are property of Sweet and Spicy Monkey. Please do not reprint this content without my permission. If you wish to include this recipe on your site, please re-write in your own words and use your own photographs and link back to this post for original recipe.

 
Follow Julie's board Sweet and Spicy Monkey on Pinterest.

Shared with: Pin Junkie Pin Party #90, Skip the Housework Link Party {#36}, City of Links #42, Pretty Pintastic Party #26, The Pinworthy Projects Link Party #39, Freedom Fridays with All My Bloggy Friends #51, Share it Sunday {51}, Snickerdoodle Sunday #52, Sweet and Savoury Sunday #85, Say G'day Linky Party {110}, Munching Mondays #62, Lou Lou Girls Fabulous Party #30, The Southern Special 30, Tickle My Tastebuds Tuesday, Simple Supper Tuesday #85, Tasty Tuesday Recipe Link Up, Busy Monday 137, Mix it up Monday!, Wine'd Down Wednesday 59, Wake Up Wednesday "Linky" #40, The Wednesday Roundup {week 49}, Pin It Thursday, On Display Thursday #18, Inspire Us Thursday Link Party #73, Great Idea Thursdays 72Let's Get Real Friday Party #63, Foodie Friends Friday Recipes Linky Party #119