Sweet and Spicy Monkey has moved to: www.sweetandspicymonkey.com

Showing posts with label snack. Show all posts

Thursday, August 6, 2015

Grilled Spanakopita Sandwiches with Tzatziki Sauce


When it's hot outside, I usually don't like a big filling meal for supper like in the winter months. I usually opt for something light, yet filling. But not like Chinese food where your starving 3 hours later. You know what I'm talking about!

Why is it every time you eat Chinese food, you're ravenously hungry an hour later, no matter how much you eat? It's one of those questions that remains a mystery.

Well, you won't be hungry after eating this recipe I'm about to share with you. It's a spin off of a Greek spanakopita, which is also known as a spinach pie.

Traditionally, spanakopita has all the Mediterranean foods like feta cheese, onions, egg whites, and spinach layered between crispy, flaky crusts.

I was introduced to spanakopita after trying Helen of Scrummy Lane's version of Greek spanakopita quesadillas with Tzatziki sauce. I was hooked!

Now I changed it up a bit with the addition of mozzarella and bleu cheeses, walnuts, and Naan bread. And I used lime juice instead of lemon juice in the Tzatziki sauce because I thought the flavor of the limes enhanced the dill and garlic flavors.


Or maybe it was just because I was enjoying my Brazilian lemonade at the time I made this, I don't know!

I think the Naan bread gives it a little more texture and blends well with all the ingredients. The mozzarella cheese reminds me of a pizza, while the sprinkling of blue cheese crumbles and chopped walnuts gives it an even more delicious flavor. Place it on the grill and the results are amazing!

A healthy, filling dish that's packed full of flavor and can be eaten anytime of the day. Besides my favorite dinner at this time, you can also eat this for a quick, nutritious breakfast, lunch, or an afternoon snack. With all of its fresh ingredients, you can see why I'm loving this!

Of course after it cools down here in Georgia, I will be making this with phyllo pastry as it is traditionally made. I cannot wait!


But in the meantime, heat up your grills and sink your teeth into this.

Grilled Spanakopita Sandwiches

Recipe by Julie Murphy
A grilled sandwich version of the traditional Greek Spanakopita.
Prep time: 15 minutes
Cook time: 8 minutes
Total time: 23 minutes
Yield: 2 Naan sandwiches
Ingredients
  • 8 ounces fresh spinach
  • 2 green onions, diced
  • 3 ounces feta cheese, crumbled
  • 1/2 cup sun dried tomatoes, diced
  • 1/2 cup walnuts, coarsley chopped
  • 1 cup mozzerella cheese, shredded
  • 2 Tablespoons Bleu cheese crumbles
  • 4 egg whites
  • Dash sea salt & pepper to taste
  • 4 pieces (2 packages) Naan bread
Cooking Directions
  1. Wash spinach and place into a microwavable bowl.
  2. Add 1 Tablespoon water, cover with paper towel, and place into microwave for about 2-3 minutes on High setting. Set aside as is while you prepare the rest of the ingredients.
  3. Combine green onions, feta and mozzarella cheeses, walnuts, bleu cheese, sun dried tomatoes, salt & pepper in a large bowl. Mix ingredients together with a wooden spoon. Set aside.
  4. Drain excess water out of spinach. I found it helps to use paper towels to dab up most of the water while draining. Be careful as water will be hot.
  5. After draining off water, cut spinach up. Large chunks are ok. Set aside.
  6. Spray large skillet with nonstick spray. If you prefer, you can use butter or olive oil.
  7. Heat skillet and add in egg whites and 1/2 of warmed cut spinach. Cook until done.
  8. On one side of Naan bread, add egg whites spinach mix and remaining spinach.
  9. Place onto grill, sprinkle remaining ingredients over egg whites and spinach. Cover with other slice of Naan bread, so it resembles a sandwich.
  10. Grill until cheeses are melted. About 5 minutes max.
  11. Remove from grill, cut into strips or triangles, and serve with Tzatziki sauce.

Originally, this Tzatziki sauce recipe calls for the juice of two lemons. But I found limes really bring out the taste of the dill and garlic much better.

Tzatziki Sauce

Ingredients
  • 1 cup Greek yogurt
  • 1/2 English cucumber, diced
  • 1 teaspoon fresh dill, chopped
  • 1/2 clove garlic, diced
  • Juice of 2 lime wedges
  • Dash of sea salt and pepper
  • Drizzle olive oil over the top before serving
Directions
  1. Add all ingredients except the olive oil into a medium bowl and mix together.
  2. Drizzle olive oil over the top and serve.

*Helpful Hints*
 
- You can grill this using a George Forman grill, Panini grill, or outside grill.
 
- Make sure you use Greek yogurt for the Tzatziki sauce as regular yogurt is too thin.

- You can also use mini Naan breads for this recipe as shown in the photos.

- You can substitute scallions or spring onions for the green onions.
 
All content and images are property of Sweet and Spicy Monkey. Please do not reprint this content without my permission. If you wish to include this recipe on your site, please re-write in your own words and use your own photographs and link back to this post for original recipe.
Follow Julie's board Sweet and Spicy Monkey on Pinterest.

Friday, July 31, 2015

Spirulina Guacamole


I love Mexican food. However, I haven't made any Mexican food here lately except for guacamole. Since avocados are in season, I've been buying them in bulk and occasionally I will make some guacamole.

I've shared a guacamole recipe with you already, but today's recipe is a little different than the one I've already shared. I made this one from scratch, using garlic, tomatoes, avocados, and lime juice with seasoning from sea salt, black pepper, onion powder, and garlic powder.

I don't know if you've seen the new craze of adding peas to guacamole? The New York Times food columnist Melissa Clark published a recipe with English peas in guacamole. Social media went on a frenzy over adding peas to traditional guacamole. I mean after all, peas aren't even considered a traditional Mexican food and you want to add English peas to guacamole? Sacrilege!

Well since that article published, adding peas to guacamole is the new craze. Some people like it and some just hate it. So I had to try it.


To tell you the truth, when I first heard about it I thought "yuck". Then I tried it and thought " not so bad after all". I actually like it! The peas DO add texture to the guacamole without changing the flavor.

Now I kept my peas whole, not mashed up, which gave my guacamole texture. And since this is a controversial dish, I went ahead and added some spirulina to it too, which gives it more vitamins and minerals with a beautiful dark green color without affecting the taste.

Just like chia seeds, spirulina was used by the Aztecs. Pretty smart people those Aztecs!

In case you don't know what spirulina is, it's a blue-green algae. Here's a smart chart to give you the skinny on spirulina.


But If you want to learn more about the health benefits of spirulina, where to buy it, and more recipes using spirulina, visit Nuts.com.

Don't let the algae part stop you from trying this super food, as it is a complete protein that contains all essential amino acids. Plus it helps protect cells from damage, which is why so many people are using it these days.


All of this in just one little bite! Who could ask for anything more?

By the way, the drink in the upper left hand corner of these photos will be on my blog next week!

Spirulina Guacamole

Recipe by Julie Murphy
A healthier version of your traditional guacamole with spirulina and peas.
Prep time: 7
Cook time: 0
Total time: 7
Yield: 2 cups
Ingredients
  • 2 avocados, seeded and removed from skins
  • 2 tomatoes, rinsed and diced
  • 1/2 to 1 clove garlic, minced
  • 1 to 2 jalapenos, seeded and diced
  • 1 cup sweet peas, cooked and cooled
  • 1 teaspoon Spirulina powder
  • 1/4 teaspoon onion powder
  • 1/4 teaspoon garlic powder
  • 2 to 3 lime wedges for juice
  • Dash sea salt and black pepper to taste
Directions
  1. In a medium bowl, add avocados. Mash with a fork until no more large clumps are visible. Some clumps will remain.
  2. Mix in spirulina, onion powder, garlic powder, salt & pepper, and juice from 2 to 3 lime wedges.
  3. Combine remaining ingredients (tomatoes, garlic, jalapeno, and peas), mixing well.
  4. Best served with tortilla chips or added to any Mexican dish.

Disclaimer ~ I was not paid any monies or compensated for this post by Nuts.com. Recipe and opinions are my own. I believe in the health benefits of spirulina.
All content and images are property of Sweet and Spicy Monkey. Please do not reprint this content without my permission. If you wish to include this recipe on your site, please re-write in your own words and use your own photographs and link back to this post for original recipe.
Follow Julie's board Sweet and Spicy Monkey on Pinterest.

Shared with: Savoring Saturdays

Sunday, July 5, 2015

Caramel Chocolate Buttered Popcorn


We're wrapping up Mystery week here with Dum Dum's lollipops mystery flavor, buttered popcorn. And what goes best with a buttered popcorn lollipop? Popcorn, of course!

But not just any popcorn, no Ma'am (or Sir)! But popcorn with cocoa almonds, m&m's, pieces of buttered popcorn lollipops, pretzels, and a caramel and chocolate sauce drizzled all over it.

This is not your ordinary popcorn. This is popcorn taken to a whole new level. This is a popcorn dessert!

A mixture of sweet and salty, crunchy, chocolate and ooey gooey caramel. Popcorn will never be the same after you try this.

You're welcome!

Caramel Chocolate Buttered Popcorn

Recipe by Julie Murphy
Sweet & salty, crunchy, ooey gooey caramel chocolate popcorn treat.
Prep time: 10 minutes (not including homemade caramel sauce preparation))
Cook time: 1 minutes
Total time: 11 minutes
Ingredients
  • 1 bag microwave popcorn, lightly salted
  • 3 bags (0.62 ounces) single servings cocoa roast almonds
  • 1 handful pretzel stix, broke in half
  • 1 small handful mini m&m's
  • 10 buttered popcorn Dum Dum's mystery lollipops, broken into large chunks with sticks removed
  • 1/2 cup dark chocolate melting wafers
  • 1/2 cup caramel sauce (recipe for Salted Caramel Coconut Sauce here)
Directions
  1. If making homemade caramel sauce, prepare and set aside.
  2. Prepare popcorn as directed on bag. After cooking popcorn, open bag so popcorn doesn't become soggy.
  3. You can either prepare this in the ready made popcorn bowl or pour popcorn into individual bowls or use 1 large bowl.
  4. Add pretzel sticks, m&m's, and almonds. Mix together.
  5. Prepare chocolate wafers as directed on package. Once melted, spoon or pour over popcorn mix.
  6. Drizzle warm caramel sauce over popcorn mix.
  7. Add broken chunks of buttered popcorn lollipops over the top.
  8. Serve and enjoy!

*Helpful Hints*
 
- Recipe for Salted Caramel Coconut Sauce can be found here.

Disclaimer ~ I received no monies from Spangler Candy Company for this post. I only received Dum Dum's Lollipops to use for my recipe. All opinions and recipe are my own. 

Shared with: The Wednesday Roundup #83
 
All content and images are property of Sweet and Spicy Monkey. Please do not reprint this content without my permission. If you wish to include this recipe on your site, please re-write in your own words and use your own photographs and link back to this post for original recipe.

Follow Julie's board Sweet and Spicy Monkey on Pinterest.

Wednesday, April 29, 2015

Healthy Nutella Protein Balls


Just when you thought you couldn't eat Nutella anymore because of all the sugar loaded in it, I'm about to make your day.  I've come up with healthy protein balls that taste like Nutella, but without all the added sugar and they help curb the Hunger monster too.

Y’all know what I’m talking about when I say the Hunger monster. It’s the moment when hunger strikes you, usually when you don’t have anything healthy on hand and you end up devouring anything and everything in sight.

It strikes when boredom sits in, during the afternoon slump between 2:00 and 5:00 p.m., whenever you get a mad craving, or sometimes it attacks you when you least expect it! The Hunger monster is a dieter’s worst enemy, wreaking havoc on good, healthy food plans everywhere.


Now I have to say while I was making these, I had to sample the original Nutella to make sure I had the right taste. I had just a little taste and boy, I was surprised at how sweet it was!

I love Nutella, but I didn't realize how sweet it really was until I tried it. I don't know if it was because I had just finished up the Sugar Crush Challenge or if it was because I hadn't had it in such a long time, but it really knocked my socks off! These protein balls don't taste quite that sweet, mainly because I didn't load them up with sugar. Instead I used dates and just a tad of honey to help hold them together.


And since I don't have hazelnuts available to me at the time I made these delicious little treats, I kinda cheated and added hazelnut flavoring.  So they still have the chocolatey hazelnut flavor that is so reminiscent of Nutella.

So when you feel that Hunger monster coming on before or after a workout, during the afternoon slump, or whenever you feel a Nutella or chocolate craving coming on, grab one of these little Nutella protein balls and crush the Hunger monster.


Healthy Nutella Protein Balls
Recipe by Julie Murphy
A healthier version of Nutella Protein Balls without all the sugar
Prep time: 15 minutes
Total time: 15 minutes
Yield: about 2 dozen
Ingredients
  • 1 and 3/4 cups unsweetened coconut flakes
  • 6 Medjool dates, pitted and pureed
  • 1 and 1/2 Tablespoons honey
  • 2 Tablespoons coconut oil, melted
  • 1/3 cup creamy peanut butter
  • 1/2 cup cocoa nibs
  • 2 teaspoons Hazelnut extract
  • 1 Tablespoon dark cocoa powder
  • 1-2 Tablespoons dark cocoa powder for rolling
Directions
  1. Line a cookie sheet with parchment paper. Set aside.
  2. In the microwave, warm peanut butter and honey in a small cup, if needed to help make stirring easier. No more than 25 seconds should help warm them. Set aside.
  3. Measure coconut and grind in a blender or food processor until coconut flakes become finely ground.
  4. In a medium to small bowl, add the finely ground coconut flakes with warmed peanut butter and honey. Mix together well with a wooden spoon. Mixture will be sticky.
  5. Blend in melted coconut oil, dark cocoa powder, pureed dates, and hazelnut extract, mixing well.
  6. Make sure mixture is not too warm before adding in cocoa nibs because you don't want them to melt. If too warm, place mixture in refrigerator for 5-10 minutes, then fold in cocoa nibs.
  7. Gently roll about 1 Tablespoon or smaller of mixture between your palms until a ball is formed. If mixture is too sticky or falls apart, place in refrigerator for 15 to 20 minutes before making ball shapes.
  8. Roll in dark cocoa powder before placing on prepared cookie sheet.
  9. Place cookie sheet in refrigerator for at least 30 minutes to let balls set up.
  10. Store in an airtight container in the refrigerator before serving.

All content and images are property of Sweet and Spicy Monkey. Please do not reprint this content without my permission. If you wish to include this recipe on your site, please re-write in your own words and use your own photographs and link back to this post for original recipe.

Saturday, April 18, 2015

No Bake Protein Bites


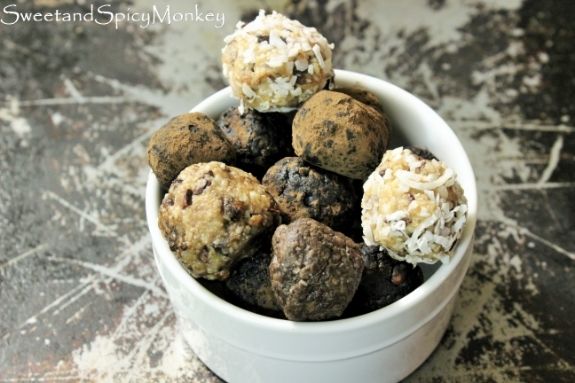
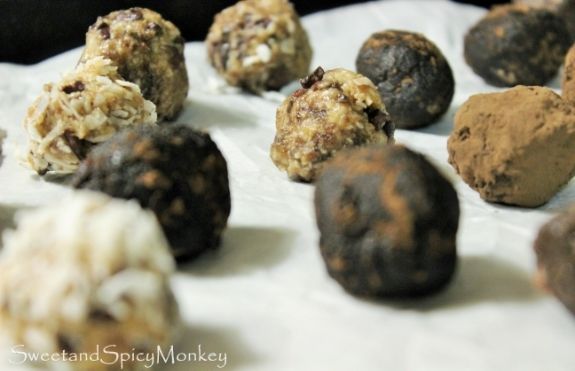
Have you seen these yet? Silly question, I know, because you probably have since they're all over Pinterest these days. These little balls that they're calling protein balls, raw balls, or cookie dough balls.

Well, if you haven't seen them yet, I'm about to introduce you. These little balls are delicious and packed with all this good for you stuff to help you survive that afternoon slump we all get between the hours of 2-5 p.m. Or they're great to pop in before or after a workout.


Whenever you eat one of these little balls, they're sure to put a little kick in your step. And they help curb any sweet cravings you have too! I'm speaking from experience here because these little balls helped me during my Sugar Crush Challenge last month. If it weren't for these little balls, I might not have survived and ate up all the sugar in sight!

I keep referring to them as "little balls" when in fact they should be called little protein bites. These protein bites might be little in size, but they're just enough to help pick you up or satisfy any sugar cravings without adding a lot of calories to your daily intake.

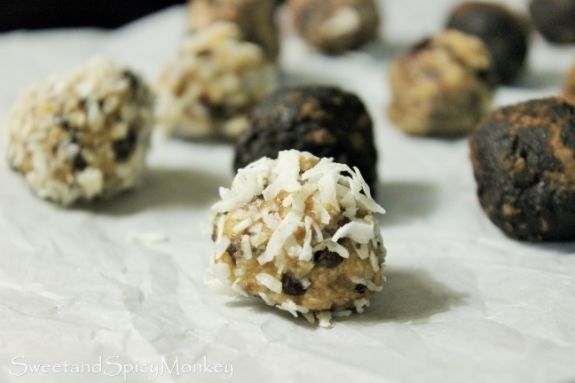
And you can make them in different flavors like I did here by rolling them in cocoa powder, unsweetened coconut flakes, or both. Or you can add nuts and dried fruit. The possibilities are endless.


No Bake Protein Bites
Recipe by Julie Murphy
Little bites of protein
Prep time: 15 minutes
Total time: 15 minutes
Yield: 15, depending on how big you make them
Ingredients
  • 1 and 3/4 cups unsweetened coconut flakes
  • 6 Medjool dates, pitted and pureed
  • 1 Tablespoon honey
  • 1 and 1/2 Tablespoons coconut oil, melted
  • 1/3 cup creamy peanut butter
  • 1/3 cup cocoa nibs
  • 2 Tablespoons unsweetened coconut flakes for rolling (optional)
  • 2 teaspoons dark cocoa powder for rolling (optional)
Directions
  1. Line a cookie sheet with parchment paper. Set aside.
  2. In the microwave, warm peanut butter and honey in a small cup, if needed to help make stirring easier. No more than 25 seconds should help warm them. Set aside.
  3. Measure coconut and grind in a blender or food processor until coconut flakes become finely ground.
  4. In a medium to small bowl, add the coconut along with warmed peanut butter and honey. Mix together well with a wooden spoon. Mixture will be sticky.
  5. Blend in melted coconut oil and pureed dates, mixing well.
  6. Make sure mixture is not too warm before adding in cocoa nibs because you don't want them to melt. If too warm, place mixture in refrigerator for 5-10 minutes, then fold in cocoa nibs.
  7. Gently roll about 1 Tablespoon or smaller of mixture between your palms until a ball is formed. If mixture is too sticky, place in refrigerator for 30 minutes before making ball shapes.
  8. You can roll in either cocoa powder or flaked, unsweetened coconut before placing on prepared cookie sheet.
  9. Place cookie sheet in refrigerator for at least 30 minutes to let balls set up.
  10. Store in an airtight container in the refrigerator before serving.


All content and images are property of Sweet and Spicy Monkey. Please do not reprint this content without my permission. If you wish to include this recipe on your site, please re-write in your own words and use your own photographs and link back to this post for original recipe.
Follow Julie's board Sweet and Spicy Monkey on Pinterest.

Shared with: Busy Monday 161, Savoring Saturdays

Monday, November 3, 2014

Pesto Roasted Almonds


I’m loving these sunny, chilly days of November! Mainly because I can start using my oven without worrying if it’s going to make my home hotter than it already is and because now baking season officially begins for me! Oh how I love a toasty, warm home with delicious aromas coming from the kitchen.

It comes as no surprise that this recipe was inspired by my Basil Pesto recipe from last week because after I made it, I was scraping the insides of my blender trying to get out every last drop because it was just that good!


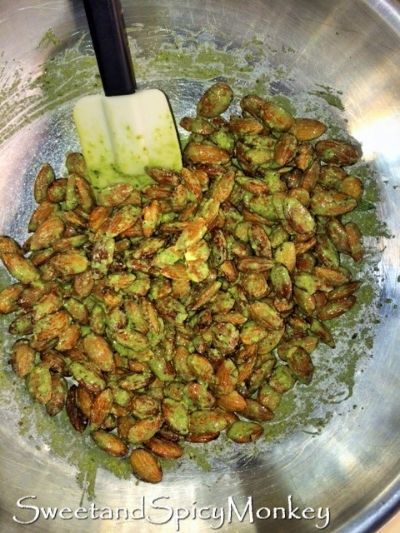
That’s when this idea popped into my head…how do I get all of this tasty pesto out of my blender and still be able to use it? Easy peasy, just add water!

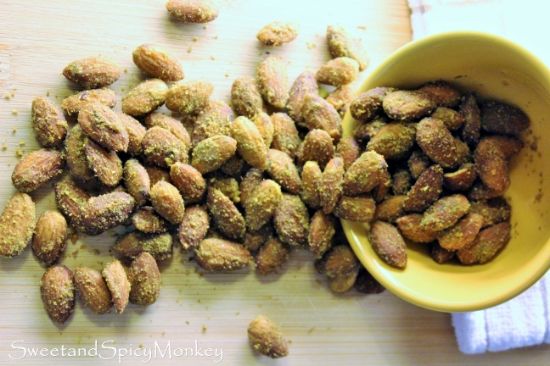
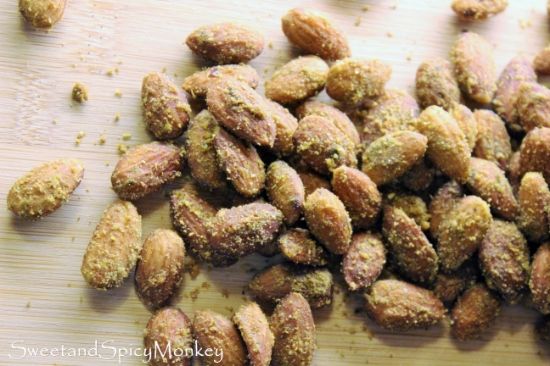
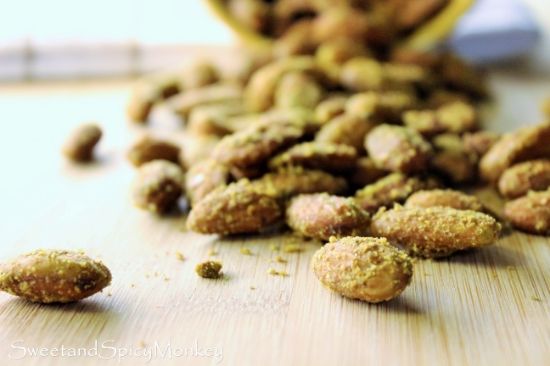
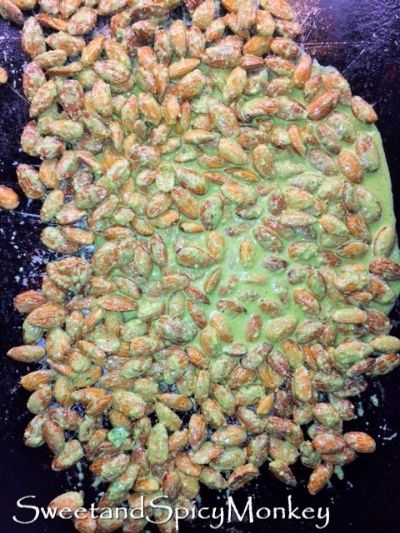
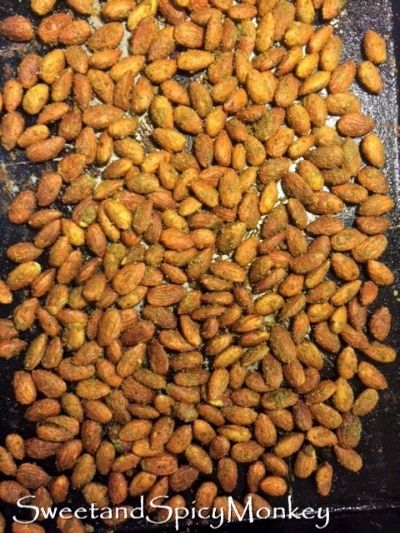
So I added some water and made this delicious pesto paste that I proceeded to pour over my remaining almonds, tossed them into the oven, and BAM! It was created, my recipe for Pesto Roasted Almonds.
 

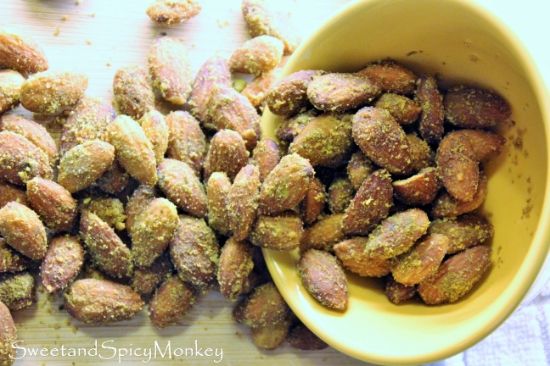
A healthy quick snack for on the go and that’s easy to make with a hint of basil and garlic. They also make for a delicious addition to any party platter and a great gift idea for any nut or pesto lover you might know.


Pesto Roasted Almonds

Ingredients

1 lb. whole, raw almonds

2 Tablespoons Basil Pesto

3 to 4 Tablespoons water

Directions

Preheat oven to 350F degrees.

Spray cookie sheet with nonstick cooking spray. Set aside.

Place pesto in a large mixing bowl, add water little at a time until you get a runny mix that is not too watery and maintains some paste so it can lightly stick to the almonds. You can always add more pesto or water, depending on your taste and how big a batch you're making.

Add in almonds and mix together until all almonds are coated with pesto mix.


Spread almonds over cookie sheet so they lay flat, not all bunched up.


Place into oven and cook for 15 minutes, this is half of your cooking time.

After 15 minutes, take pan out of oven and turn almonds over. Do this with the best of your ability, it won’t be easy but just a few flips with a spatula and move them around the pan will do, so they cook thoroughly.

Place back in oven and cook for remaining time or until mix is dry and crumbly over almonds.  Keep an eye on almonds after 15 minutes as you don’t want them to burn.

Remove from oven and let cool for 30 minutes.


After almonds have cooled off completely, store in an airtight container.

*Helpful Hints*

- You can find the recipe for my Basil Pesto here.

- About 10 minutes after removing pan from the oven, you can sprinkle with a little parmesan cheese for extra flavoring.

- All measurements are US

All content and images are property of Sweet and Spicy Monkey. Please do not reprint this content without my permission. If you wish to include this recipe on your site, please re-write in your own words and use your own photographs and link back to this post for original recipe.
Follow Julie's board Sweet and Spicy Monkey on Pinterest.

Friday, October 17, 2014

Sweet & Salty Snack Mix + Giveaway


I’ve recently teamed up with Annie's Homegrown to become a #teamannies Brand Ambassador. I just love these products as they incorporate healthy eating into our lifestyles. They use organic products which are free of artificial flavors, coloring, and preservatives. And y’all know I try to keep my eating healthy, except for the sweets, but hey, baby steps for me {smile}.


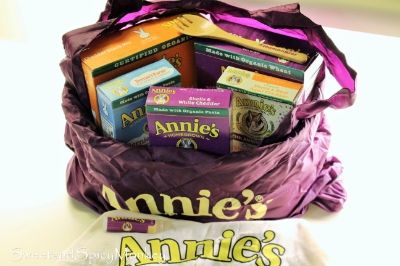
 I think they also must have heard that I cannot (for the life of me) make homemade macaroni & cheese and maybe felt a little sorry for me. Because in my care package, they sent me three boxes of Annie’s mac & cheese! Oh, I’m a happy girl! I can whip up a mean box of mac & cheese!

My Annie's care package

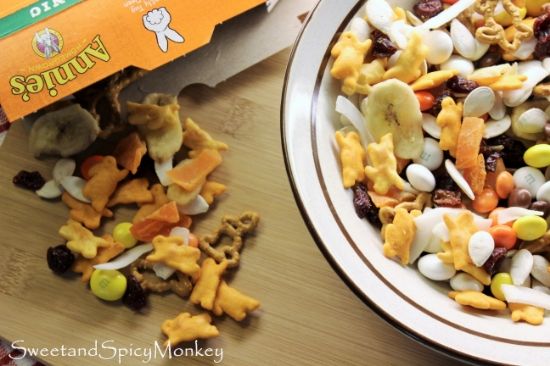
I also got some of their cheddar snack mix which combines their infamous bunny cheese crackers and pretzels...Yum! Now I know what you're thinking..."I want one of these care packages too", because if I were you, I would be thinking that right now {wink}.

Well, today must be your lucky day because Annie's is letting me host a give away where one lucky winner will receive:
  • 3 boxes of Annie's Mac & Cheese
  • 2 boxes of Annie's snacks
  • Annie's Homegrown Coupons
  • a chino bag (very cool and handy!)
  • and a Team Annie's spork (who doesn't love a spork?)
All you have to do is follow the rules listed below in the Rafflecopter Give Away and enter by leaving your answer to the following question, "How do you incorporate Annie's Homegrown ingredients into your meals?" in my comment section below. Make sure you get credit for answering the question by marking the appropriate box in the Rafflecopter section. Giveaway ends October 24, 2014 so hurry up and enter and let your friends know too. And be sure to check back for results following closing date. This giveaway is currently only open to U.S. residents.

a Rafflecopter giveaway

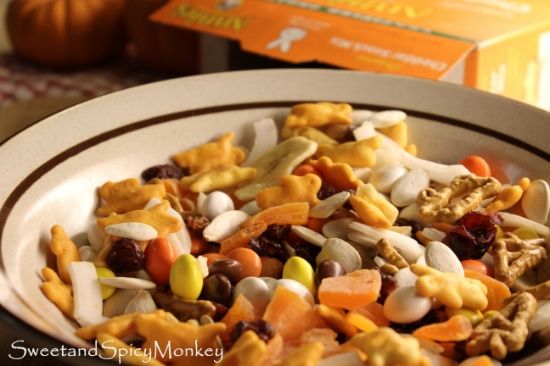
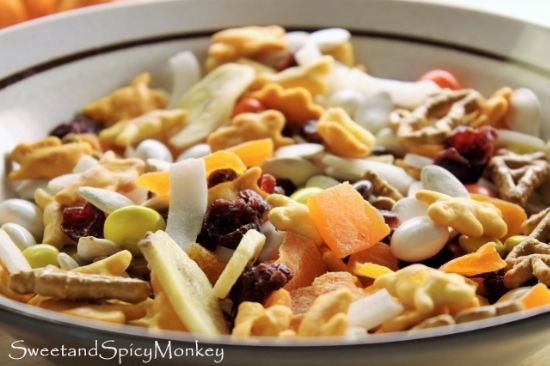
So I got to thinking, why not add a little sweetness to my cheddar bunnies and pretzels? Oh yea, the perfect blending of a little bit of sweet and a little bit of salty. The perfect combination to help satisfy my monster sweet tooth cravings!

My intention was to keep it healthy with coconut chips, dried mangos, banana chips, dried cranberries, and pumpkin seeds. But the little devil on my shoulder threw in a bag of Reese’s pieces and candy corn M&M’s when I wasn’t looking. Much to my surprise when I got back home from the store and found them in my grocery bag.


But that little devil sure had the right idea because this trail mix is unquestionably delicious! Satisfying any sweet and salty cravings you might have.

Plus, you can feel good about this snack mix because Annie’s products are made with organic ingredients and you’re the one making it, giving you the option of how much and what to put into it. So you can regulate the sweets, but still have a little taste to satisfy your cravings.


Happy snacking and Good Luck to all who enter the Giveaway!

Sweet & Salty Snack Mix

Serving size - 2 and 1/2 cups

Ingredients

1 cup Annie's Cheddar Snack mix of cheddar bunnies and pretzels

1/4 cup banana chips

1/4 cup dried mango

1/4 cup roasted & salted pumpkin seeds

1/4 cup dried cranberries

1/4 cup Reese's pieces

1/4 cup Candy Corn M&M's

12 strips of coconut strips, broken into bite size pieces

Directions

Add all ingredients together in a medium sized bowl. Enjoy!

*Helpful Hints*

- I cut my mango pieces into smaller bite size portions.

- can divide up and place into sandwich bags for individual snacks to take on the go.

- All measurements are US


Join #teamannies ~ a fun social community where fans share their love for Annie's and get special access to Annie's world. Click here to Join Team Annie's.

Disclaimer - #spon: I'm required to disclose a relationship between my blog and Annie's Homegrown. This could include Annie's providing me with content, product, access or other forms of payment.


All content and images are property of Sweet and Spicy Monkey. Please do not reprint this content without my permission. If you wish to include this recipe on your site, please re-write in your own words and use your own photographs and link back to this post for original recipe.

Friday, May 2, 2014

Japones Chili Pepper dip and Creamy Jalapeno Guacamole dip

Cinco de Mayo is one of my favorite holidays because it gives me an excuse to eat Mexican food! Not that I need an excuse, but it just it gives me one. Mexican food is one of my all-time favorites with all the spiciness, different textures, and adaptability of its dishes, not to mention the ease of throwing a Mexican feast quickly together when you don’t have much time. And being raised in California gave me a good taste of real Mexican food.

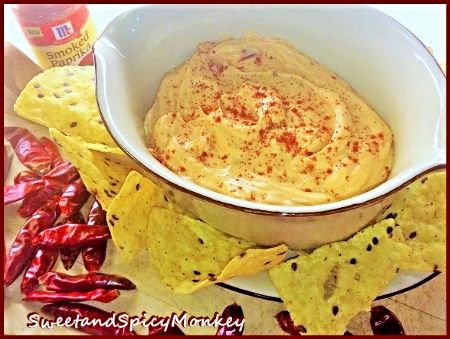
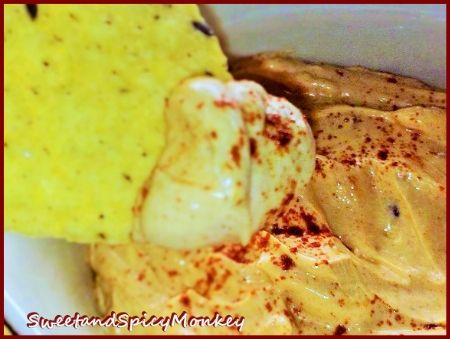
Today I’m going to share with you my Japones Chili Pepper dip and my Creamy Jalapeno Guacamole dip. The Japones chili pepper dip is a sultry, hot dip with a smoky flavor that is easily addicting. While my creamy jalapeno guacamole dip is a more mild to medium dip that embraces the flavors of the Mexican culture.

Japones, pronounced ja-pon-aaas, chilies are native to Mexico even though they are often referred to as Hontaka, Santaka, Oriental, or Chinese chilies. Japones chilies are used for their heat rather than for flavor, making them popular as a hot chili in Asian, Caribbean, and Mexican dishes. They are commonly sold as dried chilies since the drying process tends to intensify their flavor.

I discovered Japones in my local store because I could not find any fresh red peppers. I remember seeing these little peppers in the store and have always wondered how they were used in dishes. I finally found a use for them.

For my Japones chili pepper dip, I prepared the chilies by seeding them and placing in a saucepan with water and heating until boiling, then letting them sit for 15 minutes. This helps to soften the peppers. After 15 minutes, I removed the chilies and let them cool. Once cooled, I diced, measured, and added them to my dip. Simple as that.

Even without the seeds, these little chilies pack a punch as they add quite a bit of heat! However, don’t get scared because they’re hot. I usually favor medium spiciness and tend to stay away from the really hot stuff, but these little peppers are just enough to make it spicy hot, but not enough for the hotness to stay with you. And the smoked paprika adds a sultriness to this dip. The flavor combination from the cheese, peppers, and smoked paprika are addicting! I couldn’t get enough of this dip!

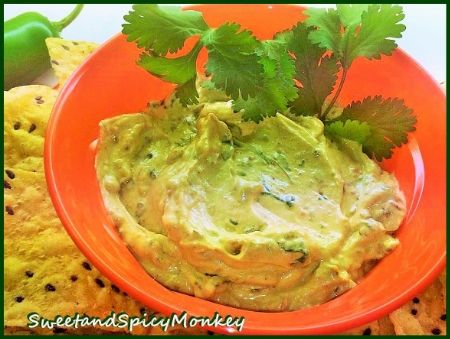
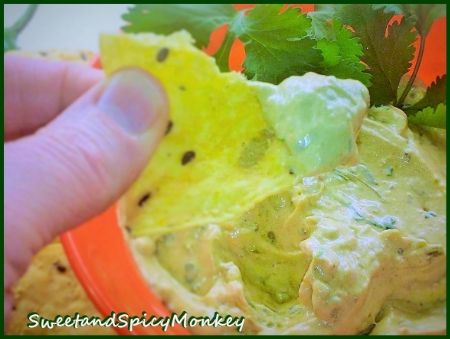
Now if the Japones chili pepper dip is too hot for your taste, then my Creamy jalapeno guacamole dip is the one for you! I’ve combined the flavorings of roasted and fresh jalapenos, goat cheese, plain Greek yogurt, cilantro, and avocado for this dip.

A mild to medium dip that can be adjusted to your taste by how many jalapenos you want to add to it. If you prefer your dips on the mild side, then just add the two roasted jalapenos and leave out the fresh jalapeno. I love the fresh jalapeno because it gives a little more spice and texture than just the roasted jalapenos alone.

So whether you, your family, or your friends prefer hot, medium, or mild, these two Mexican inspired dips will be popular at your next Cinco de Mayo party!

Japones Chili Pepper Dip

Ingredients

1 cup plain Greek yogurt

2 ounces goat cheese

3 Tablespoons Japones chilies, seeded, softened, and diced

1 teaspoon smoked paprika (you can always add more to taste)

Dash of black pepper, cumin, chipotle chili pepper, and sea salt

Directions for Japones Chili Pepper dip

Cut off the tops and remove the seeds to approximately 8-10 japones chili peppers. Set aside.

In a small saucepan, add 2 cups water and the seeded japones chili peppers. Heat over high to medium heat and bring to a boil. After water begins to boil, turn off heat and let sit for 15 minutes or until chili peppers have softened up.

After chili peppers have softened, remove from water with a slotted spoon, and let cool.

While chili peppers are cooling, add goat cheese, Greek yogurt, smoked paprika, and spices to a large mixing bowl. With a hand held mixer, whip ingredients until well blended.

Dice up cooled chili peppers and measure 3 Tablespoons to add into cheese yogurt mixture. Blend all ingredients until combined. If needed, add more spices to taste.

Serve with tortilla chips or pita chips.

Creamy Jalapeno guacamole dip

Ingredients

3 jalapenos, seeded and halved

2 ounces goat cheese

1 cup plain Greek yogurt

½ avocado, seeded, shelled, and sliced

Juice of 1 Lemon wedge

3 Tablespoons fresh salsa

3 Tablespoons fresh cilantro, chopped

Dash of black pepper, cumin, chili powder, sea salt, smoked paprika, onion powder, and garlic powder.

Directions for Creamy Jalapeno Guacamole dip

Preheat oven to 450F degrees.

Spray a non-stick spray onto one cookie sheet. Place halves of 2 jalapenos (total of 4 halves) onto prepared cookie sheet.

Cook for 12 minutes or until sides of jalapenos are browned. Remove from oven and let cool.

In a large mixing bowl, combine goat cheese, yogurt, avocado slices, salsa, juice of one lemon wedge, and cilantro.

With a hand or stand mixer, whip ingredients together until thoroughly blended.

Dice up roasted jalapenos and add to bowl.

Seed and dice fresh jalapeno and add to bowl. Whip ingredients until combined.

Blend in spices to taste.

Serve with tortilla or pita chips.

Shared with: Reasons to Skip the Housework Saturday , Strut Your Stuff Saturday Link Party Week #145 , Savoring Saturdays #13 , Think Pink Sunday #163 , Share it Sunday {26}, Weekend Potluck #116 , Munching Mondays #37, Sunday Best Link Party #13, Inspiration Monday Party , Gingham & Roses Link up & Social Media Hop {18}, Recipe Sharing Monday #93, Busy Monday #112, Marvelous Mondays #97, Lou Lou Girls Fabulous Party #5, Wednesday Roundup #24, Tasty Tuesday #59 Link Up and Get Pinned, The Makers No.16, Wonderfully Creative Wednesdays #19, Inspire Us Thursday Link Party #49, The Southern Special 05/13/2014, Time to Sparkle #60
All content and images are property of Sweet and Spicy Monkey. Please do not reprint this content without my permission. If you wish to include this recipe on your site, please re-write in your own words and use your own photographs and link back to this post for original recipe.

Wednesday, March 26, 2014

Homemade Tortilla Chips

Over this last year, I’ve been trying to cut out a lot of the processed foods and preservatives from my diet (except in sweets!). And I’m finding a lot of these foods are very easy to make at home and taste just as good, if not better, than the store bought versions.

For some reason, making my own tortilla chips never crossed my mind, until today. I googled a recipe for tortilla chips and to my surprise, many recipes came up for homemade tortilla chips. They are very easy to make. All you need is corn or flour tortillas, olive oil, salt, cookie sheets, and an oven. Check, I have all that!
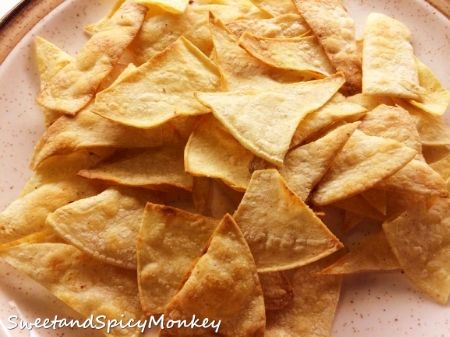
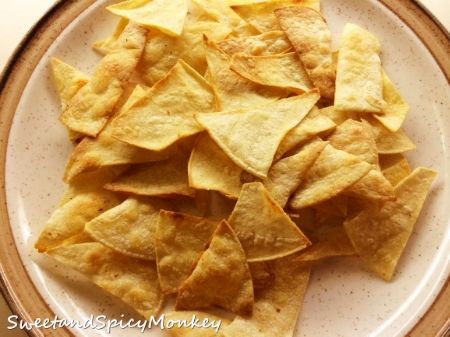
My first batch of making these was quite a learning experience as none of the recipes said how fast the chips can cook....and burn. Yep, two promising sheets filled with homemade tortilla chips now only sheets full of burnt strips in the trash (sigh).

Just like the old saying goes, “if at first you don’t succeed, try, try again”, I tried making my own tortilla chips once again, and boy, am I glad I did! You can now call me the Tortilla Chip Master! Ok, maybe not the Master, but I am getting the hang of cooking these down to a tee now. I learned to keep a close watch on the oven and not to have too much oil on the chips. Plus, not to get sidetracked while cooking these. That means no talking on the phone, no texting, and don’t answer the door when trying to make these chips because if you’re anything like me, you’ll forget all about them until the smoke alarm goes off. By the way, I’ve been told that is not a timer for the oven {smile}.

So if you’re ready to commit your life for about 10 minutes and not do any of the following listed above, then you too can enjoy your own homemade tortilla chips! And delight in the fact that these chips don’t have any artificial colors added to them and they’re made with love, the best homemade ingredient ever!


Homemade Tortilla Chips

Prep time – 4 minutes

Cook time – 7-10 minutes

Ingredients

Corn or flour tortillas

Olive oil spray

Salt (use salt of your preference, I prefer sea salt or pink Himalayan salt)

Directions

Preheat oven to 400F degrees. Spray cookie sheets with olive oil and spread over entire cookie sheet by wiping with a paper towel. Set aside.

Using a pizza cutter (these work best or you can use a sharp knife) cut tortillas into small strips, triangles, or your shape of choice. I found small to medium pieces work best because they cook more thoroughly.

Place pieces on cookie sheets. Do not overlap. Give tortilla strips a light spray of olive oil and a sprinkle salt.

Place in oven and cook for approximately 5 minutes. Edges of the tortilla chips might start curling at this time or the chips will have the appearance of bubbling.

Remove cookie sheet from oven and flip tortilla pieces over. If needed, spray a light coating of olive oil.

Place sheet back in oven and cook for remaining 3 to 5 minutes. Keep a very close eye on tortilla chips as time varies with ovens and they will cook quickly.

Once chips start turning a light golden brown, remove from oven and let cool.

Can be stored up to 1 week in airtight container.

* Helpful Hints*

- I found that the chips taste best the day after they are made because they are more crisp when cooled.

- Flour tortillas cook faster than corn tortillas
 
Recipe shared with Tex Mex Link Up 04/18/2014 


All content and images are property of Sweet and Spicy Monkey. Please do not reprint this content without my permission. If you wish to include this recipe on your site, please re-write in your own words and use your own photographs and link back to this post for original recipe.