Sweet and Spicy Monkey has moved to: www.sweetandspicymonkey.com

Showing posts with label side dish. Show all posts

Friday, January 15, 2016

Acorn Squash Risotto


Remember when I shared my Butternut Squash Risotto with you last month? I thought that was the best stuff ever since sliced bread! I mean, whoever thought of sliced bread was a genius! Who thinks of this stuff?

Sorry to say, I was wrong about my Butternut Squash Risotto. Well, not entirely wrong, because it really IS all that creamy and more. But I think I'm loving this Acorn Squash Risotto even more!

Plus, I made this batch vegan with a vegetable broth instead of chicken broth.


It's a simple recipe with only Arborio rice, onion, olive oil, vegetable broth, wine, acorn squash, Parmesan, and salt and pepper for flavoring. Nothing else. No fancy spices, meats, or herbs. Just the basics.

Do you ever notice that some of the best recipes are the simple ones with basic ingredients?

I think this risotto is even creamier than my Butternut Squash risotto, if that's even possible. 
 

YES!

I like to compare risotto to macaroni and cheese because it's so creamy with a deliciously mild flavor.


This is my new ultimate comfort food!


Acorn Squash Risotto

Recipe by Julie @ Sweet and Spicy Monkey
A deliciously creamy acorn squash risotto served in baked acorn squash halves.
Prep time: 10 minutes
Cook time: 1 hour and 25 minutes (includes baking of acorn squash)
Total time: 1 hour and 35 minutes
Yield: 4 servings with acorn squash halves, 10-12 servings risotto
Ingredients
  • 1/4 cup Extra virgin Olive oil
  • 1 sweet onion, chopped
  • 2 cups Arborio rice
  • 2 quarts vegetable broth
  • 3 acorn squash, roasted
  • 1/2 cup white wine
  • 1 and 1/2 cups freshly grated parmesan cheese
  • Sea salt & pepper to taste
Cooking Directions
  1. Preheat oven to 400F degrees.
  2. Cut acorn squashes in half, top and bottom halves. Remove stem off top half by scraping with your finger or fingernail. They come right off very easily.
  3. Remove seeds with a spoon. You can toss the seeds in the trash or bake them like pumpkin seeds to snack on for later.
  4. Brush olive oil over fleshy half of squash.
  5. Place in a baking dish, fleshy half up. Add about 1/4" of water to bottom of baking dish so squashes don't dry out or burn while cooking.
  6. Bake for 1 hour or until squash flesh is soft and lightly browned.
  7. Remove from oven.
  8. Once cooled, puree the flesh of 1 acorn squash for risotto. Set aside.
  9. Pour vegetable broth into a large sauce pan. Bring to a boil, turn off heat, and cover. Set aside.
  10. In a large skillet, heat olive oil. Add in onions once oil is heated and sauté onions until they are clear.
  11. Stir in rice and sauté until rice is a light brown color.
  12. Add wine with 1 cup of vegetable broth, stirring until liquid is absorbed.
  13. Gradually add in broth, 2 cups at a time, stirring well until almost all the liquid is absorbed in with the rice.
  14. Repeat adding broth, 2 cups at a time, until all of it has been added to rice and risotto is creamy.
  15. Stir in acorn squash puree.
  16. Remove pan from heat and add in parmesan cheese, stirring well so all cheese is mixed thoroughly.
  17. Salt & pepper to taste.
  18. Spoon risotto into baked acorn squash halves and serve with grated parmesan cheese over the tops.


All content and images are property of Sweet and Spicy Monkey. Please do not reprint this content without my permission. If you wish to include this recipe on your site, please re-write in your own words and use your own photographs and link back to this post for original recipe.
Follow Julie's board Sweet and Spicy Monkey on Pinterest.

Monday, December 7, 2015

Butternut Squash Risotto


I think my Baking Fairy has taken the holidays off. I don't blame her at all, the holidays are stressful for all of us.

Cooking, baking, shopping, on top of all the daily stuff we do everyday. It can get to you. But I really wish she would have left someone to take her place.

You see, ever since I can remember, I rarely had a dish or dessert that didn't turn out. Oh I had the bread that burnt, the smoke alarm go off, but those were only minor cooking fiascos!

In case you're wondering, a major cooking fiasco is where the house burns down!

Over the last two months, I have actually had to toss out four things I baked because they were just that bad! FOUR!!!!

In. The. Trashcan.

Which brings me back to my baking fairy, who has left me with no coverage for the holidays! What's a girl to do?

Lucky for me, my cooking fairy is still by my side helping me cook up some yummy dishes and picking up the slack for my baking fairy.

Which means I can cross risotto off my cooking bucket list after making this delicious Butternut Squash Risotto with her help. Yes, I have a cooking bucket list along with a baking bucket list. And for the longest time, risotto was on that list.

Until now.

If you've never had risotto, it's a creamy Italian rice dish that is oh so good! This Butternut Squash is so creamy it reminds me a lot of a macaroni & cheese. But made with rice, and not your regular rice, but Arborio rice.

Arborio rice is a short-grain rice that has a creamy texture, making it perfect for risotto recipes. You can find it in your local food markets located by other rice and grains.

Risotto is also easy to make and it makes a lot! The batch I made serves about ten to twelve. I was surprised it made so much because I was not expecting it! A good surprise is always welcome.

Thank you Cooking Fairy! (You have to thank them or they leave you suddenly, like my baking fairy left my side this holiday season!). So make sure you thank your cooking and baking fairies!


Hopefully my baking fairy will pop in soon, as there's a cake roll I cannot wait to try....again. You guessed it, the first one did not turn out the way it was supposed to.

Until my Baking Fairy comes back to help, you can enjoy this Butternut Squash Risotto.


Butternut Squash Risotto

Recipe by Julie Murphy
A deliciously creamy risotto flavored with butternut squash.
Prep time: 10 minutes
Cook time: 25 minutes
Total time: 35 minutes
Yield: 10-12 servings
Ingredients
  • 2 Tablespoons Extra virgin Olive oil
  • 1 sweet onion, chopped
  • 2 cups Arborio rice
  • 1 quart chicken stock
  • 1 quart chicken broth
  • 1/2 cup white wine
  • 1 cup butternut squash puree
  • 8 fresh sage leaves, chopped
  • 2 cups fresh parmesan cheese, grated
  • Sea salt & pepper to taste
Cooking Directions
  1. Pour chicken stock and broth into a large sauce pan. Bring to a boil, turn off heat, and cover. Set aside.
  2. In a large skillet, heat olive oil, add in chopped onion, and sauté until onions are clear.
  3. Stir in half of the chopped sage and rice, sautéing until rice is a light brown color.
  4. Add wine with 1 cup of chicken stock mix, stirring until liquid is absorbed.
  5. Gradually add in chicken stock mix, 2 cups at a time, stirring well until almost all the liquid is absorbed in with the rice.
  6. Repeat adding chicken stock mix, 2 cups at a time, until all of it has been added to rice and risotto is creamy.
  7. Add butternut squash puree and remaining sage.
  8. Salt & pepper as needed to taste.
  9. Remove pan from heat and add in parmesan cheese, stirring well so all cheese is mixed thoroughly.
  10. Serve warm.
 
 
 Inspired by ~ Cristina Cooks   
 
All content and images are property of Sweet and Spicy Monkey. Please do not reprint this content without my permission. If you wish to include this recipe on your site, please re-write in your own words and use your own photographs and link back to this post for original recipe.
Follow Julie's board Sweet and Spicy Monkey on Pinterest.

Thursday, November 19, 2015

Harvest Salad


I just love the colors of this salad! And yes it is still considered a salad, even though there's no lettuce or green leafy stuff in it.

According to Wikipedia (the world’s source for all information besides Google), a salad is "a various mixture of raw and cooked vegetables seasoned with a vinegar", balsamic vinegar reduction in this case.

So yes, this is a salad by those terms. And what a wonderful salad it is!

I've combined butternut squash, sweet potatoes, beets, French green beans, Brussels sprouts, persimmons, pomegranate seeds, and walnuts. As if that wasn't enough, I've also added…

It even looks beautiful without the blueberries!

A drizzling of balsamic vinegar reduction (homemade, of course!) over all those wonderfully healthy foods and a handful of fresh blueberries warmed with honey to top it all off with!

The result is a lightly sweet, healthy, and beautifully colored salad that will be the centerpiece of your Thanksgiving table.


A perfect dish for all the vegans (and non-vegans) who will be attending your home on Thanksgiving Day! Plus, it’s also gluten-free, soy-free, and paleo friendly.

I've included directions for baking the butternut squash, sweet potato, beet, French green beans, Brussels sprouts, and warmed blueberries below. Plus, I've listed a link for making Balsamic vinegar reduction in the helpful hints section below the cooking directions.

One of the best things about this salad, especially if you're making it for Thanksgiving, is you can prepare the butternut squash, sweet potatoes, beets, and pomegranate a day or two ahead to save you some time. Then before you serve it, just pop those ingredients in the microwave to warm them up again and finish with the remaining ingredients.

You'll definitely want to wait to prepare the green beans, Brussels sprouts, and blueberries until it's time to serve them since they taste best right after preparing.

I hope you don't just make this salad only for Thanksgiving, as you can enjoy it anytime of the year for a healthy and flavorful meal or side dish.

Harvest Salad

Recipe by Julie Murphy
A healthy salad with a variety of Autumn fruit and vegetables. Paleo friendly, gluten-free, soy-free.
Prep time: 20 minutes
Cook time: 1 hour and 30 minutes
Total time: 2 hours (includes baking time for squash, sweet potato, and beet)
Yield: 4 servings
Ingredients
  • 1 butternut squash, roasted
  • 1 sweet potato, baked and cut into small chunks
  • 1 beet, baked
  • 1 bunch French green beans
  • 1 lb. Brussels sprouts
  • 1 Fuyu persimmon, cored and sliced
  • 1/4 cup pomegranate seeds
  • 1/4 cup walnuts, shelled
  • 1 cup fresh blueberries, rinsed and dried
  • 1 Tablespoon honey
  • 1 to 2 Tablespoons Balsamic vinegar reduction
  • 3 to 4 Tablespoons olive oil
  • sea salt & pepper
Cooking Directions
  1. Preheat oven to 400F degrees.
  2. Wash, rinse, and dry whole butternut squash, sweet potato, and beet.
  3. Pierce sweet potato a few times with a sharp knife. Wrap sweet potato in aluminum foil.
  4. Wrap beet in aluminum foil.
  5. Place whole butternut squash onto an ungreased cookie sheet.
  6. You can place sweet potato in a small pan or fit it onto cookie sheet with butternut squash.
  7. Place butternut squash, sweet potato, and beet into oven and bake for 55-60 minutes.
  8. While those are baking, open up pomegranate and remove seeds. Place seeds into an airtight container and store in refrigerator until ready to add into salad.
  9. Wash and rinse persimmon. Core and slice. Set aside.
  10. After butternut squash, sweet potato, and beet are done baking. It's time to prepare Brussels sprouts and green beans.
  11. To prepare Brussels sprouts, add water, sea salt, and 1 Tablespoon of olive oil to a medium sauce pan. Bring to a boil. Add in Brussels sprouts and cook for 5 to 8 minutes. Drain by pouring into a colander.
  12. Add Brussels sprouts back into pan, combine 1 to 2 Tablespoons of olive oil, 1 Tablespoon balsamic vinegar, 1/2 teaspoon black pepper, and 1/4 teaspoon sea salt. Gently mix together, coating all of the Brussels sprouts with oil vinegar mix.
  13. Place Brussels sprouts onto an ungreased cookie sheet and bake at 400F degrees for 15 to 20 minutes, or until lightly roasted. Check after 10 minutes.
  14. To prepare green beans, preheat oven to 425F degrees. Place a clean, ungreased cookie sheet into preheated oven for 10 minutes. Meanwhile, place green beans into a small bowl. Combine with 1 Tablespoon of olive oil, 1/4 teaspoon black pepper, and a dash of sea salt.
  15. Spread green beans evenly over cookie sheet and bake for 8 to 10 minutes.
  16. After butternut squash, sweet potato, and beet have cooled off, its now time to prepare them.
  17. For butternut squash, cut in half, remove seeds, and cut into small cubes. Place onto serving platter.
  18. For sweet potato, remove skin and cut into small cubes. Add to platter with butternut squash.
  19. To prepare beet, remove outside skin and slice or cut into small chunks. Add to platter.
  20. Add Brussels sprouts and green beans to platter mix.
  21. Arrange persimmon slices, pomegranate seeds, and walnuts throughout squash, sweet potato, beet, green beans, and Brussels sprouts arrangement on platter.
  22. Now its time to prepare the warm blueberries.
  23. Prepare a small frying pan with non-stick cooking spray. Heat over medium heat. Once warm, add 1 Tablespoon honey and fresh blueberries. Cook over medium to low heat for about 5 minutes until warm. Don't cook too long or blueberries will start to burst. After blueberries are warmed up, pour over other ingredients.
  24. Drizzle balsamic vinegar reduction over the top (or serve on the side) and serve.


*Helpful Hints*
 
- Link for making your own Balsamic vinegar reduction can be found here ~ How to Make Reduced Balsamic Glaze.

- I find it easier to bake the butternut squash as a whole because they are so difficult to cut before baking.

- If your oven cooks HOT, you might need to turn the butternut squash over after 30 minutes to prevent browning on one side.

- You can always double the ingredients to serve more people. Example is for 8 servings, double the ingredients, and so on. This salad has a very flexible amount of ingredients as you cannot go wrong with a little more or a little less of an ingredient.

All content and images are property of Sweet and Spicy Monkey. Please do not reprint this content without my permission. If you wish to include this recipe on your site, please re-write in your own words and use your own photographs and link back to this post for original recipe.
Follow Julie's board Sweet and Spicy Monkey on Pinterest.

Shared with: Savoring Saturdays

Friday, July 31, 2015

Spirulina Guacamole


I love Mexican food. However, I haven't made any Mexican food here lately except for guacamole. Since avocados are in season, I've been buying them in bulk and occasionally I will make some guacamole.

I've shared a guacamole recipe with you already, but today's recipe is a little different than the one I've already shared. I made this one from scratch, using garlic, tomatoes, avocados, and lime juice with seasoning from sea salt, black pepper, onion powder, and garlic powder.

I don't know if you've seen the new craze of adding peas to guacamole? The New York Times food columnist Melissa Clark published a recipe with English peas in guacamole. Social media went on a frenzy over adding peas to traditional guacamole. I mean after all, peas aren't even considered a traditional Mexican food and you want to add English peas to guacamole? Sacrilege!

Well since that article published, adding peas to guacamole is the new craze. Some people like it and some just hate it. So I had to try it.


To tell you the truth, when I first heard about it I thought "yuck". Then I tried it and thought " not so bad after all". I actually like it! The peas DO add texture to the guacamole without changing the flavor.

Now I kept my peas whole, not mashed up, which gave my guacamole texture. And since this is a controversial dish, I went ahead and added some spirulina to it too, which gives it more vitamins and minerals with a beautiful dark green color without affecting the taste.

Just like chia seeds, spirulina was used by the Aztecs. Pretty smart people those Aztecs!

In case you don't know what spirulina is, it's a blue-green algae. Here's a smart chart to give you the skinny on spirulina.


But If you want to learn more about the health benefits of spirulina, where to buy it, and more recipes using spirulina, visit Nuts.com.

Don't let the algae part stop you from trying this super food, as it is a complete protein that contains all essential amino acids. Plus it helps protect cells from damage, which is why so many people are using it these days.


All of this in just one little bite! Who could ask for anything more?

By the way, the drink in the upper left hand corner of these photos will be on my blog next week!

Spirulina Guacamole

Recipe by Julie Murphy
A healthier version of your traditional guacamole with spirulina and peas.
Prep time: 7
Cook time: 0
Total time: 7
Yield: 2 cups
Ingredients
  • 2 avocados, seeded and removed from skins
  • 2 tomatoes, rinsed and diced
  • 1/2 to 1 clove garlic, minced
  • 1 to 2 jalapenos, seeded and diced
  • 1 cup sweet peas, cooked and cooled
  • 1 teaspoon Spirulina powder
  • 1/4 teaspoon onion powder
  • 1/4 teaspoon garlic powder
  • 2 to 3 lime wedges for juice
  • Dash sea salt and black pepper to taste
Directions
  1. In a medium bowl, add avocados. Mash with a fork until no more large clumps are visible. Some clumps will remain.
  2. Mix in spirulina, onion powder, garlic powder, salt & pepper, and juice from 2 to 3 lime wedges.
  3. Combine remaining ingredients (tomatoes, garlic, jalapeno, and peas), mixing well.
  4. Best served with tortilla chips or added to any Mexican dish.

Disclaimer ~ I was not paid any monies or compensated for this post by Nuts.com. Recipe and opinions are my own. I believe in the health benefits of spirulina.
All content and images are property of Sweet and Spicy Monkey. Please do not reprint this content without my permission. If you wish to include this recipe on your site, please re-write in your own words and use your own photographs and link back to this post for original recipe.
Follow Julie's board Sweet and Spicy Monkey on Pinterest.

Shared with: Savoring Saturdays

Sunday, November 23, 2014

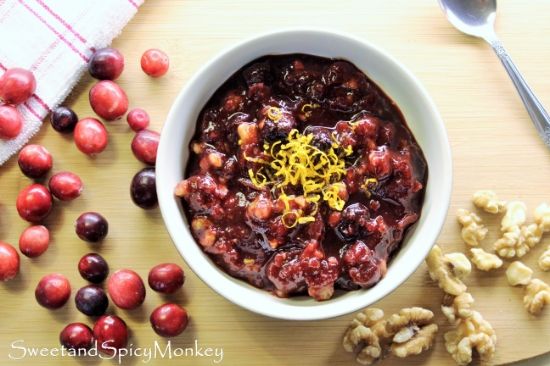
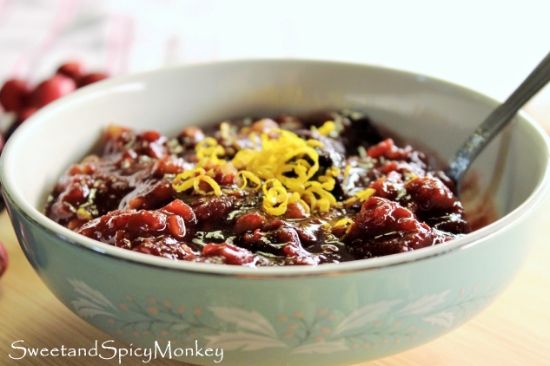
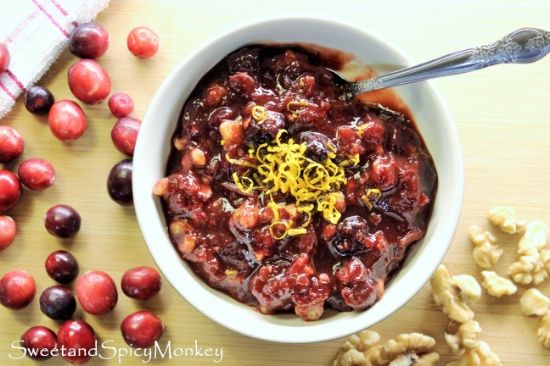
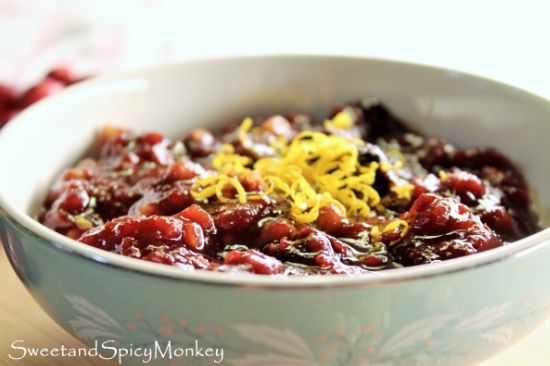
Cranberry Cherry Sauce


Can you believe Thanksgiving is just four days away? FOUR DAYS!!!???!!! Eeek!

But seriously, I can't believe how fast this year has gone by and the Holidays are once again upon us.


With that in mind, I thought it was only appropriate to share a traditional holiday recipe with y'all today. Well, not really traditional because there's a little spin on it.

The traditional recipe is cranberry sauce and the recipe I'm sharing with you is a cranberry cherry sauce. Similar yet different. And so much better than store bought.


Not to mention you can make this ahead of time so you won't have to worry about it on the big day. Which actually works out better since it needs to chill overnight.

I soaked my cherries overnight in apple cider with two tablespoons of red wine. You can probably use any type of wine you like best - white, rose, or red, which will make this dish more personable to you. Plus you can always add in a little more wine if you like {wink}.

And you can make a non-alcoholic version for the kids, by just leaving out the wine.


Just remember which one is which when serving time comes!

Cranberry Cherry Sauce

Makes 8 ounces

Ingredients

1 cup sweet apple cider
2 Tablespoons red wine

1 cup frozen cherries

12 ounces of fresh cranberries, rinsed

1 cup + 2 Tablespoons coconut sugar

1/3 cup orange juice

2/3 cup water

1/2 teaspoon cinnamon

¼ teaspoon ground nutmeg

¼ teaspoon vanilla extract

2 Tablespoons orange marmalade

3/4 to 1 cup walnuts, coarsely chopped

a pinch of orange zest for topping

Directions

Either the night before preparing or early the day of, add cherries, apple cider, and wine to an airtight container. Let refrigerate overnight or at least 8 hours before making.

After soaking cherries, place in medium saucepan with cranberries and coconut sugar. Add in orange juice, water, cinnamon, and nutmeg and bring to a simmer over medium heat, stirring continuously.

Once sauce starts to simmer, turn heat down a little and continue to cook for about 20 minutes or until cranberries have popped. You will start to hear little popping sounds as mixture heats up. Use the back of your spoon to gently pop any stragglers.

After sauce has reached desired thickness (remember it will thicken as it cools), remove pan from heat and add in vanilla and orange marmalade, blending throughout sauce. You can add in more sugar if you prefer a little sweeter sauce.

Fold in walnuts.

Let cool to room temperature and serve warm or let chill.

Top with orange zest before serving.

Watch me make this here  on Simmer.


*Helpful Hints*

- Can also use granulated white sugar instead of coconut sugar

- Best if made at least 2 days before serving, 1 day for soaking cherries overnight, the next day for chilling sauce before serving.

- All measurements are US

All content and images are property of Sweet and Spicy Monkey. Please do not reprint this content without my permission. If you wish to include this recipe on your site, please re-write in your own words and use your own photographs and link back to this post for original recipe.
Follow Julie's board Sweet and Spicy Monkey on Pinterest.

Featured at ~  Munching Mondays #69 and Host Favorites Recipes and Crafts


Shared with: Share it Sunday {55}, The Southern Special Week 34, Wine'd Down Wednesday 63, Tasty Tuesday Recipe Link Up, Inspire Us Thursday Link Party #77, Foodie Friends Friday Recipes, Crafts, Diy Linky Party , Pinworthy Projects Link Party #45, Snickerdoodle Sunday #58, Munching Mondays #68, Tickle My Tastebuds Link Party, Freedom Fridays with All My Bloggy Friends #59

Sunday, November 9, 2014

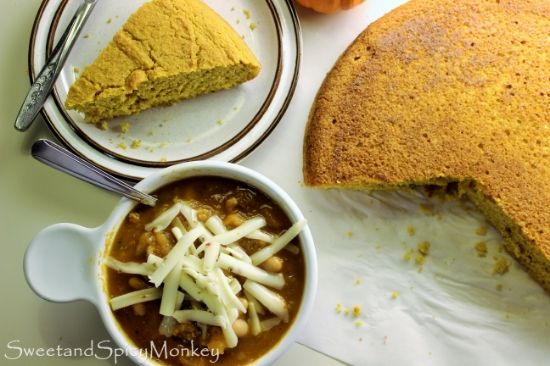
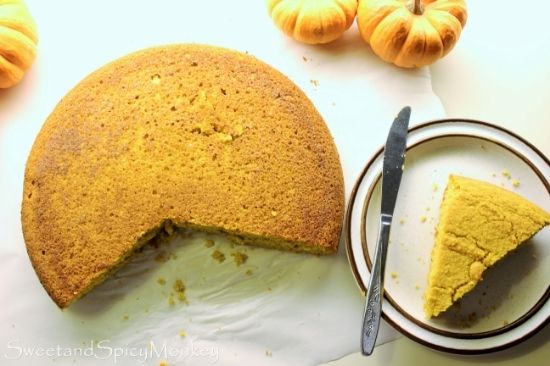
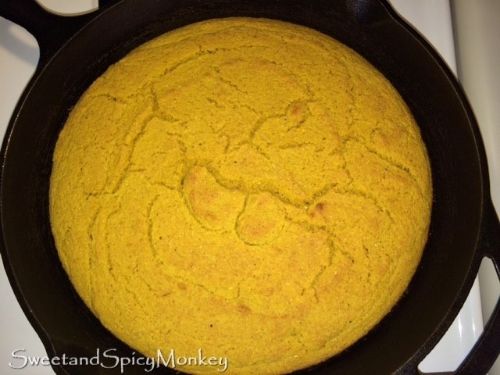
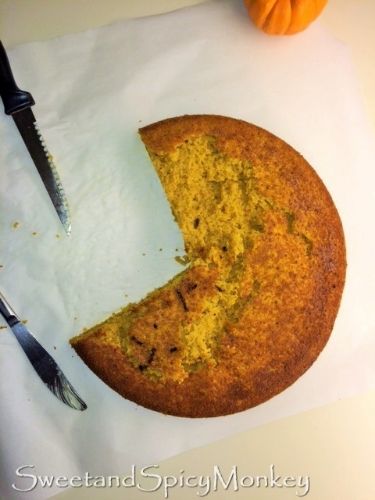
Pumpkin Sage Cornbread


Fall is my favorite time of year, as if I didn’t mention that to y’all already! And with all this colder weather upon us, it’s time to dust off my crockpot for some warming up on the insides chili and soup recipes.

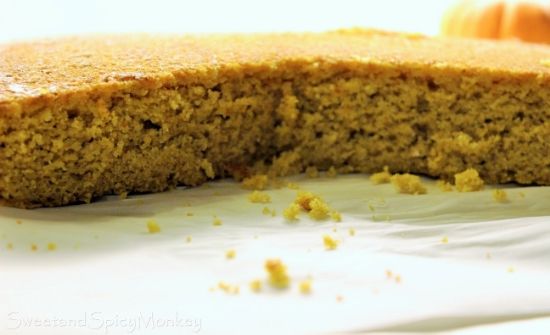
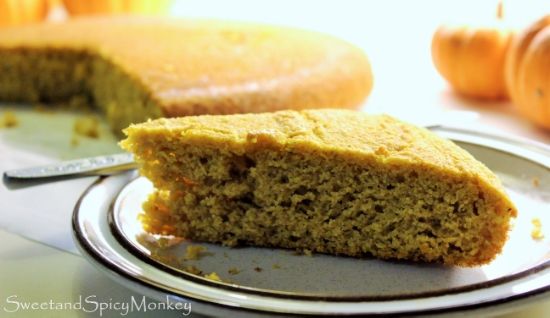
One of the best side dishes you can make when you’re serving up your chili or soup is cornbread. We’re not talking about plain ol’ cornbread today, no m’aam (or sir), we’re talking Pumpkin Sage cornbread. Cornbread that has the same texture as regular cornbread, but with a taste of the season, a hint of sweet and savory flavoring.


Now I made this recipe twice, the first time with a grittier cornbread mix and the second time with Martha White’s self-rising cornmeal mix. Both versions were delicious, but I prefer Martha White’s cornmeal mix because it produces a smoother, more cake-like cornbread, as compared to the grittier cornmeal mix. Depending on your preference, you can use Martha White’s cornmeal mix like I did for this recipe, or you can use your favorite cornmeal mix. The real flavoring comes from the other ingredients and spices.


This cornbread is the perfect complement to any soup or chili you might make during these colder months. It will also be delicious for your Thanksgiving meal, served as a side dish or made into a cornbread stuffing.


By the way, if y'all hadn't already noticed, I now have an awesome logo for my blog! I'm so happy with it and I would like to give a big THANK YOU out to Alex and the artist, Jessica Jimerson for creating it. I absolutely LOVE it and can't thank you both enough!!

Pumpkin Sage Cornbread

Ingredients

Serves - 8

1 cup pumpkin

2 large eggs

2 Tablespoons honey

1 and ¼ cups buttermilk

¼ cup coconut oil

2 cups Martha White's self-rising cornmeal mix

1 teaspoon pumpkin pie spice

1 teaspoon rubbed Dalmatian sage

¼ teaspoon sea salt

¼ teaspoon ground black pepper

shortening for coating skillet

parchment or wax paper to place cornbread on after cooking

Directions

Preheat oven to 375F degrees.

Generously coat a 10 and ½ inch iron skillet with shortening. Place in hot oven for about 10 minutes.

In a large mixing bowl, blend together pumpkin, eggs, honey, buttermilk, and oil until smooth.

Add in dry ingredients – cornmeal, pumpkin pie spice, sage, salt, and pepper until thoroughly mixed.

Remove hot skillet from oven and pour cornmeal batter into skillet.

Place into oven and cook for 40 to 45 minutes until golden brown or toothpick comes out clean.


Remove from oven and let sit for about 5 minutes. Run a clean butter knife around the edges to loosen cornbread away from sides of skillet.

Lay out a piece of parchment paper or wax paper, large enough to place cornbread on.

After 5 minutes, flip skillet over on parchment paper and gently tap bottom of skillet.

Cornbread should come clean out of skillet.

This one came out of the skillet flawlessly


Serve and enjoy!

This is what happens when your cornbread sticks to the skillet...still delicious!


*Helpful Hints*

- Shortening works best for skillet cornbread as it makes it come out of the skillet easier, with no sticking.

- All measurements are US

All content and images are property of Sweet and Spicy Monkey. Please do not reprint this content without my permission. If you wish to include this recipe on your site, please re-write in your own words and use your own photographs and link back to this post for original recipe.
Follow Julie's board Sweet and Spicy Monkey on Pinterest.

Shared with: Skip the Housework Link Party , Share it Sunday {54}, Sweet & Savoury Sundays #88, Busy Monday 140, Simple Supper Tuesday #88, The Southern Special Week 33, Lou Lou Girls Fabulous Party #33, Tasty Tuesday Recipe Link Up, Mix it up Monday!, Wake Up Wednesday Linky Party #43, The Wednesday Roundup #52, On Display Thursday #21, Inspire Us Thursday Link Party #76, Foodie Friends Friday Recipes Linky Party #122, Pinworthy Projects Link Party #43, Pin Junkie Pin Party #94, Freedom Fridays with All My Bloggy Friends #55, Savoring Saturdays #41

Saturday, August 30, 2014

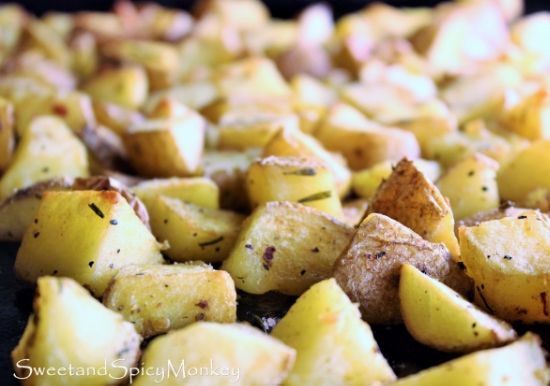
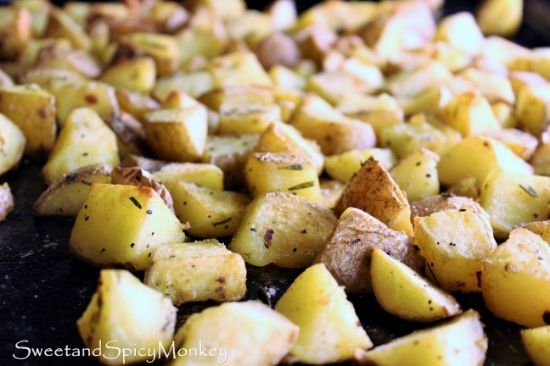
Seasoned Roasted Potatoes


The potato. It’s a staple vegetable in diets all over the world and can be prepared in many ways. You can bake it, boil it, fry it, grill it, mash it, steam it, microwave it, and roast it. You can top them with butter, sour cream, ketchup, chili, cheese, bacon, onions, or anything you desire. You can eat it as a meal or as a side dish. The options are endless as this little oblong vegetable is just that versatile. 

Potatoes are one of the most nutritious vegetables available. One plain medium potato (5.3 ounces) contains:
  • 620mg of potassium which is more than bananas, broccoli, or spinach
  • Trace amounts of essential thiamine, riboflavin, folate, magnesium, phosphorus, iron, and zinc
  • Vitamin B6 and vitamin C
  • They contain antioxidants
  • And with no fat, sodium, or cholesterol and a total of 110 calories.*
 
They have their own unique savory flavoring of mild earthiness, sometimes a little sweet and buttery, combined in a light and fluffy fleshy meat-like middle. It’s no wonder we make them a part of our everyday diets.
 
I love potatoes! Sometimes I will have a baked potato for dinner when I don’t feel like cooking. I love to season and roast potatoes in the fall and winter months. But for some reason, I got to craving roasted potatoes this week. I guess I’m just wishing fall would hurry up and get here and by cooking fall meals, it will be here faster. Talk about wishful thinking, especially since it’s supposed to be high 80’s to 90’s this week, ugh!
 
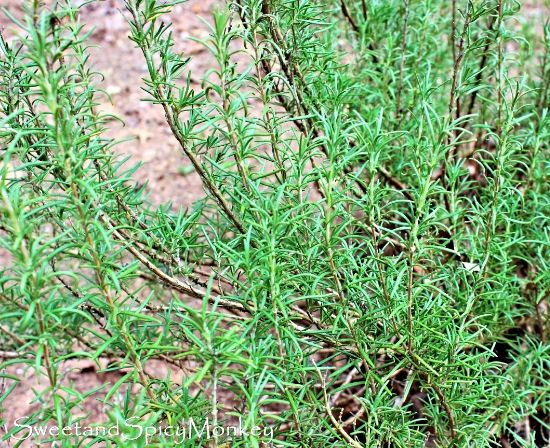
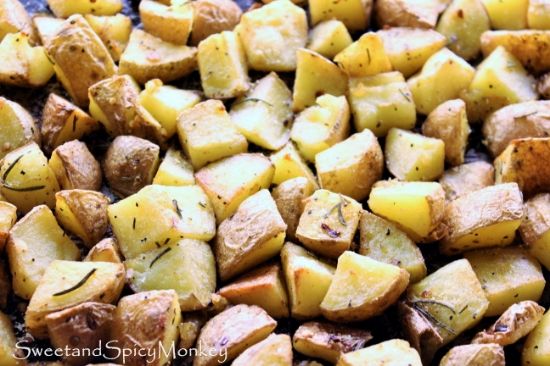
Well, if I can’t have my fall weather, I’m going to have my favorite fall side dish, Seasoned Roasted potatoes. These are lightly seasoned and roasted in the oven with fresh rosemary from my garden. I love using fresh rosemary in homemade soups, stews, and sprinkled over my roasted potatoes.
 
 
I planted my rosemary plant when I moved into this house and its one heck of a hardy little herb. It’s also the only one that I can grow! I haven’t bothered with it since I planted it six years ago and it just keeps on growing. I don’t have to water it and it has survived snow storms, ice storms, and the Georgia heat. It is my favorite plant and I love the way it smells when you rub your fingers over the leaves. I finally pruned it this year as it was starting to look in need of some TLC.


My hardy rosemary plant


Anywho, back to the recipe. This is a delicious and easy recipe to make that compliments any meal without all the heavy, creamy toppings that usually accompany a potato dish. These lightly seasoned roasted potatoes will soon become a favorite in your home during the fall and winter months ahead.


Seasoned Roasted Potatoes
 
Ingredients
 
2 lbs. potatoes, washed, rinsed, and diced into small square bites
 
1 Tablespoon fresh rosemary leaves, chopped
 
¼ teaspoon ground black pepper
 
¼ teaspoon sea salt
 
¼ teaspoon crushed red pepper (can use more if you like it a little spicier)
 
¼ teaspoon paprika
 
1 garlic clove, minced
 
3-4 Tablespoons olive oil
 
Directions
 
Preheat oven to 375F degrees. Lightly spray a cookie sheet, 17 ½” x 12”, with non-stick spray. You can also use olive oil spray or lightly wipe down the cookie sheet with olive oil if you don’t have spray. Wipe off any excess with a clean paper towel. Set aside.
 
In a large mixing bowl, combine potatoes, spices, and olive oil. Mix together well so all potatoes are covered with olive oil and spice mix.
 
Spread out evenly on prepared cookie sheet so potatoes don't overlap. Place in oven for 45 minutes or until potatoes are golden brown.

Halfway during cooking, about 20 minutes, remove pan from oven and flip potatoes over so they get crunchy on both sides.
 
Remove from oven and let cool for at least 5 minutes as potatoes will be HOT.
 
Serve and enjoy!

*Nutritional facts about potatoes obtained from ~ Potatoes Goodness Unearthed, Inc.
 
*Helpful Hints*
 
- you can use any variety of potatoes to make these.
 
- All measurements are US
 
All content and images are property of Sweet and Spicy Monkey. Please do not reprint this content without my permission. If you wish to include this recipe on your site, please re-write in your own words and use your own photographs and link back to this post for original recipe.
Follow Julie's board Sweet and Spicy Monkey on Pinterest.

Featured at ~ Sweet and Savoury Sundays #82 and On Display Thursday Linky Party #12


Mini Van Dreams
 
Cupcakery