Sweet and Spicy Monkey has moved to: www.sweetandspicymonkey.com

Showing posts with label summer. Show all posts

Wednesday, September 23, 2015

Beautiful Warm Sweet Peaches


Today you will find my recipe for Baked Peaches or better known by Ben as, "beautiful warm sweet peaches", over at The Online Grill.

I really do hope you get a chance to swing by Ben's site because he has a little bit of everything over there from benefits of eating dark chocolate to different ways you can enjoy bacon!

So hop on over to The Online Grill, take a browse, and tell Ben hello!

Follow Julie's board Sweet and Spicy Monkey on Pinterest.

Saturday, September 5, 2015

Hibiscus Lemon Tea


This has got to be the best drink recipe I've shared!

I came about this recipe when I was attempting to make hibiscus lemonade. In case you don't know, hibiscus is tart, not sweet and not sour, just tart. Add lemon and hibiscus together and we're talking major sour face. I couldn't find a sweet combination of the two by themselves without adding in a whole bag of Stevia in the raw, so I decided to add in tea to help mellow out the tart flavoring.

I'm not much of a tea drinker except when I get sick. But when I do drink tea, I love chai tea. I love the mixture of cardamom, cinnamon, ginger, cloves, and black peppercorn. So when I opened up my cupboard to see what kind of tea I had, I was pleasantly surprised to find some chai tea still in there. Let's say I was rather lucky because otherwise this would be hibiscus lemon gingerbread tea!


The chai tea was the perfect complement to the hibiscus and lemon with its warming spices. And with the colder months coming up, this tea can also be served hot, so you can enjoy it all year long! That's what I call a win-win!

With the remaining hibiscus flowers, I made hibiscus ice cubes to serve in this Hibiscus Lemon Tea. I think they make it pretty, don't you? Directions how to make these decorative ice cubes is down below under Helpful Hints.


Just like with my No-Churn Peach Hibiscus ice cream, use only organic hibiscus. As with any food, herb, or plant, please use hibiscus with caution. Or if you are nursing or pregnant, then this recipe is not intended for you, as it is not recommended due to adverse effects.

Hibiscus Lemon Tea

Recipe by Julie @ Sweet and Spicy Monkey
A refreshing blend of hibiscus, lemon, and chai tea.
Prep time: 15 minutes
Cook time: 10 minutes
Total time: 70 minutes
Yield: 3 and 1/2 quarts
Ingredients
  • 3 Tablespoons organic hibiscus flowers, dried
  • 8 cups water
  • 5 cups chai tea
  • 1 cup lemon juice
  • 3 and 1/2 cups Stevia in the raw
Directions
  1. Add 1 and 1/2 cups of water and hibiscus flowers into a small sauce pan. Over medium heat, bring to a boil. Once water starts boiling, remove from heat and let sit for 45 minutes.
  2. In a separate saucepan, add 5 and 1/2 cups (a little more than 5 cups to allow for evaporation) of water into a medium to large saucepan. Place 2 to 3 chai tea bags in water and bring to a boil. Once water starts to boil, turn off heat and let sit until room temperature.
  3. Meanwhile, add lemon juice, remaining 6 and 1/2 cups of water, and Stevia in the raw into a large pitcher. Place in refrigerator until hibiscus and tea are ready.
  4. After hibiscus sits for 45 minutes, using a fine mesh strainer placed over pitcher or a separate large bowl, pour hibiscus water through strainer. Use a wooden spoon to mash excess water out of remaining hibiscus flowers.
  5. If using a separate bowl for straining hibiscus, pour strained hibiscus water into pitcher with other ingredients.
  6. Remove tea bags from tea and pour into pitcher.
  7. Place pitcher into the refrigerator and let cool.
  8. Best served chilled over ice.

*Helpful Hints*
 
- Save the hibiscus flowers to decorate your ice cubes for this drink. In small bowl add remaining hibiscus flowers and about 1 cup of water, stir together. Pour into ice cube molds, sprinkling hibiscus flowers into each cube mold and place in freezer. Serve these ice cubes in your Hibiscus Lemon Tea for a decorative look.
 
All content and images are property of Sweet and Spicy Monkey. Please do not reprint this content without my permission. If you wish to include this recipe on your site, please re-write in your own words and use your own photographs and link back to this post for original recipe.
Follow Julie's board Sweet and Spicy Monkey on Pinterest.

Shared with: Savoring Saturdays

Wednesday, September 2, 2015

Healthy Peach Crisp


We're just one step closer to Fall {doing my happy dance!}. And even though summer is wrapping up, we can still enjoy the tastes of summer. What better way to say goodbye than with this healthy peach crisp.

I know National peach month was last month, but who says all peach recipes HAVE to be made in August? Not me! Yes, I was always the rebel. Ok, well, maybe I still am a little bit of the rebellious type {smile}.


But really, National peach month is there to help bring awareness to this fuzzy yellow fruit. Like it really needs national awareness, but who am I to say?

I've known about peaches since I was a kid. That's...er...29some years ago for those wondering.

So really National peach month to me is eating all the peaches I can in one month. Oh, that's not what I'm supposed to do? Oops!

No I haven't been eating all the peaches I can this last month. There might have been a day or two I missed because I ran out of them!

But really, if I could, I would eat a peach every day just like that saying, "Eat a peach a day helps keep the doctor away." What? That's not a peach a day?! I would much rather have a peach every day than an apple. No offense apple lovers because your season is coming up here soon enough.

Since it is still summer, I'm going to give peaches another chance to shine in this healthy peach crisp.


No refined sugar or butter here. Just a lot of peaches, a little honey, cinnamon, oats, coconut, and pecans making up most of the ingredients in this recipe.

It can be considered paleo friendly if you don't top it with ice cream and caramel sauce like I did here. Now I know what you're thinking, but before you let those words slip out of your mouth, that's a no sugar added ice cream and paleo friendly caramel sauce.


Thank you very much!

Healthy Peach Crisp

Recipe by Julie Murphy
A healthier version of your mom's peach crisp. Paleo friendly and gluten-free.
Prep time: 15 minutes
Cook time: 60 minutes
Total time: 75 minutes
Yield: 4 servings
Ingredients
  • 4 cups peaches, diced into small pieces
  • 1 to 2 Tablespoons honey
  • 1 to 2 Tablespoons water
  • 1/8 teaspoon nutmeg
  • 1/2 teaspoon cinnamon

Topping for Peach Crisp

Ingredients
  • 1/2 cup old fashioned oats
  • 2 Tablespoons coconut flour
  • 1/4 teaspoon cinnamon
  • 2 teaspoons organic brown sugar
  • 2 Tablespoons coconut oil
  • 2 Tablespoons organic coconut flakes, unsweetened
  • 3 Tablespoons chopped pecans
  • 1 teaspoon coconut sugar
  • dash sea salt
Cooking Directions
  1. Preheat oven to 350F degrees.
  2. Prepare a 6" x 9" pan by lightly wiping it with coconut oil or using a non-stick cooking spray.
  3. In a medium mixing bowl, combine all ingredients. Making sure all of the peaches get covered with cinnamon.
  4. Pour mixture into prepared pan. Cover with aluminum foil and place into the oven.
  5. Bake for 20 to 30 minutes, or until peaches are soft. You should be able to cut the peaches using nothing but a fork.
  6. Remove from the oven.
  7. Pour 1/2 of crumb mixture over the top of the peaches. Fold in gently. Crumb mixture doesn't have to be mixed all the way throughout the peaches. Just one or two stirs should do it.
  8. Pour remaining 1/2 of crumb mixture over the top of your peaches.
  9. Place back into oven and bake for 15 minutes, or until crumb mixture starts to turn a golden brown.
  10. At this time, remove pan from oven. Cover with aluminum foil, and place back into the oven for another 10 to 15 minutes.
  11. Remove from oven and uncover.
  12. Let sit for 5 minutes before serving.
  13. Serve immediately or let cool before serving.
  14. Best served with ice cream, whipped cream, and/or caramel sauce, or all of them!

All content and images are property of Sweet and Spicy Monkey. Please do not reprint this content without my permission. If you wish to include this recipe on your site, please re-write in your own words and use your own photographs and link back to this post for original recipe.
Follow Julie's board Sweet and Spicy Monkey on Pinterest.

Shared with: Savoring Saturdays

Saturday, August 22, 2015

No-Churn Peach Hibiscus Ice Cream


Before we get to my recipe today, I just want to let y'all know that you can follow me on Yummly. Yes, I finally joined! Ooh, I feel like such a social media maven now!

Anyways, you can follow me here so you can save my recipes to your recipe box, making it easier to shop for the ingredients because they even have a shopping list section. How cool is that?

I know it helps me because I'm usually trying to scroll through Pinterest just to find the recipe and then have to search the site for the ingredients, using up more data.

But lucky for me and you, Yummly now makes it easier. I'm still in the process of moving my recipes to my Yummly page. So if you don't see it there and there's a recipe you want to save, just click on the Yummly button on the upper right hand side of my page here, and it will save it to your Yummly recipe box. And I thought Pinterest was awesome! You rock Yummly!

With that being said, now we can talk food!

August is National Peach month. Yes, a whole month dedicated to the fuzzy yellow stone fruit that reminds so many people of summer. There's nothing like biting into the soft, juicy flesh of a peach and having the sweet juice run down your chin.


I don't know if you remember from last year in my Peaches and Cream recipe post , I mentioned Zeeny Cobb, or better known in these parts as "the Peach man." He sells peaches at a road stand I pass by on the way home and they are some of the juiciest peaches I've ever tasted.

If you’re near the Georgia-South Carolina border within the next 2 weeks, be sure to exit at mm177 at Dad’s cafe. Hopefully, he will still be there selling some of the best peaches you’ve ever had!


Lucky for you, I picked some up this past weekend. Now I couldn't let National Peach month slip by without a peach recipe to share with y'all. And this isn't just a recipe with peaches, as I've added hibiscus flowers. This tropical flower is not only beautiful, but dried hibiscus flowers are popular for use in teas and foods throughout Mexico, Latin America, and North Africa.

So I thought, "why not combine dried hibiscus flowers with peaches for a deliciously sweet ice cream?” With their beautiful red coloring and the sweet peach taste, what better way to enjoy the last days of summer.


*Disclaimer ~ As with any food, herb, or plant, please use dried hibiscus flowers with caution. Dried hibiscus flowers are NOT recommended for pregnant or nursing women due to adverse effects.*

No-Churn Peach Hibiscus Ice Cream

Recipe by Julie Murphy
A sweet combination of fruit and floral, Peach and Hibiscus ice cream.
Prep time: 10 minutes
Cook time: 10 minutes
Total time: 20 minutes
Yield: 1 quart
Ingredients
  • 4 large peaches
  • 1/2 cup + 1 Tablespoon water
  • 1 cup sugar
  • 1/2 cup plain Greek yogurt
  • 1 cup heavy cream
  • 1/4 teaspoon vanilla extract
  • 1 wedge lime juice
  • 6 Tablespoons organic dried hibiscus flowers
Directions
  1. Peel peaches, cut in half, remove the pits. Cut peaches into small chunks.
  2. Place peach chunks and dried hibiscus into a medium sauce pan with water and cook over low to medium heat for about 8 minutes, stirring occasionally.
  3. Add in sugar and continue to cook for another 2 minutes or until peaches become soft.
  4. Remove from heat and let cool to room temperature.
  5. After peaches have cooled, place 1/2 of cooked hibiscus peach mix into a blender with remaining ingredients.
  6. Pulse 1 to 2 times at high speed until mixture becomes smooth in texture, yet still chunky.
  7. Pour into a large bowl and mix in other half of cooked hibiscus peach mix.
  8. Pour into a freezer proof container and place in freezer for at least 6 hours before serving. Overnight is best.
  9. If leaving ice cream overnight in a freezer, let ice cream sit out for at least 20 to 30 minutes before attempting to scoop it out. As ice cream becomes frozen and is very difficult to scoop out right from the freezer.
  10. Best served with fresh peaches and hibiscus syrup over the top.

Inspired by ~ Peach Ice Cream by David Lebovitz, from his book, 'The Perfect Scoop'.
 
All content and images are property of Sweet and Spicy Monkey. Please do not reprint this content without my permission. If you wish to include this recipe on your site, please re-write in your own words and use your own photographs and link back to this post for original recipe.

Friday, August 14, 2015

Macaroni Salad


It's still summer and y'all know what that means? There’s still time for some outdoor get-togethers and Bar-B-Q's with some good old fashioned foods.

One of my favorite foods for these type of things is macaroni salad. I love the creaminess and sweet tangy taste of this stuff. Even more so than potato salad, and I love me some tater salad!

Funny thing is, I've never made macaroni salad until a couple weeks ago. Sad but true. I always bought my macaroni salad at the store (Gasp!).

Now the first time I made my mom's macaroni salad, I used Miracle Whip, even though the recipe calls for mayonnaise. Yes, I'm one of "those" people who prefer Miracle Whip over mayonnaise because of the tanginess it brings to foods.

However, that batch of macaroni salad I made with my all-time favorite Miracle Whip was watery after a few days in the fridge. Plus, I felt like it needed a creamier mayonnaise. Yes, I hate to admit it, but Miracle Whip failed me on this recipe.

Needless to say, I opted for Dukes mayonnaise on my second batch of macaroni salad. And the results were just what I was looking for! A thick and ultra-creamy mayonnaise that didn't get all watered down on me after a couple days in the fridge. As you can see from the photos, Dukes mayonnaise made my macaroni salad creamy and Oh so good!


By the way, since living out here in Georgia, I've noticed some products are named differently than on the West coast. Like Hellman's mayonnaise out here is known as Best Foods mayonnaise in California. So if you don't have Dukes mayonnaise where you live, see if it's known by another name. Because Dukes is a must ingredient for this macaroni salad!

Food for fun, just how many times did I say macaroni salad? Were you paying attention? Count them and let me know how many “macaroni salads” there are in this post in the comments below.


Macaroni Salad

Recipe by My mom
Macaroni Salad, a classic summer salad.
Prep time: 20 minutes
Cook time: 10 minutes
Total time: 20 minutes + chilling time
Yield: a whole lotta macaroni salad
Ingredients
  • 1 box (16 ounces) Elbow macaroni
  • 4 hard boiled eggs, peeled and chopped
  • 1/2 sweet onion, diced
  • 2 and 1/2 cups chopped celery
  • 12 to 20 (add to taste) sweet gherkins (pickles), diced
  • 3 teaspoons sweet pickle juice
  • 2 teaspoons white vinegar
  • 2 teaspoons sugar
  • 1 teaspoon ground black pepper
  • 1/2 teaspoon sea salt (can add more if needed to taste)
  • 1 teaspoon yellow mustard
  • 1 teaspoon spicy brown mustard
  • 2 and 1/2 cups Dukes mayonnaise
Directions
  1. Prepare macaroni noodles as directed on box. Drain and rinse with cool water.
  2. As noodles drain, prepare other ingredients by dicing and measuring out.
  3. After noodles have drained and cooled, place all ingredients into a large serving bowl and mix together well.
  4. Add salt and pepper to taste.
  5. Garnish with diced gherkins.
  6. Cover and place in refrigerator to let chill or serve immediately.
  7. Best served chilled and after ingredients have "married".

*Helpful Hints*
 
- Prepare eggs ahead of time so they are cooled by the time you add them into the macaroni salad.
 
Disclaimer ~ This is not a paid post by Dukes mayonnaise. I have no affiliation with them. I just found their mayonnaise to be the best. Sorry Miracle Whip!
 
All content and images are property of Sweet and Spicy Monkey. Please do not reprint this content without my permission. If you wish to include this recipe on your site, please re-write in your own words and use your own photographs and link back to this post for original recipe.
Follow Julie's board Sweet and Spicy Monkey on Pinterest.

Monday, August 3, 2015

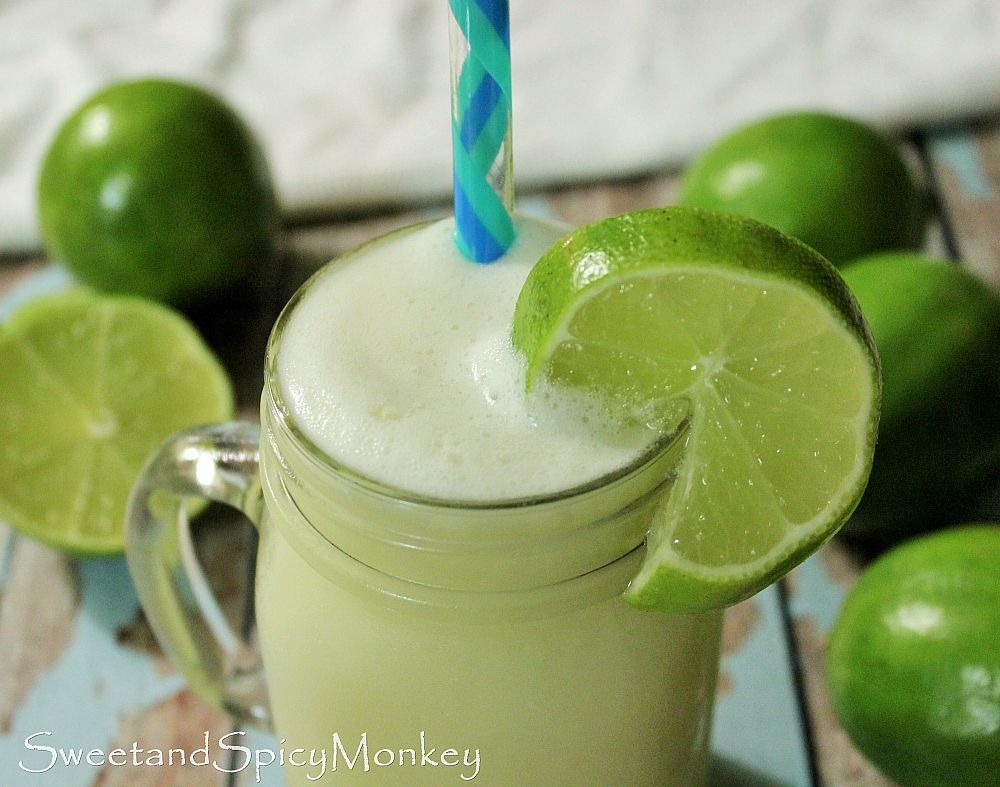
Brazilian Lemonade


Summer is heating up and I'm still looking for ways to keep my cool out here in Georgia. And what better way than with this tropical sounding Brazilian Lemonade.

Funny thing is, its called a lemonade, but there aren't any lemons in it. Nope, no lemons. Instead it's made with whole limes. Why they don't just call it Brazilian Limonade is beyond me.

But I think it's because when you use the entire lime, peeling and all, you end up with a tart, citrusy drink that resembles a lemonade. Add in the sweetened condensed milk, and it reminds me a lot of a margarita mix, in texture and all limey tasting, just like a margarita.

If it's too tart for you, add in more water, sweetened condensed milk, or lime juice. But I prefer mine a little tart like my lemonade. That's the beauty with this drink, you can add to it and still have a refreshing drink made to your tastes to help you cool off during this heat wave.


Or if you want to booze it up, you can always add in some tequila, vodka, or gin. After all, it's still summer and the living is easy.

Bottoms up!

Brazilian Lemonade

A refreshing alternative to classic lemonade.
Prep time: 10 minutes
Cook time: 0
Total time: 10 minutes + chilling time
Yield: 60 fluid ounces
Ingredients
  • 4 limes, washed, rinsed, and quartered
  • 8 cups water
  • 1 and 1/2 cups Stevia in the Raw (or your choice of sweetener)
  • 6-8 Tablespoons sweetened condensed milk
  • 1 to 2 limes, cut into wedges for serving
Directions
  1. Combine water and Stevia together in a large pitcher, mix well. Place into the refrigerator to chill.
  2. Meanwhile, wash limes with soap and water and rinse under clean running water. Make sure you don't skip this step because you will be using the whole lime (skin and all) to make this drink.
  3. Cut both ends off each lime. Important not to miss this step either because if you do, your drink will be more bitter.
  4. Cut limes into halves, then quarters. Place half of the limes into blender with half of the sugar water. Pulse on High until limes are pureed.
  5. Using a fine mesh strainer and the pitcher you will be serving the drink in, place strainer over opening of pitcher. Pour a little at a time of the pureed lime mix into the strainer until all liquid is in the pitcher. Discard the lime pulp left in the strainer or save it for another use as it will not be used in this drink.
  6. Repeat above steps with remaining half of limes and sugar water (puree and strain).
  7. Add sweetened condensed milk into serving pitcher.
  8. Place in refrigerator to chill (overnight is best).
  9. Squeeze remaining lime quarters into individual glasses before serving and/or use as a garnish.
  10. Best served chilled or poured over ice.
  11. *Optional - can add in tequila, vodka, or gin to booze it up.

Inspired by ~ Taylor at My Mom Taught Me to Play with my Food @playzwithfood 
 
All content and images are property of Sweet and Spicy Monkey. Please do not reprint this content without my permission. If you wish to include this recipe on your site, please re-write in your own words and use your own photographs and link back to this post for original recipe.

Follow Julie's board Sweet and Spicy Monkey on Pinterest.

Shared with: Savoring Saturdays

Tuesday, July 28, 2015

Skinny Strawberry Lemonade


Last week I shared with you my Skinny Lemonade and my Skinny Frozen Strawberry Lemonade. Well this week, were stepping back a bit to my Strawberry Lemonade before I added ice cream to it.

I don't know about y'all, but it's been hot out here in Georgia over this last month. High 90's with humidity, only dipping down to 75 at night. Ugh! I love summer but I need a break.

Which is why I've been sharing drink and ice cream recipes with you. I'm trying to bring myself to a cool happy place instead of this sweltering heat. And it's working, at least for a little while.

So today I'm sharing my Skinny Strawberry Lemonade. A sweet and tart drink that will help quench your thirst on hot summer days.


For the non-alcoholic version, place some plain strawberries in the freezer and use those to help chill your drink instead of ice cubes. I also poured some of my Skinny Lemonade into an ice tray and use those instead of plain water ice cubes. That way the ice doesn't water down your drink and it adds a little more flavor.

And if you want a boozy Strawberry Lemonade, just add a little vodka and you've got a whole new drink. Or you can always soak some strawberries in vodka and place them in the freezer until you're ready to serve your drinks. I like using them as a little spike to my drink.

Anyway you choose to serve my Skinny Strawberry Lemonade, it's sure to help you chill out this summer.

Strawberry Lemonade

Recipe by Julie Murphy

A sweet twist on a classic lemonade drink that will help quench your thirst on hot summer days.
Prep time: 5 minutes
Cook time: 0
Total time: 5 minutes
Yield: 8 quarts
Ingredients
  • 3 cups strawberries, rinsed and hulled
  • 1 and 3/4 cups lemon juice
  • 1 and 1/2 cups Stevia in the Raw (or your choice of sweetener)
  • 8 cups water
Directions
  1. Add 2 cups water and 2 cups of strawberries into a blender. Puree until mixture is smooth.
  2. Pour into a large pitcher with remaining ingredients. Mix well.
  3. Place remaining cup of strawberries in a bag and freeze. Use in place of ice cubes to help keep your drink chilled.
  4. Garnish with lemon slices and frozen strawberries. Best when served chilled.

All content and images are property of Sweet and Spicy Monkey. Please do not reprint this content without my permission. If you wish to include this recipe on your site, please re-write in your own words and use your own photographs and link back to this post for original recipe.
Follow Julie's board Sweet and Spicy Monkey on Pinterest.

Shared with: Savoring Saturdays

Monday, July 20, 2015

Skinny Frozen Strawberry Lemonade


I told y'all last week that I wasn't through with my lemon love! After making my ginormous batch of Skinny Lemonade, I started looking at different ways to enjoy it. That's when I came across a copycat Chick-fil-A's Frosted Lemonade recipe.

I have to admit, I don't eat fast food. I may sneak off to Subway for a sandwich once in a while when I don't feel like cooking (gasp! Yes that happens to me!). And I can't even remember the last time I ate one.

I stay away (far away) from places like McDonalds, Wendy's, Burger King, and even Chick-fil-A. The reason being is they all serve processed foods and most of it is fried. I try to stay away from that sort of thing.


Which probably explains why I've never heard of a frosted lemonade. What an ingenious idea this is! Taking one of summers most favorite beverages, lemonade, and adding ice cream to it! Simply delicious!

So I got an idea to add frozen strawberries to my Skinny Lemonade and add ice cream (no sugar added version), to make this Skinny Frozen Strawberry Lemonade. All the creaminess of an ice cream shake without all the sugar and calories.


So go ahead, make one for yourself and savor a few of summer’s favorites in one delicious drink.

Skinny Frozen Strawberry Lemonade

Recipe by Julie Murphy
A frozen drink combining a few of summer's favorites, lemonade, strawberries, and ice cream.
Prep time: 5 minutes
Cook time: 0
Total time: 5 minutes
Yield: 1 tall glass or 2 small child's cups
Ingredients
  • 1 cup lemonade
  • 1 and 1/2 cups frozen strawberries
  • 3 scoops vanilla ice cream (with no added sugar)
Directions
  1. Combine lemonade and frozen strawberries into a high speed blender. Blend until mixture is liquefied, no more strawberry chunks.
  2. Add in vanilla ice cream and blend until mixture is smooth.
  3. Pour into a tall glass and enjoy!

Inspired by ~ Chick-fil-A's Frosted Lemonade.
 
All content and images are property of Sweet and Spicy Monkey. Please do not reprint this content without my permission. If you wish to include this recipe on your site, please re-write in your own words and use your own photographs and link back to this post for original recipe.
Follow Julie's board Sweet and Spicy Monkey on Pinterest.

Friday, July 10, 2015

Skinny Pineapple Ice Cream Floats


These days everybody is so busy running around. Running to work, picking up the kids from school, taking the kids to their gymnastics (or insert sport here) practice, running to the store, to the gym, and back to the store. You get the hint, everybody's just so darn busy doing something.

I think it's time we all take a break. Put down our smartphones, turn off the TV, unplug from the world, and enjoy this moment. Live in the now.

Take a little "me" time to sit back on your front porch and relax those weary feet, catch your breath, let your hair down, and listen to the sounds of the world all around you.

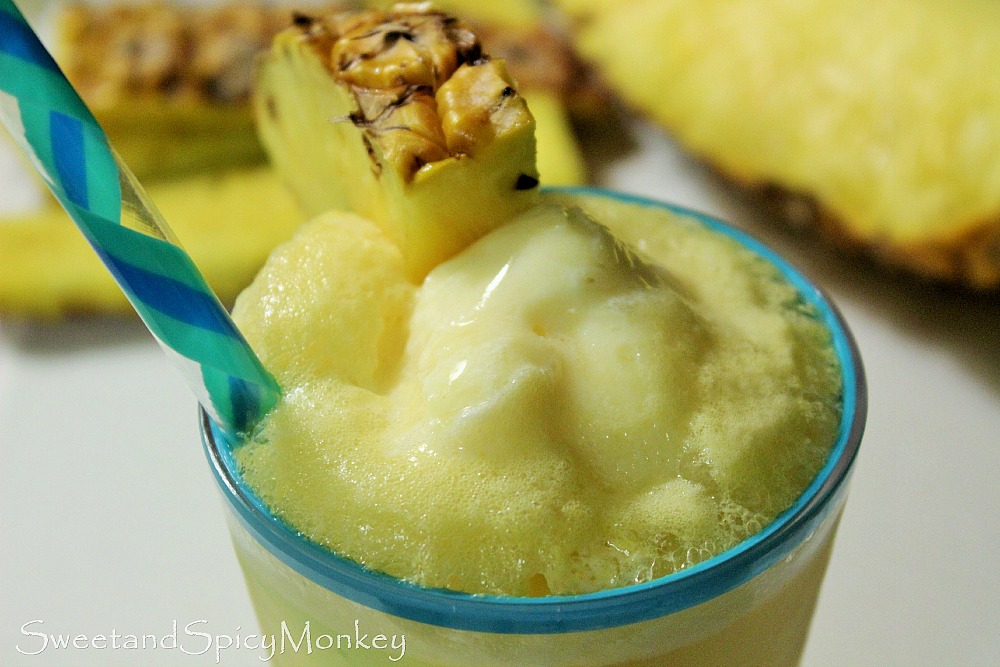
And I've got just the treat for you to enjoy this moment with, my Skinny Pineapple Ice Cream Float. A chilled, bubbly tropical drink with creamy scoops of vanilla frozen yogurt to whisk your worries away with just one sip.

Yes, a skinny ice cream float! I used fat free frozen yogurt with no added sugar and Ice’s Pineapple sparkling water to create this chillin' tropical delight. Your taste buds won’t be able to tell the difference!


So sit back and enjoy this moment because nothings better than an ice cream float on a hot summer day. Well, maybe my Skinny Pineapple Ice Cream Float on a tropical beach with Brad Pitt somewhere in the middle of the ocean.

Oh well, a girl can dream….and until then, I'll be sipping on my pineapple ice cream float!

Skinny Pineapple Ice Cream Floats

Recipe by Julie Murphy
A chilled fizzy tropical skinny drink.
Prep time: 5 minutes
Cook time: 0
Total time: 5 minutes
Yield: 2 ice cream floats
Ingredients
  • 1 - 17 ounce bottle ICE Sparkling Coconut Pineapple water
  • 4-6 scoops vanilla frozen yogurt, fat free with no added sugar
  • 2 wedges fresh pineapple, for garnish
Directions
  1. In 2 tall glasses, add 2 to 3 scoops of vanilla frozen yogurt to each glass.
  2. Slowly pour sparkling coconut pineapple water over the top of the frozen yogurt, until the glass is full.
  3. Garnish with fresh pineapple wedges.
  4. Serve and enjoy the moment!

All content and images are property of Sweet and Spicy Monkey. Please do not reprint this content without my permission. If you wish to include this recipe on your site, please re-write in your own words and use your own photographs and link back to this post for original recipe.
Follow Julie's board Sweet and Spicy Monkey on Pinterest.

Shared with: Savoring Saturdays

Sunday, June 14, 2015

Homemade Ice Cream Sandwiches


Sometimes you just need to give in. Throw out all the must Do's and just give in to your inner child. That's how I felt when I came across the idea of these homemade ice cream sandwiches.

I have been so good with cutting out refined sugars and using agave, honey, or coconut sugar since I completed the Sugar Crush challenge in April. But when I saw this idea in a magazine, I just had to give in and make these!


I mean how could I say No to ice cream and cookies scrunched together to make these "homemade" ice cream sandwiches? I know, right?

Now you can use any store bought cookies and ice cream to make these with, but when I saw these lemon chocolate chip cookies...need I say anymore? Y'all know my weakness for lemon (and if you don't, just scroll through my recipes. You'll notice I also L-O-V-E coconut).


Pair these cookies with some frozen yogurt (I tried to keep it healthy) and YUM! I felt like a kid again with the ice cream, er, frozen yogurt dripping all over my hands as I tried to eat my ice cream sandwich!

As you can see, I also tried this recipe with sugar cookies that I rolled into shapes with a mint chocolate gelato. I was surprised with how the sugar cookies held up after rolling the dough out flat. I thought I had made them too thin, but they held together until the very. Last. Bite. Not even crumbling apart in my hands!


Not only are these homemade ice cream sandwiches fun to eat, but they're also fun to make. If you have kids, they will love helping you make these on a hot summer day. They'll also love helping you eat them!

And you don't have to be a whiz in the kitchen to make them either. Just as long as you know how to turn on the oven, watch a timer, and scrunch ice cream between two cookies then you can make these homemade ice cream sandwiches.

Leaving you more "me" time.

Homemade Ice Cream Sandwiches

Easy ice cream sandwiches you can make at home.
Prep time: 5 minutes
Cook time: 10 to 12 minutes
Total time: 1 hour and 17 minutes (includes cooling time for cookies)
Ingredients
  • 1 package store bought cookie dough
  • 1 carton ice cream
Directions
  1. Bake cookies as directed on package.
  2. If using sugar cookies and you want to create different shapes, roll out on a floured surface with a floured rolling pin. Cut shapes with a sharp knife or a pizza cutter. A pizza cutter works great for this! Bake as directed on package.
  3. Remove cookies from oven and let cool for at least 1 hour before assembling ice cream sandwiches.
  4. To make ice cream sandwiches, drop 1 scoop of ice cream onto a cookie and press another cookie on top.
  5. Serve and enjoy!

Inspired by Better Homes and Gardens 2013 Cookbook recipe - Tropical Treat Ice Cream Sandwiches.
 
All content and images are property of Sweet and Spicy Monkey. Please do not reprint this content without my permission. If you wish to include this recipe on your site, please re-write in your own words and use your own photographs and link back to this post for original recipe.
Follow Julie's board Sweet and Spicy Monkey on Pinterest.

Saturday, June 13, 2015

Coconut Sorbet


This week’s #letsgetfoodiechallenge from Amanda is all about alcohol. She chose this because English Wine week is May 23rd through May 31st and World Gin day is June 13th.

So what better way to celebrate both than to have week 3 of our #letsgetfoodiechallenge to involve alcoholic recipes. Amanda made Malibu Rainbow cookies with Malibu Rum. If you want to check out that recipe you can find it on her site here.


I had a couple ideas for this challenge but I think this one is best with the hot weather. Oh who am I fooling, coconut won this choice, hands down!

Because y'all know how much I love (some might say obsessed with) my coconut! That and the creamy coolness of this sorbet.

Perfect for eating straight out of the container (a bowl for you people with manners), or you can even serve it on top of a slice of cake, brownies, or fruit.


Whatever way you serve it up, you will swoon over this coconut sorbet!

Coconut Sorbet

Recipe by Julie Murphy
A refreshingly cool, tropical frozen treat you can make at home.
Prep time: 5 minutes
Cook time: 0
Total time: 8 hours and 5 minutes (includes freezing time)
Ingredients
  • 1 cup organic unsweetened coconut flakes
  • 2 cups (1 can) coconut milk
  • 3/4 cup coconut water
  • 1/2 cup honey
  • 1/4 cup coconut vodka*
  • pinch sea salt
Directions
  1. Add coconut flakes to a blender or food processor and blend on High until flakes are smaller. Don't completely liquefy the flakes, but make them almost pureed. You want a little texture for the sorbet.
  2. Add remaining ingredients into blender with flakes and pulse until all ingredients are combined.
  3. Pour into a freezer safe container and cover.
  4. Place into the freezer overnight or for at least 6 to 8 hours so it can set up.

*Helpful Hints*

- *If you prefer non-alcoholic Coconut Sorbet, leave out the coconut vodka and increase coconut water to 1 cup.

- *If you want it a little more boozy (which I'm going to try next time I make this) you can always increase to a 1/2 cup of coconut vodka.

All content and images are property of Sweet and Spicy Monkey. Please do not reprint this content without my permission. If you wish to include this recipe on your site, please re-write in your own words and use your own photographs and link back to this post for original recipe.
Follow Julie's board Sweet and Spicy Monkey on Pinterest.

Shared with: Savoring Saturdays, The Wednesday Roundup #83

Friday, September 5, 2014

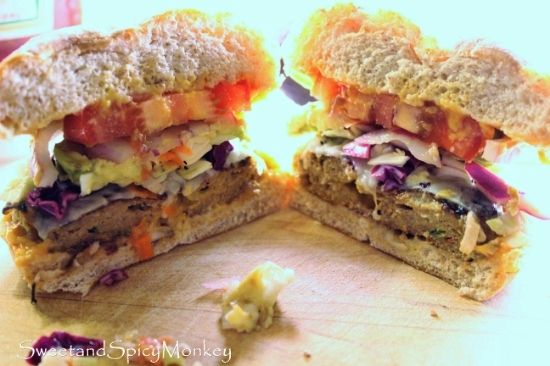
Jalapeno Turkey Burgers with Slaw


As summer is winding down, there’s still time to enjoy your end of summer grill outs with family and friends before it gets too cold to venture outside. Now everybody knows the all-American grill out involves hamburgers and hot dogs. But what do you do when you don’t eat beef or pork, like myself? You don’t want to feel left out and you also don’t want to feel like the “special diet” person.

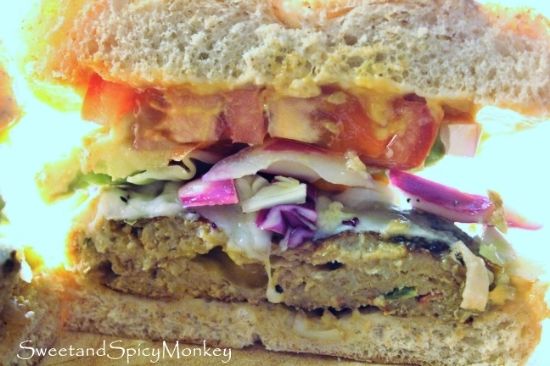
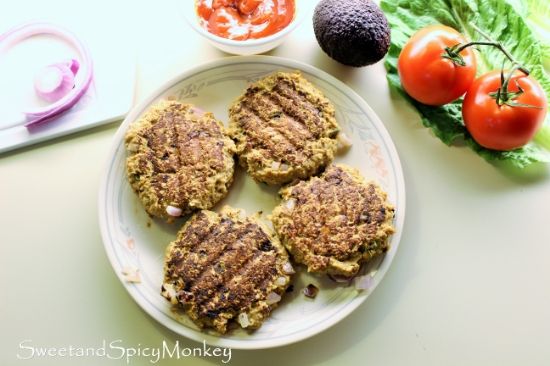
My go to “hamburger” is my jalapeno turkey burger. These are so good you can serve them to everybody instead of beef hamburgers and they won’t be asking "where’s the beef ?".


These burgers are flavorful and hearty, just like a beef hamburger. I add fresh diced jalapenos for flavor which doesn’t make them too spicy. But if you don’t like jalapenos or you think it might be too spicy for you or the kids, you can leave them out.

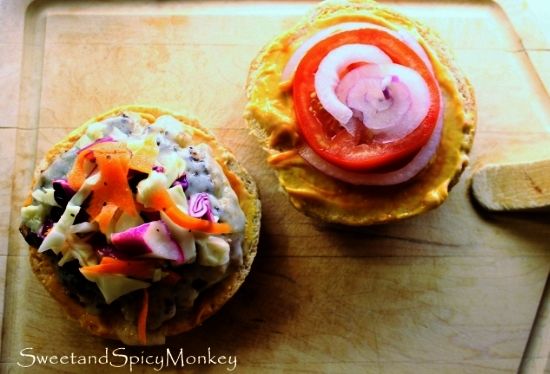
I also served these up on cracked wheat Kaiser rolls and they really made the “hamburger” even yummier as they add a delicious flavoring and don’t fall apart in your hands from everything you place on your burger. Y’all know what I’m talking about – when you slather on some mayo, mustard, and ketchup and your bun starts to slip and slide and break apart in your hands as you’re trying to eat it and your left holding your burger between pieces of lettuce, onion, and tomato. Y’all know it’s happened to you too! Well, it won’t with the Kaiser rolls, not even with slaw on your burger.


That’s right, in honor of the South, I added slaw instead of lettuce to my turkey burger. And not your usual mayo based slaw, but a nice tangy apple cider vinegar based slaw that complements the deliciousness of this burger.

These burgers are so flavorful that you and your family might just enjoy them all year round instead of waiting for next summer’s get together!

Jalapeno Turkey Burgers with Slaw

Ingredients for Turkey burgers

Makes 5 turkey burgers

1 lb. ground turkey

1 cup instant oats

2 Tablespoons of your favorite salsa

1 Tablespoon Teriyaki sauce (Teriyaki glaze is the same thing)

1 egg

½ teaspoon honey

¼ teaspoon smoked paprika

1 garlic clove, minced

1 slice of red onion, chopped and diced (Not 1 whole onion, just 1 slice)

½ jalapeno, seeded and diced

Cheddar cheese, cut into 5 small squares – to be inserted into middle of burger before cooking

A sprinkle of ground black pepper, sea salt, onion powder, garlic powder, and cumin for flavoring

1 package of Kaiser rolls (for burger buns)

Slaw ingredients

Makes 2 cups of slaw

1 head green cabbage

1 head purple cabbage

The peelings of 1-2 carrots

6 Tablespoons apple cider vinegar

2-3 teaspoons agave (can also use honey or sugar)

Salt & pepper to taste

Directions for Slaw

Wash and dry cabbage. Slice and chop cabbage so you have about 2 cups of cabbage (green and purple cabbage combined).

Place chopped cabbage into a medium sized bowl. Set aside.

Wash and rinse carrots. Using a carrot peeler, peel off top layer (skin) and toss in trash. Once outer later is removed, start peeling the carrot over your cabbage until you have desired amount.

Add apple cider vinegar, agave, salt and pepper to cabbage mix. Toss until all cabbage is covered with cider “dressing”.

Cover and place in refrigerator until burgers are done and you’re ready to eat.

Directions for Turkey burgers

Turn on your grill to preheat.

Prepare onion, jalapeno, cheese, and garlic as required above. Set aside.

Place ingredients on the counter with measuring cups and spoons so you can access them easily without getting raw turkey all over your cupboard or door handles.

In a large mixing bowl, add ground turkey and ingredients except for cheddar cheese. Mix together  with your hands. Making sure to break apart yolk in egg and mix thoroughly with turkey.

Take a chunk of meat mixture and roll into balls, then flatten gently with palm of your hand. You can make your burgers thick or thin by adding meat or making them flatter. Just keep in mind, the thicker burger will take longer to cook. I like mine medium size, not too thick and not flat.

Place on a clean plate as you prepare rest of burger patties.

After making burger patties, push a square of cheddar cheese into the middle of each patty, covering with the meat.

Place burgers on prepared grill and cook until done. Flipping them in between so they cook through. I usually eyeball mine by cutting into the thickest patty and seeing how well done it is, not cutting all the way through, but just a small cut. And cooking longer until all pink is gone. I don’t do medium rare burgers as one has to be careful about food poisoning.

You can also place a slice of cheese on top of the burger right before you take it off the grill, just long enough to let the cheese melt.

Place cooked patties on a clean plate and not the same plate used when making your burger patties.

Yes, there's only 4 burger patties here in the photo. The missing 5th patty is shown above.

Serve burgers with Kaiser rolls, mayo, mustard, ketchup, sliced tomato, sliced avocado, and slaw. Enjoy!

*Helpful Hints*

- If you want to use beef, these still make for quite a tasty beef hamburger!

- All measurements are US

All content and images are property of Sweet and Spicy Monkey. Please do not reprint this content without my permission. If you wish to include this recipe on your site, please re-write in your own words and use your own photographs and link back to this post for original recipe.
Follow Julie's board Sweet and Spicy Monkey on Pinterest.

Featured at ~ The Southern Special 28

Shared with: Wake Up Wednesday "Linky" #36, City of Links #39, Savoring Saturdays #34, Snickerdoodle Sunday #49, Tickle My Tastebuds #21, The Southern Special #27

Tuesday, September 2, 2014

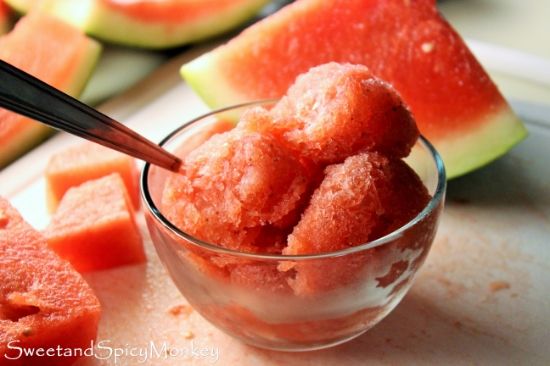
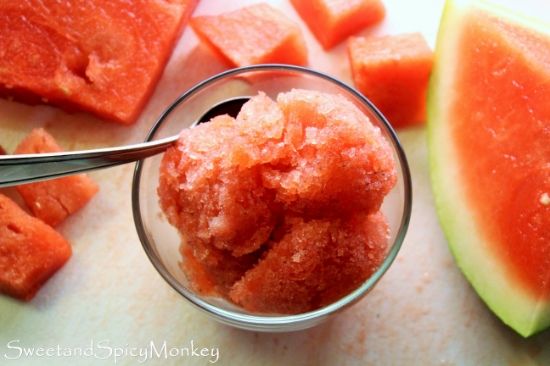
Strawberry Watermelon Sorbet


Can you believe it’s September?? The kids are back in school, the days are getting shorter, the acorns and leaves are starting to fall, and best of all, its football season! But summer is hanging on strong here and I want  need something to help me cope with these hot days.

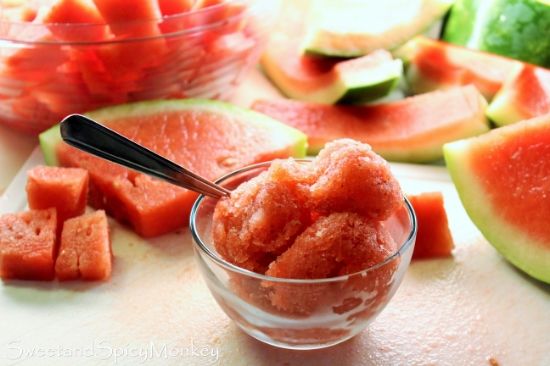
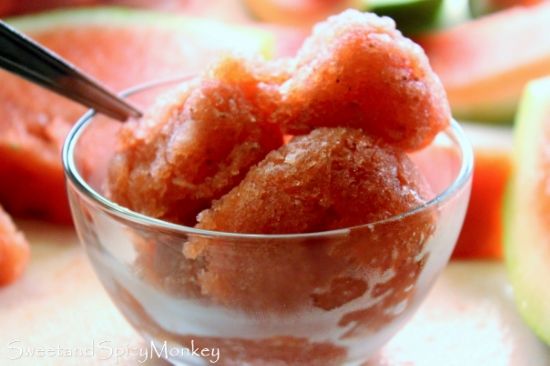
And I think I found it in this Strawberry Watermelon Sorbet. A fresh and fruity frozen treat combined with my favorite, Pink Moscato, to help me ease out of this summer heat and into the coolness of fall.
 

Yes, this is an adult’s only treat because, well, I deserve it and you do too! Like yourself, I work hard and every now and then I just need a little “me” time.


So after the kids have left for school, mix up a batch of my Strawberry Watermelon Sorbet so you can enjoy it later in the day while you’re doing your next home pedi before the kids come home. And while you’re at it, pour yourself a glass of wine, preferably pink Moscato, and relax. Or for a real treat, pour a little wine over the sorbet {smile}.


After all, it’s only a couple more hours before you’ll be back on your feet, making dinner and cleaning up after everyone else until it starts all over again tomorrow morning.
 
Strawberry Watermelon Sorbet

Ingredients

2 cups strawberries, washed, rinsed, and topped

1 to 2 cups watermelon

¾ cup water

¾ cup granulated sugar

½ cup pink Moscato

3 Tablespoons fresh lime juice

Directions

In a small saucepan, add water and sugar. Stirring continuously, heat until sugar is dissolved. Once dissolved, set aside and let cool to room temperature.

Add room temperature sugar water, fruit, lime juice, and wine into a blender and puree until all ingredients are completely mixed together, about 2 minutes.

Pour into a freezer safe bowl and freeze overnight. You can also make it in the early morning so you can enjoy it later in the day while everyone is away with a glass of wine. Enjoy!

*Since this does have wine, please drink eat responsibly.

*Helpful Hints*

- If freezing overnight, leave out for about 20-30 minutes before scooping as it will be frozen hard

- Can also use a white zinfandel wine or your wine of choice

- All measurements are US

All content and images are property of Sweet and Spicy Monkey. Please do not reprint this content without my permission. If you wish to include this recipe on your site, please re-write in your own words and use your own photographs and link back to this post for original recipe.
Follow Julie's board Sweet and Spicy Monkey on Pinterest.

Shared with: #glutenfreefridays #110, Savoring Saturdays #33, Wine'd Down Wednesday 55, Great Idea Thursdays