Sweet and Spicy Monkey has moved to: www.sweetandspicymonkey.com

Showing posts with label Holiday. Show all posts

Friday, November 27, 2015

Chai Tea Pumpkin Pie


I'm not much of a tea drinker. I'm definitely a coffee drinker as you best make sure I have my coffee first before even speaking to me in the mornings.

Did I mention I'm not much of a not at all a morning person either?

However, I do love to drink tea in the colder months or when I get sick and coffee just makes my head hurt.

My favorite kind of tea is chai tea. I fell in love with it after I tried Starbucks Chai Tea Latte.

Oh, if you haven't tried it yet, it's everything like fall should taste like, with warm spices of ginger, cinnamon, cardamom, and black pepper all blended together with black tea. Mmmm….


Which brings us to today's recipe, Chai Tea Pumpkin Pie. A pie that stands alone with a blend of fall spices along with pumpkin chai tea made into a pie!


Did I mention the gingersnap cookie crust? Oh yes I did!

I've been wanting to make a gingersnap cookie crust for some time now and I knew this would be the perfect recipe for it.

Not only can you smell the spices in it, but the flavors are A-M-A-Z-I-N-G!

You'll be going back for seconds with this pie. Ok, maybe thirds and fourths, your secret is safe with me. Just as long as you save me a slice!


Serve me a cup of coffee and this pie and I'll be yours for life, no matter what time of day it is!

Chai Tea Pumpkin Pie

Recipe by Julie Murphy
An infusion of pumpkin chai tea and spices make this delicious Chai Tea Pumpkin Pie perfect for Thanksgiving holidays.
Prep time: 25 minutes
Cook time: 55 minutes
Total time: 1 hour and 10 minutes (includes cooking crust time)
Yield: 1 - 9" pie
Ingredients
  • 4 and 1/2 cups gingersnap cookies
  • 8 Tablespoons (1 stick) unsalted butter, melted
  • 3/4 cup granulated sugar
  • 1/2 teaspoon sea salt
  • 1 teaspoon cinnamon
  • 1/2 teaspoon ground ginger
  • 1/4 teaspoon ground cloves
  • 1/4 teaspoon ground cardamom
  • 2 tea bags pumpkin chai tea
  • 2 large eggs
  • 1-15 ounce can 100% pure pumpkin puree
  • 1-12 ounce can evaporated milk
Cooking Directions
  1. Preheat oven to 325F degrees.
  2. Place gingersnap cookies into a food processor or high speed blender and pulse a few times until cookies resemble fine crumbs. Pour cookie crumbs into a medium size mixing bowl.
  3. Melt butter in microwave on High for about 45 seconds or until butter is melted. This might take a little longer depending on how your microwave cooks.
  4. Pour butter into crumbs and mix together, combining all crumbs with butter.
  5. Press buttered crumbs into a 9" circumference x 2" deep pie pan, including bottom and sides.
  6. Place into oven and bake for 8-10 minutes.
  7. Remove from oven and let cool to room temperature.
  8. To make pie filling:
  9. Preheat oven to 350F degrees.
  10. Cut tea bags open and pour ingredients into a spice grinder and grind until fine powder.
  11. If using a food processor or high speed blender, add tea bag ingredients, 1/4 cup of the pumpkin puree and 1/2 can of evaporated milk. Pulse 4 to 5 times until tea bag ingredients are finer. Add remaining can of evaporated milk, sea salt, cinnamon, ginger, cloves, cardamom and pulse 3 to 4 more times until blended.
  12. In a large mixing bowl, beat eggs. Add in sugar and remaining pumpkin, blending well. Combine evaporated milk mixture.
  13. Pour into cooled pie shell.
  14. Place into oven and bake for 45-55 minutes or until knife inserted into middle of pie comes out clean.
  15. Remove from oven and let cool on a wire rack for at least 2 hours.
  16. Serve after pie has cooled or refrigerate. If refrigerating, make sure pie is cool before covering for storage.
  17. Best served with Maple Whipped Cream on top. Recipe below.

Homemade Maple Whipped Cream

Recipe by Julie Murphy
A delicate maple flavored homemade whipped cream.
Prep time: 5 minutes
Cook time: 0
Total time: 5 minutes
Yield: 2 cups
Ingredients
  • 1 cup heavy cream
  • 1/2 teaspoon vanilla extract
  • 1 Tablespoon powdered sugar
  • 2 Tablespoons pure maple syrup
Directions
  1. Add all ingredients into a mixing bowl.
  2. Using a wire whisk, whip until stiff peaks start to form or desired thickness of whipped cream. I always like mine a little thicker so I whip for about 4 to 5 minutes.
  3. Place into an airtight container and let chill.
  4. Store in refrigerator up to 1 week.
  5. Use anywhere whipped cream is called for in a recipe.

Pie recipe inspired by ~ Libby's Famous Pumpkin Pie recipe from the label of 100% Pumpkin product. 

All content and images are property of Sweet and Spicy Monkey. Please do not reprint this content without my permission. If you wish to include this recipe on your site, please re-write in your own words and use your own photographs and link back to this post for original recipe.
Follow Julie's board Sweet and Spicy Monkey on Pinterest.

Monday, November 23, 2015

Thanksgiving Recipe Round-up


This week is one of the biggest food holidays of the year, Thanksgiving. And since Thanksgiving is all about sharing, I asked some of my foodie friends to share some of their Thanksgiving recipes so I can share them with you.

Because we all are a little a lot stressed around this time of year. And trying to find a recipe to take to your significant others mom’s home for the big day that will WOW everyone at the table is mind boggling on top of all the other stresses, like trying to decide what shoes to wear with your outfit! I mean really, should you wear heels, flats, or boots?

Plus, you have to decide how to wear your hair and then your boyfriend (significant other) announces he has "volunteered" you to make what?!? When?!? And for how many people?!? What time are we supposed to be there?!?

Oh the joys of family gatherings during the holidays!

No need to freak out because we have you covered. There's a recipe for cranberry salad, stuffing/dressing, dinner rolls, drinks, and everyone's favorite, dessert.

So sit back, pour yourself a glass (or two) of wine, relax, and tell your hubby you've got it covered.

Now if only you can decide what shoes to wear?

1.) Smoked Bourbon Gravy | Vindulge
Mary teaches you how you can get the taste of smoked gravy without ever smoking your bird.

2.)  Fall Harvest Stuffing | Baking in a Tornado
Karen shares with us her Fall Harvest Stuffing made with a smoky cornbread. Are you noticing a trend here? This stuffing mixed with the smoked gravy sounds delicious!

Another traditional side dish for Thanksgiving is potatoes. And you might see these spuds prepared in many different ways including mashed, au gratin, and sweet potatoes.

3.) Gratin Dauphinois | Mon Petit Four
Beeta shares with us a French version of potatoes, Gratin Dauphinois. Now don't let the fancy French name scare you away as these are easy to make and so worth it! This dish consists of potato slices that are layered with cream and gruyere cheese before they're baked. The cheese forms a crispy layer with creamy, tender potatoes underneath. Those French definitely do know how to cook!

4.) Potatoes Au Gratin with Creamy Jalapeno Sauce | Living Sweet Moments
As if those didn't have your mouth watering yet for the big day to come, Tiffany spices things up a bit with her Potatoes Au Gratin with Creamy Jalapeno Sauce. Mmm, y'all know how I love Mexican foods!

5.) Coconut Sweet Potatoes | Sweet and Spicy Monkey
Who can forget these from last year? A taste of the tropics mixed in with classic Thanksgiving flavors.

6.) Tamale and Cornbread Dressing with Chorizo | This is How I Cook
Another Mexican inspired recipe for Thanksgiving is this Tamale and Cornbread Dressing with Chorizo by Abbe.

7.) Biscuit and Cornbread Dressing | Chattavore
Mary brings us back to the states, down South to be exact, with this Biscuit and Cornbread Dressing. Thank you m'aam!

8.) Ricotta Filled Cornbread recipe | Living Sweet Moments
Tiffany combines buttermilk and ricotta cheese in a cornbread that is based on a traditional Jewish dish called "malay". It's a mixture of sweet, savory, while bursting with flavors.

9.) Apricot and Almond Stuffing | The Hungary Buddha
A Middle Eastern inspired stuffing that's packed full of flavors.

10.) Homemade Dinner Rolls | Living Sweet Moments
Here Tiffany shares her recipe with a tutorial so even the most amateur baker can have these light, fluffy dinner rolls on their Thanksgiving table this year.


No Thanksgiving table is complete without the cranberry sauce. I'm sharing with y'all four different ways you can enjoy this seasonal berry.

11.) Crazy Easy Fresh Cranberry Sauce | Full Belly Sisters
A few wonderful fresh ingredients and you have yourself a show stopping side dish!

12.)  Greek Yogurt Cornbread Cranberry Trifle | Full Belly Sisters
Such an easy dessert to make, yet so elegant looking.

13.)  Frozen Cranberry Salad | This is How I Cook
A frozen mixture of cream cheese, Cool Whip, cranberries, pineapple, and walnuts. Yes, please!

14.)  Cranberry Cherry Sauce | Sweet and Spicy Monkey
Made with red wine. Just another excuse to open up a bottle of wine!

15.) Pomegranate Sparkling Sangria with Asian Pear | Diary of a Mad Hausfrau
Start your Thanksgiving Day guests off with this festive drink for a merrier celebration.

16.)  Harvest Salad | Sweet and Spicy Monkey
A variety of autumn vegetables and fruits combined for a healthy and flavorful dish. Perfect for all vegans any time of the year!

17.) Lebanese Spiced Squash with Roasted Fennel Salad | The Hungary Buddha
Acorn squash with the flavors of za' atar seasonings.

18.) Pecan Pie | Platter Talk
Dan shares a recipe that's been in his family for decades. A traditional recipe that's not only delicious, but holds many memories and hope for more!

19.) Maple Pecan Cream Cheese Pound Cake | This is How I Cook
 A taste of fall with every bite!

20.)  GF Chocolate Chai Latte Pound Cake | Sweet and Spicy Monkey
I didn't forget about you chocolate lover's out there!

21.)  Apple Pie | Sweet and Spicy Monkey
Blends apples with bourbon for a smooth tasting apple pie like you've never had before!

22.) Soft Gingersnap Cookies | Sweet and Spicy Monkey
Perfect for keeping you from eating all the desserts before dinner.

23.) No-Churn Bourbon and Pumpkin Ginger Spice ice cream | Sweet and Spicy Monkey
Easy to make and oh so deliciously creamy!

24.) Bourbon and Brown Sugar Sauce | Sweet and Spicy Monkey
This sauce makes everything taste better!

25.) Cinnamon Baked Donuts | Amanda Bootes Blog
Easy to make without any specialized equipment or techniques. Mmm, Donuts!

26.) Pumpkin Caramel Cheesecake French Macarons | Diary of a Mad Hausfrau
 A bite size cookie with a taste of pumpkin cheesecake and a caramel finish.

27.)  Turkey, Cranberry and Sweet Potato Pie recipe | This is How I Cook
This savoury pie of turkey sausage, breast of turkey, cranberries, and sweet potatoes all enclosed with a flaky pie crust is a meal in itself. This would be great for breakfast the day after Thanksgiving!


All content and images are property of Sweet and Spicy Monkey. Please do not reprint this content without my permission. If you wish to include this recipe on your site, please re-write in your own words and use your own photographs and link back to this post for original recipe.
Follow Julie's board Sweet and Spicy Monkey on Pinterest.

Tuesday, November 3, 2015

Apple Pie


I have to confess, when I was growing up Apple pie was my least favorite pie. I remember going around telling my family members that I must not be American because I don't like apple pie or baseball {Gasp!!!}.

Nope, my favorites were are pecan pie and football.

Which now I know you're wondering what changed, if anything, because here I am making and sharing a recipe for Apple pie.

I really don't know other than I guess my tastes have changed since I was a kid. Or it could have been that one of my ex-boyfriends loved Apple pie, so I had to swallow my dislike and learn not only how to make it, but to love it too!

Oh, the things we do for love. And even though he’s no longer in the picture, I still love apple pie.

Now I used store bought pie crust because after peeling, coring, and dicing the apples, I just didn't feel like making my own pie crust.

But if you're into that sort of thing, then go right ahead and use your home made pie crust. For me, I'm taking the shortcut and focusing all my energy on the contents of this apple pie.

I think you'll surprisingly love my secret ingredient that makes this pie A-M-A-Z-I-N-G, a little splash of bourbon! Yes, bourbon, because everything's a little better around the Holidays with alcohol!

As you can see my pie vented on its own too, which is ok because it makes for more of a homemade look.

Plus the bourbon gives it a smooth appley (yes, appley as in rich apple flavoring) essence like no other!

All in all, I'm glad I finally learned how to love apple pie. As for baseball, well, why bother when I have football.


Apple Pie

An old fashioned apple pie recipe with a hint of bourbon for a smooth apple flavor.
Prep time: 30 minute
Cook time: 50 minutes
Total time: 1 hour and 10 minutes
Yield: 1 Apple pie
Ingredients
  • 3 lbs. Granny Smith apples, peeled, cored, and diced
  • 1 Tablespoon lemon juice
  • 1/4 cup brown sugar, packed
  • 1/4 cup white sugar
  • 1 teaspoon cinnamon
  • 1/2 teaspoon apple pie spice
  • 1/4 teaspoon nutmeg
  • 1/4 teaspoon sea salt
  • 2 Tablespoons unsalted butter
  • 2 Tablespoons corn starch
  • 4 teaspoons bourbon
  • 1 double pie crust (store bought or homemade)
  • 1/4 cup warm water
  • 1 Tablespoon white sugar
Cooking Directions
  1. Preheat oven to 425F degrees.
  2. In a large bowl, mix together lemon juice, brown and white sugars, cinnamon, apple pie spice, nutmeg, sea salt, and 2 teaspoons of bourbon.
  3. As you peel, core, and dice your apples, toss them into the bowl with sugar and spices and mix to allow the apples to start macerating.
  4. After all the apples are in the bowl, mix together so apples are covered with sugar and spice mixture, and let sit at room temperature for about 1 to 3 hours.
  5. You can prepare your pie dough at this time. If using store bought pie crust, remove from refrigerator and bring to room temperature. This helps it roll out easier without cracking (hopefully!).
  6. After apple mix has set out, mix together and strain out 1/2 cup of their juices.
  7. Add the juice and butter to a small saucepan. Cook over medium to high heat until it becomes thick and syrup-like, about 10 minutes.
  8. Combine syrup, cornstarch, and remaining 2 teaspoons of bourbon with apples and mix together.
  9. Pour apples into prepared pie shell. Cover with remaining pie shell. Make a few slices in top crust to help vent while baking.
  10. Transfer into oven and bake for 45 to 50 minutes.
  11. After 20 minutes of baking, you might have to place aluminum foil around the edges so pie crust will not burn.
  12. After 45 minutes, remove pie from oven and brush with warmed sugar water (recipe below).
  13. Place back into oven for 5 to 10 minutes, or until pie crust is lightly golden brown.
  14. Remove from oven and let cool for 2 to 3 hours.
  15. Best served warm and topped with vanilla ice cream or a dollop of whipped cream on top.

Sugar water

Directions
  1. In a small bowl add 1/4 cup water and 1 Tablespoon white sugar.
  2. Place in microwave for about 40-50 seconds or until warm.
  3. Mix together and brush over pie crust.
  4. You will have some remaining so DO NOT brush all of it on pie crust.


Inspired by ~ Pacific Pie Company. Check out their page for alternatives to their Old Fashioned Apple Pie recipe.
 
All content and images are property of Sweet and Spicy Monkey. Please do not reprint this content without my permission. If you wish to include this recipe on your site, please re-write in your own words and use your own photographs and link back to this post for original recipe.
Follow Julie's board Sweet and Spicy Monkey on Pinterest.

Monday, October 26, 2015

Halloween Apples

 
I'm so excited to be sharing today’s recipe, Halloween Apples, and just in time for Halloween! I know it doesn't sound like anything special, but think of melted candy, Halloween sprinkles, and apples.
 

It's like a cupcake, but with apples, and without the cake. So it's healthy for you, right?
 
I love these tombstone sprinkles!

I have to confess, I had so much fun making these because it's, well, so FUN to do! Or maybe I just really get into making my food!
 

Let's just say Thor was looking at me and shaking his little feline head. Really all I needed was a witch’s hat and a giant cauldron to set the scene in my kitchen the day I made these!
 

And the best part about making these (other than eating them) is you don't have to have any cooking skills. Well, okay, it wouldn't hurt to know how to operate a microwave.

But that's the extent of cooking skills needed. If you can operate a microwave oven, then you can make these Halloween Apples.

Plus you can decorate 12 apples in under 20 minutes. How's that for time management?

And they're the healthier choice for Halloween treats! Yes, I believe if I tell myself that enough times, then it’s true. They ARE healthy!


Halloween Apples

Recipe by Julie Murphy
Halloween inspired apples for a healthier Halloween treat!
Prep time: 5 minutes
Cook time: 2 to 3 minutes
Total time: 20 minutes
Yield: 3 lbs. Halloween apples
Ingredients
  • 3 lbs. mini Granny Smith apples, washed well, rinsed, and dried
  • 2 - 12 ounces white candy melts
  • 1 packet (30 count) Bamboo lollipop sticks
  • 2-3 small bottles Halloween cupcake sprinkles
Directions
  1. After apples have been washed, rinsed, and dried, remove the stems.
  2. Insert lollipop sticks, about 1 inch, into center of apples where stem once was. Set apples with sticks aside.
  3. Line a cookie sheet with wax paper. Set aside.
  4. Place 3 small bowls on counter where you will be decorating apples. If no shaker top is on your sprinkle bottle, pour sprinkles into separate small bowls.
  5. Place 1 clean spoon near sprinkle bowls.
  6. In a medium to large microwave-proof bowl, pour in 1 bag of candy melts. (I found it easier to use 1 bag of candy melts at a time when making my Halloween Apples.)
  7. Place into microwave oven and microwave on High for 2 to 3 minutes, stirring with a wooden spoon every 20 to 30 seconds until all candy melts are melted. Keep in mind, candy melts will not look melted until you stir them and stirring every 20-30 seconds helps prevent burning the candy melts.
  8. After candy melts are melted, its time to start dipping the apples.
  9. Grabbing apples by the lollipop sticks, insert the apple into the melted candy and spin around the bowl, coating the apple with melted candy. You can use a spatula to cover the area around the stick and cover up any bare spots on the apple.
  10. After apples are coated with candy melts, sprinkle with Halloween sprinkles by either sprinkling over the apple or spooning sprinkles over the apple while holding the apple over the bowl.
  11. Place candy coated apples on wax paper. Repeat process with remaining apples.
  12. Place into the refrigerator to help set the candy coating.
  13. Serve at room temperature.


Cinnamon coated apples
I had some remaining apples so I made Cinnamon Coated Apples just for fun! I hope you love these too!


Cinnamon Coated Apples

Recipe by Julie Murphy
Cinnamon coated apples that are a deliciously sweet treat for Halloween and Thanksgiving holidays.
Prep time: 5 minutes
Cook time: 2 minutes
Total time: 10 minutes
Yield: 5 cinnamon coated apples
Ingredients
  • 5 mini Granny Smith apples
  • 1/2 to 3/4 cup white candy melts
  • 1/2 cup cinnamon chips
  • 1/4 cup sugar
  • 1 to 2 teaspoons ground cinnamon


Directions
  1. After apples have been washed, rinsed, and dried, remove the stems.
  2. Insert lollipop sticks, about 1 inch, into center of apples where stem once was. Set apples with sticks aside.
  3. Line a cookie sheet with wax paper. Set aside.
  4. Mix sugar and cinnamon together in a small bowl. Place on counter where you will be decorating apples.
  5. Place 1 clean spoon near bowl.
  6. In a medium to large microwave-proof bowl, pour in cinnamon chips and candy melts.
  7. Place into microwave oven and microwave on High for 1 to 2 minutes, stirring with a wooden spoon every 20 to 30 seconds until all candy is melted. Keep in mind, candy will not look melted until you stir them and stirring every 20-30 seconds helps prevent burning the candy.
  8. After candy is melted, its time to start dipping the apples.
  9. Grabbing apples by the lollipop sticks, insert the apple into the melted candy and spin around the bowl, coating the apple with melted candy. You can use a spatula to cover the area around the stick and cover up any bare spots on the apple.
  10. After apples are coated with melted cinnamon, sprinkle with cinnamon sugar by spooning cinnamon sugar over the apple while holding the apple over the bowl.
  11. Place candy coated apples on wax paper. Repeat process with remaining apples.
  12. Place into the refrigerator to help set the candy coating.
  13. Serve at room temperature.        
*Helpful Hints*
 
- You can use white chocolate chips mixed with vegetable or coconut oil instead of candy melts. Use 1 teaspoon of oil to 1 cup white chocolate chips.
 
All content and images are property of Sweet and Spicy Monkey. Please do not reprint this content without my permission. If you wish to include this recipe on your site, please re-write in your own words and use your own photographs and link back to this post for original recipe.
Follow Julie's board Sweet and Spicy Monkey on Pinterest.

Shared with: Savoring Saturdays

Tuesday, October 20, 2015

Pumpkin Marshmallow Popcorn Balls


Fall is finally here and Halloween is just around the corner. And I can't let October slip away without making some Halloween inspired treats. After all, what kind of food blogger would I be if I left y'all hanging like that?

Don't worry your pretty little heads because I have a special treat for you today, Pumpkin Marshmallow Popcorn Balls.

Yes, I have slipped into the dark side and (finally) made a pumpkin flavored treat! But these are nothing like your ordinary pumpkin treats. These are ooey, gooey marshmallow combined with lightly salted popcorn for a sweet & salty snack attack!


Not only are they all that, but they're made to resemble small pumpkins for a festive Halloween or Thanksgiving treat.

I have to say I was excited as a little kid on Christmas morning when I found this recipe. Just the thought of marshmallowey goodness and popcorn made me shiver with excitement! I mean who can resist having their hands covered with gooey marshmallow, right?

What's more fun is the kids can help you make these too! Just be sure the cat and dog are nowhere to be found during the making process or you will have little hands stuck on Fido's hair!


I'm hoping these Pumpkin Marshmallow Popcorn Balls bring out the kid in you too!

Pumpkin Marshmallow Popcorn Balls

Pumpkin marshmallow popcorn balls are both sweet & salty, crunchy & gooey. Perfect for both Halloween and Thanksgiving!
Prep time: 5 minutes
Cook time: 10 minutes
Total time: 35 minutes
Yield: 1 dozen popcorn balls
Ingredients
  • 2 - 3.2 ounce bags lightly salted, light butter microwave popcorn, uncooked
  • 1- 16 ounce bag miniature marshmallows
  • 1/2 cup + 1 Tablespoon butter or margarine
  • 1 teaspoon pumpkin pie spice extract
  • 1 teaspoon vanilla extract
  • 2 to 3 drops red & yellow food coloring
  • green writing gel or frosting
  • Honey Wheat braided pretzel twists
  • parchment paper
Directions
  1. Line cookie sheet with parchment paper. Place in refrigerator or freezer to chill until ready to use.
  2. Cook microwave popcorn as directed on box. Remove from microwave and open bags. Set aside.
  3. Add 1/2 cup butter to a large sauce pan over low to medium heat. Melt butter while stirring constantly to help prevent burning.
  4. Once butter is melted, add marshmallows. Continue stirring marshmallow butter mixture over heat until all marshmallows are melted, about 10 minutes. When all marshmallows are melted, remove pan from heat.
  5. Stir in pumpkin pie spice extract and vanilla.
  6. Add a couple drops of red and yellow food coloring to melted marshmallows until you get desired orange coloring. 2 to 3 drops for a light orange coloring, more for a deeper orange color.
  7. Combine 5 and 1/2 cups of cooked popcorn with orange marshmallows, stirring well to get all popcorn covered with marshmallow. If it looks like there is still a lot of marshmallow in the pan, add more popcorn.
  8. With the 1 Tablespoon of butter or margarine, rub between your hands, leaving your hands lightly buttered. You won't be using all of it at once, you will be buttering up your hands between shaping each popcorn ball.
  9. Grab some marshmallow covered popcorn and shape into a ball, compress tightly. Once ball shape is formed, place onto chilled parchment lined cookie sheet.
  10. Repeat with remaining marshmallow covered popcorn. You can make any size balls you like. I found the small popcorn balls hold their shape best.
  11. To make stem of popcorn balls, break braided pretzel twist in half and insert into top of popcorn balls. Press popcorn around pretzel to hold in place.
  12. Decorate with green writing gel or frosting to make leaves or vines. Use your imagination!
  13. Place into your refrigerator to chill.
  14. Store covered up to 1 week in the refrigerator.

*Helpful Hints*

- Wash your hands with soap & water and slather butter on them before shaping each ball. Otherwise your hands will stay sticky, making it hard to shape the marshmallow popcorn into balls.
 
- I've seen where some recipes say to use non-stick cooking spray instead of butter or margarine to use on your hands before shaping the balls. I tried it and it did not work for me. I found butter or margarine works best to keep everything from sticking to your hands.
 
- If watching your sodium intake, use plain popcorn.
 
- To keep these gluten-free, use GF pretzel twist.

- You can use ground pumpkin pie spice if you don't have the extract.
  
Inspired by ~ Mom On Time Out
 
All content and images are property of Sweet and Spicy Monkey. Please do not reprint this content without my permission. If you wish to include this recipe on your site, please re-write in your own words and use your own photographs and link back to this post for original recipe.

Tuesday, December 9, 2014

Dreamy Dark Chocolate Peanut Butter Dip


It's all about the food....'bout the food...'bout the food this month as December is the season for parties. You have Christmas parties for work, Christmas parties with family and friends, another Christmas party with your other friends, and the Christmas party with your neighbors. And that's just the Christmas parties. Then there's the New Years Eve parties and New Years parties.

You'll not only need food for main courses, but you'll need appetizers, chips and dips, and drink ideas. Plus you'll need food for the kids while you're out doing "grown up stuff".


This dip is perfect for any of the above. Plus it's quick and easy to make and you probably have all the ingredients in your cupboards right now.

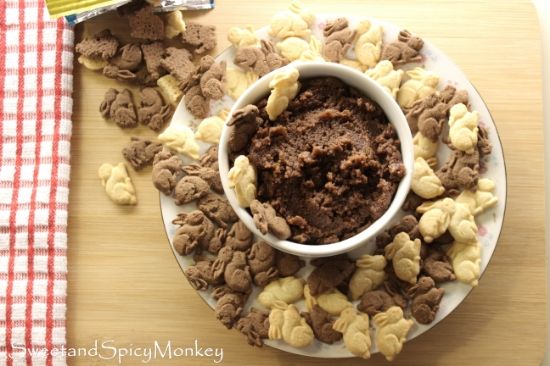
It's also quite versatile. You can serve it with anything from graham crackers, pretzels, chocolate or vanilla wafers to banana chips and plantain chips. Trust me, I tried them all, for the sake of saving you from having to do all the hard work, of course.

I'll just dance a little more this season to help burn off the calories. Ha, if you saw me dance you wouldn't have let me taste test my dip with all the different dippers {chuckle}. Remember that Seinfeld episode where Elaine dances....


 Feel free to try it with your own likings and let me know what combinations you serve it up with.

Dreamy Dark Chocolate Peanut Butter Dip

Ingredients

8 ounces cream cheese, room temperature

1 cup Dark Chocolate Dreams peanut butter

1 teaspoon cinnamon

6 Tablespoons honey

Directions

In a medium sized mixing bowl, add cream cheese and peanut butter, blending together until creamy.

Mix in cinnamon and honey throughout mixture. Mixture will be thick like a cookie dough.

Refrigerate in an air tight container until ready to serve. Can be stored refrigerated up to one week.

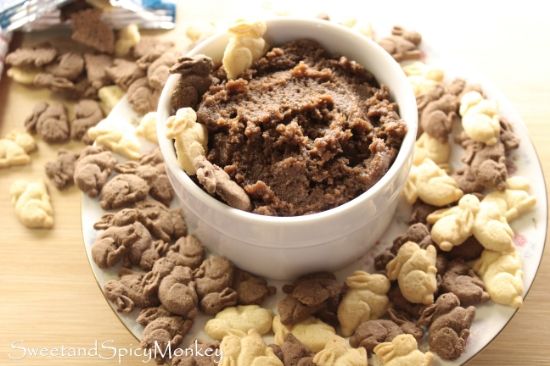
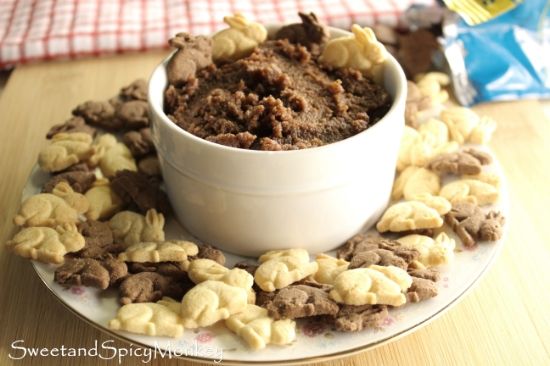
Serve in a bowl with side of pretzels, wafers, banana chips, plantains, or Annie's cocoa and vanilla gluten free bunny crackers, as pictured in the photos.

*Helpful Hints*

- Can also use whipped cream cheese, low-fat or fat-free cream cheese, or Neufchatel cheese, room temperature.


Disclaimer ~ I do not represent Peanut Butter & Co., nor did I receive any monies for this post. I just love their Dark Chocolate Dreams peanut butter and found it delicious in this recipe.

All content and images are property of Sweet and Spicy Monkey. Please do not reprint this content without my permission. If you wish to include this recipe on your site, please re-write in your own words and use your own photographs and link back to this post for original recipe.


Follow Julie's board Sweet and Spicy Monkey on Pinterest.

Shared with: Freedom Fridays with All My Bloggy Friends #61, Munching Mondays #73

Saturday, December 6, 2014

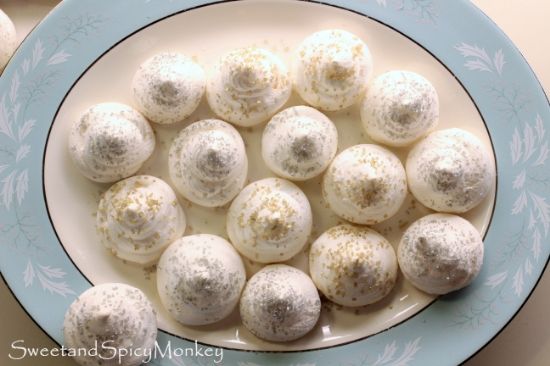
Peppermint Meringue Cookies


Can you believe its December? And you know what that means, don’t you? Yep, cookie making season is officially here!

I love baking cookies, especially Christmas cookies. There are so many different kinds, flavors, textures…I think you get my hint. There are just so darn many Christmas cookies to make that one month is not enough time to bake them all in!

And in my…umm, let’s just say older years, there are still some I’ve never made before. Yes, it’s true, I have not baked all of the different kinds of Christmas cookies out there. I know, I can’t believe it myself.

So far this year, I’ve made two different kinds of Christmas cookies that I’ve never attempted to bake before. One being these meringue cookies I'm sharing with you today and the other is the Christmas cookies I made for the cookie swap, that I will be sharing with you on December 15th.


I don't know why I've never made these cookies before. After all, they're light, airy, and fat free. Yes, fat free since their main ingredients are egg whites and sugar. That means gluten-free too!

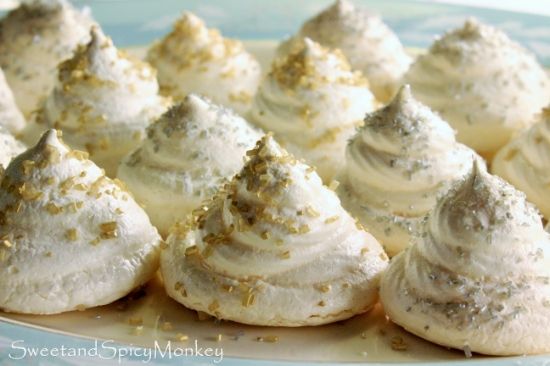
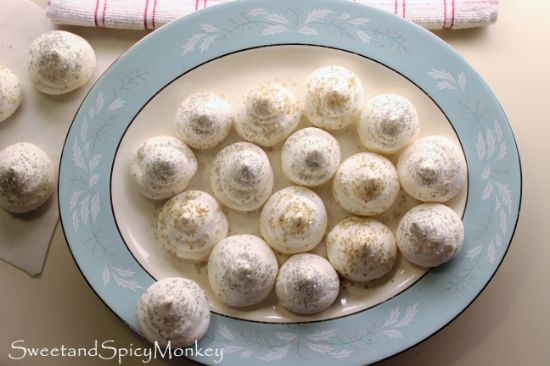
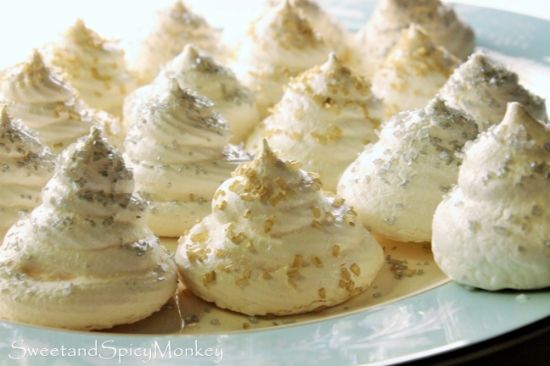
Even though these were a little messy for me to make (anything that involves piping stuff is messy for me), the end result are these beautiful snowy white meringue cookies sprinkled with silver and gold with a kiss of peppermint flavoring. The perfect cookie for any Holiday party.


I kept singing the Christmas song from Rudolph the red-nosed reindeer, "Silver and Gold" while I was making these cookies. You too can listen to it right here ~

    .
Now that you’re in the mood, here’s the recipe for my Peppermint Meringue Cookies so you can enjoy them at your home too, while singing "Silver and Gold" {smile}.

Peppermint Meringue Cookies

Ingredients

4 egg whites

1 cup sugar

2 pinches Cream of Tartar

¼ teaspoon peppermint extract

1/8 teaspoon vanilla extract

Gold decorating cupcake gems (found in the baking aisle)

Silver decorating cupcake gems

Directions

Preheat oven to 195F degrees.

Line cookie sheets with parchment paper. Making sure to fit the parchment paper on the cookie sheet by cutting off any overhang. I found it easier to crinkle the parchment paper when placing it on the cookie sheet so it stays in place and won’t roll everywhere with its natural shape from being on the tube. Set aside.

Fill a large saucepan halfway with water. Heat until boiling. Turn down heat after it begins to boil.

In a large metal mixing bowl, combine egg whites, sugar, and cream of tartar. Using a small hand whisk, whisk together for about 10 seconds, until all ingredients are combined.

Place over heated water and whisk until sugar dissolves. This should only take a couple minutes. Remove from heated water.

Using either a hand or a stand mixer, whip mixture on High speed until peaks start to form.

Add in vanilla and peppermint extract. Continue to whip until stiff peaks start to form. You can tell this when you remove the wire whip away from the mixture and it remains peaked.

Now it’s time to make the cookies. Using a pastry bag and an open star tip, carefully make round circles going wide then narrowing as they go up in height. Making about 2 inches in height and placing 2 inches apart on the cookie sheet. Or you can make any design you wish.

Sprinkle with your gold and silver decorating cupcake gems {Feel free to sing during this time}.

Bake for 90–120 minutes. That’s one hour and a half to two hours baking time. You don’t want them to brown, so keep an eye on them after 90 minutes if they need to cook a little longer. They should have a crispy outer shell when tapped.

After meringues have baked, leave them in the oven, turn off the heat, prop the oven door open about 3 inches to let the cookies cool and crisp up a little more. Leave like this for 2 hours.

After 2 hours, remove cookies from the oven.

To remove the cookies from the parchment paper, either gently twist off the cookies or gently pull parchment paper away from the cookies. They should come off clean.

There might be a little sticky going on and that’s where the gentle pulling of the parchment paper away from the cookie works best. Be careful not to squish the cookies between your fingers while trying to remove them from the parchment paper.

Store in an airtight container for up to one month. In high humidity climates, they will keep for 2-3 weeks in storage.

*Helpful Hints*

- I didn’t find this out until after I made my cookies which I made on a rainy day but meringue is best made on a day without humidity. Because the humidity causes soft and muted peaks instead of stiff and sharp peaks.

- You can also add any flavoring or coloring you like to these cookies.

- Keep a damp towel nearby when making these because you will get it on your hands. Unless, of course, you’re a professional, but for those like me, it will get on your hands {smile}.

Disclaimer - "Silver and Gold" is from the classic 1964 CBS Special "Rudolph the Red-Nosed Reindeer", sung by Burl Ives. Video uploaded from YouTube.*

All content and images (excluding video "Silver and Gold")* are property of Sweet and Spicy Monkey. Please do not reprint this content without my permission. If you wish to include this recipe on your site, please re-write in your own words and use your own photographs and link back to this post for original recipe.
Follow Julie's board Sweet and Spicy Monkey on Pinterest.

Featured here ~ Sweet and Savoury Sundays #93, Gluten- Free Holiday Drinks & Cookies, Savoring Saturdays


Shared with: The Wednesday Roundup #54, Wake Up Wednesday Linky Party, On Display Thursday #23, Pinworthy Projects Link Party #46, City of Links #49, Savoring Saturdays Party, Snickerdoodle Sunday #59, Sweet and Savoury Sunday #92, Wine'd Down Wednesday 66, Simple Supper Tuesday #19, The Southern Special Week 37, Tickle My Tastebuds Link Party, Foodie Friends Friday Recipes, Crafts, DIY Linky Party #126

Wednesday, December 3, 2014

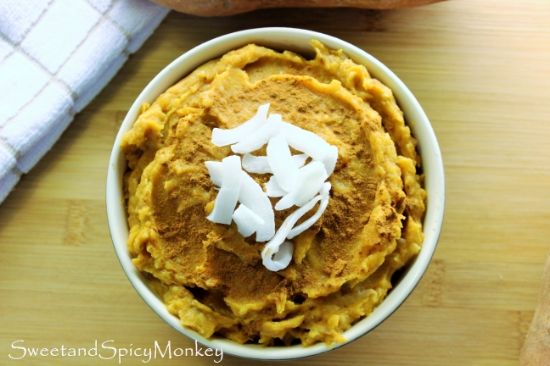
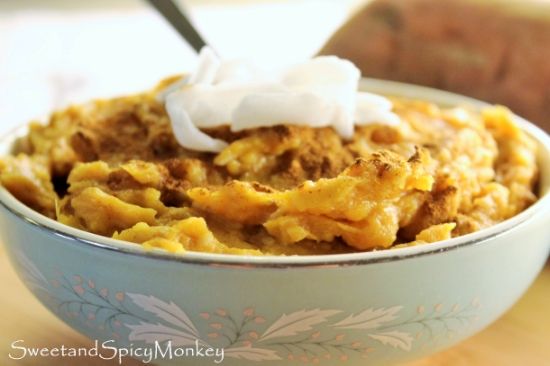
Coconut Sweet Potatoes


I know I'm a little late for Thanksgiving with this recipe but sweet potatoes are still in season. And I'm hoping Thanksgiving isn't the only time you eat these awkwardly shaped orange delights because they are so good and good for you.

Remember over the summer when I couldn't get enough coconut? Well, I still love the stuff and I've found a way to bring the taste of the tropics to my Fall and Winter menu. I've added coconut to my sweet potatoes! Oh. Yes. I. Did!


When I saw FOOD52 making mashed sweet potatoes using coconut milk, it gave me an idea. On Thanksgiving, I added shredded coconut to my sweet potato and liked it. But it needed a little something else to moisten it up, which is when I remembered the coconut milk.


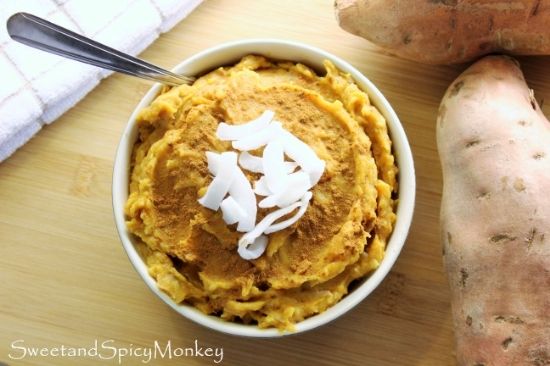
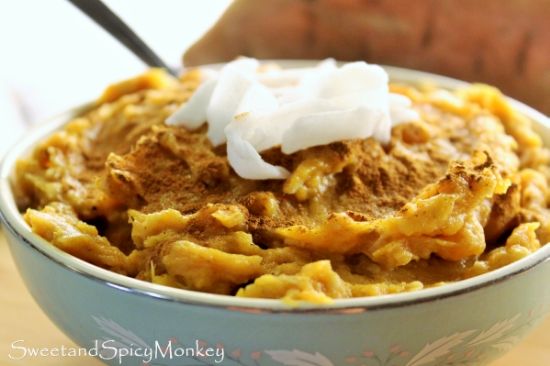
So the next time I cooked a couple sweet potatoes, I removed the skin, whipped them up, added brown sugar, coconut milk to help make them creamy and add a little coconut flavor, just a dab of butter, cinnamon, and shredded coconut flakes. The result was A-M-A-Z-I-N-G!


If you love coconut, then you'll absolutely flip for these sweet potatoes! They're sweet and creamy, and I love the texture the coconut flakes bring to them. It's like a little taste of the islands brought to your table during these long cold winter months.

Watch me make this recipe on Simmer here.

Coconut Sweet Potatoes

Serves 4


Ingredients


2 medium sweet potatoes - cooked, skinned, and quartered

1 Tablespoon unsalted butter (can also use margarine)


½ cup + 1 Tablespoon coconut milk, canned

6 Tablespoons brown sugar, packed


1 cup flaked coconut, unsweetened

1 teaspoon ground cinnamon

Dash of cinnamon for topping


Coconut strips for topping
 
Directions

If cooking in the oven, preheat oven to 325F degrees.

Line a cookie sheet with parchment paper and set aside.


Clean sweet potatoes under running water and scrub with a vegetable brush until clean. Dry.

Make a few holes in potatoes with a sharp knife and wrap in aluminum foil.
Place on a cookie sheet lined with parchment paper and cook for about 1 hour and 20 minutes or until sweet potato is tender. You should be able to easily insert a sharp knife or fork into the middle of the sweet potato flesh.
Remove from oven and unwrap to cool.
After cooling for about 10 minutes, move sweet potatoes to a cutting board and cut in half. Be careful as sweet potato will still be hot. You should be able to gently remove the skin with a knife and fork without touching the flesh with your fingers.
Cut into quarters and toss into a large mixing bowl. 
Whip potatoes for about 1-2 minutes, or until potatoes are no longer solid.
Blend in butter and coconut milk until potatoes become creamier in texture.

Mix in brown sugar, flaked coconut, and cinnamon until all ingredients are blended.

Pour into a serving bowl. May have to heat in the microwave for a minute or two before serving if they have cooled off too much.  

Top with a dash of cinnamon and a few coconut strips on top and serve.

*Helpful Hints*
- I prefer sweet potatoes cooked in the oven as to boiled in water since they retain more of their nutrients when cooked in the oven.
- I found parchment paper helped in not burning the bottom of my sweet potatoes as they cooked. If you don't have parchment paper, you can always turn them over through half of the cooking time.
- You can always add a little more coconut milk if you like a thinner texture to your potatoes.

 All content and images are property of Sweet and Spicy Monkey. Please do not reprint this content without my permission. If you wish to include this recipe on your site, please re-write in your own words and use your own photographs and link back to this post for original recipe.


Follow Julie's board Sweet and Spicy Monkey on Pinterest.

Shared with: On Display Thursday #22 , Foodie Friends Friday Linky Party, Freedom Fridays with All My Bloggy Friends #58, Skip the Housework #45 Link Party, Mix it Up Monday!, Crafty and Delicious Party

Sunday, November 23, 2014

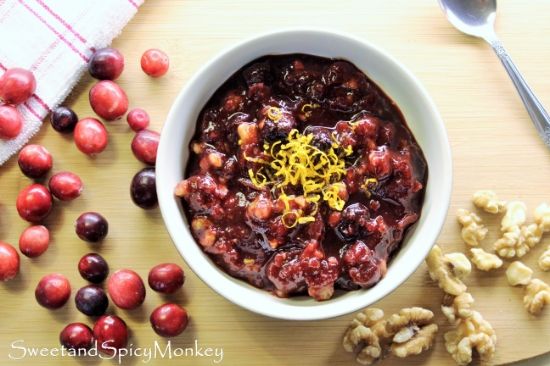
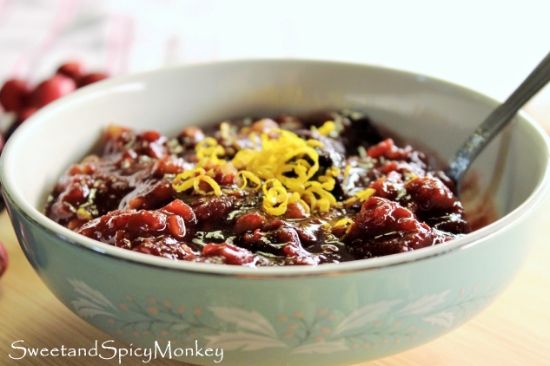
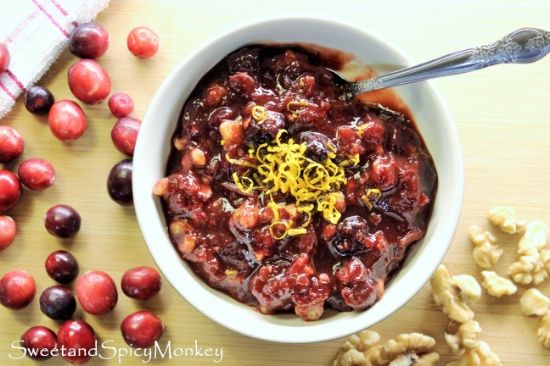
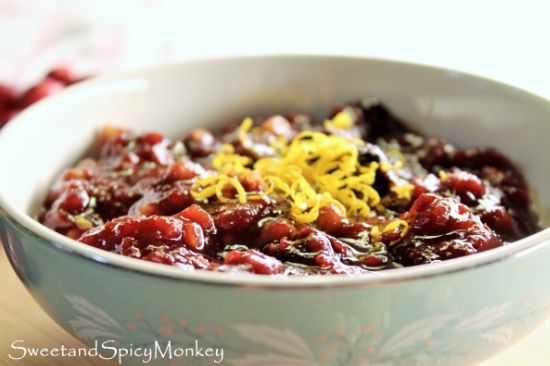
Cranberry Cherry Sauce


Can you believe Thanksgiving is just four days away? FOUR DAYS!!!???!!! Eeek!

But seriously, I can't believe how fast this year has gone by and the Holidays are once again upon us.


With that in mind, I thought it was only appropriate to share a traditional holiday recipe with y'all today. Well, not really traditional because there's a little spin on it.

The traditional recipe is cranberry sauce and the recipe I'm sharing with you is a cranberry cherry sauce. Similar yet different. And so much better than store bought.


Not to mention you can make this ahead of time so you won't have to worry about it on the big day. Which actually works out better since it needs to chill overnight.

I soaked my cherries overnight in apple cider with two tablespoons of red wine. You can probably use any type of wine you like best - white, rose, or red, which will make this dish more personable to you. Plus you can always add in a little more wine if you like {wink}.

And you can make a non-alcoholic version for the kids, by just leaving out the wine.


Just remember which one is which when serving time comes!

Cranberry Cherry Sauce

Makes 8 ounces

Ingredients

1 cup sweet apple cider
2 Tablespoons red wine

1 cup frozen cherries

12 ounces of fresh cranberries, rinsed

1 cup + 2 Tablespoons coconut sugar

1/3 cup orange juice

2/3 cup water

1/2 teaspoon cinnamon

¼ teaspoon ground nutmeg

¼ teaspoon vanilla extract

2 Tablespoons orange marmalade

3/4 to 1 cup walnuts, coarsely chopped

a pinch of orange zest for topping

Directions

Either the night before preparing or early the day of, add cherries, apple cider, and wine to an airtight container. Let refrigerate overnight or at least 8 hours before making.

After soaking cherries, place in medium saucepan with cranberries and coconut sugar. Add in orange juice, water, cinnamon, and nutmeg and bring to a simmer over medium heat, stirring continuously.

Once sauce starts to simmer, turn heat down a little and continue to cook for about 20 minutes or until cranberries have popped. You will start to hear little popping sounds as mixture heats up. Use the back of your spoon to gently pop any stragglers.

After sauce has reached desired thickness (remember it will thicken as it cools), remove pan from heat and add in vanilla and orange marmalade, blending throughout sauce. You can add in more sugar if you prefer a little sweeter sauce.

Fold in walnuts.

Let cool to room temperature and serve warm or let chill.

Top with orange zest before serving.

Watch me make this here  on Simmer.


*Helpful Hints*

- Can also use granulated white sugar instead of coconut sugar

- Best if made at least 2 days before serving, 1 day for soaking cherries overnight, the next day for chilling sauce before serving.

- All measurements are US

All content and images are property of Sweet and Spicy Monkey. Please do not reprint this content without my permission. If you wish to include this recipe on your site, please re-write in your own words and use your own photographs and link back to this post for original recipe.
Follow Julie's board Sweet and Spicy Monkey on Pinterest.

Featured at ~  Munching Mondays #69 and Host Favorites Recipes and Crafts


Shared with: Share it Sunday {55}, The Southern Special Week 34, Wine'd Down Wednesday 63, Tasty Tuesday Recipe Link Up, Inspire Us Thursday Link Party #77, Foodie Friends Friday Recipes, Crafts, Diy Linky Party , Pinworthy Projects Link Party #45, Snickerdoodle Sunday #58, Munching Mondays #68, Tickle My Tastebuds Link Party, Freedom Fridays with All My Bloggy Friends #59