Sweet and Spicy Monkey has moved to: www.sweetandspicymonkey.com

Showing posts with label light. Show all posts

Thursday, July 16, 2015

Lemon Honey Granita


With the summer heat increasing and no chance of a cool change coming anytime soon (hurry up Fall), my lemon love is coming on strong. For those of you that didn't notice, this is my second lemon recipe this week! Funny thing is, I made this before my Skinny Lemonade. It just took me until now to post it.

This Lemon Honey Granita speaks for itself and you're either going to love it or not. Which means if you don't like lemons, then you can just stop right here. And I don't think we can be friends either.

Because as all of you know, that little tart yellow fruit is one of my favorite foods to use, whether in cooking or baking. Lemons are one of my all-star foods!

Now there's not much I can really say about this Lemon Honey Granita.
  • it's cold (always a good thing in the summertime)
  • it's lemony (always a plus in my book!)
  • and it has a sweet honey flavoring that blends well with the tartness of the lemons.
Plus it's made with vodka. You can never go wrong when you add a little booze to your Granita!

Blend that all together and you have a refreshingly light treat for a hot summer day. Perfetto!


Just a little note, you ain't seen the last of my lemon love!

Lemon Honey Granita

Recipe by Julie Murphy
A refreshingly sweet lemon Granita infused with vodka to help you keep your cool during the summer months.
Prep time: 5 minutes
Cook time: 5 minutes
Total time: 10 minutes (not including freeze time)
Ingredients
  • 1 cup Lemon water*
  • 1 cup lemon juice, freshly squeezed
  • 1 cup water
  • 1 cup honey
  • 1/2 cup vodka
Directions
  1. Add 1 cup of plain water and honey to a non-reactive small saucepan. Heat over low to medium heat until honey is dissolved into water. Remove from heat.
  2. In a large bowl, combine lemon water, lemon juice, vodka, and heated honey water. Stir together.
  3. Pour into a freezer proof container, a bread loaf pan works great for this.
  4. Place into the freezer, being careful not to spill contents.
  5. After 1 hour, remove from freezer and check to see if ice crystals have started to form around the edges. If so, take a fork, stir the mixture, scraping the ice crystals to the center of the pan.
  6. Replace back into the freezer, checking about every 30 to 45 minutes, stirring to help break up large ice crystals. Placing back into the freezer.
  7. Repeat above steps until you have fine crystals of Granita. This usually takes about 6 to 7 more times of breaking up mixture with fork, depending on your freezer settings.
  8. Let freeze overnight. You can even repeat above steps after mixture sets overnight.
  9. Serve immediately when ready, as mixture may melt quickly. To help prevent rapid melting, you can always dish out ahead of time into serving cups and place into freezer until ready to serve.
  10. Garnish with lemon zest or fresh sprigs of peppermint leaves.

*Helpful Hints*
 
- Lemon water is made by placing freshly washed lemons into a jar of water and letting it sit in the refrigerator up to 2 to 3 weeks, and then using the water for this Granita. You know the Lemon water is ready to use when it has a yellowish tint to it.
 
All content and images are property of Sweet and Spicy Monkey. Please do not reprint this content without my permission. If you wish to include this recipe on your site, please re-write in your own words and use your own photographs and link back to this post for original recipe.
Follow Julie's board Sweet and Spicy Monkey on Pinterest.

Shared with: Savoring Saturdays
Sunday, April 19, 2015

Mediterranean Salad


The weathers warming up and bikini season draws closer, although we all wish it wouldn't come so fast! I mean there's so much I still have to do like pull the weeds in my garden, lay out some mulch, lose five more pounds, and bake some more yummies before it gets too hot to turn on my oven.

Wow, did you notice that? I just said lose five more pounds and bake some more yummies. Kind of ironic, don't ya think?


With all these warm days, there's so much to do and so little time to do it with not much time left to prepare lunch or dinner. Which is why this Mediterranean Salad has been my go to lunch salad for the last month.

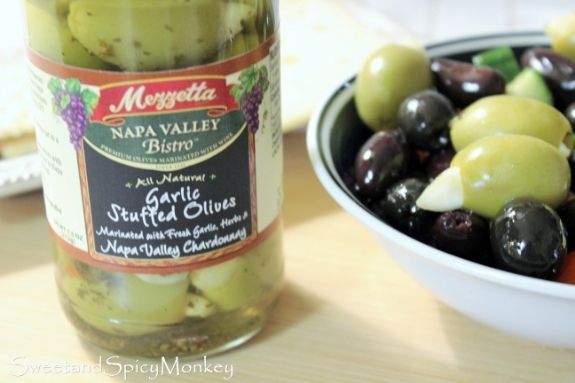
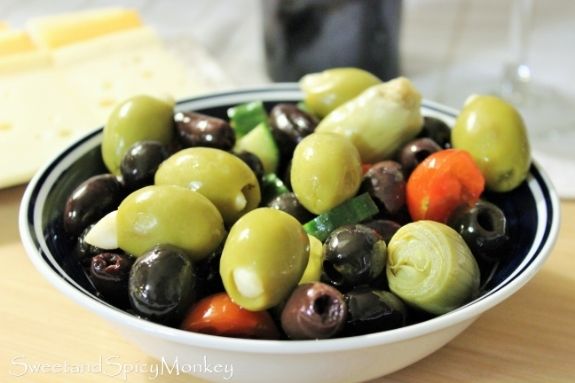
I just love these Garlic stuffed olives!

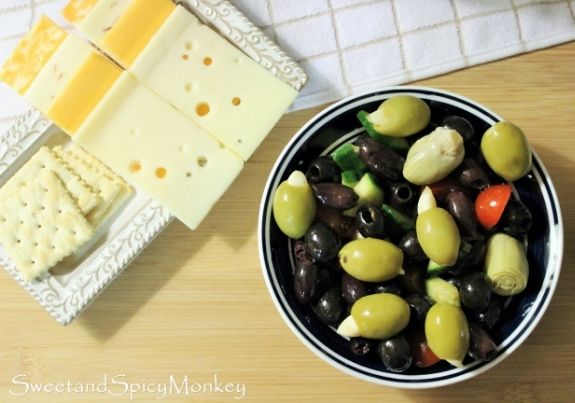
I love the variety of flavors the olives bring to this dish. I've combined three different kinds of olives here with Kalamata Greek olives, black olives, and garlic stuffed colossal queen olives. Yes, garlic stuffed olives and they are delicious! Plus I added diced English cucumbers, artichoke hearts, and grape tomatoes with white Balsamic vinegar and olive oil drizzled over the top.


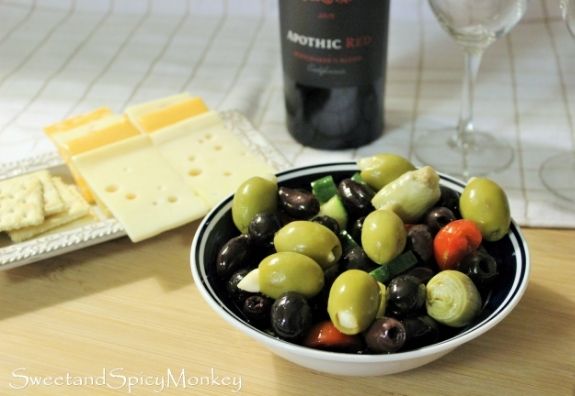
A quick and easy salad to make paired with cheese and crackers and a glass of your favorite wine makes for a delicious meal anytime.

Mediterranean Salad

Recipe by Julie Murphy
A deliciously light olive salad
Prep time: 10 minutes
Total time: 10 minutes
Yield: 6 servings
Ingredients
  • 1 can (5.75 ounces DR WT) whole large black olives, pitted
  • 1 jar (7.5 ounces DR WT) Garlic stuffed olives
  • 1 jar (9.5 ounces DR WT) Greek Kalamata olives, pitted
  • 1 English cucumber, diced
  • 1 - 10 ounce package grape tomatoes, washed (can also use cherry tomatoes)
  • 2 cups artichoke hearts
  • 2 Tablespoons white Balsamic vinegar
  • 2 Tablespoons olive oil
  • Sea salt & pepper to taste
  • 1 Feta cheese to crumble over the top *(optional)
Directions
  1. Add all ingredients into a large bowl.
  2. Drizzle Balsamic vinegar and olive oil over the top.
  3. Add salt & pepper to taste.
  4. Mix all ingredients together and serve with cheese and crackers and a glass of your favorite wine.
  5. Store in an airtight container up to 1 week.

All content and images are property of Sweet and Spicy Monkey. Please do not reprint this content without my permission. If you wish to include this recipe on your site, please re-write in your own words and use your own photographs and link back to this post for original recipe.
Follow Julie's board Sweet and Spicy Monkey on Pinterest.

Saturday, December 6, 2014

Peppermint Meringue Cookies


Can you believe its December? And you know what that means, don’t you? Yep, cookie making season is officially here!

I love baking cookies, especially Christmas cookies. There are so many different kinds, flavors, textures…I think you get my hint. There are just so darn many Christmas cookies to make that one month is not enough time to bake them all in!

And in my…umm, let’s just say older years, there are still some I’ve never made before. Yes, it’s true, I have not baked all of the different kinds of Christmas cookies out there. I know, I can’t believe it myself.

So far this year, I’ve made two different kinds of Christmas cookies that I’ve never attempted to bake before. One being these meringue cookies I'm sharing with you today and the other is the Christmas cookies I made for the cookie swap, that I will be sharing with you on December 15th.


I don't know why I've never made these cookies before. After all, they're light, airy, and fat free. Yes, fat free since their main ingredients are egg whites and sugar. That means gluten-free too!

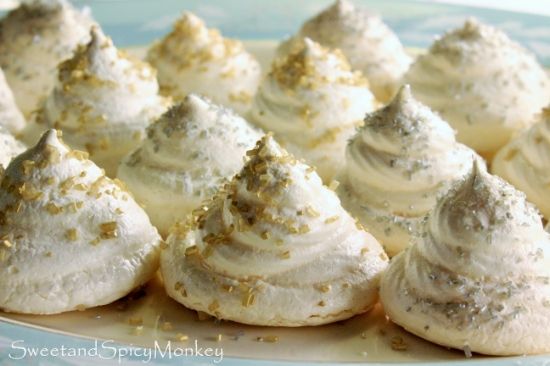
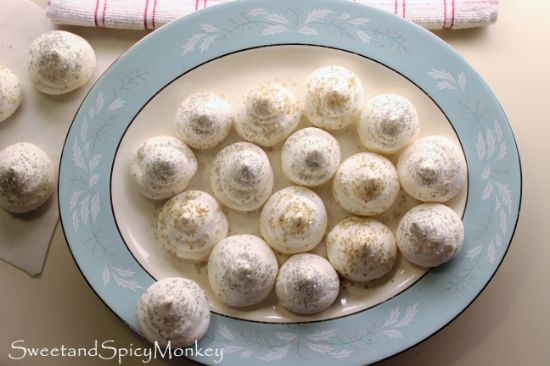
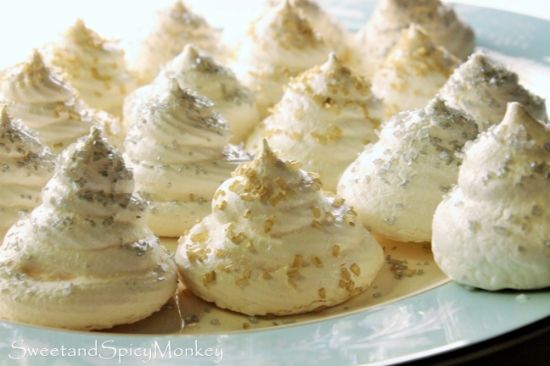
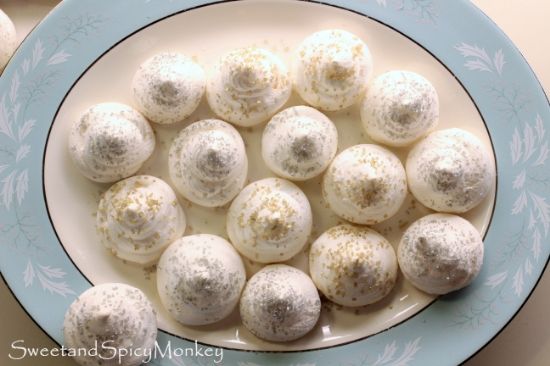
Even though these were a little messy for me to make (anything that involves piping stuff is messy for me), the end result are these beautiful snowy white meringue cookies sprinkled with silver and gold with a kiss of peppermint flavoring. The perfect cookie for any Holiday party.


I kept singing the Christmas song from Rudolph the red-nosed reindeer, "Silver and Gold" while I was making these cookies. You too can listen to it right here ~

    .
Now that you’re in the mood, here’s the recipe for my Peppermint Meringue Cookies so you can enjoy them at your home too, while singing "Silver and Gold" {smile}.

Peppermint Meringue Cookies

Ingredients

4 egg whites

1 cup sugar

2 pinches Cream of Tartar

¼ teaspoon peppermint extract

1/8 teaspoon vanilla extract

Gold decorating cupcake gems (found in the baking aisle)

Silver decorating cupcake gems

Directions

Preheat oven to 195F degrees.

Line cookie sheets with parchment paper. Making sure to fit the parchment paper on the cookie sheet by cutting off any overhang. I found it easier to crinkle the parchment paper when placing it on the cookie sheet so it stays in place and won’t roll everywhere with its natural shape from being on the tube. Set aside.

Fill a large saucepan halfway with water. Heat until boiling. Turn down heat after it begins to boil.

In a large metal mixing bowl, combine egg whites, sugar, and cream of tartar. Using a small hand whisk, whisk together for about 10 seconds, until all ingredients are combined.

Place over heated water and whisk until sugar dissolves. This should only take a couple minutes. Remove from heated water.

Using either a hand or a stand mixer, whip mixture on High speed until peaks start to form.

Add in vanilla and peppermint extract. Continue to whip until stiff peaks start to form. You can tell this when you remove the wire whip away from the mixture and it remains peaked.

Now it’s time to make the cookies. Using a pastry bag and an open star tip, carefully make round circles going wide then narrowing as they go up in height. Making about 2 inches in height and placing 2 inches apart on the cookie sheet. Or you can make any design you wish.

Sprinkle with your gold and silver decorating cupcake gems {Feel free to sing during this time}.

Bake for 90–120 minutes. That’s one hour and a half to two hours baking time. You don’t want them to brown, so keep an eye on them after 90 minutes if they need to cook a little longer. They should have a crispy outer shell when tapped.

After meringues have baked, leave them in the oven, turn off the heat, prop the oven door open about 3 inches to let the cookies cool and crisp up a little more. Leave like this for 2 hours.

After 2 hours, remove cookies from the oven.

To remove the cookies from the parchment paper, either gently twist off the cookies or gently pull parchment paper away from the cookies. They should come off clean.

There might be a little sticky going on and that’s where the gentle pulling of the parchment paper away from the cookie works best. Be careful not to squish the cookies between your fingers while trying to remove them from the parchment paper.

Store in an airtight container for up to one month. In high humidity climates, they will keep for 2-3 weeks in storage.

*Helpful Hints*

- I didn’t find this out until after I made my cookies which I made on a rainy day but meringue is best made on a day without humidity. Because the humidity causes soft and muted peaks instead of stiff and sharp peaks.

- You can also add any flavoring or coloring you like to these cookies.

- Keep a damp towel nearby when making these because you will get it on your hands. Unless, of course, you’re a professional, but for those like me, it will get on your hands {smile}.

Disclaimer - "Silver and Gold" is from the classic 1964 CBS Special "Rudolph the Red-Nosed Reindeer", sung by Burl Ives. Video uploaded from YouTube.*

All content and images (excluding video "Silver and Gold")* are property of Sweet and Spicy Monkey. Please do not reprint this content without my permission. If you wish to include this recipe on your site, please re-write in your own words and use your own photographs and link back to this post for original recipe.
Follow Julie's board Sweet and Spicy Monkey on Pinterest.

Featured here ~ Sweet and Savoury Sundays #93, Gluten- Free Holiday Drinks & Cookies, Savoring Saturdays


Shared with: The Wednesday Roundup #54, Wake Up Wednesday Linky Party, On Display Thursday #23, Pinworthy Projects Link Party #46, City of Links #49, Savoring Saturdays Party, Snickerdoodle Sunday #59, Sweet and Savoury Sunday #92, Wine'd Down Wednesday 66, Simple Supper Tuesday #19, The Southern Special Week 37, Tickle My Tastebuds Link Party, Foodie Friends Friday Recipes, Crafts, DIY Linky Party #126

Thursday, August 7, 2014

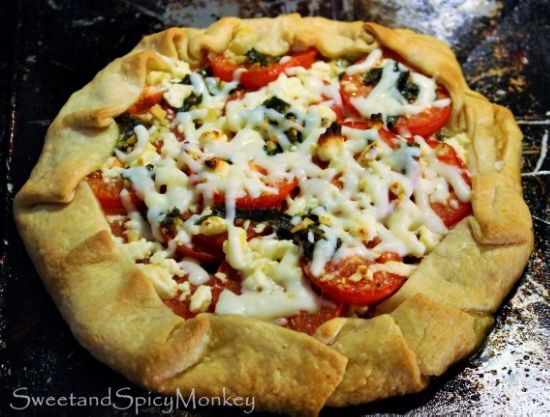
Tomato and Cheese Crostata


I’ve always dreamed of going to Italy. And next year, I was planning on finally making my dream vacation come true. But sadly, life got in the way and unless something changes, I won’t be going to Italy next year {sad face}.


Milano Naviglio Pavese by Emanuele Pinna
This doesn’t mean I’m giving up on my dream vacation, it just means it’s on hold for now. So at least I can save up more money to spend for shopping when I finally do get to go!

And if I can’t go to Italy, I might as well eat like I’m in Italy! And what better represents a little taste of Italy than a tomato and cheese crostata.


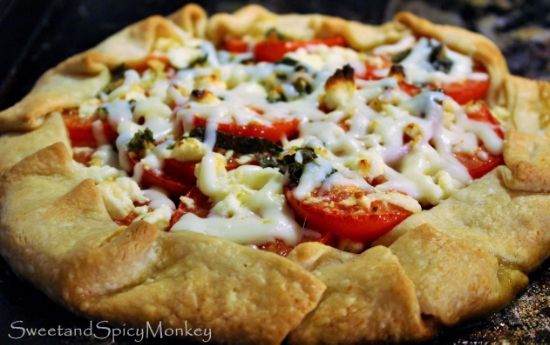
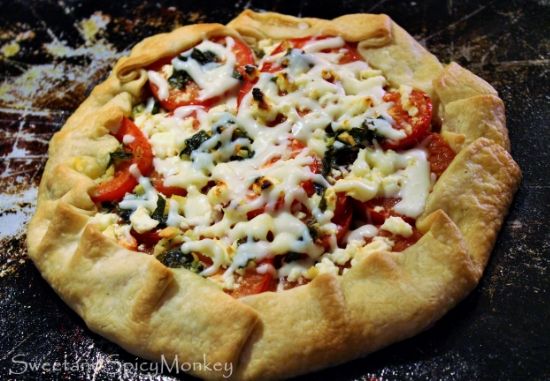
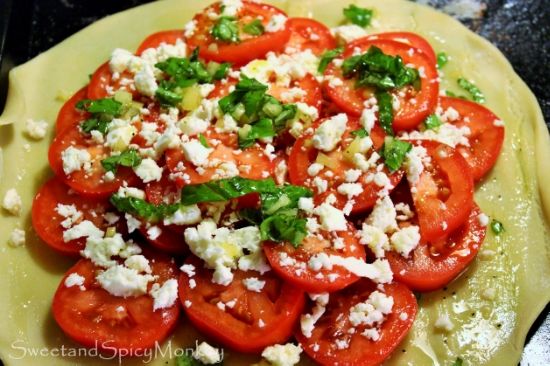
This pie inspired dish is made with authentic Italian ingredients that include Roma tomatoes, olive oil, fresh basil, feta cheese, and mozzarella enveloped within a flaky pastry dough.


A deliciously light and savoury pie-dish to enjoy for lunch or dinner with a glass of wine so you can close your eyes and imagine that you’re dining in Italy. At least for one night {smile}....

Tomato and Cheese Crostata

Ingredients

1 ready-made pie crust, room temperature

3 Roma tomatoes, sliced

2 Tablespoons Feta cheese

1 Tablespoon mozzarella cheese, grated

3 Tablespoons olive oil

3 Tablespoons fresh basil, chopped

2 garlic cloves, minced

Pinch of sea salt

Pinch of ground black pepper

Directions

Preheat oven to 425F degrees.

Place a sheet of parchment paper onto a baking sheet. Roll out pie crust dough onto lined baking sheet. Set aside.

In a small bowl, combine olive oil, basil, garlic cloves, salt & pepper. Spoon half over pie crust dough, spreading evenly and keeping about 1 inch from edges oil free.

Arrange sliced tomatoes evenly around pie crust dough, leaving about 1 inch from the edges so you will have enough to fold over. Crumble feta cheese over tomatoes.


 Pour remaining oil mixture over tomatoes and cheeses, keeping 1 inch of edges oil free.


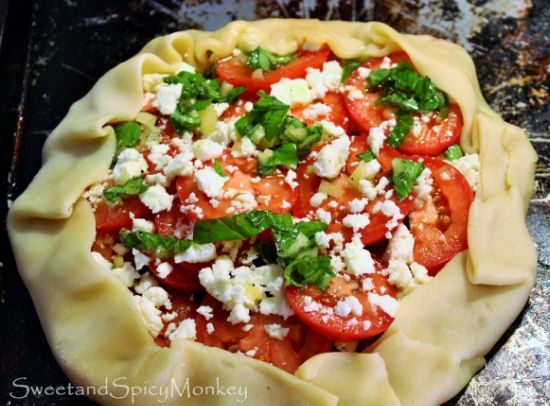
Gently fold the dough edges up and over the tomatoes so it lays flat. The center will be dough free so it gives you a beautiful view of the cooked tomatoes and cheeses when done.


Sprinkle mozzarella over the open area of tomatoes and feta, making sure not to cover the edges.

Bake for 20-30 minutes or until edges of pie crust are golden.

Remove from oven and let sit for 10 minutes before serving. Can be served warm or at room temperature.

*Helpful Hints*

- All measurements are US

Inspired by ~ Kellie at The Suburban Soapbox

All content and images are property of Sweet and Spicy Monkey. Please do not reprint this content without my permission. If you wish to include this recipe on your site, please re-write in your own words and use your own photographs and link back to this post for original recipe.
Follow Julie's board Sweet and Spicy Monkey on Pinterest. Follow on Bloglovin Instagram

Featured at ~ Sweet and Savoury Sunday #78


Shared with ~ Savoring Saturdays #27, Foodie Friends Friday Recipes Linky Party #110, Anything Goes Linky #169, Skip the Housework Link Party, Say G'day Linky Party {102}, Share it One More Time #3, Sweet and Savoury Sunday #77, Share it Sunday {43}, Inspiration Monday ~ Giveaway Week, Snickerdoodle Sunday #44, Munching Mondays #54, Mix it up Monday!, Simple Supper Tuesday #77, The Southern Special ~ Week 22, Tickle My Tastebuds Tuesday #16, Wine'd Down Wednesday 51, Tasty Tuesday Link Up, Lou Lou Girls Fabulous Party #22, Wonderfully Creative Wednesdays Link Party, Wake Up Wednesday "Linky" #32, Great Idea Thursdays 65, The Wednesday Roundup #42, On Display Thursday #10 , Let's Get Real Friday Party #55, Freedom Fridays with All My Bloggy Friends #44, Pin it Thursday, Pin Junkie Pin Party #83, Pinworthy Projects Link Party #32, Pretty Pintastic Party #19, City of Links #35, Inspire Us Thursday Link Party #66