Sweet and Spicy Monkey has moved to: www.sweetandspicymonkey.com

Showing posts with label No bake. Show all posts

Monday, June 1, 2015

No Bake Coconut Cookies

There's this commercial I've been searching high and low for on the Internet but cannot find. Mainly because I can't even remember what it's for! Now I know what you're saying, "how can you be looking for something when you don't even know what it is?".

Well, I remember the commercial and the goofy husband in it since that's the part I wanted to show one of my friends because that goofy guy reminds me of a co-worker and I wanted to show him. But I cannot remember for the life of me what the commercial is for.

The commercial in question starts with a pregnant wife and a friend at a baby shower, talking about not knowing the gender of the baby. And she will find out when they cut the cake because it will either be pink for a girl or blue for a boy. And then the goofy husband walks out of the kitchen eating a cupcake and gives this silly grin all covered in blue frosting, totally clueless.

Yes, I remember the commercial clearly and can probably even act it out, but what it's promoting, I have no clue since I got so caught up in how much that goofy guy reminds me of a co-worker. Do you know which commercial I'm talking about? If so, please let me know down below in the comments so I can end this search and show my friend that I'm not making this up.

I did stumble upon something during my search for this commercial, a blog, Renegade Mothering, by Janelle Hanchett, also known as Renegade Mama. The post I read was about how much she despises gender reveal parties. It was totally hilarious and had me rolling on the floor with laughter. If you get a chance, you can link to it here. Be warned, she does use adult language.

But anywho, enough ramblings from me. I'm not making any gender colored cupcakes, cakes, or cake pops today. As a matter of fact, these sweet little treats I'm sharing with you today are neutral in coloring, but don't let that fool you as they are quite flavorful. Of course anything coconut is flavorful to me!


These cookies are a no bake cookie and are dairy free, gluten-free, egg free, and Paleo friendly. All that and easy to make too with no baking involved! How's that for a summer treat?

You can make these cookies under 15 minutes and either start munching right away or you can let them chill for 30 minutes to let them sit up a bit. They're great for a quick breakfast on the run, during your morning commute, between meals, or when you get a craving for sweets and don't want to indulge in something sinful.

Either way, they're easy and quick to make so you have more free time to go shopping or for some more sun time by the pool. Or to help me find that dang commercial!


No Bake Coconut Cookies

Recipe by Julie Murphy
These No Bake protein coconut cookies are gluten free, dairy free, egg free, vegan, and paleo friendly.
Prep time: 15
Cook time: 0
Total time: 45 minutes (including 30 minutes for chilling)
Yield: 1 dozen
Ingredients
  • 1/2 cup oats, ground to flour
  • 1/2 cup cold milled golden flax seed
  • 1 scoop vanilla protein powder
  • 2 Tablespoons coconut butter
  • 1/4 teaspoon vanilla extract
  • 1/4 teaspoon coconut extract
  • 1 Tablespoon coconut flour
  • 2 Tablespoons organic unsweetened coconut flakes
  • Pinch Himalayan pink salt
  • 2 Tablespoons Honey
  • 1/2 cup Silk coconut milk, unsweetened
  • 1/4 cup organic unsweetened coconut flakes for rolling
Directions
  1. Line 1 cookie sheet with parchment paper. Set aside.
  2. Place 1/4 cup of coconut flakes into a small bowl. Set aside.
  3. In a large bowl, combine all ingredients and mix together.
  4. Take about 1 Tablespoonful of dough and roll into a ball between your hands.
  5. Roll ball shaped dough in bowl of coconut flakes.
  6. Place cookie ball on prepared cookie sheet and gently press down with finger tips or palm of your hand.
  7. Repeat process for remaining dough.
  8. Eat immediately or place in refrigerator to let chill so dough can set up.
  9. Store with cookies on parchment paper (to prevent sticking) in an airtight container for up to 1 week.

*Helpful Hints*

- can use sea salt in place of Himalayan pink salt.

- recipe for coconut butter coming soon!

Recipe inspired by ~ Arman's No Bake Vanilla Cake Batter Breakfast Cookies over at The Big Man's World.

All content and images are property of Sweet and Spicy Monkey. Please do not reprint this content without my permission. If you wish to include this recipe on your site, please re-write in your own words and use your own photographs and link back to this post for original recipe.
Follow Julie's board Sweet and Spicy Monkey on Pinterest.

Featured here ~ Savoring Saturdays @ It's a Love/Love Thing
Shared with: Savoring Saturdays

Tuesday, May 12, 2015

Coconut Cream Truffles


I've done it again. I've put myself up for another food challenge. However, unlike my last challenge, the Sugar Crush Challenge, this current one is specific to me challenging myself to create a food from one of my fellow foodies, Amanda Bootes, food picks. And this week Amanda has challenged us to creating a recipe with chocolate.

Amanda chose chocolate to start off our challenge because she cares about raising awareness for the Sick Children'sTrust, who hosts a Big Chocolate Tea Party each year to help raise awareness, monies, and support for their charity.

 If you're interested in raising awareness for the Sick Children's Trust, you can also host a party, either online or through an organization such as schools or your workplace. Just go to their website here and check it out. It's a great way to give back to those in need of help.
Yes, that's a strawberry you see in the back there. With the leftover chocolate, I made chocolate dipped strawberries.
 
So in honor of the chocolate food challenge this week, I made a recipe I've had my eye on for some time now, Coconut Cream Truffles covered in dark chocolate.
A creamy coconut filling surrounded by a thin layer of dark chocolate. They remind me of a Mounds bar. So if you love Mounds bars, you're going to love these scrumptious little coconut bites.

And the best part is that I made them a little more healthy so you don't have to feel so guilty about eating them! I substituted coconut oil for the butter and pure coconut cream for the sugar laden cream of coconut. Plus I used organic unsweetened coconut flakes instead of the ones covered in sugar. And we all know dark chocolate is much better for you than milk chocolate.
 

The result is a sweet, creamy coconut center with a thin chocolate shell that satisfies any sweet tooth. If I never told you, you would never have guessed the ingredients I substituted to make these truffles good for you.
Stay updated to my blog for more food challenges this month from Amanda's  #letsgetfoodiechallenge.
 
 
Coconut Cream Truffles

Recipe by Julie Murphy
Scrumptious bites of creamy coconut covered in dark chocolate.
Prep time: 15
Total time: 25
Yield: 1 dozen
Ingredients
  • 1/4 cup organic coconut oil, softened
  • 2 Tablespoons coconut cream (separated from coconut milk)
  • 1/2 teaspoon coconut extract
  • 1/2 teaspoon vanilla extract*
  • pinch sea salt
  • 1 cup organic unsweetened flaked coconut
  • 1 and 1/2 cups powdered sugar
  • 6-8 ounces dark chocolate melting wafers
Cooking Directions
  1. Line a cookie sheet with wax paper. Set aside.
  2. In a medium to large bowl, beat together coconut oil and coconut cream until smooth.
  3. Blend in coconut extract, vanilla, and salt.
  4. Gradually add in powdered sugar until thoroughly blended.
  5. Fold in coconut flakes, making sure everything is mixed together.
  6. Take Tablespoon size balls and roll between your palms until mixture is made into a uniform ball shape.
  7. Place onto wax paper and repeat.
  8. Once all of coconut mixture is shaped into balls, place cookie sheet into freezer for at least 1 hour so balls can set up. Can even leave in freezer overnight.
  9. When you're ready to dip ball shapes, prepare melting wafers as directed on package.
  10. Have 2-3 clean forks, a large spoon, and toothpicks available nearby.
  11. Place chilled ball into prepared dark chocolate. Leaving the ball in one place, take spoon and gently drip chocolate over the ball.
  12. Once ball is covered with chocolate, place ball onto spoon, lift out of dipping chocolate, gently transfer chocolate covered ball over to fork. Tap off excess chocolate using edge of bowl or two fingers from your free hand. Swipe fork on edge of bowl and repeat tap, swipe at least 2-3 times. You do this to remove excess chocolate so the chocolate doesn't overpower the coconut cream filling of your truffle.
  13. Once this process has been repeated 2-3 times, take truffle ball on fork over prepared cookie sheet with wax paper, place toothpick at bottom of truffle ball and gently swipe off of fork using the toothpick. Immediately sprinkle with coconut flakes or candy sprinkles if desired.
  14. After all truffles have been dipped in chocolate, place cookie sheet into refrigerator and chill for at least 1 hour to let chocolate set.
  15. Best served at room temperature.
 
*Helpful Hints*
 
- Watch me and learn how to dip your truffles here.

- I used Madagascar Vanilla extract, which is also known as bourbon vanilla.

-  As in the directions above, I state to have a few clean forks available while dipping your truffles. This is because you want a clean fork for dipping the truffles. Sometimes the truffle filling will get stuck between the tines. If this happens, just grab a clean fork that is nearby or wipe fork off clean with a towel.

Recipe inspired by ~ Dorothy at Crazy for Crust.
 
All content and images are property of Sweet and Spicy Monkey. Please do not reprint this content without my permission. If you wish to include this recipe on your site, please re-write in your own words and use your own photographs and link back to this post for original recipe.

Thursday, October 23, 2014

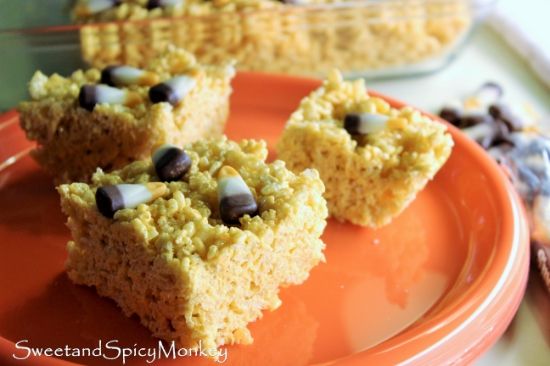
S'mores Candy Corn Marshmallow Treats (aka Marshmallow Gremlins)


I can’t remember the last time I made rice crispy treats, that sticky, crispy, sweet marshmallowey (yep, that is a word in my kitchen {smile}) goodness I loved when I was a kid. So when I saw these candy corn marshmallows at my local grocery store, I just knew I had to make some.

Since it had been years from the last time I made marshmallow treats, I forgot how messy the whole making process was! Melted marshmallow sticks to E-V-E-R-Y-T-H-I-N-G! Even the pot and spoons I used to make it. Yes, I used two spoons because the marshmallow was a big blob on one spoon and the other spoon was used to help get the marshmallow off the other spoon, which really wasn’t much help at all! So there I was in my kitchen, laughing like some crazy lady with two spoons full of marshmallow treats!


I really wish you could have been there because you would have been laughing at me! Sorry, no photos of that as my hands were also covered in marshmallow treats. Now I know why kids love making these!

After I got all the marshmallow off my hands and the spoons and into the pan, I finally got smart and sprayed my hands with a little bit of nonstick coconut spray. This worked great as I used my hands to help flatten the top of the marshmallow treats into the pan. I might remember this little trick for the spoons when I make these again {wink}.*


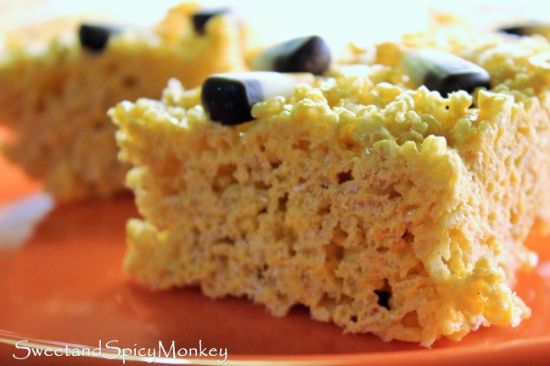
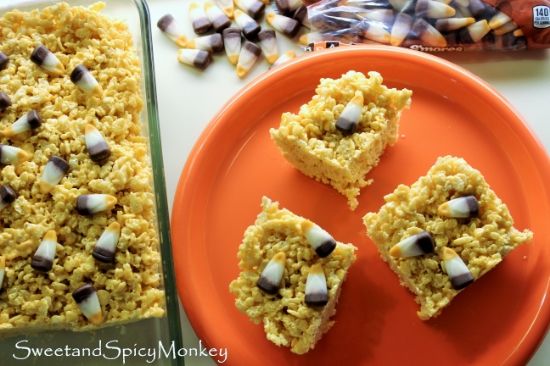
The result are these beautiful orange marshmallow treats sprinkled with S’mores candy corn. Don’t they just look spooktacular!


I like to refer to them as marshmallow gremlins, after the scene in my kitchen when I was creating them {smile}.

S’mores Candy Corn Marshmallow Treats (aka Marshmallow Gremlins)

Ingredients

3 Tablespoons butter

1- 14 ounce package of Candy Corn Marshmallows

6 cups crispy rice cereal

1 package S’mores candy corns

Directions

Prepare 11" x 8" pan by spraying with nonstick cooking spray and wiping off excess with clean paper towel. You can also use butter or margarine if preferred. Set aside.

Over low heat, melt butter in a large sauce pan. 

After butter has melted, add marshmallows and cook over Low heat until thoroughly melted.

Remove from heat and stir in crispy rice cereal. Making sure all cereal is covered with marshmallow.

Place in prepared pan and press down with hands. * See above for tips.*

Sprinkle S’mores candy corns over the top.

Let cool before serving.

Cut into squares and enjoy!

Store in airtight container.

Original recipe ~ The Original Rice Crispies Treats

*Helpful Hints*

- You might want to spray nonstick cooking spray on utensils used after the cooking process. Of course, you won't have as much fun as I did when making them!

- These would also be great for Thanksgiving treats with their orange coloring and the S'mores candy corns.

- All measurements are US

Disclaimer - This post may contain affiliate links.

All content and images are property of Sweet and Spicy Monkey. Please do not reprint this content without my permission. If you wish to include this recipe on your site, please re-write in your own words and use your own photographs and link back to this post for original recipe.

 
Follow Julie's board Sweet and Spicy Monkey on Pinterest.

Shared with: Pin Junkie Pin Party #90, Skip the Housework Link Party {#36}, City of Links #42, Pretty Pintastic Party #26, The Pinworthy Projects Link Party #39, Freedom Fridays with All My Bloggy Friends #51, Share it Sunday {51}, Snickerdoodle Sunday #52, Sweet and Savoury Sunday #85, Say G'day Linky Party {110}, Munching Mondays #62, Lou Lou Girls Fabulous Party #30, The Southern Special 30, Tickle My Tastebuds Tuesday, Simple Supper Tuesday #85, Tasty Tuesday Recipe Link Up, Busy Monday 137, Mix it up Monday!, Wine'd Down Wednesday 59, Wake Up Wednesday "Linky" #40, The Wednesday Roundup {week 49}, Pin It Thursday, On Display Thursday #18, Inspire Us Thursday Link Party #73, Great Idea Thursdays 72Let's Get Real Friday Party #63, Foodie Friends Friday Recipes Linky Party #119

Wednesday, September 17, 2014

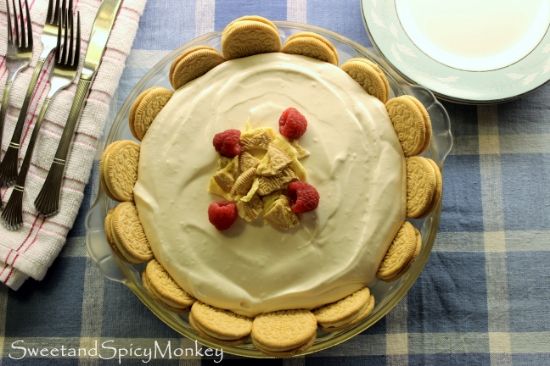
No Bake Lemon Chiffon Pie


What a weekend! I came home this past Friday from work to find my baby boy, Willy, missing. My other dogs were in my yard but no sign of Willy. Definitely not the way I wanted to spend my weekend as I was expecting to write up a post for y’all, bake something yummy, and get my game on with some football.

Instead I spent Saturday and Sunday searching for my baby boy. I asked my neighbor’s if they had seen him and I actually was able to find out that they had seen him running up and down the street all day Friday but no one had seen him Saturday. So I hopped in my car and drove around town, stopping to ask strangers if they had seen him, and dropping off flyers.


As it started to rain, I became more worried for him because he’s afraid of thunder and that pretty much ended my outside search. Since it was the weekend, all the vets nearby were closed so I started posting on social media, especially Facebook, and asking people to share in case someone recognized him. I posted on every vet and animal shelter FB page in the surrounding area in hopes somebody would recognize him and contact me.

Saturday evening came and went with no sign of Willy. Sunday morning came and I went out driving around once more, calling out his name, hoping he would hear me and come running. Nothing. It was two days and I was giving up any hope of ever finding him. Mainly because I’ve had him for at least eight years and he’s never done anything like this before and Boo, his sister, was still in the yard.

As Sunday evening came, I checked FB once more for some lead of where Willy might be. Miraculously, I got a lead. I contacted the person and she said she had seen Willy at her aunt’s house. She sent me a photo and it was Willy!!! I was so happy!!! He was only about two miles down the road from where I live, and had been hanging out there for the last two days. I actually had driven by that house, calling out his name, at least three times in the past two days he was missing.

It was a happy reunion for me, Willy, and his sisters that evening. I don’t know what caused him to stray but I’m so happy we were able to find him and bring him back home alive and well! Let’s just say, Willy will be wearing his collar all the time now.

Willy & Boo ~ reunion

Enough rambling about my weekend but I just had to share with y’all why I only put out one post last week and the power of social media. It was a busy weekend of searching and well worth it to have him back home once again!

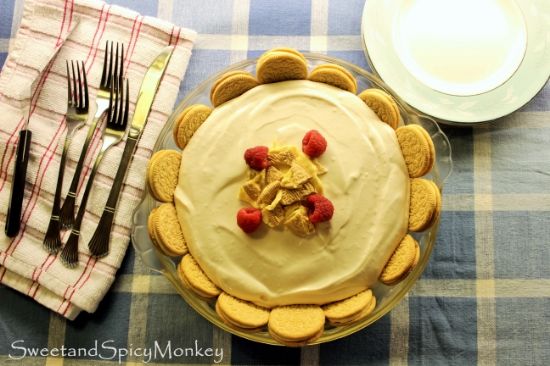
During this time, I did get a chance to make this luscious lemon pie. There’s no crust to prepare, no baking involved, and it only has four ingredients! How easy is that?


You heard that right, only four ingredients and one of them is the Lemon Oreo cookies that I used for the crust! That’s right, Lemon. Oreo. Cookies. If y’all remember, I discovered these little lemon delights this past spring when I was making anything and everything lemon. Let’s just say I’m glad I stocked up on these luscious lemony cookies {smile}.

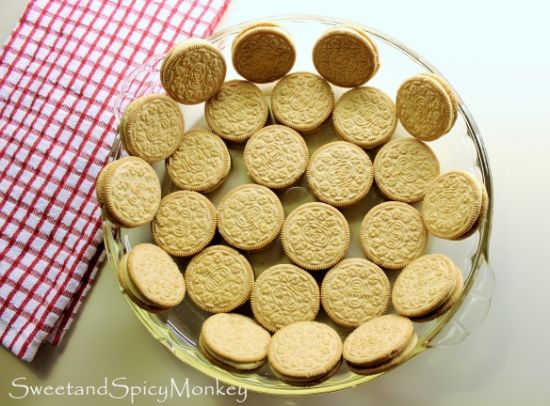
So if you can lay cookies in a pan (one for the pan, one for me - that’s how I did it and it really works out nicely!), whip up some Cool whip and sweetened condensed milk, along with some lemon juice, then you can make this pie!


And your friends and family won’t know any better because this pie taste like you spent all day in the kitchen, but that will be our little secret {wink}. As the sweet, creamy, lemony, chiffon paired with the lemon Oreos is sure to bring a smile to you and your family’s face.

Yep, I think I’m falling in love with lemon all over again….

No Bake Lemon Chiffon Pie

Ingredients

1 - 14 ounce can sweetened condensed milk

1 – 8 ounce container Cool Whip

½ cup fresh lemon juice

1 - 15.25 ounce package of Lemon Oreos

Directions

In a pie pan, lay Oreos flat onto bottom of pan. Once bottom is covered in Oreos, lay cookies around the sides of the pan. Set aside.


In a large mixing bowl, blend together milk and lemon juice (medium speed if using a KitchenAid stand mixer).

Once blended, gently fold in Cool Whip.

Gently blend (Low speed if using Kitchen Aid stand mixer) all ingredients together until thoroughly mixed.

Pour over Oreo cookies in pan and refrigerate at least 6-8 hours before eating.

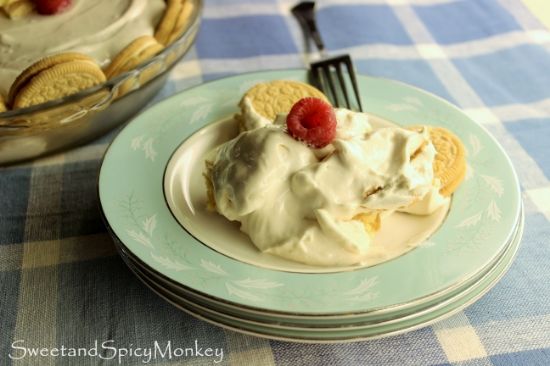
I only waited 4 hours before dishing out. It was still delicious but as you can see, it wasn't set up yet.

Can top with fresh fruit such as raspberries, blueberries, or blackberries and whipped cream.

*Helpful Hints*

- I let my pie chill for 4 hours and it came out runny. Best if it chills overnight so it will firm up.

- You can add yellow food coloring. I did not add any coloring and as you can see, it was a pale yellow.

- You can add some lemon zest for more lemon flavor and a little coloring.

- All measurements are US

- If you love lemon like I do, check out my other lemon recipes:
No Bake Lemon Chiffon Pie recipe inspired by ~ Stephanie at Plain Chicken

All content and images are property of Sweet and Spicy Monkey. Please do not reprint this content without my permission. If you wish to include this recipe on your site, please re-write in your own words and use your own photographs and link back to this post for original recipe.
Follow Julie's board Sweet and Spicy Monkey on Pinterest.