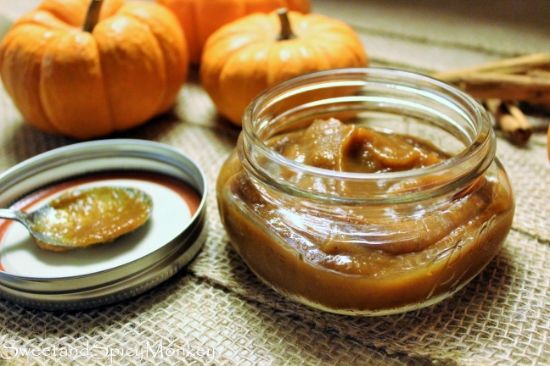
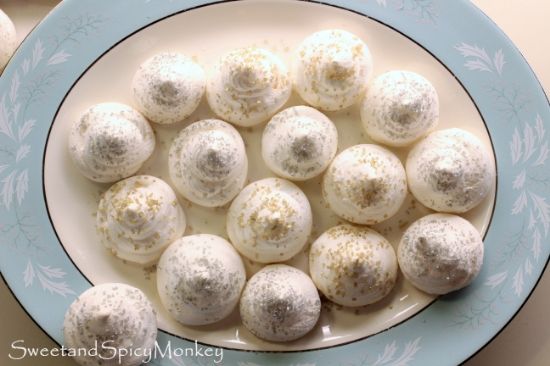
Sweet and Spicy Monkey has moved to: www.sweetandspicymonkey.com

Showing posts with label gluten-free. Show all posts

Sunday, February 21, 2016

No-Bake Granola Bars


Recently I attended a Facebook Q&A (well, I logged onto and submitted a question) for David Lebovitz on Sur La Table's Facebook page. Sur La Table's Q&A gives fans a chance to ask questions to some of their favorite food chefs. And I was lucky enough to see this one for David Lebovitz coming up.

You know where you see something coming up and you get all excited about it? And then the day comes around and you've totally forgotten about it? Yea, that happened to me on this Q&A. Luckily, I still had 10 minutes left in it, so I thought of a quick question to ask.

One that's been on my mind (especially after my Swiss Cake Roll fail x 2, thank you very much) is does he have one recipe that he finds a challenge. So that's the one question I submitted.

And do you know what the answer was for this famous pastry chef and cookbook author? Granola bars! Yes, you read that right, granola bars. A healthy granola bar gives David Lebovitz troubles.


This made me feel good because if you follow me, you know the troubles I've had with the Swiss Cake Roll. Although after the last one, I learned that you have to make the cake by scratch because box cake mixes are more crumble-prone than homemade sponge cakes. Something I was unaware of at the time. I've yet to try it after the last fail because I got so frustrated over it.

But to know that David Lebovitz has troubles with granola bars (of all things) makes me feel good. Sorry. Not Sorry. David.

Which got me thinking of the granola bars I made last year and never got to share with y'all. Yes, I held out a recipe from you. Well, not intentionally, just forgot.

These No-Bake Granola Bars are so yummy, you'll forget they're good for you too! I've packed them full of coconut, chia seeds, cacao nibs, and dried cherries. And to help sweeten them, I used a combination of honey and dates.


The best part is you don't need to bake anything and they're ready to eat immediately. Although, I would let them chill for a few hours so the honey and peanut butter can set since they might be a little crumbly if eaten right away. That's the "glue" that holds them together.

Of course, you can also put chopped peanuts, almonds, or pistachios instead of the chia seeds, but you might want to add a little more honey or peanut butter (1 to 2 Tablespoons extra) because that might throw off the wet to dry ratio.

But don't let the chia seeds throw you off thinking these bars won't have any crunch to them. The chia seeds, along with the cocao nibs, gives a nice crunchy texture to these granola bars.


You can also substitute for the dried cherries, using raisins, dried cranberries or blueberries. It's a very customizable recipe so try what you like and let me know how they turn out.

Now about that Swiss Cake Roll recipe....


No-Bake Granola Bars
Recipe by Julie Murphy @ Sweet and Spicy Monkey
Deliciously healthy & easy to make granola bars for on the go breakfast or snacking.
Prep time: 10 minutes
Total time: 15 minutes
Ingredients
  • 3 cups Old Fashioned Oats, uncooked
  • 1 and 1/2 cups creamy peanut butter
  • 1/2 cup honey
  • 1 cup unsweetened coconut flakes
  • 5 Medjool dates, diced
  • 3/4 to 1 cup dried cherries
  • 1/2 cup cocao nibs
  • 4 Tablespoons chia seeds
Directions
  1. Prepare 8" x 11" pan by wiping down with coconut oil. Wipe any excess off with a clean, dry paper towel. Set aside.
  2. Add all ingredients into a large mixing bowl and stir together, making sure peanut butter and honey coat all ingredients.
  3. Pour mixture into prepared pan and press down firmly with palm of hand.
  4. Cover pan and let chill in refrigerator so peanut butter and honey can set.
  5. Can store in covered pan in refrigerator for up to 1 week. But they won't last that long!
 *Helpful Hints*     
- You can use a smaller pan, but that will make bars thicker. Same goes if you want to use a larger pan, bars will be thinner in size. Bars shown are 1" thick using an 8" x 11" pan.

- You can use semi-sweet or dark chocolate chips instead of cocao nibs in this recipe.

- You can use flaked sweetened coconut instead of unsweetened coconut flakes.

All content and images are property of Sweet and Spicy Monkey. Please do not reprint this content without my permission. If you wish to include this recipe on your site, please re-write in your own words and use your own photographs and link back to this post for original recipe.
Follow Julie's board Sweet and Spicy Monkey on Pinterest.

Saturday, January 30, 2016

Flourless Peanut Butter Oatmeal Chocolate Chip Cookies


You ever have one of those days where you feel like doing absolutely nothing? I have. Well, I did, last Saturday. I didn't feel like doing anything. I mean just going into the kitchen to fill up my glass of water was too strenuous for me that day.

I just wanted to melt into my chair and watch me some football. Thing is, there was no football on last Saturday. I think the broadcasting channels were having the same kind of day I was because there was absolutely nothing on TV last Saturday.

Seriously people, next time snow is expected, put something worth watching on TV. Is that a little too much to ask? I didn't think so either.

And since I didn't have anything to entertain me that required no energy, I immediately thought of making cookies. Why? Well because I'm one of those people who (even though I don't want to do anything) need something to do or else I become fidgety. So making cookies was it!


Not just any cookie, but these Flourless Peanut Butter Oatmeal Chocolate Chip Cookies. Now you can say I made these because I was too lazy to add in the flour, but that's not the case. With my healthier eating diet this year, these cookies were the perfect choice for me.

No white sugar added, no flour (which is great if you're gluten-free), and sugar-free chocolate chips. So you don't feel guilty eating them as you melt into the chair and channel surf.

How could I say no? You're right, I couldn't!


Plus, they're easy to make and you can make them under 30 minutes. BAM!

These are definitely my kind of lazy day cookies! I think you'll agree.


Flourless Peanut Butter Oatmeal Chocolate Chip Cookies

Recipe by Julie Murphy @ Sweet and Spicy Monkey
A healthier flourless and white sugar-free version of the classic peanut butter oatmeal chocolate chip cookie.
Prep time: 10 minutes
Cook time: 20 minutes
Total time: 30 minutes
Yield: 2 dozen cookies
Ingredients
  • 1 cup peanut butter, creamy (can also use chunky)
  • 1 large egg
  • 1 teaspoon vanilla extract
  • 3/4 teaspoon baking soda
  • 1/4 teaspoon sea salt
  • 1/2 cup honey
  • 1 and 1/2 cups old fashioned oats, uncooked
  • 1/2 to 1 cup sugar-free chocolate chips
Cooking Directions
  1. Preheat oven to 350F degrees.
  2. Line cookie sheet with parchment paper. Set aside.
  3. Cream together peanut butter, egg, vanilla, and honey in a large mixing bowl.
  4. Mix in baking soda, salt, oats, and chocolate chips.
  5. Using a cookie scoop, scoop dough onto prepared cookie sheet. You can either leave them as is or press with fork tines to make criss cross design on top of cookie.
  6. Place in oven and bake for 10 minutes or until edges are lightly golden brown.
  7. Remove from oven and let cool for 5-8 minutes on cookie sheet before transferring to a wire rack where they can cool completely.
  8. Can be stored in an airtight container for up to 1 week.

All content and images are property of Sweet and Spicy Monkey. Please do not reprint this content without my permission. If you wish to include this recipe on your site, please re-write in your own words and use your own photographs and link back to this post for original recipe.
Follow Julie's board Sweet and Spicy Monkey on Pinterest.

Sunday, January 3, 2016

Vegan Buffalo Cauliflower Bites


I'm starting this year off with healthy eats. Let me just say, I've had my share of rich food and sweets during the holidays and I'm finding my pants a little tighter than they were back in November.

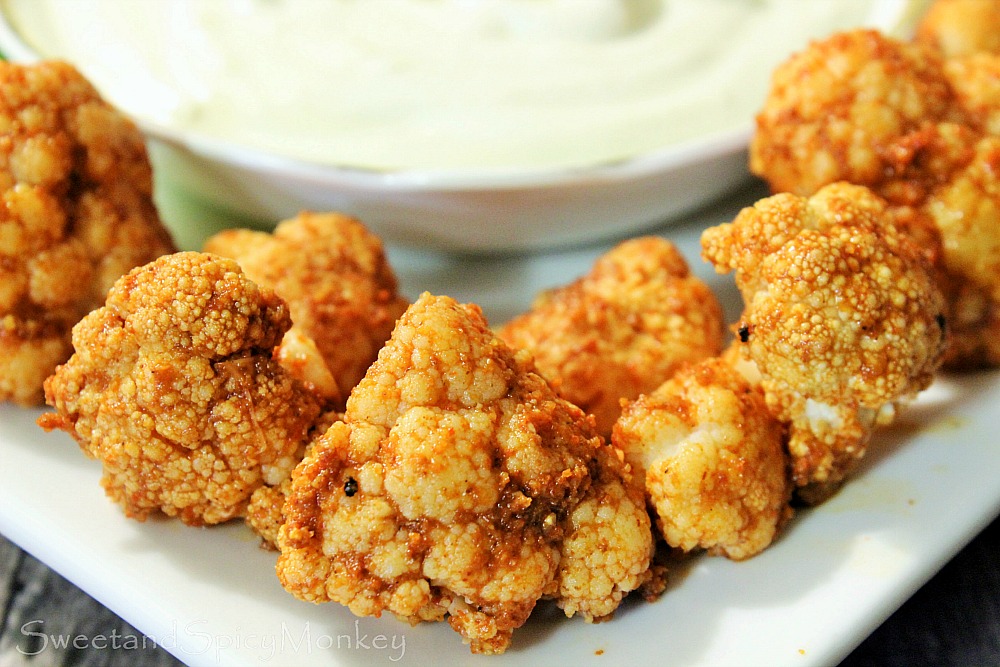
So I thought I would start off the new year with these Vegan Buffalo Cauliflower Bites. Only because I had this intense (some might call it crazy) craving for something Buffalo wing tasting. I was on a search for some buffalo wings.

But since I've also had my share of meat over the last couple months (think back Engagement Chicken and a Thanksgiving turkey), I didn't want chicken wings. Or any other kind of meat for that matter. I'm all meated out!

Then I found a recipe for vegan buffalo cauliflower bites and knew I had to try it.

Now I had my doubts when I first saw this recipe, but since cauliflower works in Alfredo sauce, I thought "why not?" And so I did!


You see, cauliflower is a very versatile vegetable in the vegetarian community because it's like a blank sheet of paper. Cauliflower has a very mild taste, if anything, and with a few common spices, it can become any food you want it to.

The one thing I love about this recipe is it tastes so much like the buffalo wings I've had before, but it only uses apple cider vinegar and a few spices. Plus, it doesn't have any preservative filled foods like Ranch dressing or Pete's buffalo wing sauce. Just simple ingredients here.


So you're getting your vegetables with the buffalo wing taste without all the preservatives, fat, and calories. And no meat!

Serve it up with my Greek yogurt blue cheese dressing and you will be in vegan Buffalo wing heaven! Well, I was literally in vegan buffalo wing heaven while munching on these and licking my fingers.


Yep, these Vegan Buffalo Cauliflower Bites are certifiably finger licking good!

And I can't think of a better way to start the new year!

What recipes do you like to use cauliflower in?

Vegan Buffalo Wings

Recipe by Julie Murphy
A vegan dish inspired by the famous tailgating food, Buffalo wings, made with fresh cauliflower and served with a homemade Greek yogurt blue cheese dressing.
Prep time: 20 minutes
Cook time: 10 minutes
Total time: 20 minutes
Yield: Serves 4 to 6
Ingredients
  • 1 head cauliflower
  • 1 Tablespoon garlic powder
  • 2 Tablespoons paprika
  • 3/4 teaspoon smoked paprika
  • 1/4 teaspoon chipotle chile pepper powder
  • 1/4 teaspoon sea salt
  • 1/4 teaspoon cayenne pepper
  • 1/8 teaspoon ground black pepper
  • 1/4 cup apple cider vinegar
  • 1 Tablespoon olive oil (for cookie sheet)
Cooking Directions
  1. Preheat oven to 450F degrees.
  2. Rinse cauliflower well and pat dry. Cut into small florets.
  3. Pour 1 Tablespoon olive oil over a clean cookie sheet, wiping off any excess with a clean, dry paper towel.
  4. Place cauliflower florets on cookie sheet and bake in preheated oven for 10 minutes.
  5. While cauliflower is baking, mix together remaining ingredients in a large bowl.
  6. As soon as cauliflower comes out of the oven, place into large bowl with buffalo sauce and mix well, covering all cauliflower florets with sauce.
  7. Serve immediately with blue cheese dressing and celery sticks.

Inspired by ~ Whole Foods Market.
 
All content and images are property of Sweet and Spicy Monkey. Please do not reprint this content without my permission. If you wish to include this recipe on your site, please re-write in your own words and use your own photographs and link back to this post for original recipe.
Follow Julie's board Sweet and Spicy Monkey on Pinterest.

Sunday, October 11, 2015

Cauliflower Alfredo Sauce


It's true, I've been holding out on you. You see, I first made this recipe back in September. Wow, that sounds so long ago, but really just a few short weeks, so I really haven’t been holding out on you for too long.

Since I first made this sauce, I've made it many, many times. I can't get enough of this Alfredo sauce! It's just that delicious!


This sauce is butter free and gluten free. Yet it still has that creamy texture and flavors so characteristic of your classic Alfredo sauce.

Funny thing is when I first made this sauce, I did not have any milk or cream on hand, so I decided to use canned coconut milk. I had no idea if it would work in this sauce or if it would end up tasting like coconuts.


Boy, was that a great substitute for the milk, because it turned out amazing! The coconut milk gives this sauce its creamy texture without tasting like a coconut. This sauce is so good I can eat this stuff straight out of a bowl with a spoon!

If you haven’t tried a cauliflower Alfredo sauce yet, this is one healthy recipe substitution you NEED to try.

If you want to make this a dairy-free and Paleo friendly sauce, just leave out the parmesan cheese and add a little more olive oil for flavoring.


Let me know how you like it by leaving me a comment below, as I always love hearing what you think.

Cauliflower Alfredo Sauce

Recipe by Julie Murphy
A creamy cauliflower Alfredo sauce.
Prep time: 10 minutes
Cook time: 20 to 35 minutes
Total time: 45 minutes
Yield: 36 ounces
Ingredients
  • 5 to 6 large cauliflower florets
  • 1 - 32 ounce container vegetable broth
  • 2 to 4 cups water
  • 8-12 garlic cloves, diced
  • 2 Tablespoons Extra virgin olive oil
  • 1/2 cup canned coconut milk, full fat
  • 1 teaspoon sea salt
  • 1/2 teaspoon ground black pepper
  • 1 Tablespoon freshly grated parmesan cheese
Cooking Directions
  1. In a large pan, add cauliflower florets. Pour vegetable broth over florets. If needed, add water to pan, enough to almost cover cauliflower. Bring to a boil and continue cooking until you can easily pierce the cauliflower with a fork. Once this happens, turn off heat.
  2. In a small skillet, heat olive oil. Once olive oil is heated, add diced garlic. Sauté until garlic is softened. Remove from heat.
  3. In a large blender, add coconut milk, salt & pepper, 1 cup vegetable broth from pan, cauliflower, sautéed garlic with olive oil, and parmesan cheese.
  4. Pulse on High until sauce becomes smooth in texture and there are no more cauliflower clumps. Add more broth or milk until you reach desired sauce texture.
  5. Serve over pasta and enjoy!
  6. Store in an air tight container for up to 1 week in your refrigerator.

*Helpful Hints*
  
- Add in a little more olive oil to help keep the sauce smooth and add more flavor.

- Use your blender as directed when it comes to blending hot liquids. You may need to let ingredients cool off to room temperature before placing into your blender. Also, Do Not fill blender all the way to the top when blending Hot ingredients.

All content and images are property of Sweet and Spicy Monkey. Please do not reprint this content without my permission. If you wish to include this recipe on your site, please re-write in your own words and use your own photographs and link back to this post for original recipe.
Follow Julie's board Sweet and Spicy Monkey on Pinterest.

Friday, August 28, 2015

Matcha Quinoa Granola


As the end of August nears, days start getting shorter, and the kids go back to school, it's only obvious that Fall is just around the corner. Wow, where did this year go? It feels like only yesterday when we were expecting snow and freezing temperatures.

Have I mentioned how much I love fall? If you didn't know yet, I absolutely L-O-V-E fall. I love everything about it. The cooler days, football season, the smell of spices like cinnamon, nutmeg, and cloves permeating from the kitchen. And most of all, the freedom to bake! Yes, actually being able to bake anytime I want without worrying about heating up the house. Baking freedom! Can I get a Woot! Woot!

This recipe I'm sharing with y'all is perfect for fall too. And it makes for a healthy start to your day as I've combined Matcha powder, quinoa, and chia seeds in my granola. Yes, quinoa in my granola.


I got the idea from a store bought granola I recently purchased. The quinoa gives the granola an extra little crunch.

A delicious and lightly sweetened homemade granola that's so much better tasting than the store bought types with their heavy sugar content. And you can always personalize it by adding dried fruit, chocolate chips, or sunflower seeds. Your imagination is the limit!

You and your family will also love the way your home smells when you make this granola. If you didn't know it already, baking smells have such a relaxing effect on people.


So go release some stress by getting busy in the kitchen with this easy homemade granola recipe. It will bring a smile to your face with that first bite. But not just because you know you're eating something healthy that you made, but because it also taste better than any granola you've ever brought home from the store.

Matcha Quinoa Granola

Recipe by Julie Murphy
An easy and healthy granola with Matcha powder, quinoa, and chia seeds for breakfast or snacking.
Prep time: 5 minutes
Cook time: 25 miinutes
Yield: 3 1/2 cups
Ingredients
  • 3 cups Old Fashioned oats
  • 2 Tablespoons organic brown sugar
  • 1/2 teaspoon cinnamon
  • 1/4 cup coconut oil
  • 1/2 cup cooked quinoa
  • 2 teaspoons Matcha powder
  • 1/4 cup pure Maple syrup
  • 2 Tablespoons chia seeds
  • dash pink Himalayan salt
  • 1/2 cup organic coconut flakes, unsweetened
  • 1/2 cup chopped pecans
Cooking Directions
  1. Preheat oven to 325F degrees.
  2. Prepare a cookie sheet by wiping down with a small amount of (your choice) coconut oil, sunflower oil, butter, or non-stick cooking spray. Wipe off any excess oil with a clean, dry paper towel. Doing this will help decrease any chance of burning your granola. Set prepared cookie sheet aside.
  3. In a large mixing bowl, combine oats, brown sugar, cinnamon, coconut oil, quinoa, Matcha powder, maple syrup, chia seeds, and salt. Mix well.
  4. Spread granola evenly over cookie sheet.
  5. Place into oven and bake for 20 to 25 minutes, stirring granola every 5 minutes. It's very important to stir granola every 5 minutes, otherwise you will end up with burnt granola (just sayin, not like it happened to me or anything).
  6. Remove from oven.
  7. Stir in chopped pecans and coconut. Allow to let cool completely, approximately 1 hour.
  8. Store in an airtight container.
  9. Can be used for breakfast cereal, mixed in with pancake mix, snacking, or as a topping for yogurt, ice cream, or fruit cobblers.

*Helpful Hints*

- Always add dried fruits, nuts, and seeds after granola comes out of the oven.

- You can always use sweetened coconut flakes, brown sugar, or sea salt instead of organic and unsweetened ingredients.

- You can leave out the chia seeds if you don’t like them.


All content and images are property of Sweet and Spicy Monkey. Please do not reprint this content without my permission. If you wish to include this recipe on your site, please re-write in your own words and use your own photographs and link back to this post for original recipe.


Tuesday, August 11, 2015

Banana Pudding - GF, Dairy-free, Soy-free


I have been obsessed this past week with banana pudding. And not just your ordinary banana pudding, but a dairy free banana pudding.

It just so happens as I was putting my carton of Silk coconut milk in the fridge the other day, I saw a recipe on the back for banana pudding. This is what started my crazy banana pudding search. I decided to try the recipe and I opted for Splenda instead of sugar, because I wanted a refined sugar- free pudding.

Now I don't know if it was the Splenda, or if I stirred it too long or at too high a temperature, or maybe this is what it's supposed to look and taste like. But according to the reviews it got, I think either I messed up somewhere along the way or those reviews are all falsified! Because my coconut milk banana pudding didn't look anything like the photo! Gasp!

While their coconut banana pudding looked fluffy and creamy and Oh So delicious, mine was clumpy, not at all fluffy cloud-like, and had a very mild vanilla taste, even after I added more vanilla than the recipe called for.

Now don't get me wrong, for a sugar-free alternative, it was edible (but I threw out the rest), but nothing like the creamy vanilla pudding I remember as a kid.

Needless to say, I started looking at ways to improve my dairy free pudding. I wanted a creamy pudding that tasted like bananas. After all, there’s a reason they don't call banana pudding vanilla pudding. It's supposed to be banana pudding with sliced bananas, vanilla wafers, and whipped cream.

Banana. Mania!


So off I went to search for the ultimate dairy free banana pudding recipe. It wasn't easy and I don't recommend it to anyone. Long sleepless nights, weary, tired eyes, endless cups of coffee, after searching endless hours, maybe even days, on Pinterest.

Did you know you there are lots of recipes for banana pudding on Pinterest? And I love how they put pins on your search page that don't even have the ingredient you're searching for. Somehow I got lost in the chocolate and peanut butter search. I didn't even know I was looking for a chocolate and peanut butter recipe!

They must know I have a short attention span. Oh look butterflies.....
squirrel....oooh, pretty red bird!

Hello, I'm back!

So after my search, I finally found this dairy free pudding recipe using coconut milk and honey. I love how it uses honey and not refined sugar.

I tweaked it a bit and came up with my own version of dairy free banana pudding. A rich and creamy, banana-ey pudding that has no refined sugar and is dairy free. I hope you like it as much as I do. (Pssst, I even tried it with vanilla wafers and it is A-M-A-Z-I-N-G!).

If you don't like this version, you can always try the recipe on the back of the Silk coconut milk carton. But if you do, please let me know how yours turned out, clumpy like mine or like a whipped cloud of vanilla yumminess as pictured on the carton.

Oh, look at the shiny spoon....

Banana Pudding - GF, Dairy-free, Soy free

Prep time: 5 minutes
Cook time: 8 to 10 minutes
Total time: 15 minutes
Yield: 4 servings
Ingredients
  • 2 ripe bananas, pureed
  • 1/2 teaspoon sea salt
  • 1 teaspoon vanilla extract
  • 2 teaspoons Banana Royale Fountain Flavor
  • 4 egg yolks
  • 1/4 cup + 1 Tablespoon honey
  • 1/4 cup + 2 Tablespoons cornstarch
  • 2 cups canned coconut milk, full fat
  • extra bananas for garnish
Cooking Directions
  1. Puree 2 bananas in a blender.
  2. Pour bananas into a small bowl and add salt, vanilla, and banana flavoring. Mix together and set aside.
  3. In a separate bowl, whisk together egg yolks, honey, and cornstarch. Set aside.
  4. In a medium sauce pan, heat coconut milk over medium heat for about 5 minutes, whisking occasionally. Do not let it boil.
  5. Remove coconut milk from heat.
  6. Using a ladle, pour about 1 cup of warmed coconut milk into egg yolk mix. Making sure you stir constantly as you do this so you don't end up with scrambled eggs. Stir in another small ladle of coconut milk into egg yolk mixture.
  7. Add egg yolk mixture back into sauce pan and stir together.
  8. Place pan back over medium heat and continue to stir while cooking for another 3 to 4 minutes. Mixture will become thicker the longer you cook it. Continue to stir while not letting it boil. If it starts to boil, turn down heat or remove pan from heat and then replace back on burner and continue cooking until it reaches desired thickness. Keep in mind, it will be less thick after adding banana mixture.
  9. After mixture thickens, remove from heat and stir in banana mixture, mixing well.
  10. Transfer into a large bowl. Cover top with wax paper. Place into refrigerator for at least 4 hours.
  11. After pudding chills, serve in small bowls or cups.
  12. Garnish with fresh, sliced bananas, whipped cream (dairy-free, of course), and/or granola.

*Helpful Hints*
 
- I purchased Banana Royale Flavor Fountain online at Olive Nation. It's Kosher, sugar free, gluten-free, calorie free, and water soluble.

- If you don't have a blender, you can mash the bananas by hand with a fork. But they will make your pudding clumpy instead of smooth.

- Depending how ripe your bananas are, pudding might turn out tan in color. It's perfectly ok like this as it does not affect the taste. Also pudding will darken during storage in refrigerator due to bananas.

- If you want to make this Paleo friendly, use arrowroot powder in place of cornstarch. However, measurements might not be the same for arrowroot as  they are for the cornstarch. This recipe was made for using cornstarch.
 
Inspired by ~ Rebecca at Paleo Grubs.

Disclaimer ~ I was not paid for this post to endorse Olive Nation. I just purchased their product and thought I would share it with you, as its an excellent flavoring for many things.
 
All content and images are property of Sweet and Spicy Monkey. Please do not reprint this content without my permission. If you wish to include this recipe on your site, please re-write in your own words and use your own photographs and link back to this post for original recipe.
Follow Julie's board Sweet and Spicy Monkey on Pinterest.

Shared with: Savoring Saturdays

Monday, June 1, 2015

No Bake Coconut Cookies

There's this commercial I've been searching high and low for on the Internet but cannot find. Mainly because I can't even remember what it's for! Now I know what you're saying, "how can you be looking for something when you don't even know what it is?".

Well, I remember the commercial and the goofy husband in it since that's the part I wanted to show one of my friends because that goofy guy reminds me of a co-worker and I wanted to show him. But I cannot remember for the life of me what the commercial is for.

The commercial in question starts with a pregnant wife and a friend at a baby shower, talking about not knowing the gender of the baby. And she will find out when they cut the cake because it will either be pink for a girl or blue for a boy. And then the goofy husband walks out of the kitchen eating a cupcake and gives this silly grin all covered in blue frosting, totally clueless.

Yes, I remember the commercial clearly and can probably even act it out, but what it's promoting, I have no clue since I got so caught up in how much that goofy guy reminds me of a co-worker. Do you know which commercial I'm talking about? If so, please let me know down below in the comments so I can end this search and show my friend that I'm not making this up.

I did stumble upon something during my search for this commercial, a blog, Renegade Mothering, by Janelle Hanchett, also known as Renegade Mama. The post I read was about how much she despises gender reveal parties. It was totally hilarious and had me rolling on the floor with laughter. If you get a chance, you can link to it here. Be warned, she does use adult language.

But anywho, enough ramblings from me. I'm not making any gender colored cupcakes, cakes, or cake pops today. As a matter of fact, these sweet little treats I'm sharing with you today are neutral in coloring, but don't let that fool you as they are quite flavorful. Of course anything coconut is flavorful to me!


These cookies are a no bake cookie and are dairy free, gluten-free, egg free, and Paleo friendly. All that and easy to make too with no baking involved! How's that for a summer treat?

You can make these cookies under 15 minutes and either start munching right away or you can let them chill for 30 minutes to let them sit up a bit. They're great for a quick breakfast on the run, during your morning commute, between meals, or when you get a craving for sweets and don't want to indulge in something sinful.

Either way, they're easy and quick to make so you have more free time to go shopping or for some more sun time by the pool. Or to help me find that dang commercial!


No Bake Coconut Cookies

Recipe by Julie Murphy
These No Bake protein coconut cookies are gluten free, dairy free, egg free, vegan, and paleo friendly.
Prep time: 15
Cook time: 0
Total time: 45 minutes (including 30 minutes for chilling)
Yield: 1 dozen
Ingredients
  • 1/2 cup oats, ground to flour
  • 1/2 cup cold milled golden flax seed
  • 1 scoop vanilla protein powder
  • 2 Tablespoons coconut butter
  • 1/4 teaspoon vanilla extract
  • 1/4 teaspoon coconut extract
  • 1 Tablespoon coconut flour
  • 2 Tablespoons organic unsweetened coconut flakes
  • Pinch Himalayan pink salt
  • 2 Tablespoons Honey
  • 1/2 cup Silk coconut milk, unsweetened
  • 1/4 cup organic unsweetened coconut flakes for rolling
Directions
  1. Line 1 cookie sheet with parchment paper. Set aside.
  2. Place 1/4 cup of coconut flakes into a small bowl. Set aside.
  3. In a large bowl, combine all ingredients and mix together.
  4. Take about 1 Tablespoonful of dough and roll into a ball between your hands.
  5. Roll ball shaped dough in bowl of coconut flakes.
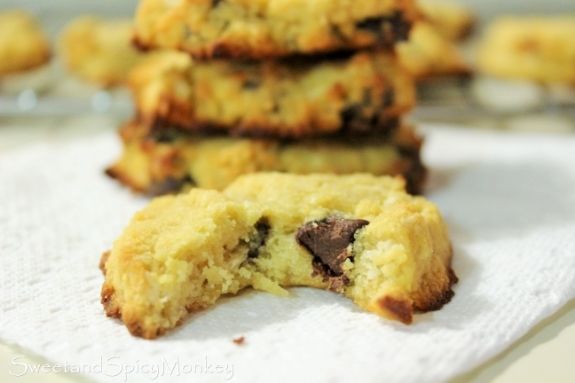
  6. Place cookie ball on prepared cookie sheet and gently press down with finger tips or palm of your hand.
  7. Repeat process for remaining dough.
  8. Eat immediately or place in refrigerator to let chill so dough can set up.
  9. Store with cookies on parchment paper (to prevent sticking) in an airtight container for up to 1 week.

*Helpful Hints*

- can use sea salt in place of Himalayan pink salt.

- recipe for coconut butter coming soon!

Recipe inspired by ~ Arman's No Bake Vanilla Cake Batter Breakfast Cookies over at The Big Man's World.

All content and images are property of Sweet and Spicy Monkey. Please do not reprint this content without my permission. If you wish to include this recipe on your site, please re-write in your own words and use your own photographs and link back to this post for original recipe.
Follow Julie's board Sweet and Spicy Monkey on Pinterest.

Featured here ~ Savoring Saturdays @ It's a Love/Love Thing
Shared with: Savoring Saturdays

Friday, April 3, 2015

Paleo Coconut Chocolate Chip Cookies


I have only one more week left of my Sugar Crush Challenge and this week has got to be the most difficult. With all the Easter chocolates, Peeps, Cadbury eggs, chocolate bunnies, and all those Easter yummies, I'm finding myself hanging on by a thread here!

H-E-L-P M-E!

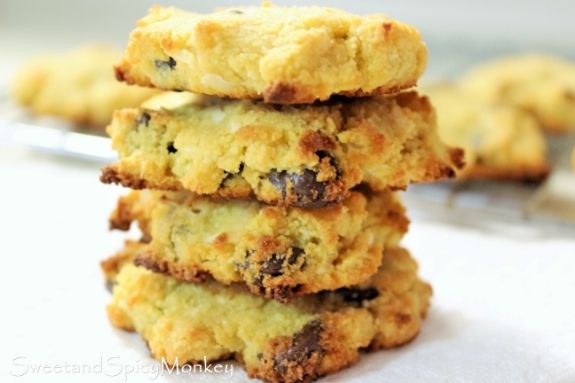
And then I came across this recipe by Rebecca at Paleo Hacks, Paleo Coconut Flour Chocolate Chip Cookies! It was like she heard my cry for help and threw me a life raft to keep me afloat during this sugar-filled Holiday.

I was so excited I made them that day but I added my own little twist to them, a little bit more coconut goodness with coconut flakes, unsweetened, of course. Because E-V-E-R-Y-T-H-I-N-G is better with coconut!


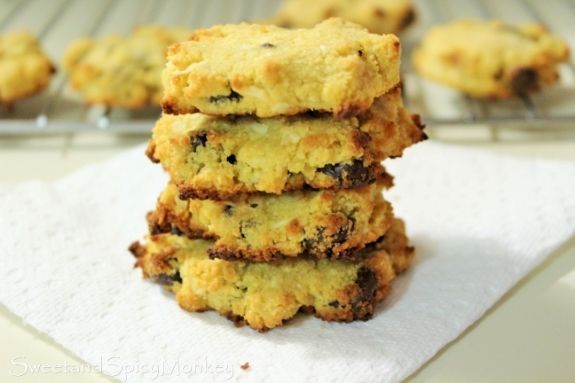
Mmmm, these little scrumptious morsels are everything I was hoping they would be...and more!


With the dark chocolate chips and coconut flakes, they remind me of an Easter treat. So I no longer feel left out this year while everyone else is enjoying their sugar-filled sweets.

Look at all the yumminess of these cookies!

So go ahead and throw another sugar-filled Holiday at me, 2015. I will make another healthy recipe to get through it all! {smile}.

-----------------------------------------------------------

Paleo Coconut Chocolate Chip Cookies

Recipe by Julie Murphy
Prep time: 8 minutes
Cook time: 10-15 minutes
Total time: 30 minutes
Yield: 1 dozen cookies
Ingredients
  • 1/3 cup coconut flour
  • 1/3 cup dark chocolate chips
  • Pinch sea salt
  • 2 eggs
  • 1/4 cup organic cold-pressed, virgin coconut oil, melted
  • 1/4 cup honey
  • 1 teaspoon vanilla extract
  • 2 Tablespoons organic unsweetened coconut flakes
Cooking Directions
  1. Preheat oven to 350F degrees.
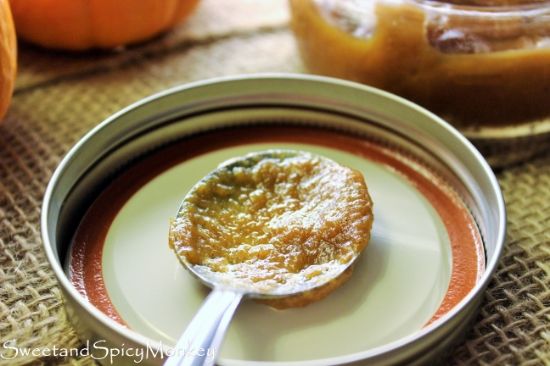
  2. Line cookie sheet (2 if you have available, otherwise, just one cookie sheet will do) with parchment paper. Set aside.
  3. In a medium to large mixing bowl, add coconut flour, sea salt, eggs, melted coconut oil, honey, and vanilla. Mix together until all ingredients are blended. Making sure to scrape the bottom and sides of the bowl with a spatula to get all the coconut flour blended in. Texture will be reminiscent of normal cookie dough. It might take a little longer for the coconut flour to soak in the wet ingredients. If using a stand mixer, about 5 minutes longer. If texture is still runny, add in coconut flour a little at a time until you achieve correct texture.
  4. By hand, fold in coconut flakes and dark chocolate chips.
  5. Using a Tablespoon or pre-set cookie spoon, drop onto prepared cookie sheet, about 2 inches apart.
  6. Gently press down cookie with your fingers or palms, as cookies will not spread out during baking.
  7. Bake for 10-15 minutes, or until cookies are a light golden brown.
  8. Remove from oven and let cool on cookie sheet for 5 minutes before transferring to a wire rack where they can cool completely.
  9. Store in an airtight container for up to 1 week. But trust me, they won't last that long!
  10. Cookies will retain a soft texture during storage.
           

All content and images are property of Sweet and Spicy Monkey. Please do not reprint this content without my permission. If you wish to include this recipe on your site, please re-write in your own words and use your own photographs and link back to this post for original recipe.
Follow Julie's board Sweet and Spicy Monkey on Pinterest.

Featured at ~ Savoring Saturdays

Shared with: Savoring Saturdays, Munching Mondays #85

Tuesday, March 24, 2015

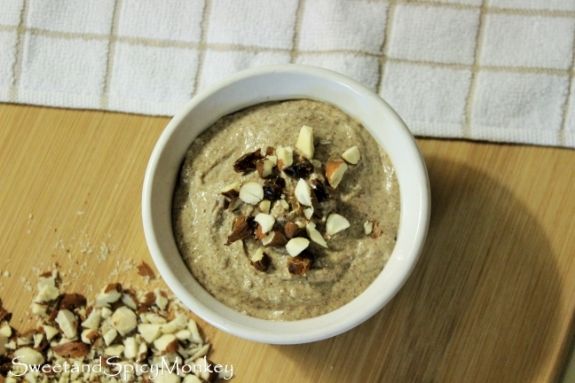
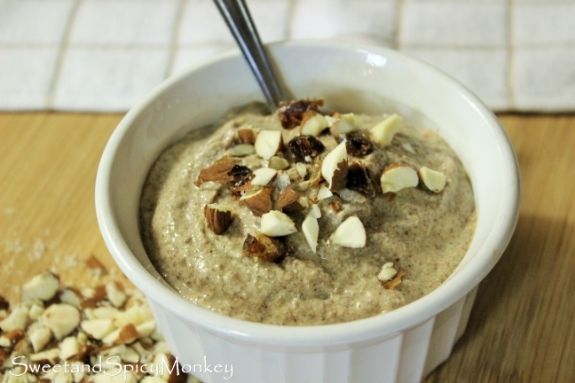
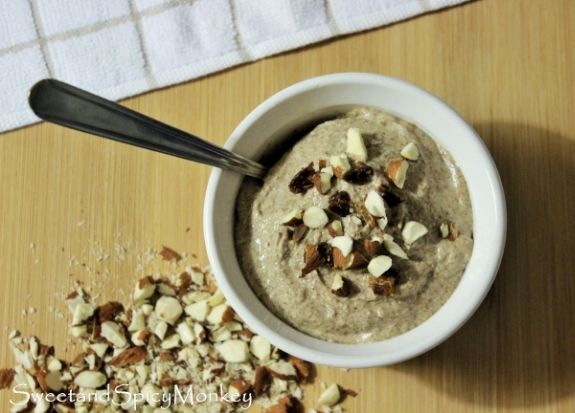
Almond Date Chia Pudding


If you've been following me, y'all know that I've been on the Sugar Crush Sugar-Free Challenge since the beginning of March. Mainly because I have a huge sweet tooth that had has gotten out of control. I mean I was eating cookies, pancakes with sweet syrups, and more cookies! And my thinking was this challenge would help me regain control of my sweet tooth once again.

Over the last few weeks, I'm slowly starting to regain control of my sweet tooth {smile}. And it really wasn't that difficult to do.

The first five days, I kept a food journal and kept tabs on the sugar content of the foods I ate. Most of my sugar was in my breakfast meals, hidden in my orange juice and milk. Since then, I've learned ways to cut my sugar down in my breakfast.


I've also started eating other foods that I had never tried before like chia seeds and matcha (recipes coming soon for matcha too!). So in all, I'm just trying to get back to my " healthy" and keep cutting out the sugar in my diet so my overzealous sweet tooth doesn't take over again!

And in doing so, I've learned how to make chia pudding. I know, if you've seen photos of chia pudding before, it doesn't look appetizing at all, with those little seeds covered in what some may call, er, slime. But really, if you grind those little seeds up, not only will you get more nutrients from them, but they don't have the slimy texture either. And you're left with a creamy, pudding- like mixture that is also good for you.


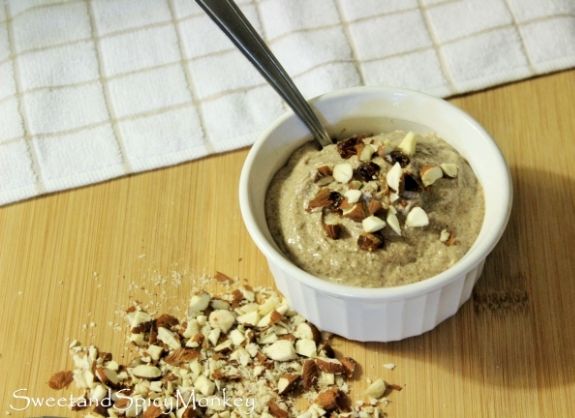
To make this, I ground up my almonds, used unsweetened almond milk, a little agave nectar along with dates for sweetener, some cinnamon, vanilla and almond extract, and wa-la, Almond Date Chia Pudding was born.

The best thing about this pudding is you don't even have to refrigerate to let it set up before eating as the texture is pudding-like as soon as you're done making it! Even though it does taste better after its chilled and the flavors mingle together.

After a bite of this, I'm like "sugar? Who needs sugar anymore when I've got this Almond Date Chia Pudding!


BAM!
------------------------------------------------------------

Almond Date Chia Pudding

Makes 17.6 ounces (500 grams)
------------------------------------------------------------
Ingredients
  • 2 cups Almond milk. unsweetened
  • 6 Tablespoons Chia seeds
  • 1 teaspoon ground cinnamon
  • 1 teaspoon Almond extract
  • 2 teaspoons vanilla extract
  • 2 Tablespoons coconut butter
  • 1 cup whole, raw almonds
  • 12 dates, chopped
  • 2 Tablespoons agave nectar
 
Directions
  1. Add almonds, chopped dates, and chia seeds into a high speed blender and turn on High setting. Blend until almonds, dates, and chia seeds are a fine powder, about 5 minutes or less.
  2. Add in remaining ingredients until all ingredients are mixed and ingredients resemble a thick pudding-like mixture, about 3-5 minutes.
  3. Place into a bowl, cover, and refrigerate or you can serve immediately.
 
Serve topped with chopped dates, chopped almonds, or both as pictured above. 
Store in refrigerator for up to 5-7 days.

*Helpful Hints*

- When cutting your almonds, make sure you use a clean cutting board and not one that's used for meats. Here's a helpful link brought to you by CustomMade that tells you how to care for your cutting board and what makes the best type of cutting board, one that is easily cleaned and doesn't harbor bacteria from foods

- Also make sure you use a sharp knife that's made to chop the almonds. Here's a helpful link brought to you by Fix that tells you what type of knives work best with what you're cutting, how to care for your knives, plus how to properly store knives so they will last a lifetime in your kitchen.

*Disclaimer - This post contains affiliate links.*

All content and images are property of Sweet and Spicy Monkey. Please do not reprint this content without my permission. If you wish to include this recipe on your site, please re-write in your own words and use your own photographs and link back to this post for original recipe.
Follow Julie's board Sweet and Spicy Monkey on Pinterest.

Shared with: Savoring Saturdays, Munching Mondays #84

Saturday, December 6, 2014

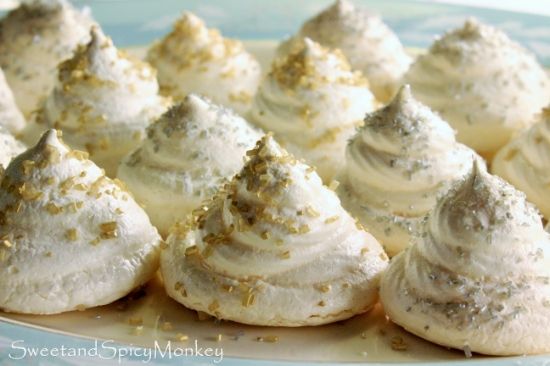
Peppermint Meringue Cookies


Can you believe its December? And you know what that means, don’t you? Yep, cookie making season is officially here!

I love baking cookies, especially Christmas cookies. There are so many different kinds, flavors, textures…I think you get my hint. There are just so darn many Christmas cookies to make that one month is not enough time to bake them all in!

And in my…umm, let’s just say older years, there are still some I’ve never made before. Yes, it’s true, I have not baked all of the different kinds of Christmas cookies out there. I know, I can’t believe it myself.

So far this year, I’ve made two different kinds of Christmas cookies that I’ve never attempted to bake before. One being these meringue cookies I'm sharing with you today and the other is the Christmas cookies I made for the cookie swap, that I will be sharing with you on December 15th.


I don't know why I've never made these cookies before. After all, they're light, airy, and fat free. Yes, fat free since their main ingredients are egg whites and sugar. That means gluten-free too!

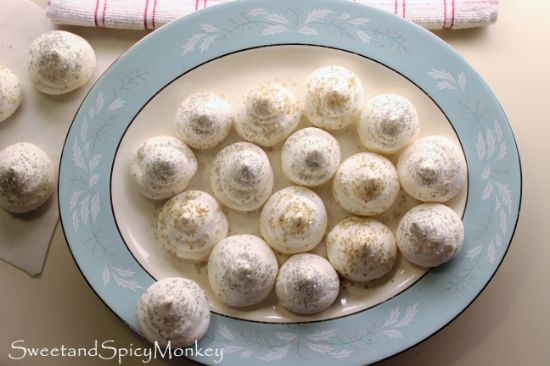
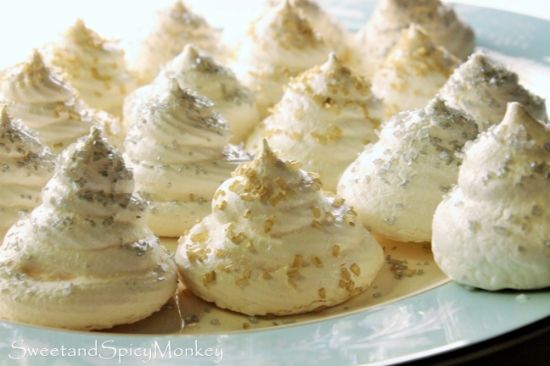
Even though these were a little messy for me to make (anything that involves piping stuff is messy for me), the end result are these beautiful snowy white meringue cookies sprinkled with silver and gold with a kiss of peppermint flavoring. The perfect cookie for any Holiday party.


I kept singing the Christmas song from Rudolph the red-nosed reindeer, "Silver and Gold" while I was making these cookies. You too can listen to it right here ~

    .
Now that you’re in the mood, here’s the recipe for my Peppermint Meringue Cookies so you can enjoy them at your home too, while singing "Silver and Gold" {smile}.

Peppermint Meringue Cookies

Ingredients

4 egg whites

1 cup sugar

2 pinches Cream of Tartar

¼ teaspoon peppermint extract

1/8 teaspoon vanilla extract

Gold decorating cupcake gems (found in the baking aisle)

Silver decorating cupcake gems

Directions

Preheat oven to 195F degrees.

Line cookie sheets with parchment paper. Making sure to fit the parchment paper on the cookie sheet by cutting off any overhang. I found it easier to crinkle the parchment paper when placing it on the cookie sheet so it stays in place and won’t roll everywhere with its natural shape from being on the tube. Set aside.

Fill a large saucepan halfway with water. Heat until boiling. Turn down heat after it begins to boil.

In a large metal mixing bowl, combine egg whites, sugar, and cream of tartar. Using a small hand whisk, whisk together for about 10 seconds, until all ingredients are combined.

Place over heated water and whisk until sugar dissolves. This should only take a couple minutes. Remove from heated water.

Using either a hand or a stand mixer, whip mixture on High speed until peaks start to form.

Add in vanilla and peppermint extract. Continue to whip until stiff peaks start to form. You can tell this when you remove the wire whip away from the mixture and it remains peaked.

Now it’s time to make the cookies. Using a pastry bag and an open star tip, carefully make round circles going wide then narrowing as they go up in height. Making about 2 inches in height and placing 2 inches apart on the cookie sheet. Or you can make any design you wish.

Sprinkle with your gold and silver decorating cupcake gems {Feel free to sing during this time}.

Bake for 90–120 minutes. That’s one hour and a half to two hours baking time. You don’t want them to brown, so keep an eye on them after 90 minutes if they need to cook a little longer. They should have a crispy outer shell when tapped.

After meringues have baked, leave them in the oven, turn off the heat, prop the oven door open about 3 inches to let the cookies cool and crisp up a little more. Leave like this for 2 hours.

After 2 hours, remove cookies from the oven.

To remove the cookies from the parchment paper, either gently twist off the cookies or gently pull parchment paper away from the cookies. They should come off clean.

There might be a little sticky going on and that’s where the gentle pulling of the parchment paper away from the cookie works best. Be careful not to squish the cookies between your fingers while trying to remove them from the parchment paper.

Store in an airtight container for up to one month. In high humidity climates, they will keep for 2-3 weeks in storage.

*Helpful Hints*

- I didn’t find this out until after I made my cookies which I made on a rainy day but meringue is best made on a day without humidity. Because the humidity causes soft and muted peaks instead of stiff and sharp peaks.

- You can also add any flavoring or coloring you like to these cookies.

- Keep a damp towel nearby when making these because you will get it on your hands. Unless, of course, you’re a professional, but for those like me, it will get on your hands {smile}.

Disclaimer - "Silver and Gold" is from the classic 1964 CBS Special "Rudolph the Red-Nosed Reindeer", sung by Burl Ives. Video uploaded from YouTube.*

All content and images (excluding video "Silver and Gold")* are property of Sweet and Spicy Monkey. Please do not reprint this content without my permission. If you wish to include this recipe on your site, please re-write in your own words and use your own photographs and link back to this post for original recipe.
Follow Julie's board Sweet and Spicy Monkey on Pinterest.

Featured here ~ Sweet and Savoury Sundays #93, Gluten- Free Holiday Drinks & Cookies, Savoring Saturdays


Shared with: The Wednesday Roundup #54, Wake Up Wednesday Linky Party, On Display Thursday #23, Pinworthy Projects Link Party #46, City of Links #49, Savoring Saturdays Party, Snickerdoodle Sunday #59, Sweet and Savoury Sunday #92, Wine'd Down Wednesday 66, Simple Supper Tuesday #19, The Southern Special Week 37, Tickle My Tastebuds Link Party, Foodie Friends Friday Recipes, Crafts, DIY Linky Party #126

Sunday, October 5, 2014

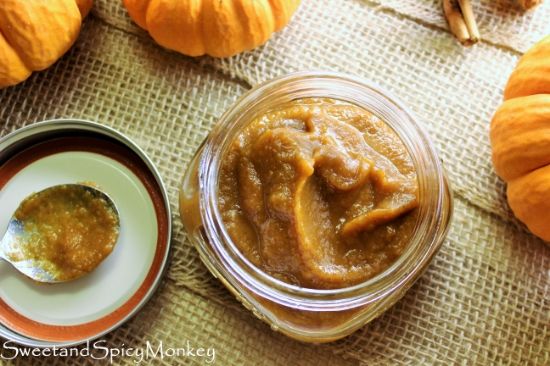
Pumpkin Butter


Fall has finally made its presence here in Georgia with the shorter days and the cool, crisp nights. Pumpkin patches and corn mazes are popping up everywhere and Fall festivals are taking place. Have I mentioned this is my favorite time of year? I love Fall {smile}.

One of my favorite foods of Fall is pumpkin. I was making pumpkin cookies and roasting pumpkin seeds when I was growing up, many years before they popped up on every food blog. But that was the extent of my cooking with pumpkin.

At least until these last few years, as I’ve gotten creative and started using pumpkin for many recipes. After all, pumpkin puree is similar to apple sauce, or so that’s my way of thinking.

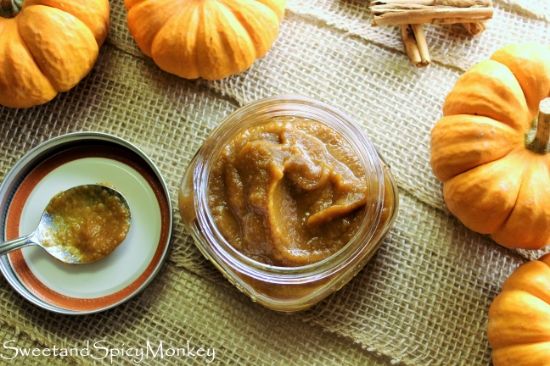
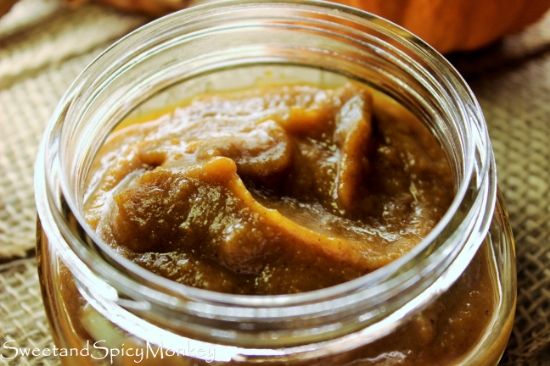
You can only imagine how happy I was when I first heard of pumpkin butter! Yes, I said Pumpkin. Butter. It reminds me of everything Fall….pumpkin and all the spices like cinnamon, ginger, nutmeg, and ground cloves, which are used in many recipes this time of year. I love these spices and this pumpkin butter is bursting with that robust Fall flavor. You can always cut the spice measurements in half if you want a more subtle taste of the spices.


It has a similar consistency to that of apple butter. So if you love apple butter, then you’re going to flip over pumpkin butter. It’s a one of a kind pumpkin experience!

Now you can always take the easy way out and purchase a ten ounce jar from Trader Joe’s for about $10.00. Or you can make your own, like I do, for much less. The best part being that it has no added preservatives, no granulated sugar, or salt and you can spice it up and sweeten it to your liking.

It also makes for great gifts for the upcoming Holidays (yes, that time of year is knocking on the door), as you can get creative personalizing the jars. Mason jars work great for this as they come in different sizes and have that old fashioned, rustic look.


But let’s not get ahead of ourselves just yet. After all, Fall has just arrived and there’s still time to enjoy the leaves falling on these cool, sunny days while picking out pumpkins in the pumpkin patch with your kids and finding your way through the corn mazes.

Of course after your breakfast of pumpkin butter on your morning toast {smile}.


Pumpkin Butter

Makes about 1 pint

Ingredients

1 – 14.5 ounce can pumpkin puree

1/3 cup sweet Apple Cider (not apple juice or apple concentrate)

¾ cup honey

1 Tablespoon pumpkin pie spice

¼ teaspoon cinnamon

1/8 teaspoon ground cloves

1/8 teaspoon ground ginger

Dash of nutmeg

Directions

Combine all ingredients into a medium saucepan. Over medium heat, bring to a boil, stirring continuously.

Once mixture starts boiling, turn down to Low heat, cover, and let simmer for 2 and ½ hours, stirring occasionally. Sauce will thicken as it cooks so cooking time depends upon how thick you desire it to be.

Remove from heat and let cool to room temperature before storing in refrigerator.

Store in an airtight container in your refrigerator up to 1 month.

Makes a great topping for toast and bagels.


*Helpful Hints*

- This recipe does not taste the same with other sugars. I just made a batch with coconut sugar and it had a completely different taste. This recipe is intended to be made only with honey.

- All measurements are US


All content and images are property of Sweet and Spicy Monkey. Please do not reprint this content without my permission. If you wish to include this recipe on your site, please re-write in your own words and use your own photographs and link back to this post for original recipe.
Follow Julie's board Sweet and Spicy Monkey on Pinterest.

Featured at ~ On Display Thursday Linky Party #16

Shared with: Share it Sunday {48}, Wake Up Wednesday, Wine'd Down Wednesday 56, Wonderfully Creative Wednesdays Link Party, Freedom Fridays with All My Bloggy Friends #49, Pin Junkie Pin Party #88, Foodie Friends Friday Recipes Linky Party #116, Pretty Pintastic Party #24, Pinworthy Projects Link Party #37, City of Links #40, Inspire Us Thursday Link Party #70, On Display Thursday Linky Party #15, Great Idea Thursdays 69, Let's Get Real Friday Party #60, Savoring Saturdays #35, Skip the Housework {Link Party}, Sweet and Savoury Sunday #83, Snickerdoodle Sunday #50, Munching Mondays #60, Busy Monday 135, Simple Supper Tuesday #83, Tickle My Tastebuds Tuesday {22}