Sweet and Spicy Monkey has moved to: www.sweetandspicymonkey.com

Showing posts with label syrup. Show all posts

Monday, September 21, 2015

Hibiscus Syrup


I think I'm falling in love. Or maybe it's just an obsession for me. I don't know which it is, but whatever it is, I'm loving it!

I'm talking about hibiscus. Remember when I made my Peach Hibiscus ice cream a few weeks back? And it had that luscious red syrup dripping down the ice cream? Well, that was hibiscus syrup.

I've been meaning to share it with y'all after I did that post but I forgot and one thing led to another. Kind of like when you go into a room looking for your car keys and you notice clean clothes you still haven't folded sitting in the basket. So you start folding them and by the time the clean laundry is folded, you've forgotten all about the keys. You know what I'm talking about!


Anyways, before I forget again, let's get to this hibiscus syrup. It's not like other syrups I've made. This syrup is sweet, thick and with a beautiful red coloring.

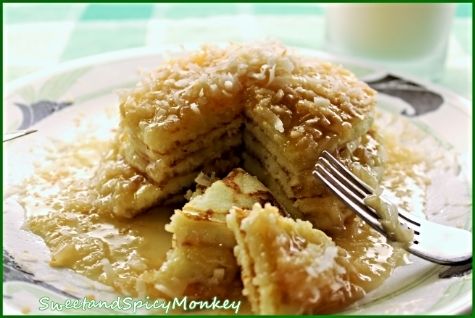
You can use it for anything you like too. Pancakes, waffles, ice cream, drinks, anything you want. Even right out of the jar on a spoon.


Yes it's just that good!

Just like with my other hibiscus recipes, use only organic hibiscus. As with any food, herb, or plant, please use hibiscus with caution. Or if you are nursing or pregnant, then this recipe is not intended for you, as it is not recommended due to adverse effects.


Hibiscus Syrup

Recipe by Julie Murphy
A delicious simple syrup flavored with hibiscus flowers.
Prep time: 5 minutes
Cook time: 50 minutes
Total time: approximately 1 hour
Yield: 1 and 1/2 cups
Ingredients
  • 4 Tablespoons organic dried Hibiscus flowers
  • 2 cups water
  • 1 cup granulated sugar
  • 1 lime wedge, juice of
Cooking Directions
  1. Add dried hibiscus flowers and water to a small sauce pan. Bring to a boil over medium heat, stirring occasionally.
  2. Turn off heat and let sit for 45 minutes to 1 hour.
  3. After hibiscus water has been allowed to sit and deepen in color, pour hibiscus water through fine mesh strainer seated over a large pan. Press hibiscus flowers down with a wooden spoon to extract most of the water.
  4. Place pan containing strained hibiscus water on stove top.
  5. Add in sugar and juice of 1 lime wedge.
  6. Cook over medium to low heat until mixture starts to thicken, stirring constantly so sugar doesn't burn. This should take about 20 to 30 minutes.
  7. If it starts to boil vigorously, turn heat down to low. You want to maintain a mild boil while stirring constantly.
  8. After mixture starts to thicken, remove from heat and let cool to room temperature.
  9. Pour into a glass jar and refrigerate.
  10. Can be stored up to 4 weeks in the refrigerator.
  11. You can use hibiscus syrup as a topping to ice creams or cakes, to flavor drinks, or over pancakes and waffles.

All content and images are property of Sweet and Spicy Monkey. Please do not reprint this content without my permission. If you wish to include this recipe on your site, please re-write in your own words and use your own photographs and link back to this post for original recipe.
Follow Julie's board Sweet and Spicy Monkey on Pinterest.

Shared with: Savoring Saturdays
Saturday, February 7, 2015

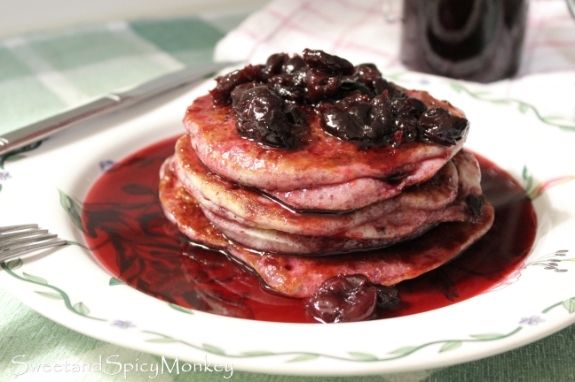
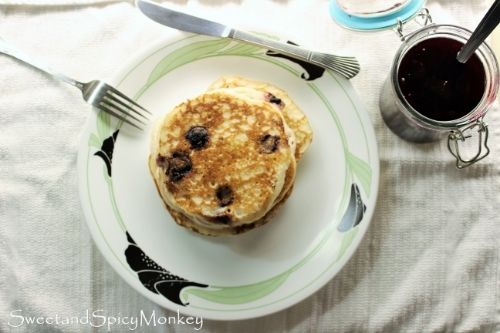
Sweet Cherry Syrup & Cherry Pancakes


Everything is coming up cherries over here at Sweet and Spicy Monkey. I told y'all I’ve been craving cherries, and this recipe satisfies that craving from the start of my day.

Originally, I made this sweet cherry syrup because, well, it just sounds too darn good not to make! I mean, how can you not WANT to make this luscious red and sweet cherry syrup that you can pour over your pancakes? I couldn’t resist the urge.

Not only is it easy to make, but it also has no added preservatives or artificial coloring. That makes it health food, right? {smile}

Maybe not health food, but a whole lot more good for you than some of these store bought syrups. Have you ever read the ingredient label on some of them? Sodium benzoate and FD&C red #40, what the…?

Sodium benzoate is a widely used food additive to help preserve freshness and shelf life. FD&C red #40 is derived from petroleum (yes, you read that right, petroleum) and is controversial in food use. Yeah, I’d rather make my own cherry syrup after discovering that too!

Not only can you use this cherry syrup over your pancakes, waffles, or French toast but you can also use it to make your own cherry flavored sodas like cherry coke or cherry 7-up, or drizzle it over ice creams, shaved ice or snow. Mmmm, the options are endless with your imagination. I’m sure your little ones will be pouring it over everything they eat! You’re Welcome {smile}.


Now I kept the whole cherries in my syrup because I like having a cherry in every bite. But you can strain them out so you’re left with just the liquid syrup.

You're sure to start your day off with a smile after waking up to these cherry pancakes and sweet cherry syrup drizzled all over them {smile}.

Sweet Cherry Syrup

Makes about 35 ounces

Ingredients

4 cups whole dark cherries, frozen

2 cups granulated sugar

1 cup water

Juice from ½ lime, about 2 Tablespoons

Directions

Using a medium saucepan with a heavy bottom, add in cherries, water, and sugar. Mix together.

Cook over medium heat, stirring occasionally.

Stir in lime juice.

Continue cooking until mixture begins to boil. Once boiling, turn heat down to Low and simmer, uncovered, for 15-20 minutes.

While mixture is cooking, use a potato masher to mash the cherries, to help release some of their juices. *Make sure you hold onto the edge of your pan while doing this or it might overturn your pan and spill the ingredients all over the place.*

After simmering for 15-20 minutes, turn off heat and let cool. Syrup will thicken as it cools.

After syrup cools, pour into a glass container and refrigerate.

Store in refrigerator for up to 3 weeks.

Cherry Pancakes

Ingredients

1 cup of your favorite pancake mix

1 egg

2 Tablespoons sunflower oil (or your cooking oil of choice)

1 cup buttermilk*
 
¼ cup dried cherries

1 cup frozen dark cherries

½ teaspoon cherry extract

 
Directions
Spray large skillet with non-stick cooking spray. (Can also use coconut oil, butter, or Crisco, whatever your choice). Set aside.
Mix all ingredients together in a large mixing bowl.
Cook as directed on box of pancake mix.
Serve with sweet cherry syrup on the side or drizzled over the top.
Cherry syrup inspired by ~ Carrie at Fields of Cake.

*Helpful Hints*

- I used frozen cherries since fresh cherries were not available to me at this time. You can use fresh cherries, just be sure to pit them. I will be making this with fresh cherries come summertime.

- Make sure you use buttermilk for the pancake recipe. Once you try buttermilk, you will never go back to regular milk as it makes your pancakes fluffy and delicious.

All content and images are property of Sweet and Spicy Monkey. Please do not reprint this content without my permission. If you wish to include this recipe on your site, please re-write in your own words and use your own photographs and link back to this post for original recipe.
Follow Julie's board Sweet and Spicy Monkey on Pinterest.

Shared with: Savoring Saturdays #50
Friday, July 4, 2014

German Chocolate Pancakes


Remember when you were a kid and mom would never let you have cake for breakfast? No matter how much you begged her, she would still say NO and ya had to wait all day before you could eat it!

Well, now that you’re all grown up and on your own (hopefully most of you are), who says you can’t have cake for breakfast?


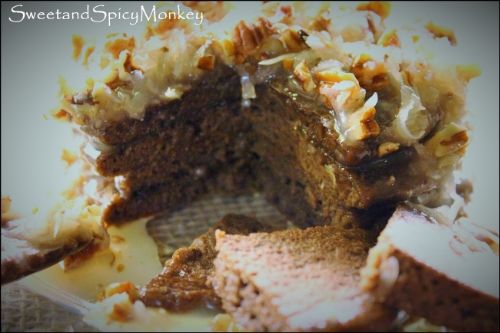
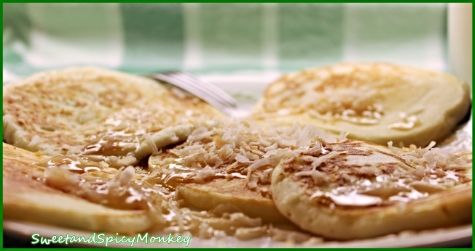
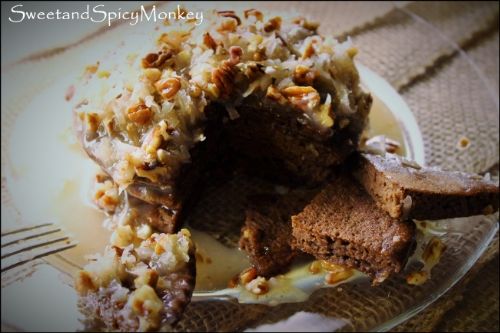
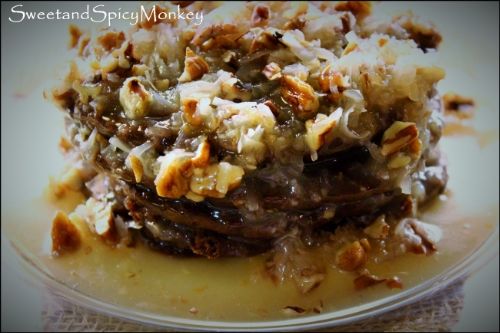
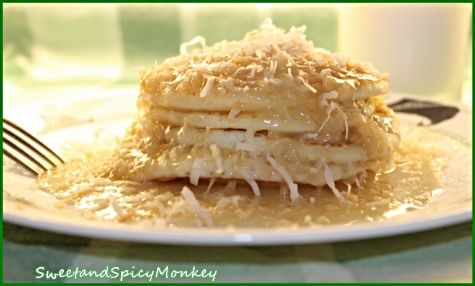
That’s right, I’m talking chocolate pancakes with sweet, sticky, coconutty syrup dripping down the sides breakfast! Today! Are ya with me yet?


Let me introduce you to Series 3 of the Ultimate Chocolate Lover's Breakfast version of German Chocolate Pancakes…


I guess this came to be when I kept seeing photos with recipes for German Chocolate cake all around me and I wanted to make it so bad, but didn’t feel like turning on my oven in this heat.

So I came up with an easy version of German Chocolate Cake. I just added cocoa powder to my pancake mix and pecans to my coconut syrup and made this deliciously wicked recipe for breakfast!


And now (are you listening Mom?), I can have my cake for breakfast! {Happy dance}


German Chocolate Pancakes

Pancakes Recipe

Makes 5-6 pancakes

Ingredients

1 cup of pancake mix (I use my gluten-free Bisquick pancake mix)

1 egg

1 cup milk (your choice of type, I find buttermilk makes a light fluffy pancake as does coconut milk)

2 Tablespoons sunflower oil

2 Tablespoons cocoa powder, unsweetened

Directions

Prepare large skillet  or griddle by coating with your choice of oil or non-stick spray. Set aside.

Prepare pancake mix as directed on box, adding in cocoa powder. Mix until blended.

Place skillet on medium heat and let warm up.

Pour pancake mix into skillet and cook until batter bubbles. Flip pancake over and cook until done. Place on plate and serve.

Syrup recipe

Coconut Syrup with pecans

Serves - 4

Prep time – 5 minutes

Cooking time – 15 minutes

Ingredients

1 cup Karo syrup

1 cup cream of coconut

2 Tablespoon sweetened condensed milk

2 teaspoon vanilla extract

½ cup toasted coconut

2 Tablespoons pecans, chopped *

Directions

Over low heat, add all ingredients into a medium sauce pan. Continue stirring until mixture reaches desired heat.

* Important to not let syrup boil as you don’t want it to burn. *

*Helpful Hints*

- You can use oil substitutes for pancake mix

- Pecans can be left out if allergic to nuts

- All measurements are US

All content and images are property of Sweet and Spicy Monkey. Please do not reprint this content without my permission. If you wish to include this recipe on your site, please re-write in your own words and use your own photographs and link back to this post for original recipe.
Follow Julie's board Sweet and Spicy Monkey on Pinterest.
Follow on Bloglovin

Instagram

Featured week of 07/21/2014 at ~ Motivational Mondays Linkup Party


Shared with: Let's Get Real Friday Party #47, Foodie Friends Friday Recipes Linky Party #103, #GetHimFed Fridays {No.43}, Anything Goes Linky #162 and Features , City of Links #27, Pretty Pintastic Party #11, Skip the Housework Saturday #27, Mix it Up Monday!, Munching Mondays #47, Busy Monday 122, Share It Sunday {36}, The Southern Special 15, Tasty Tuesday Link Party!, Simple Supper Tuesday #71, Lou Lou Girls Fabulous Party #15, Tickle My Tastebuds Tuesday #9, Motivational Mondays - Share Your Recipes!, Wine'd Down Wednesday 44, Wonderfully Creative Wednesdays #29, Wake Up Wednesday "Linky" #25, The Wednesday Roundup #34, Great Idea Thursdays 62, On Display Thursday #3, Freedom Fridays with All My Bloggy Friends #37, Say G'day Saturday Linky Party {96}, Inspiration Monday Party

Sunday, June 15, 2014

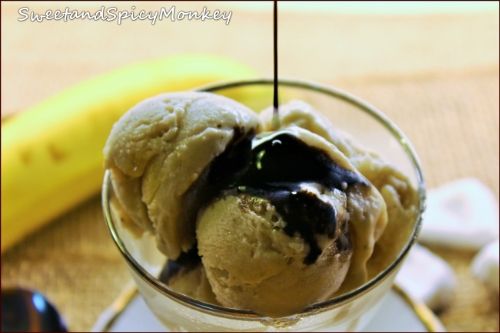
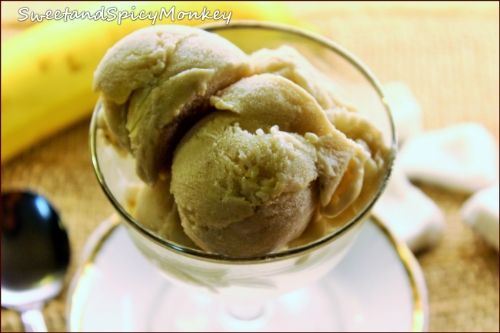
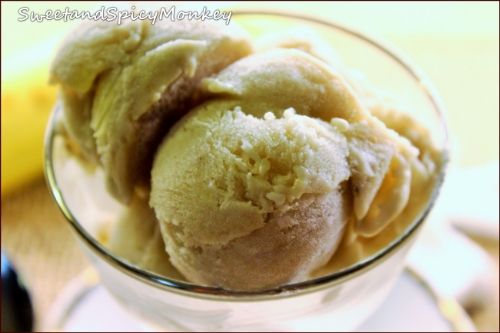
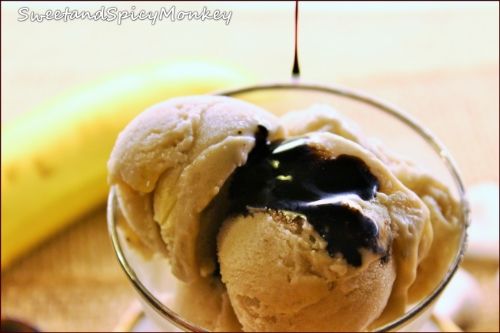
Homemade Banana Coconut Ice Cream with Homemade Chocolate Syrup


Who doesn’t love ice cream? I mean really, who can resist the cold creaminess that melts in our mouths (or all over your hands if eating from a cone) that brings back so many memories of summers past when you were a little kid? Not this girl!


And since last week, when I discovered by accident how to make my own homemade ice cream without an ice cream maker, I have been experimenting in my kitchen {Muahahaha….insert evil laugh here}. But this is all good….for you and me….maybe not so much my diet though {smile}.


Like you, I’ve been seeing recipes for ice cream made strictly with frozen bananas. I happened to have some ripe bananas that I threw in the fridge because they were ripening so fast and I wanted to use them in something. Every time I put bananas in the refrigerator I chuckle because it reminds me of a line from the movie “Friends with Benefits” starring Justin Timberlake and Mila Kunis, where Mila’s mom in the movie says “… Bananas in the refrigerator? What are you, Puerto Rican?” Just love that movie!

Anyhow to get back on track, with the bananas I decided to make banana coconut ice cream. A simple dairy free, soy free, gluten free, and nut free ice cream the whole family will enjoy throughout the summer.

Did I mention no added sugar and no artificial coloring or preservatives? That’s right and you can make it in less than 10 minutes! How easy is that? The hardest part is letting it sit overnight in the freezer before eating it!

You can call this recipe “Ice Cream with Benefits” because I’m also sharing a recipe for making homemade chocolate syrup to drizzle over your homemade ice cream!


And not only can you use this syrup over ice cream, but you can use it over cakes, pancakes, and anything else you want chocolate on.

This chocolate syrup tastes so much better than the store bought kind and is easy to make at home. And you’ll find it makes the perfect topping to this banana coconut ice cream!

Banana Coconut Ice Cream

Ingredients

1 cup coconut milk

1 cup Cream of coconut

3 ripe bananas

¼ teaspoon vanilla extract

¼ teaspoon coconut extract

¼ cup shredded coconut *optional*

Directions

Mash 2 and ½ bananas and slice remaining half.

Add coconut milk, cream of coconut, mashed bananas, vanilla, and coconut extract into a large mixing bowl and whip for 5 minutes.

Gently fold in remaining sliced banana and shredded coconut.

Pour into freezer safe dish and freeze overnight.

Homemade Chocolate Syrup

Makes – 2 cups

Prep & Cooking time – 10 minutes

Ingredients

1 cup water

½ cup unsweetened cocoa powder (can also use Dark cocoa powder)

2 cups sugar

Pinch sea salt

¼ teaspoon vanilla extract

Directions

Add water and cocoa into a medium saucepan. Whisk together over medium heat until cocoa powder is dissolved.

Stir in sugar until dissolved. While stirring occasionally, bring to a boil and continue cooking for 3 minutes, stirring continuously now.

If it starts to boil over (rising up near edge of saucepan), remove pan from heat, turn down heat, and place back on heat once mixture goes down and continue to stir.

After 3 minutes, remove from heat, add in salt and vanilla and continue to stir for another minute.

Set aside and let cool.

Can either serve heated or as a cold syrup for chocolate milk or over ice cream.

Pour into a container (preferably glass or heat proof) and store in refrigerator.

Can be stored in refrigerator up to 2 months.


*Helpful Hints*

- I used Hershey’s 100% Special Dark Cocoa powder because I love dark chocolate and this syrup was amazing!

- All measurements are US

Chocolate Syrup source ~ Adapted from Nikki at Seeded at the Table

All content and images are property of Sweet and Spicy Monkey. Please do not reprint this content without my permission. If you wish to include this recipe on your site, please re-write in your own words and use your own photographs and link back to this post for original recipe. 

Featured week of 07/01/2014 at ~ The Southern Special Week #13

Featured week of 06/27/2014 at ~ Savoring Saturdays #21  
Shared with: #glutenfreefridays#96, Let's Get Real Friday Party #44, #Gethimfed Fridays No. {#40}, City of Links #24 , Say G'day Saturday Linky Party {92}, Skip the Housework #24, Snickerdoodle Sunday 06/21/2014, Pinworthy Projects Link Party #23, Share it One More Time Party and Features, Sweet & Savoury Sundays #67, Inspiration Monday , Share it Sunday {33}, Munching Monday #44, Busy Monday 119, Mix it up Monday!, Lou Lou Girls Fabulous Party #12, The Southern Special Week #12, Tasty Tuesday Link Up, Simple Supper Tuesday #68, The Makers No. 23, Tickle my Tastebuds Tuesday #6 - Get Your Link On!, Wine'd Down Wednesday 41, From the Farm Hop 6/27/14

Follow Julie's board Sweet and Spicy Monkey on Pinterest.

Wednesday, May 28, 2014

Coconut Syrup


I’m really loving this warm weather we’ve been having here in Georgia, mid-80’s, sunny and especially NO RAIN! I don’t know if you remember, but last year we got approximately 66 inches of rain here in Georgia! I felt like I was living in a tropical rain forest! Don’t get me wrong now, living in a tropical rain forest wouldn’t be all that bad, as long as I had the waterfalls, beaches, surfers {sigh}, and fresh tropical fruit to go along with all that rain {smile}.


On the topic of tropical fruit, nothing is more tropical than the coconut. And right now, coconut is getting its fair share of publicity due to all the good for ya stuff packed into that little brown hairy ball with the face on it. I remember when I was a kid, my mom would buy coconuts and then my dad would drill a hole in it and drain the milk into a glass so all us kids could drink it. And we would fight over who got the milk. My dad had to start pouring it in separate glasses so we would all get some of that flavorful coconut milk. There is nuthin’ like pure coconut milk straight from the source! We knew what a good thing coconuts were back then before all these trend setters jumped on the band wagon some 20 odd years later.


Back to coconuts, which are known for their smooth, fruity, nutty taste. There’s really no other food that taste like it. Lately, I’ve been experimenting with this little tropical wonder and by gosh, I think I nailed it on this recipe, coconut syrup. A creamy coconut syrup to drizzle over your pancakes, waffles, or French toast or a treat to top your ice cream with followed by some toasted coconut….YUM!! I’m getting hungry right now just thinking about it! Excuse me while I go get me some….

Mmmm…I wish I could share some of this with you right now so you can see what I’m talking about. But since I can’t, I’ll just get to the recipe so you can make some and see for yourself what a deliciously sweet tropical treat this coconut syrup really is.


Coconut Syrup

Prep time – less than 5 minutes

Cooking time – 15 minutes

Ingredients

½ cup Karo syrup

½ cup cream of coconut

1 Tablespoon sweetened condensed milk

1 teaspoon vanilla extract

4-5 Tablespoons toasted coconut

Directions

Over low heat, add all ingredients into a small sauce pan.

Continue stirring until mixture reaches desired heat. * Important to not let syrup boil as you don’t want it to burn.*

Remove from heat and serve over pancakes, waffles, French toast, or ice cream. And enjoy your little taste of the tropics!

*Helpful Hints*

- Toasted coconut recipe found here.

- All measurements are US

- can sprinkle on more toasted coconut (I sprinkle a lot!)

- by the way, this coconut syrup is delicious over Talenti's Tahitian Vanilla Bean gelato...which is shown in the picture along with their Double Dark Chocolate gelato. Mmmm, YUM!!

All content and images are property of Sweet and Spicy Monkey. Please do not reprint this content without my permission. If you wish to include this recipe on your site, please re-write in your own words and use your own photographs and link back to this post for original recipe.

Featured week of 06/13/2014 at ~ City of Links #22
City Of Creative Dreams

Featured week of 06/08/2014 at ~


Shared with: Share it One More Time Features and Party 05/31/2014, Share it Sunday {30}, Sweet & Savoury Sunday #64, Snickerdoodle Sunday 06/01/2014, Mix it up Monday 06/01/2014, Busy Monday 116, Lou Lou Girls Fabulous Party #9, The Makers No. 20, The Southern Special 9, Simple Supper Tuesday #65, Wine'd Down Wednesday 38, Wednesday Roundup #28, Great Idea Thursdays #58, Freedom Fridays with All My Bloggy Friends #31, Foodie Friends Friday Recipes Linky Party 06/06/2014, Pinworthy Projects Link Party #21, Pretty Pintastic Party #6, Friday Link Party #70, Skip the Housework #22, City of Links #22, Pin it Thursday #39, Munching Mondays #42, Wonderful Wednesday #77


Follow Julie's board Sweet and Spicy Monkey on Pinterest.

Thursday, April 24, 2014

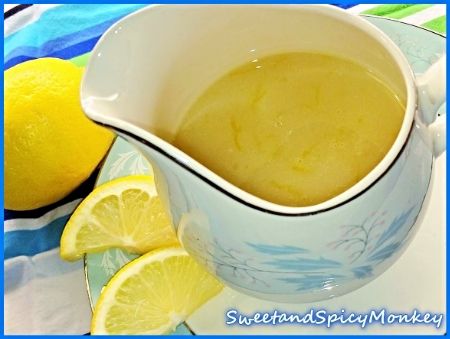
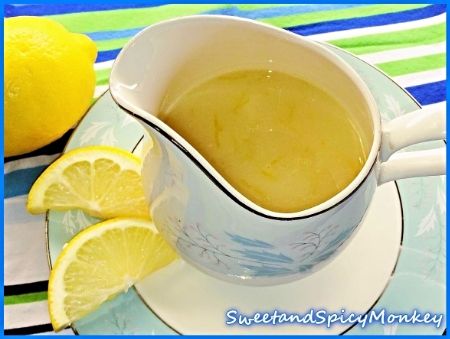
Myer's Lemon Syrup

As if you haven’t figured it out yet, I’m loving anything and everything lemon! Ah yes, the refreshing and citrusy taste of sweet lemon is divine. If I can flavor it with lemon, then I most definitely will!

I love having my pancakes on my cheat days over the weekend and as I was having them this past weekend, I got to thinking how good they would be with lemon syrup drizzled over them! Oh my, my mouth started watering and the wheels in my brain started turning as I thought of ways to make this sweet, citrusy liquid to drizzle over my pancakes.

As I was making this lemon syrup, I wondered to myself why my mom never thought of making flavored syrup. I guess I grew up in a time when maple syrup was the all-time favorite and nothing else would or could ever replace it on top of our pancakes, waffles, or French toast.

Oh, how times have changed! Now you can have any flavor imaginable these days. And if there isn’t the flavor you want, you can make it.

So Mom, this is a gift from me to you, a new way to start your day with this citrusy, sweet lemon syrup to replace that everyday maple syrup over your pancakes in the morning. After all, isn’t it time for a change?

Myer’s Lemon Syrup

Serves - 2

Prep & Cooking time - 15 minutes

Ingredients

½ cup Karo light syrup

1 Tablespoon sweetened condensed milk

3 Tablespoons Myer’s lemon juice, freshly squeezed

1 Tablespoon lemon zest

Directions

Add all ingredients in a small saucepan and stir continuously over low to medium heat until syrup heats up to desired temperature. Once warmed, serve over pancakes, waffles, or French toast and enjoy!

*It is very important to NOT let the syrup boil as you do not want to burn the sugars.*

*Helpful Hints*

Makes for a great addition to an Easter or a Mother's Day breakfast or brunch.


Shared with Freedom Fridays with All My Bloggy Friends #25, Inspire Us Thursday Link Party #47, Pin it Thursday , Strut Your Stuff Saturday Link Party #144, Boost Your Post Party, Savoring Saturdays #12, Skip the Housework Saturday, Weekend Potluck- #115, Say G'day Saturday Linky Party #84, Making Your Home Sing Monday Link Party 04/27/2014, Simple Saturdays Blog Hop #20, Munching Mondays #36, Think Pink Sunday #162, Marvelous Mondays 4-27-14, Busy Monday #111, Gingham & Roses Link up & Social Media Hop #17, Take it on Tuesday blog hop #121, Time to Sparkle #58, Tasty Tuesday #58 , The Makers Link Party #15, Wine'd Down Wednesday #33, The Wednesday Roundup #23, Freedom Fridays with All My Bloggy Friends #30

All content and images are property of Sweet and Spicy Monkey. Please do not reprint this content without my permission. If you wish to include this recipe on your site, please re-write in your own words and use your own photographs and link back to this post for original recipe.