Sweet and Spicy Monkey has moved to: www.sweetandspicymonkey.com

Showing posts with label fruit. Show all posts

Thursday, March 3, 2016

Strawberry Banana Beet Smoothie


Some big things are in store for Sweet and Spicy Monkey this month. The first (and probably biggest change) is Sweet and Spicy Monkey will be moving to a new location on the World Wide Web.

Yes, it's finally going to happen! Sweet and Spicy Monkey is getting it's very own .com site! I'm so excited with this move as it’s been a goal of mine for this site since I started blogging. And now I'm finally able to make my dreams come to reality.

I know, I know, I'm such a nerd!

Don't worry about missing any recipes though, as I will let you know when the big move becomes final. In the meantime, I'm still going to be sharing recipes here.

Speaking of food, I haven't shared a smoothie recipe with y'all in quite some time. If I remember last, my green smoothie recipe was the last. And green smoothies are so last year!

2016 is all about the color and right now, my new smoothie crush is this pink Strawberry Banana Beet Smoothie.

Made with beet, beet juice, strawberries, banana, chia seeds, dates (for sweetness), and cashew milk or your milk of choice. This smoothie is easy and quick to make for those hurried mornings or your go-to drink before or after your workouts, or between meals.


I love to drink it in the morning before I leave the house or sometimes for breakfast or lunch. It's chock full of vitamins and good for you stuff.   And with its bright pink coloring, this smoothie is sure to wake you up in the mornings to the start of a great day.

After all, how can you stay grumpy in the morning with this beautiful pink Strawberry Banana Beet smoothie?

You can't!


Strawberry Banana Beet Smoothie

Recipe by Julie Murphy @ Sweet and Spicy Monkey
A quick and easy Strawberry Banana Beet smoothie that you can enjoy at breakfast, as a snack, or anytime of the day.
Prep time: 5 minutes
Total time: 5 minutes
Yield: 2 servings
Ingredients
  • 1 banana
  • 1/2 cooked beet
  • 7 to 10 whole strawberries
  • 1/4 cup beet juice
  • 2 Medjool dates
  • 1/4 cup water
  • 2 Tablespoons chia seeds
  • 1 scoop vanilla protein powder (optional)
  • 1/4 cup uncooked oats
  • 1 tall glass (8 ounces) cashew milk
Directions
  1. In a small microwavable cup, add 1/4 cup water and the 2 dates. Cook on High for 45 to 60 seconds. Remove from microwave and let cool as you prepare smoothie.
  2. Add remaining ingredients into a high speed blender.
  3. Remove dates from water and slice in half. Remove seeds and place dates into blender.
  4. Pour water from dates into blender.
  5. Pulse on High setting until all ingredients are pureed, about 7 to 10 times. Or about 1 minute of continuous blending at High speed.
  6. Pour into a tall glass and serve.


All content and images are property of Sweet and Spicy Monkey. Please do not reprint this content without my permission. If you wish to include this recipe on your site, please re-write in your own words and use your own photographs and link back to this post for original recipe.
Follow Julie's board Sweet and Spicy Monkey on Pinterest.

Thursday, August 27, 2015

Blueberry Scones


These last few days, I've been busy with conferences in Atlanta, which has left me little time to do much of anything in the kitchen. Luckily last weekend I took advantage of the cooler weather out here in Georgia, since I was afraid the summer heat was coming back and I needed to make something with all the blueberries I just bought.


So I made these delicious blueberry scones. I made these a little differently than my first batch of scones by playing with the main ingredients. I used coconut milk instead of yogurt and coconut oil along with the butter, so I could still have that buttery flavor. I think it really made a difference!

Plus I realized I wanted my scones a little thicker. To achieve that, I didn't roll these out as much as my first batch. Actually I just placed the rolling pin over the top of the dough and went over it once, tidied up the edges with my hands, sliced the dough like a pizza, and that was it.


I'm happy with how thick they turned out, yet light and fluffy with a mildly sweet blueberry taste, and the scraggly texture which is so reminiscent of scones.


I think I have this scone thing figured out! Which is a good thing because like I said before, this ain't gonna be my last scone recipe!

Blueberry Scones

Recipe by Julie Murphy
Delicious blueberry scones that are fluffy and light in texture. Perfect for breakfast or snacking.
Prep time: 10 minutes
Cook time: 10 to 15 minutes
Total time: 25 minutes
Yield: 12 scones
Ingredients
  • 2 cups + 4 Tablespoons all-purpose flour
  • 1 Tablespoon baking powder
  • 1/2 teaspoon baking soda
  • 3/4 teaspoon sea salt
  • 1/4 teaspoon ground cinnamon
  • 3 Tablespoons coconut oil, frozen
  • 2 Tablespoons butter, frozen
  • 1/4 teaspoon vanilla extract
  • 1 cup full-fat coconut milk, canned
  • 1 egg
  • 4 Tablespoons honey
  • 1 cup blueberries
Cooking Directions
  1. Preheat oven to 450F degrees.
  2. Prepare cookie sheet by spraying with a non-stick cooking spray. Wipe off any excess with a dry paper towel. Set aside.
  3. In a large mixing bowl, add all dry ingredients. Blend together with a fork.
  4. Using your mixer with correct attachment for dough making, pastry fork, or your fingers, work in frozen coconut oil and frozen butter with the dry ingredients until crumbly.
  5. Mix in vanilla, coconut milk, egg, and honey.
  6. Knead dough for about 5 to 10 minutes using your KitchenAid mixer.
  7. After kneading dough, remove from bowl, and place on a flour dusted surface. (Yes, you're about to get messy here! If you're anything like me, change into an old shirt, preferably NOT a black shirt).
  8. Work the dough with your hands for about 1 to 2 minutes.
  9. If dough is too sticky to work with your hands, add more flour 1 Tablespoon at a time. Dough should be a little sticky, not smooth like an ordinary bread dough.
  10. Gently fold in blueberries, blending throughout dough mixture.
  11. Shape dough into a round shape with your hands. Lightly roll the dough mixture with a floured rolling pin, sprinkling on more flour if needed to prevent sticking. You want dough to be at the least 1/2 inch thick. The thicker the dough, the larger your scones. But remember, you want them to cook all the way through so not too thick here.
  12. Tidy up the outside edges with your fingers, keeping in mind that you want the dough to look rough, since that is the beauty of a scone.
  13. Cut your circle into pieces, similar to a round pizza.
  14. Gently transfer each piece of dough (a spatula works great for this) onto your prepared cookie sheet, leaving 1/2 inch between each piece of dough.
  15. Place into the oven and bake for 10 to 15 minutes, or until the tops are a light golden brown.
  16. Remove from the oven.
  17. Scones can be served fresh out of the oven, warm, or room temperature.
  18. Best served with butter, mascarpone cheese, or cream cheese and coffee or tea.

All content and images are property of Sweet and Spicy Monkey. Please do not reprint this content without my permission. If you wish to include this recipe on your site, please re-write in your own words and use your own photographs and link back to this post for original recipe.

Thursday, June 4, 2015

Berry Oatmeal Breakfast Squares


They always say third times a charm and it proved right when I made these Berry Oatmeal Breakfast Squares. When I first saw the recipe for Blueberry Oatmeal Breakfast Bars by Erin over at DelightfulEmade, they looked so good but I knew there had to be a way to healthy them up.

The original recipe was "almost" healthy with the blueberries and oatmeal but I can do without the white flour and butter. Whenever possible, I try to replace butter with coconut oil and white flour with either a whole wheat flour or some kind of gluten-free flour, like the coconut flour I used in this recipe.

One thing I've learned when baking with coconut flour is you need to adjust the measurement for it since it adds a drier texture than white flour. Which is why I've made this recipe three times already.

Yes, three times! I made the first batch with blackberries, the second batch with blueberries, and a combination of raspberries and blackberries in the third batch. And I have to say, I like the blackberries and the raspberries the best.


Of course I've been on a blackberry kick here lately. This batch would have been all blackberries except it seems they had a shortage the day I wanted to make this because I could not find blackberries at any store I went to that day. Luckily, they had raspberries and I had some blackberries stored in the freezer from a few weeks ago!

So the first time I made these, the oatmeal texture was too powdery. The second batch, I added a little too much coconut oil to make up for the dry texture. The third time, I added more coconut flakes and it turned out perfect. Not too dry and not too crumbly, not too oily, but just right.

Top with plain Greek yogurt for a healthy breakfast

So just like Goldilocks, it took me three times before I found the right one. Trust me, you'll be happy it did because like they say "third times a charm." Or in this case, berry charm!

Berry Oatmeal Breakfast Squares

Recipe by Julie Murphy
Healthy baked oatmeal breakfast squares with fresh summer berries.
Prep time: 10 minutes
Cook time: 25 minutes
Total time: 35 minutes
Ingredients
  • 2 and 1/4 cups Old fashioned oats
  • 2 cups coconut flour
  • 1 cup organic brown sugar
  • 1/2 cup coconut sugar
  • 1 and 1/2 cups coconut oil, melted
  • 1 cup organic unsweetened coconut flakes
  • 1 and 1/2 teaspoons baking soda
  • 1/2 teaspoon sea salt
  • 2 cups raspberries, rinsed
  • 2 cups blackberries, rinsed
  • 1 Tablespoon corn starch
  • 1/4 cup coconut sugar (to mix with berries)
Cooking Directions
  1. Preheat over to 350F degrees.
  2. Spray 9" x 11" pan with non-stick cooking spray or rub down with coconut oil. Set aside.
  3. In a large mixing bowl, combine together oats, flour, brown sugar, 1/2 cup coconut sugar, coconut flakes, baking soda, and sea salt.
  4. Pour melted coconut oil over dry oat blend and mix together, coating all dry ingredients with melted coconut oil. Mixture will be crumbly.
  5. Place about 2/3 of oat blend into prepared pan. Flattening down mixture with your hands. Set aside.
  6. In a separate bowl, add fruit, corn starch, and 1/4 cup coconut sugar. Blend until the berries are coated with sugar and corn starch.
  7. Pour berry mix over flattened oatmeal blend.
  8. Sprinkle remaining oatmeal blend over top of the berries.
  9. Place into preheated oven and bake for 20-25 minutes or until top is golden brown in color.
  10. Remove from oven and let cool. Once cool, cut into squares. Place into refrigerator and let cool completely. This helps bottom crust set up.
  11. Serve individual squares in a small bowl.
  12. Best served with plain Greek yogurt.
*Helpful hints*
 
- can use fresh or frozen raspberries and blackberries. Fresh is always best, especially now that they're in season.
 

All content and images are property of Sweet and Spicy Monkey. Please do not reprint this content without my permission. If you wish to include this recipe on your site, please re-write in your own words and use your own photographs and link back to this post for original recipe.
Follow Julie's board Sweet and Spicy Monkey on Pinterest.

Friday, May 29, 2015

Strawberry Salsa


Remember, my Pineapple salsa I made a few weeks ago? Where I combined tropical pineapple with spicy salsa? Well, if you love spicy mixed with a little sweetness, then you are going to L-O-V-E the taste of strawberries in this salsa!

Fresh strawberries combined with cool cucumbers and spicy jalapeños. It wakes up your taste buds that have been sleepwalking through all of your meals over the last few days, months, or even years.

And the best part about this salsa, you can eat it with plain tortilla chips or you can pair it with cinnamon sugar tortilla chips for an entirely different snack.


Whatever you thought about salsa before, my Strawberry Salsa is sure to change the way you think about salsa from now on.

Strawberry Salsa

Recipe by Julie Murphy
A sweet & fruity twist on traditional salsa.
Prep time: 7 minutes
Cook time: 0
Total time: 7 minutes
Yield: 1 and 1/2 cups salsa
Ingredients
  • 4 strawberries, pureed
  • 1 cup whole strawberries, diced
  • 1 teaspoon lime juice
  • 1 teaspoon fresh cilantro, diced
  • 9 slices (about 1/2 of a whole) English cucumber, diced
Directions
  1. Puree 4 strawberries. Place into a medium bowl.
  2. Add diced strawberries, lime juice, cilantro, and cucumber to pureed strawberries. Mix together.
  3. Serve with tortilla chips, cinnamon sugar tortilla chips, or over vanilla ice cream.
  4. Store refrigerated in an airtight container for up to 1 week.

All content and images are property of Sweet and Spicy Monkey. Please do not reprint this content without my permission. If you wish to include this recipe on your site, please re-write in your own words and use your own photographs and link back to this post for original recipe.
Follow Julie's board Sweet and Spicy Monkey on Pinterest.

Shared with ~ Freedom Fridays with All My Bloggy Friends #89

Thursday, May 7, 2015

Lemon Blackberry Cake #whenwebake


Disclaimer ~ I was provided a coupon for a free Country Crock spread for this recipe. All thoughts and opinions are my own. #whenwebake

I was asked by my friends at The Daily Meal and Country Crock  to create a recipe for Mother's Day. And since my mom is the one who inspired me to cook and bake, this sounded like such a great idea to me. I could not pass it up!

I grew up with Country Crock spread when my mom decided it was time for us to eat healthier and not use so much butter. Country Crock is still my go-to butter substitute because it tastes so much like real butter, but easier to spread and not as many calories or fat. Did you know that Country Crock has 65% less saturated fat and 20% less calories than butter? That’s right, Country Crock has 80 calories and 8 grams of fat, with 2.5 grams being from saturated fat. Compared to butter, which has 100 calories and 11 grams of fat, with 7 grams of saturated fat per serving. And Country Crock still has the buttery rich flavor of butter and spreads easily, even when cold.


Believe it or not, my mom also loves the sweet, tangy taste of lemon treats (I guess I really am my mom's daughter {smile}). And with my lemon love back and going strong, this cake was a no-brainer recipe for a Mother’s Day brunch. I mean what better way for my mom to celebrate her Mother's Day than with some sort of lemony treat. That's why this Lemon Blackberry Cake is perfect for her upcoming special day.

Now my mom resides in California while I'm over here in Georgia and she won't be able to enjoy this cake with me. However, with the miracle of the Internet, she can make her own cake with my recipe here, as you can too.

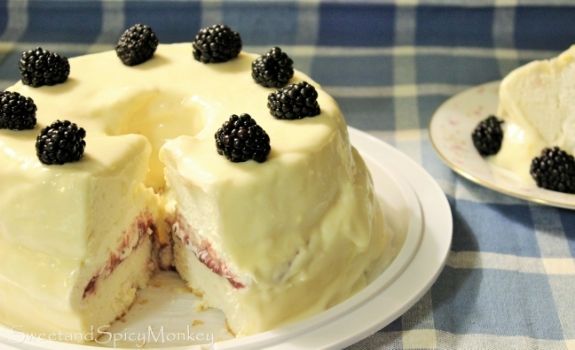
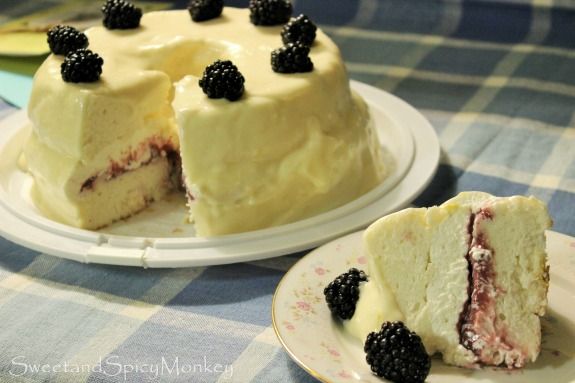
I've combined lemon whipped cream and a homemade blackberry curd sandwiched between two slices of Angel food cake, covered with a lemon cream cheese buttercream frosting and topped with fresh blackberries. The blackberries compliment the lemon flavors.

This cake is so easy to make. Especially since I used liquid egg whites instead of separating the egg yolks from the whites, which can be messy and leave you with twelve egg yolks. I was also surprised with how nice the liquid egg whites whipped up with stiff peaks! And you can even make the cake a day ahead or use a store bought Angel food cake if you're crunched for time.

I know my mom is going to love a big slice of this Lemon Blackberry Cake on Mother's Day.


This cake is also perfect for any Spring or Summer get together with its fresh fruity flavors that are reminiscent of sunny days.

Homemade Angel Food Cake

Recipe by Julie Murphy
A light and fluffy homemade Angel food cake made with liquid egg whites so you can save time and less mess in the kitchen from trying to separate the eggs yourself.
Prep time: 10
Cook time: 35
Total time: 2 hours (including cooling time for cake)
Ingredients
  • 1 and 1/3 cups granulated sugar
  • 1 cup cake flour
  • 1/4 teaspoon sea salt
  • 2 and 1/4 cups liquid egg whites
  • 1/3 cup warm water
  • 1 teaspoon vanilla extract
  • 1 and 1/2 teaspoons cream of tartar
Cooking Directions
  1. Preheat oven to 350F degrees.
  2. Spray Angel food cake pan or Bundt pan with non-stick cooking spray. Set aside.
  3. Place sugar into a food processor and blend until fine. Set aside.
  4. In a medium bowl, sift together cake flour, salt, and half of fine sugar. Set aside.
  5. In a large bowl, egg whites, warm water, vanilla, and cream of tartar. Using a hand whisk, gently mix together until blended. Attach bowl to stand mixer and using the whisk attachment, whip ingredients together while slowly adding in remaining half of sugar. Beat until egg white mixture starts to form medium peaks.
  6. Sprinkle a small amount of cake flour blend over the top of egg whites and blend on low speed. Continue to add in flour mixture, a little at a time, while gently whipping egg white mixture, making sure all of cake flour blend is evenly combined with egg white mixture.
  7. Using a spatula, gently pour into prepared pan.
  8. Place into preheated oven and bake for 35 minutes or until top is golden brown. Also make sure cake is evenly baked throughout by inserting a clean, sharp knife into the center and pulling back out. Knife should come out clean.
  9. To cool cake, invert over wire rack and cool upside down.
  10. Once cake is completely cooled, gently run a clean knife around the edges (without scraping cake pan) to help loosen cake, and remove pan.
  11. To make the cake, slice in half with a large, sharp knife so you have a top and a bottom layer. Remove the top and set aside.
  12. Layer bottom half of cake generously with blackberry curd. Gently layer lemon whipped cream over the blackberry curd. Place top half gently over the lemon whipped cream.
  13. Generously apply lemon cream cheese buttercream frosting over cake, covering all exposed sides and top. It's ok if it starts to drip down the sides. Place fresh blackberries on top.
  14. Cover and refrigerate until ready to serve. Store covered in the refrigerator for up to 1 week.

Recipe for Lemon Whipped Cream, and Lemon Cream Cheese Buttercream Frosting below. Link for Blackberry Curd recipe below.


Lemon Whipped Cream

Recipe by Julie Murphy
A deliciously light and fluffy lemon whipped cream.
Prep time: 5
Cook time: 0
Total time: 15
Yield: 8 ounces
Ingredients
  • 1 cup heavy cream
  • 8 Tablespoons powdered sugar
  • 3 Tablespoons lemon juice, freshly squeezed
Directions
  1. Add all ingredients into large bowl of stand mixer and whip with whisk attachment until stiff peaks form, about 8 - 10 minutes.
  2. Using a spatula, pour into an 8 ounce container, cover, and refrigerate until ready to use.


Lemon Cream Cheese Buttercream Frosting

Recipe by Julie Murphy
A deliciously lemon cream cheese buttercream frosting.
Prep time: 5
Cook time: 0
Total time: 10
Ingredients
  • 1 - 8 ounce package cream cheese, room temperature
  • 1/4 cup Country Crock spread
  • 4 Tablespoons lemon juice, freshly squeezed
  • Zest from 1 lemon
  • 1 teaspoon vanilla extract
  • 1 teaspoon lemon extract
  • 5 cups powdered sugar
Cooking Directions
  1. Place cream cheese and Country Crock spread into a large bowl of stand mixer. Gently blend together until mixed.
  2. Add in lemon juice, lemon zest, vanilla, and lemon extract. Beat until smooth and fluffy.
  3. Blend in powdered sugar in 2 separate additions. Beat until creamy.
  4. Pour into a bowl and cover. If not using immediately, refrigerate until ready to use.
  5. After refrigerating, let frosting warm to room temperature before frosting cake so it spreads easily without tearing cake.
  6. Can store any leftover frosting in a covered container in the refrigerator up to 2 weeks.


Recipe for Blackberry Curd can be found here.

Additional recipes from Country Crock #whenwebake can also be found on Facebook, Twitter, and Pinterest.
Country Crock information obtained from - Country Crock's website

All content and images are property of Sweet and Spicy Monkey. Please do not reprint this content without my permission. If you wish to include this recipe on your site, please re-write in your own words and use your own photographs and link back to this post for original recipe.
Follow Julie's board Sweet and Spicy Monkey on Pinterest.

Shared with: Crafty and Delicious Party, Foodie Friends Friday Linky Party #146, Munching Mondays #90

Wednesday, May 6, 2015

Blackberry Curd


Ever since I made Lemon curd last week, I've been  playing with other flavors of curd. As you can see from the photo above, blackberries have been my fruit of choice for today's recipe.
 
I have been on a blackberry streak here lately because they are just now coming into season and they are so delicious this year. This year the blackberries are sweet and just look how big they are...Yum!
 
And since blackberries are filled with many little seeds, unlike lemons, I had to throw them in a food processor and puree them before placing them into a strainer, pushing the puree through the small holes, to help the puree become more smooth, leaving most of those little seeds behind. I was amazed at how easy this was and how smooth the puree became.
 
After that easy step, I cooked it up just like the lemon curd, and it came out beautifully. A sweet and smooth blackberry curd that can be used in anything from cakes and cupcakes, or put on biscuits and scones, just like a jam or jelly, but so much better. I used my blackberry curd for a cake filling and I will be sharing that recipe with you later this week.
 
 
I'm thinking if I can do this with blackberries, what other fruits can I try this with? Be sure to sign up for updates to my blog to find out what flavor curd I make next....
 

Blackberry Curd

Recipe by Julie Murphy
A delicious curd made with summer blackberries
Prep time: 10 minutes
Cook time: 7 minutes
Total time: 17 minutes
Yield: 1 cup
Ingredients
  • 1 cup blackberries
  • 1 Tablespoon lemon juice, freshly squeezed
  • 1/3 cup granulated sugar
  • 3 egg yolks, strained
  • 4 Tablespoons butter, cut into small pieces
  • Pinch Himalayan pink salt
Cooking Directions
  1. Place blackberries into a food processor or blender and pulse until blackberries are pureed.
  2. Pour pureed blackberries into a strainer. Place a small bowl underneath the strainer to catch puree.
  3. Using a wooden spoon, smash blackberries through the strainer. This should make about 4-5 Tablespoons of blackberry puree.
  4. Take the strained blackberry puree and place into a small saucepan with the lemon juice, sugar, egg yolks, and salt.
  5. Over medium heat, stir mixture constantly with a wooden spoon. If mixture starts to boil, turn down heat. Also make sure to scrape sides and bottom of saucepan when stirring. Cook until mixture coats the back of the wooden spoon, about 5-7 minutes.
  6. Remove pan from heat and gradually add in butter pieces, stirring well until all butter is melted. Curd should have a smooth texture.
  7. Using a spatula, pour curd into a small bowl. Place plastic wrap directly over the top of the curd's surface to help prevent a skin from forming. Wrap tightly.
  8. Place in refrigerator and let chill for at least 1 hour before using.
  9. Transfer into an airtight container for storage. Store up to 2 weeks in the refrigerator.

*Helpful Hints*

- It's important to use a wooden spoon when making curd as the lemon juice sometimes reacts to metal spoons.

All content and images are property of Sweet and Spicy Monkey. Please do not reprint this content without my permission. If you wish to include this recipe on your site, please re-write in your own words and use your own photographs and link back to this post for original recipe.

Follow Julie's board Sweet and Spicy Monkey on Pinterest.

Thursday, March 5, 2015

Blueberry Pineapple Smoothie


It's been three days since I started the Sugar Crush 30 day Sugar-Free Challenge and I'm doing better than I expected and I've been making healthier food choices. My body hasn't went into a downward spiral sugar shock (yet) and I'm still alive despite not having any cookies in the last few days. {whispering}....I still have some Red Velvet Oreos in my kitchen cupboard that I haven't touched yet!

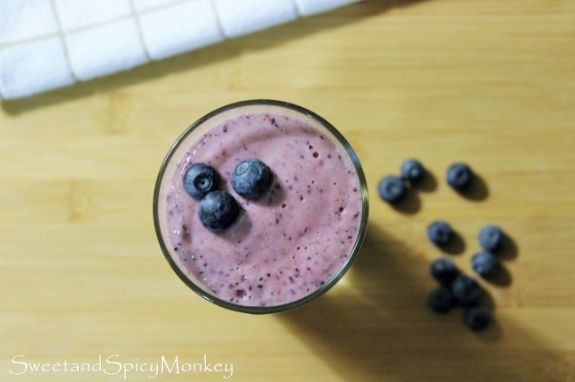
This smoothie is one of those healthier food choices. It has banana, pineapple, blueberries, chia seeds, and Greek yogurt. Yep, that's it! No milk, no almond milk nor coconut milk in this smoothie. I've found that the chia seeds work great for thickening up smoothies so you don't need any milk.

It's great for anyone who's eating clean, gluten-free, or just watching their waistline as this smoothie has 595 calories with 6.5 grams of fat. Plus it has all those antioxidants from the chia seeds and blueberries.


It makes for a delicious, nutritious breakfast when you're on the go and don't have time to make anything in the morning. Or as an afternoon snack to perk yourself up during those slump hours between 1 and 5 p.m., when cravings hit you the hardest.

Whenever you drink this smoothie, you'll feel a whole lot better drinking this than having those cookies sitting on your kitchen counter {smile}.

Blueberry Pineapple Smoothie

Makes 1 serving

Ingredients

½ cup plain Greek yogurt

¾ cup water

1 cup fresh pineapple chunks

2 cups fresh blueberries, washed and rinsed

1 frozen banana, sliced

1 Tablespoon chia seeds

Directions

Add all ingredients into a blender. Blend on Medium to High until all ingredients are liquefied.

Pour into a tall glass and enjoy!

All content and images are property of Sweet and Spicy Monkey. Please do not reprint this content without my permission. If you wish to include this recipe on your site, please re-write in your own words and use your own photographs and link back to this post for original recipe.
Follow Julie's board Sweet and Spicy Monkey on Pinterest.

Featured at ~ Savoring Saturdays

Shared with: TotallyTerrificTuesday #24, Savoring Saturdays, Foodie Friends Friday Linky Party #139

Wednesday, March 4, 2015

Banana Blueberry Oatmeal


Y'all know I have a major sweet tooth. Yes, I'm a self-proclaimed sweet addict. And lately, it has been overtaking my life and causing me to indulge in my sweet cravings a little more than usual.
So when I saw this Sugar Crush 30 day Sugar-Free Challenge, I knew it would be something for me to try to get my sweet tooth back under control. And maybe lose a few pounds along the way too {smile}.

During these next 30 days, I will be sharing healthy recipes with you that help curb those sweet cravings as I stumble through this 30 day Sugar Crush Challenge.

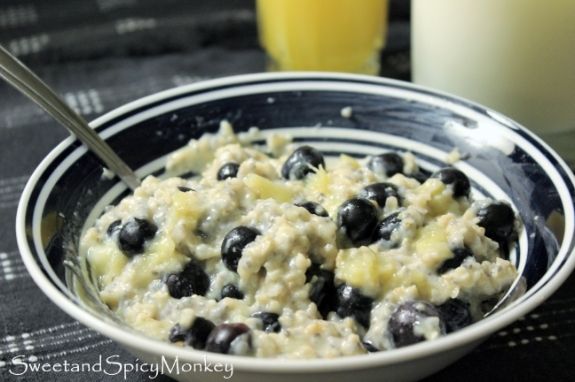
My first recipe as part of this challenge makes for a great way to start your day. It has fruit and nuts, antioxidants, warms you up, keeps your tummy full, is delicious, and ready in about five minutes. All this and with no added sugar, my recipe for Banana Blueberry Oatmeal. One of my favorite ways to wake up in the morning, along with my cup of coffee {smile}.

If you want to try the Sugar Crush 30 day Sugar-Free Challenge with me, go here and check out all the helpful hints they have to help get you through this sugar free journey.

And let me know in the comments below so we can support each other. You can also follow me on Facebook and Instagram to see what choices I make during these next 30 days.

Banana Blueberry Oatmeal

1 serving

Ingredients

¼ cup instant oats (can also use old-fashioned or steel cut)

1 medium banana, sliced

½ cup blueberries, washed and rinsed

½ scoop protein powder

1 Tablespoon chopped walnuts

1 Tablespoon chia seeds

Directions

Add oats, banana, protein powder, walnuts, and chia seeds together in a small microwave safe bowl. Add enough water to cover ingredients, about 1 cup. Mix together.

Add just enough water to cover and wet ingredients like above

Place in microwave for 1-2 minutes on High. Stir together. Fold in blueberries. Enjoy!

*Helpful Hints*

- If too watery, place back in microwave for a little longer.

- If too dry, add a little more hot water.

All content and images are property of Sweet and Spicy Monkey. Please do not reprint this content without my permission. If you wish to include this recipe on your site, please re-write in your own words and use your own photographs and link back to this post for original recipe.
Follow Julie's board Sweet and Spicy Monkey on Pinterest.

Shared with: Foodie Friends Friday Linky Party #137, Savoring Saturdays

Tuesday, September 2, 2014

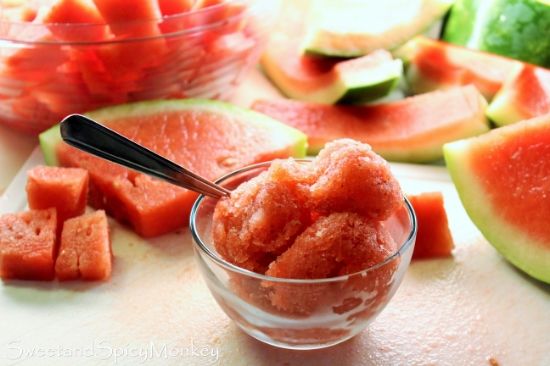
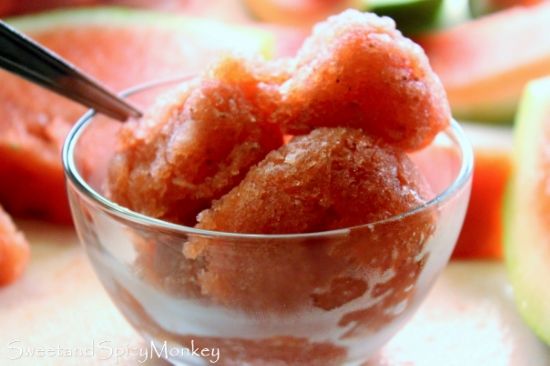
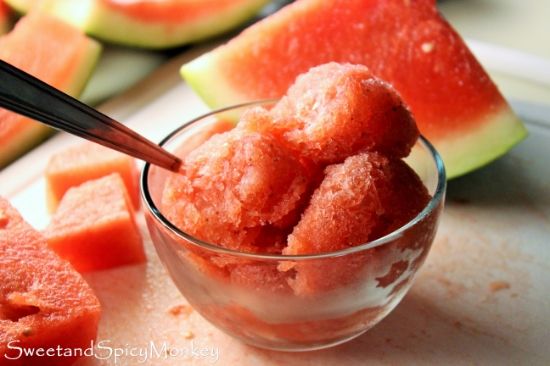
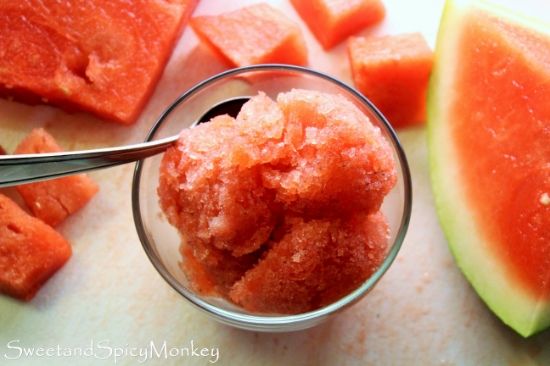
Strawberry Watermelon Sorbet


Can you believe it’s September?? The kids are back in school, the days are getting shorter, the acorns and leaves are starting to fall, and best of all, its football season! But summer is hanging on strong here and I want  need something to help me cope with these hot days.

And I think I found it in this Strawberry Watermelon Sorbet. A fresh and fruity frozen treat combined with my favorite, Pink Moscato, to help me ease out of this summer heat and into the coolness of fall.
 

Yes, this is an adult’s only treat because, well, I deserve it and you do too! Like yourself, I work hard and every now and then I just need a little “me” time.


So after the kids have left for school, mix up a batch of my Strawberry Watermelon Sorbet so you can enjoy it later in the day while you’re doing your next home pedi before the kids come home. And while you’re at it, pour yourself a glass of wine, preferably pink Moscato, and relax. Or for a real treat, pour a little wine over the sorbet {smile}.


After all, it’s only a couple more hours before you’ll be back on your feet, making dinner and cleaning up after everyone else until it starts all over again tomorrow morning.
 
Strawberry Watermelon Sorbet

Ingredients

2 cups strawberries, washed, rinsed, and topped

1 to 2 cups watermelon

¾ cup water

¾ cup granulated sugar

½ cup pink Moscato

3 Tablespoons fresh lime juice

Directions

In a small saucepan, add water and sugar. Stirring continuously, heat until sugar is dissolved. Once dissolved, set aside and let cool to room temperature.

Add room temperature sugar water, fruit, lime juice, and wine into a blender and puree until all ingredients are completely mixed together, about 2 minutes.

Pour into a freezer safe bowl and freeze overnight. You can also make it in the early morning so you can enjoy it later in the day while everyone is away with a glass of wine. Enjoy!

*Since this does have wine, please drink eat responsibly.

*Helpful Hints*

- If freezing overnight, leave out for about 20-30 minutes before scooping as it will be frozen hard

- Can also use a white zinfandel wine or your wine of choice

- All measurements are US

All content and images are property of Sweet and Spicy Monkey. Please do not reprint this content without my permission. If you wish to include this recipe on your site, please re-write in your own words and use your own photographs and link back to this post for original recipe.
Follow Julie's board Sweet and Spicy Monkey on Pinterest.

Shared with: #glutenfreefridays #110, Savoring Saturdays #33, Wine'd Down Wednesday 55, Great Idea Thursdays

Saturday, August 23, 2014

Rustic Peach Galette

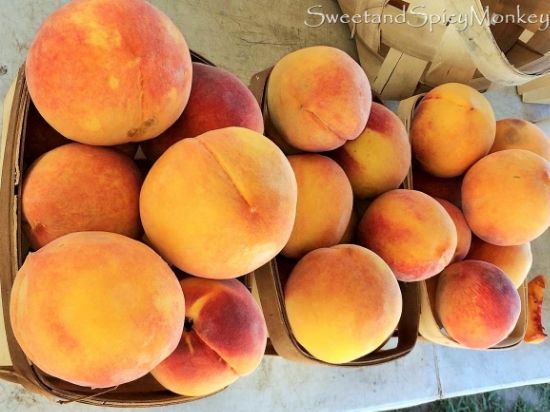
Aren't these just beautiful?

As promised, continuing with Peach week here at Sweet and Spicy Monkey, today’s recipe is my Rustic Peach Galette!!
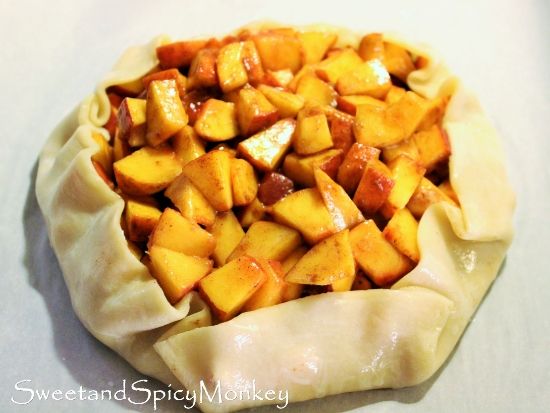
In case you’re wondering, galette’s are from the tart family with the exception that they are often placed on a single layer of pie crust with a layer of fruit, often one variety, in the middle. Instead of the straight, square sides of a tart, the galette’s edges are folded over, creating an open middle displaying the fruit. A simple pie.


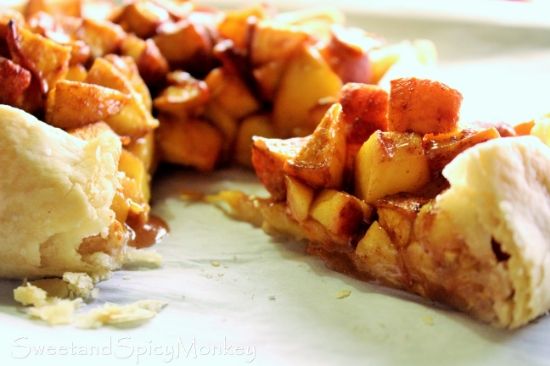
But don’t get me wrong, there’s nothing simple about the taste of this peach galette. It still has the flaky, buttery pie crust with the taste of sweet, juicy summer peaches baked in cinnamon that reminds you of your grandma’s peach pie. It’s just a little bit healthier than grandmas and a whole lot easier to make. And y’all know how I feel about easy!

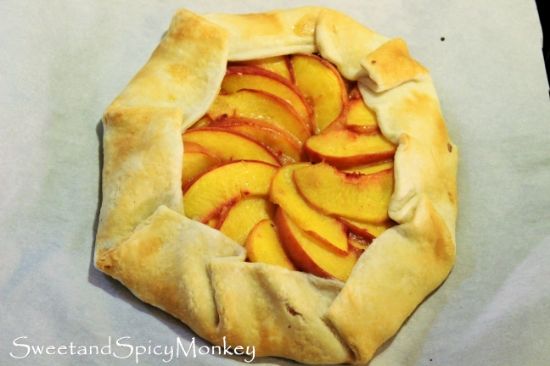
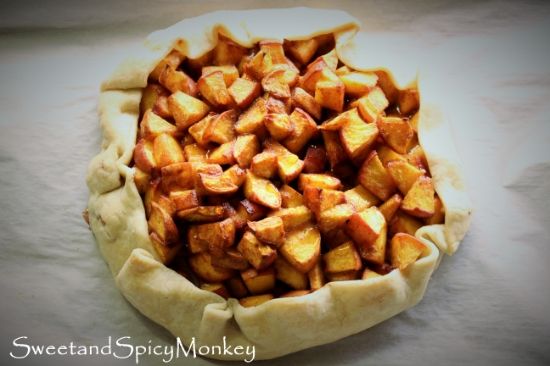
When I first made this last week, I sliced up two peaches and laid them out all pretty looking like the picture below. The only problem with it was there just wasn’t enough peaches. So that’s why I wanted to make another one before sharing.  


And I’m so glad I went back to the kitchen with this recipe before sharing with y’all. The extra peaches I added in the different shapes with the drizzle of honey over the top made this peach galette taste even more like my grandma’s peach pie!


It definitely has enough peaches now and the taste of cinnamon baked into those sweet, juicy peaches… mmm!  The tastes reminds me of everything summer…
Rustic Peach Galette

Ingredients

1 ready-made pie crust, room temperature

4 peaches, washed and rinsed, diced thin into any shape you desire

½ teaspoon cinnamon

1 teaspoon flour (I used my GF flour)

1 Tablespoon + 1 teaspoon coconut oil, melted

1 Tablespoon + 1 teaspoon honey

1-2 Tablespoons water

Pinch of granulated sugar

Directions

Preheat oven to 325F degrees.

Line a baking sheet with parchment paper. Set aside.

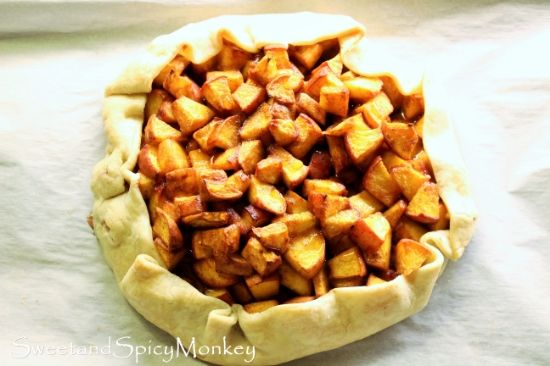
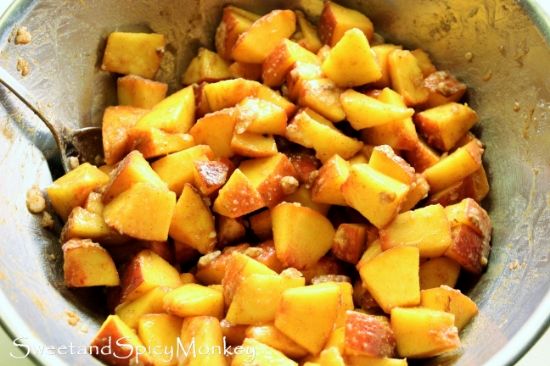
Dice peaches thinly into any shape you desire (I cut my peaches into small squares) and place into a medium size bowl.

Add in coconut oil, cinnamon, honey, and flour. Mix well, making sure all peaches are covered with honey mixture. Set aside.


Roll out room temperature pie crust onto parchment paper.

Spoon peach mixture onto pie crust, leaving a 1 inch border on edges. Gently fold pie crust up and over peaches. Don’t worry if it tears just push together with dampened fingers.


Mix together water and sugar to a small bowl. Lightly brush water and sugar mixture around the edges of the pie crust. You won’t be using all of the water and sugar mixture so don’t worry about leftovers here.

Place baking sheet with galette into oven for 30-40 minutes or until edges are a golden brown.

Remove from oven and drizzle some honey over the peaches. Let cool for 10-15 minutes before serving.


These are delicious as is or you can serve topped with your choice of vanilla ice cream or whipped cream.

*Helpful Hints*

- All measurements are US

All content and images are property of Sweet and Spicy Monkey. Please do not reprint this content without my permission. If you wish to include this recipe on your site, please re-write in your own words and use your own photographs and link back to this post for original recipe.
Follow Julie's board Sweet and Spicy Monkey on Pinterest.

Featured at ~ Daily Dish Magazine Host Favorites

Shared with: Wine'd Down Wednesday 53, Wake Up Wednesday Linky, Wonderfully Creative Wednesdays Link Party, On Display Thursday Linky Party #12, Great Idea Thursdays 66, Lou Lou Girl's Fabulous Party #25, The Wednesday Roundup #45, Inspire Us Thursday Link Party #68, Pin it Thursday, Let's Get Real Friday Party #58, Freedom Fridays with All My Bloggy Friends #47, Pin Junkie Pin Party #86, Foodie Friends Friday Recipes Linky Party, Snickerdoodle Sunday #48, Sweet and Savoury Sunday #81, Share it Sunday {47}, Skip the Housework Link Party, Munching Mondays #58, Mix it up Monday!, Busy Monday 133, Simple Supper Tuesday #81, Tasty Tuesday Link Up

Saturday, July 26, 2014

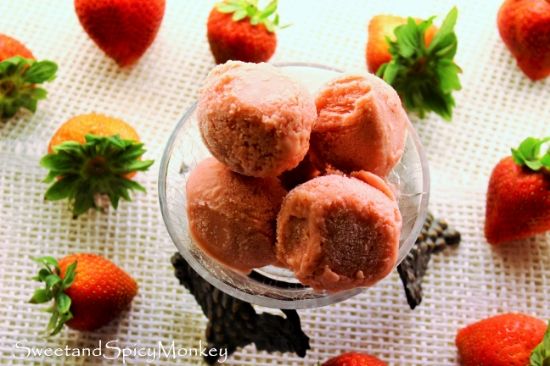
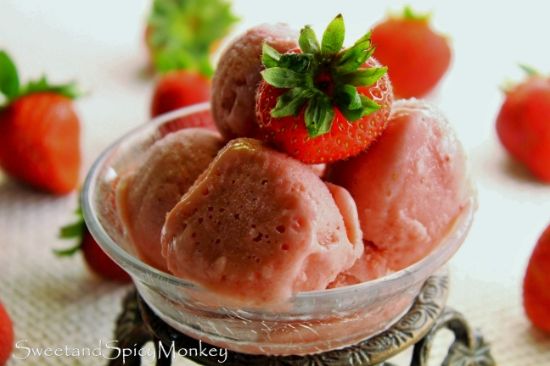
Strawberry Coconut Sorbet


You didn’t really think I would forget to share an ice cream recipe with you this week, did you? After all, we will be wrapping up July here soon and nothings better on a hot summer day than a cold frozen treat to help you forget about this heat…at least for a little while {smile}.

And what better way to enjoy yourself than with a combination of summer’s two favorite flavors, strawberries and coconut.


Those sweet, red, juicy berries that only make their presence during spring and summer are being mixed here with the tropical nutty flavor of coconut. And why not bring in just a little flavoring of Amaretto to top this yumminess off!

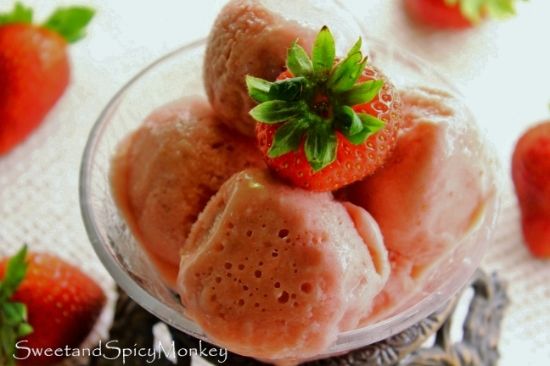
Yep, I have created in my lab kitchen a Strawberry Coconut Sorbet that will tickle your taste buds while helping you cool down.


Just like my other ice cream recipes, no churn is needed. And this ice cream is dairy free, soy free, and no added granulated sugar as I used honey instead, giving it a deliciously smooth, sweet taste.

Now if you’re making this for the kids, leave out the Amaretto. Or you can substitute Amaretto extract, which I did not. Even though it’s just a small amount, I really think the Amaretto adds a delicious essence to the strawberry and coconut flavoring.


And I’m just going to say this, if you are over 21 years of age and use Amaretto (the alcoholic version), my PSA for this recipe is Do Not Eat and Drive. Even though it’s a small amount, please stay responsible.

Strawberry Coconut Sorbet

Ingredients

2 cups whole strawberries, washed and topped

1 cup coconut milk

1 cup cream of coconut

1 teaspoon Amaretto (can substitute Amaretto extract)

½ teaspoon vanilla extract

¼ teaspoon coconut extract

2 Tablespoons honey

Directions

Place all ingredients into a blender and puree until thoroughly mixed.

Pour into a freezer safe dish and place in freezer overnight.

*Helpful Hints*

- can also be made first thing in the morning so you can enjoy it later that evening.

 - All measurements are US

All content and images are property of Sweet and Spicy Monkey. Please do not reprint this content without my permission. If you wish to include this recipe on your site, please re-write in your own words and use your own photographs and link back to this post for original recipe.
Follow Julie's board Sweet and Spicy Monkey on Pinterest. Follow on Bloglovin Instagram

Shared with ~ #glutenfreefridays#102, Say G'day Saturday Linky Party {98}, The Wednesday Roundup #38, Pin it Thursday, Inspire Us Thursday Link Party #62, Share It One More Time Party and Features, Tasty Tuesday Link Up, Wonderfully Creative Wednesdays, Wine'd Down Wednesday 48, Foodie Friends Friday Recipes Linky Party , Anything Goes Linky #167 & Features, #GetHimFed Fridays {No. 48}, Freedom Fridays with All My Bloggy Friends #41, Pretty Pintastic Party #16, Pin Junkie Pin Party #80, City of Links #32, Pinworthy Projects Link Party #29, Share it Sunday {41}, Snickerdoodle Sunday #42, Sweet and Savoury Sunday #75, Munching Mondays #52, The Southern Special #20, Busy Monday 127, Mix it up Monday!

Saturday, March 29, 2014

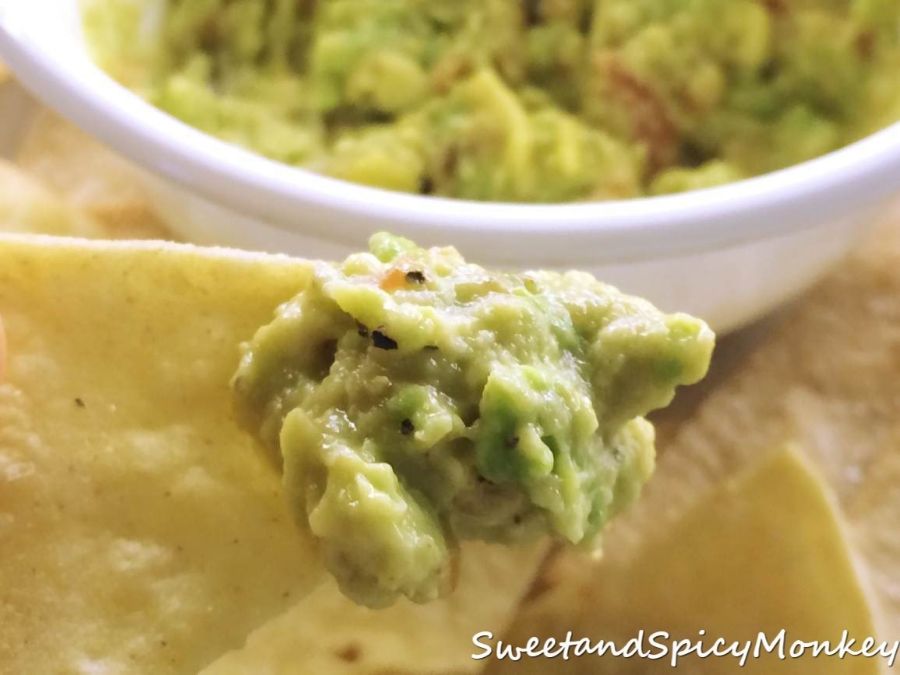
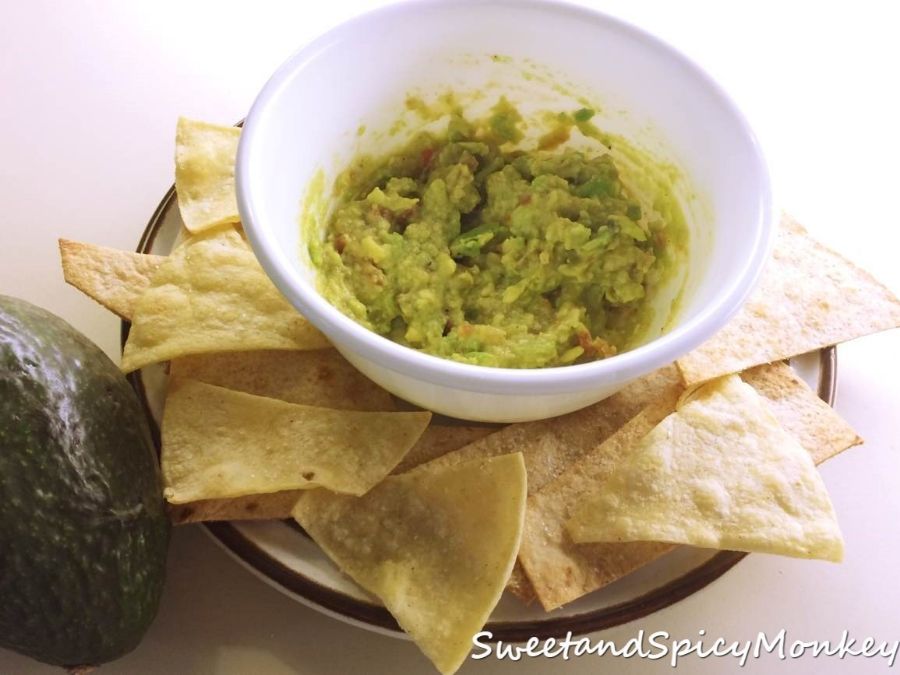
Guacamole


Last week, I made homemade tortilla chips and what better way to enjoy snacking on them than with some homemade guacamole. Do you sense a theme here? I do love me some Mexican food!

Guacamole is an avocado based concoction that dates back as early as the 16th century when it was found to be prevalent in the Aztec’s diet. Yes, this ugly little dark green fruit (yes, avocados are a fruit) with an extremely large pit in the middle, has been around for quite some time.
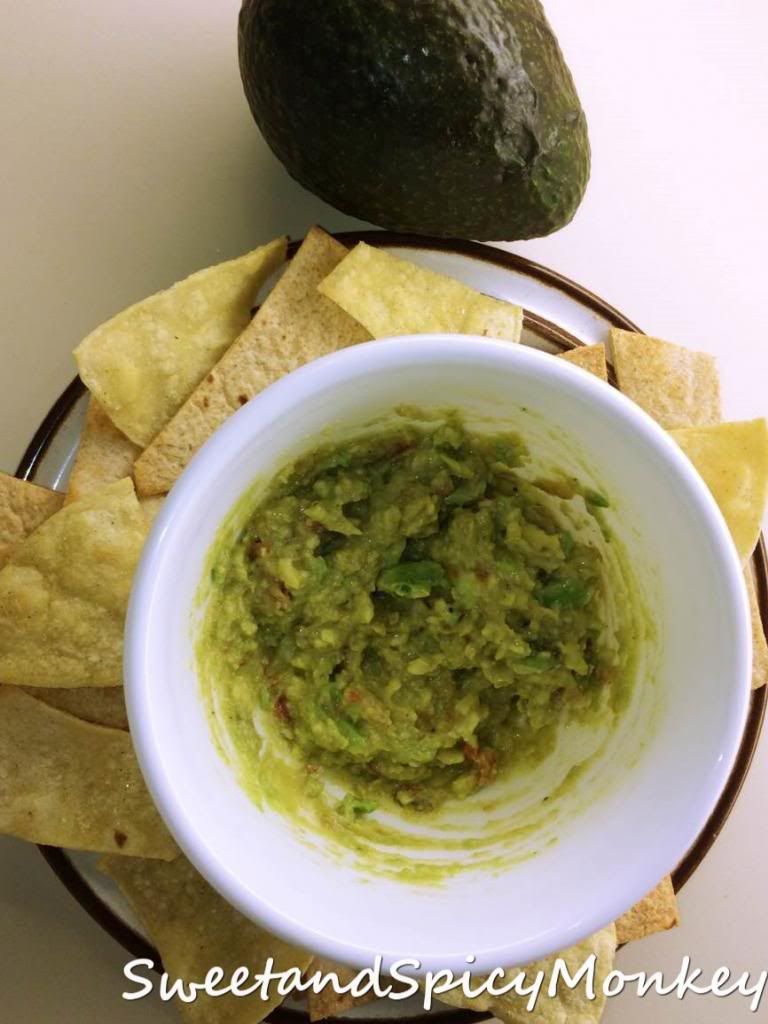
Avocados are a climacteric fruit, meaning they mature on the tree but ripen after they’ve been picked off the trees, just like bananas. So when you go shopping for avocados and don’t need it for that day’s meal, pick one that is a little firmer so it can ripen before you have to use it. Now if you need an avocado and all you’re finding are firm ones, simply place the avocado in a paper bag with either an apple or a banana, and it will ripen faster. This is due to the influence of the ethylene gas, a natural plant hormone, produced by apples and bananas.

There are many tips for storing avocado halves once you cut them open so it doesn’t turn brown and I’ve tried many of them. I’ve heard of squeezing lemon or lime juice over the half and storing in an airtight container, ½ teaspoon of vinegar over the half will prevent browning, slathering the half with olive oil, just leaving the pit intact, wrapping the half in cling wrap, or placing a red onion in the bowl with the avocado half will prevent browning. None of these methods work as good as the one I came across in a Cosmopolitan magazine article a few years back, of all places!

The best way I’ve found to help prevent an avocado half from turning brown is to simply place the half under cold running water for a few seconds and then store in an airtight container in your refrigerator. The cold water helps by acting as a seal against the air (oxygen), helping to prevent any further browning.


The reason avocados turn brown is because they contain an enzyme called polyphenol oxidase, which basically causes the avocado to turn brown when it comes in contact with oxygen (air). I’ve tried the cold water method many times and it is by far the best method to prevent your avocado half from browning. Regardless, it will still turn a slight brown because of the contact with air, but not as dark as the other options.

And you thought we were just making guacamole today! And that we are now that you know a little more about the avocado fruit. It’s a simple recipe that embraces the fresh taste of avocados and a mild spiciness of its Mexican culture.

 Homemade Guacamole

Serves  - 2
Prep Time - 5 minutes

Ingredients

1 avocado, halved and pitted

1/2 jalapeno*, seeded and diced

4 Tablespoons fresh salsa

1/8 teaspoon paprika

2 lemon wedges

Dash of salt, black pepper, garlic powder, onion powder, cumin, and Chipotle Chile pepper to taste.

Directions

In a small mixing bowl, mash avocado.

Mix in salsa, juice from the two lemon wedges, paprika, and spices to taste. Add diced jalapeno.

Mix well and serve with tortilla chips.

*Helpful Hints*

- *jalapeno can be optional*

- can also be served with any type of Mexican food or just out of the bowl! Don't limit yourself, be creative!


This recipe is featured on Kat's Simply Living Simply Sunday Social Blog Hop #9 on 04/06/2014.

You can also find this recipe shared at Grassfed mama's Sunday Social Blog hop 03/30/2014 and featured on The Sunday Social Blog Hop #9 on 04/06/2014, shared with Gluten-free Fridays #86, Side Dishes Blog Hop 4/11/2014, Tex Mex Link Up 4/18/2014, Pin it Thursday , Munching Mondays #37
All content and images are property of Sweet and Spicy Monkey. Please do not reprint this content without my permission. If you wish to include this recipe on your site, please re-write in your own words and use your own photographs and link back to this post for original recipe.