Sweet and Spicy Monkey has moved to: www.sweetandspicymonkey.com

Showing posts with label peanut butter. Show all posts

Saturday, January 30, 2016

Flourless Peanut Butter Oatmeal Chocolate Chip Cookies


You ever have one of those days where you feel like doing absolutely nothing? I have. Well, I did, last Saturday. I didn't feel like doing anything. I mean just going into the kitchen to fill up my glass of water was too strenuous for me that day.

I just wanted to melt into my chair and watch me some football. Thing is, there was no football on last Saturday. I think the broadcasting channels were having the same kind of day I was because there was absolutely nothing on TV last Saturday.

Seriously people, next time snow is expected, put something worth watching on TV. Is that a little too much to ask? I didn't think so either.

And since I didn't have anything to entertain me that required no energy, I immediately thought of making cookies. Why? Well because I'm one of those people who (even though I don't want to do anything) need something to do or else I become fidgety. So making cookies was it!


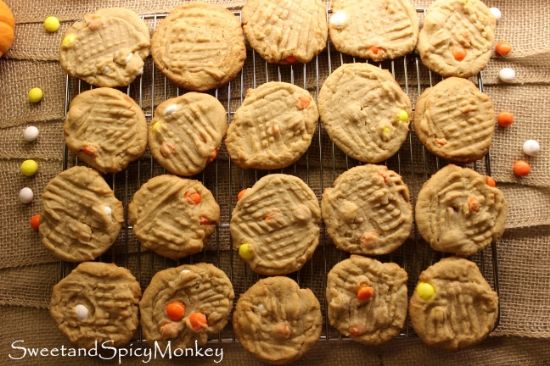
Not just any cookie, but these Flourless Peanut Butter Oatmeal Chocolate Chip Cookies. Now you can say I made these because I was too lazy to add in the flour, but that's not the case. With my healthier eating diet this year, these cookies were the perfect choice for me.

No white sugar added, no flour (which is great if you're gluten-free), and sugar-free chocolate chips. So you don't feel guilty eating them as you melt into the chair and channel surf.

How could I say no? You're right, I couldn't!


Plus, they're easy to make and you can make them under 30 minutes. BAM!

These are definitely my kind of lazy day cookies! I think you'll agree.


Flourless Peanut Butter Oatmeal Chocolate Chip Cookies

Recipe by Julie Murphy @ Sweet and Spicy Monkey
A healthier flourless and white sugar-free version of the classic peanut butter oatmeal chocolate chip cookie.
Prep time: 10 minutes
Cook time: 20 minutes
Total time: 30 minutes
Yield: 2 dozen cookies
Ingredients
  • 1 cup peanut butter, creamy (can also use chunky)
  • 1 large egg
  • 1 teaspoon vanilla extract
  • 3/4 teaspoon baking soda
  • 1/4 teaspoon sea salt
  • 1/2 cup honey
  • 1 and 1/2 cups old fashioned oats, uncooked
  • 1/2 to 1 cup sugar-free chocolate chips
Cooking Directions
  1. Preheat oven to 350F degrees.
  2. Line cookie sheet with parchment paper. Set aside.
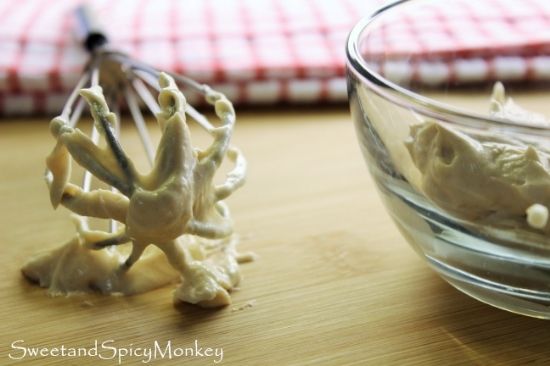
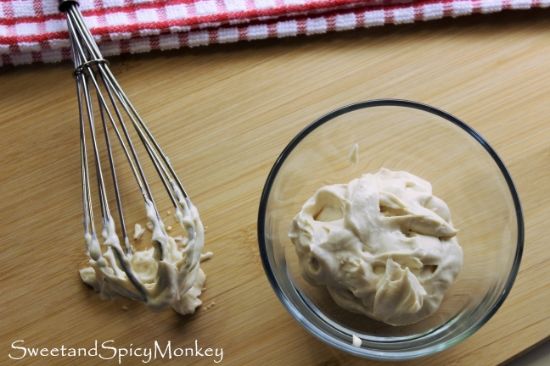
  3. Cream together peanut butter, egg, vanilla, and honey in a large mixing bowl.
  4. Mix in baking soda, salt, oats, and chocolate chips.
  5. Using a cookie scoop, scoop dough onto prepared cookie sheet. You can either leave them as is or press with fork tines to make criss cross design on top of cookie.
  6. Place in oven and bake for 10 minutes or until edges are lightly golden brown.
  7. Remove from oven and let cool for 5-8 minutes on cookie sheet before transferring to a wire rack where they can cool completely.
  8. Can be stored in an airtight container for up to 1 week.

All content and images are property of Sweet and Spicy Monkey. Please do not reprint this content without my permission. If you wish to include this recipe on your site, please re-write in your own words and use your own photographs and link back to this post for original recipe.
Follow Julie's board Sweet and Spicy Monkey on Pinterest.

Monday, June 29, 2015

Ice Cream Cupcakes


This week is all about mystery here at Sweet and Spicy Monkey as I will be featuring recipes using Dum Dum's Lollipops  mystery flavors. And for today's recipe, I will be using everyone's favorite, bacon!

Yes, you read that right, B-A-C-O-N, as in bacon lollipops! I crushed the lollipops to sprinkle on top of my "cupcakes". They are what make this recipe of Ice Cream Cupcakes! The sweet and savory flavor of bacon mixed with a chocolate mocha cream cheese frosting (or peanut butter cream cheese frosting, take your pick) along with caramel, chocolate, and/or banana ice cream. Mmmm...can you taste it yet?


I was asked by Spangler Candy Company, who makes Dum Dum's Lollipops, to create a recipe for these new savory flavors. Dum Dum's Lollipops are trying out their new savory flavors of bacon, pizza, and buttered popcorn that the public (that's you!) have been asking for. Spangler Candy Company is taking candy to a whole new level with these savory flavors, going where no candy company has gone before.

I remember when I was a kid growing up and all we had for lollipop flavors were cherry, grape, lemon, orange, pineapple, and root beer. So you can imagine my excitement when I was asked to create a recipe for these three savory flavors!


Since its summer (a hot & sizzling summer) I've had ice cream on my mind. And because bacon is all the rage right now (just ask they guys I work with, bacon goes with anything and everything), I've topped these ice cream cupcakes with crushed bacon lollipops!


I couldn't decide between peanut butter or chocolate, so I made them both! I mean, what doesn't go with peanut butter or chocolate? Right? Especially these bacon flavored lollipops!

By the way, I did try these ice cream cupcakes with the bacon lollipops (because I can't be sharing a recipe I have not tried) and I was amazed at how delicious they really are! You're in for a surprise, a good, yummy surprise!


A sweet and savory ice cream cupcake that will be the hit of your summer this year! And since 4th of July is coming up this week (yes, its that time of year already!) you have plenty of time to run to your local grocery store and grab all the ingredients so you can enjoy these ice cream cupcakes.

Best hurry up, Saturday will be here before ya know it and these bacon lollipops won't be around for long!


Ice Cream Cupcakes

Recipe by Julie Murphy
A sweet and savory easy to make ice cream cupcake.
Prep time: 10 minutes
Cook time: 0
Total time: 2-3 hours (includes freezing time)
Yield: 6 ice cream cupcakes
Ingredients
  • 1 - 14.3 ounce package Oreo cookies
  • 1 carton chocolate ice cream
  • 1 carton caramel ice cream
  • 1 carton banana ice cream
  • 1 package cupcake baking cups
  • 8 Dum Dum's Mystery flavor Bacon lollipops, crushed and with sticks removed
Directions
  1. Place baking cups inside the cupcake pan. Set pan aside.
  2. Twist 12 Oreo's apart, scraping off the filling with a butter knife. You can place Oreo filling into a small bowl to use in the future.
  3. Place 1 chocolate Oreo wafer cookie into the bottom of each cupcake cup.
  4. Place 1 scoop of ice cream (your choice of flavor) onto the chocolate wafer cookie.
  5. Place another chocolate wafer cookie over the ice cream and gently squish down to fill out cupcake cup.
  6. Place another scoop of ice cream over the chocolate wafer cookie and squish down, filling out the cupcake cup.
  7. You should have 3 chocolate wafer cookies with 2 scoops of ice cream layered between them - chocolate cookie, ice cream, cookie, ice cream, cookie.
  8. Place into your freezer.

Now its time to make the frosting.

Chocolate Mocha Cream Cheese Frosting - small batch

Recipe by Julie Murphy
A chocolate mocha cream cheese frosting that glides on easy and smoothly.
Prep time: 5 minutes
Cook time: 0
Total time: 40 minutes (includes chilling time for cream & instant coffee)
Yield: 2 cups
Ingredients
  • 1/4 cup heavy cream
  • 2 packets instant coffee
  • 4 ounces cream cheese, room temperature
  • 2 Tablespoons butter, room temperature
  • 1 Tablespoon Dark cocoa powder
  • 1 and 1/2 cups powdered sugar
Directions
  1. In a small cup, mix together heavy cream and instant coffee. Place into refrigerator for about 30 minutes or until all coffee flakes are dissolved.
  2. In a medium to large mixing bowl, mix together cream cheese, butter, and creamed coffee mix. Blend on medium to high speed.
  3. Slowly add in powdered sugar and cocoa powder, mixing well. Blend on medium to high speed for another 45 to 60 seconds.
  4. Frosting should be creamy with no lumps. If you have lumps, blend for a few seconds longer. You might have a few small lumps but that's ok.
  5. After all ingredients are blended and no more lumps are noticeable, decorate cupcakes as desired.
  6. Sprinkle with crushed bacon lollipops.
  7. Place back into the freezer for at least 4 hours. Overnight is best so the cupcakes and frosting can set up.

Peanut Butter Cream Cheese Frosting - small batch

Recipe by Julie Murphy
A peanut butter cream cheese frosting that glides on easy and smoothly.
Prep time: 5 minutes
Cook time: 0
Total time: 10 minutes
Yield: 2 cups
Ingredients
  • 4 ounces cream cheese, room temperature
  • 1/4 cup heavy cream
  • 2 Tablespoons butter, room temperature
  • 1/4 teaspoon vanilla extract
  • 4 Tablespoons creamy peanut butter
  • 1 and 1/2 cups powdered sugar
Directions
  1. In a medium to large mixing bowl, mix together cream cheese, butter, peanut butter, heavy cream, and vanilla. Blend on medium to high speed.
  2. Slowly add in powdered sugar, mixing well. Blend on medium to high speed for another 45 to 60 seconds.
  3. Frosting should be creamy with no lumps. If you have lumps, blend for a few seconds longer. You might have a few small lumps, but that's ok.
  4. After all ingredients are blended and no more lumps are noticeable, decorate cupcakes as desired.
  5. Sprinkle with crushed bacon lollipops.
  6. Place back into the freezer for at least 4 hours. Overnight is best so the cupcakes and frosting can set up.

Disclaimer ~ I received no monies from Spangler Candy Company for this post. I only received Dum Dum's Lollipops to use for my recipe. All opinions and recipe are my own.

All content and images are property of Sweet and Spicy Monkey. Please do not reprint this content without my permission. If you wish to include this recipe on your site, please re-write in your own words and use your own photographs and link back to this post for original recipe.


Shared with: The Wednesday Roundup #82, Freedom Fridays with All My Bloggy Friends #89
Follow Julie's board Sweet and Spicy Monkey on Pinterest.

Friday, June 19, 2015

Overnight Hot Peanut Butter & Banana Granola


You might be familiar with the saying, "when one door closes, another door opens." Sadly the end has come to Amanda's #letsgetfoodiechallenge, which was to run through until October of this year. Amanda had to end her #letsgetfoodiechallenge as other priorities took over and she could no longer do everything she wished.

But as this door closed, another door opened for me as I accepted the Golden Girl Granola Blogger Recipe Challenge. Yes, another challenge! I'm loving them as they give me a, er....dare I say, challenge. Yes, I just said that {smile}.


I don't know if you've ever heard of Golden Girl Granola before. They're a family owned business that started out of their kitchen up in Massachusetts. They're slowly growing their business which is why they started these challenges to help people become familiar with their product through recipes. Which is a great marketing idea if you ask me! A win-win for everyone!

Golden Girl Granola has challenged bloggers who have responded to their plea to create an entree recipe using their granola. And since my favorite time to eat granola is in the morning because breakfast is the MOST important meal of the day (as y'all know), I created a breakfast recipe, Overnight Hot Peanut Butter & Banana Granola.


A blend of Golden Girl's Honey & Coconut Granola with bananas, peanut butter, almonds, and coconut all warmed up to help you start your day off right.

Overnight Hot Peanut Butter & Banana Granola

Recipe by Julie Murphy
An overnight granola that makes mornings warmer & easier.
Prep time: 5 minutes
Cook time: 2 minutes
Total time: 7 minutes
Yield: 1 serving
Ingredients
  • 1/2 cup + 1 Tablespoon Golden Girl's Honey & Coconut Granola
  • 3/4 cup + 1 Tablespoon unsweetened coconut milk
  • 2 Tablespoons unsweetened flaked coconut
  • 1 Tablespoon almonds, chopped
  • 1-2 teaspoons honey (optional)
  • 1 Tablespoon creamy peanut butter
  • 1 banana, sliced
Cooking Directions
  1. In a small bowl, add 1/2 cup granola, coconut milk, coconut flakes, and almonds.
  2. Mix together, cover, and place in refrigerator until morning.
  3. In the morning, mix in peanut butter and a dash (about 1 Tablespoon) of coconut milk to help keep mixture moist while cooking.
  4. Place bowl into microwave for about 1 to 2 minutes on High setting.
  5. After 2 minutes, remove bowl from microwave, stir, and add sliced banana. Mix together.
  6. Top with coconut flakes and 1 Tablespoon granola.
  7. Serve and enjoy!

Disclaimer - I did not receive any monies for this post. I only received one bag of granola from Golden Girl Granola to help in making with the recipe. All thoughts and opinions are my own.
 
All content and images are property of Sweet and Spicy Monkey. Please do not reprint this content without my permission. If you wish to include this recipe on your site, please re-write in your own words and use your own photographs and link back to this post for original recipe.
Follow Julie's board Sweet and Spicy Monkey on Pinterest.

Tuesday, December 9, 2014

Dreamy Dark Chocolate Peanut Butter Dip


It's all about the food....'bout the food...'bout the food this month as December is the season for parties. You have Christmas parties for work, Christmas parties with family and friends, another Christmas party with your other friends, and the Christmas party with your neighbors. And that's just the Christmas parties. Then there's the New Years Eve parties and New Years parties.

You'll not only need food for main courses, but you'll need appetizers, chips and dips, and drink ideas. Plus you'll need food for the kids while you're out doing "grown up stuff".


This dip is perfect for any of the above. Plus it's quick and easy to make and you probably have all the ingredients in your cupboards right now.

It's also quite versatile. You can serve it with anything from graham crackers, pretzels, chocolate or vanilla wafers to banana chips and plantain chips. Trust me, I tried them all, for the sake of saving you from having to do all the hard work, of course.

I'll just dance a little more this season to help burn off the calories. Ha, if you saw me dance you wouldn't have let me taste test my dip with all the different dippers {chuckle}. Remember that Seinfeld episode where Elaine dances....


 Feel free to try it with your own likings and let me know what combinations you serve it up with.

Dreamy Dark Chocolate Peanut Butter Dip

Ingredients

8 ounces cream cheese, room temperature

1 cup Dark Chocolate Dreams peanut butter

1 teaspoon cinnamon

6 Tablespoons honey

Directions

In a medium sized mixing bowl, add cream cheese and peanut butter, blending together until creamy.

Mix in cinnamon and honey throughout mixture. Mixture will be thick like a cookie dough.

Refrigerate in an air tight container until ready to serve. Can be stored refrigerated up to one week.

Serve in a bowl with side of pretzels, wafers, banana chips, plantains, or Annie's cocoa and vanilla gluten free bunny crackers, as pictured in the photos.

*Helpful Hints*

- Can also use whipped cream cheese, low-fat or fat-free cream cheese, or Neufchatel cheese, room temperature.


Disclaimer ~ I do not represent Peanut Butter & Co., nor did I receive any monies for this post. I just love their Dark Chocolate Dreams peanut butter and found it delicious in this recipe.

All content and images are property of Sweet and Spicy Monkey. Please do not reprint this content without my permission. If you wish to include this recipe on your site, please re-write in your own words and use your own photographs and link back to this post for original recipe.


Follow Julie's board Sweet and Spicy Monkey on Pinterest.

Shared with: Freedom Fridays with All My Bloggy Friends #61, Munching Mondays #73

Thursday, October 2, 2014

Homemade Peanut Butter Pudding Parfaits


I hope you didn’t have too much of a bumpy ride this week as we finally reach our final destination at Peanut Butter Land! That’s right, anything and everything peanut butter! So all you peanut butter lover’s grab your spoons as we are about to dig into some…


wait for it…


Peanut butter pudding! It tastes just like it sounds, creamy, peanut buttery pudding. I’m drooling right now just thinking of it!

And what’s better than peanut butter pudding, you ask? Well, grab some of the peanut butter cookies and peanut butter whipped cream I made a few days ago…


combine them all together, sprinkle a few Reese’s pieces and candy corn M&M’s in between, and you have a peanut butter lover’s creamy dream in this peanut butter parfait!

Ah yes, our travels are complete here in Peanut Butter Land…and my taste buds and tummy are happy {smile}.

Ingredients for Peanut Butter Pudding

2 cups Almond-Coconut milk (can use any type of milk you prefer)

2 Tablespoons Creamy peanut butter

1 cup granulated sugar

3 Tablespoons cornstarch

¼ teaspoon sea salt

3 egg yolks, in a separate bowl

1 teaspoon vanilla extract

2 Tablespoons unsalted butter

Directions for Peanut Butter Pudding

Without placing on burner, add your sugar, cornstarch, and salt in a medium saucepan and mix together. Set aside.

Separate egg yolks from egg whites and place in a small bowl and beat the yolks until they are blended. Set aside egg yolks. *You will not be needing the egg whites for this recipe so place the whites in refrigerator for another use.*

In a small saucepan, add milk and peanut butter. Over medium to high heat, melt peanut butter in milk, stirring often. You do not want milk to burn.

Once peanut butter is melted. Slowly add milk mixture to dry ingredients in medium saucepan.
Continue cooking over medium heat until mixture boils.

After it becomes thick, cook an additional 2 minutes longer.

Remove from heat.

Add 1 Tablespoon of hot mixture into beaten egg yolks, stirring constantly. Once combined, add in another Tablespoon of hot pudding mix into egg yolks, stirring until mixed completely. Add egg yolk mixture into pudding mixture, stirring well.

Return to medium heat and cook for another 2 minutes, while gently boiling and continuously stirring.

Remove from heat.

Add in butter and vanilla. Mix well until all ingredients are combined.

Pour pudding into bowl and cover with wax paper. Place in refrigerator and let cool.

Best if it sits overnight so flavors can combine.

Directions for making Parfaits

Place peanut butter cookie crumbs in the bottom of dishes, layer with peanut butter pudding, peanut butter whipped creampeanut butter cookie crumbs, and Reese’s pieces and/or Candy corn M&M’s.

Can top with chopped peanuts, M&M’s, peanut butter syrup, salted caramel coconut sauce, or chocolate syrup. Enjoy!


*Helpful Hints*

- All measurements are US

All content and images are property of Sweet and Spicy Monkey. Please do not reprint this content without my permission. If you wish to include this recipe on your site, please re-write in your own words and use your own photographs and link back to this post for original recipe.
Follow Julie's board Sweet and Spicy Monkey on Pinterest.

Sunday, September 28, 2014

Peanut Butter Whipped Cream

 
So glad you joined me on the peanut butter wagon last week because today we’re traveling a little farther down that road. We’re continuing the peanut butter love today with peanut butter whipped cream! Just thinking about it gives me shivers all over. Light and fluffy, creamy peanut butter whipped, just like 50 Shades of Grey, except faster and no marks!

Just think of the possibilities for this whipped cream:

As a topping for pie, cake, pudding, or ice cream

Pancakes, French toast, or waffles topping

Your morning coffee, not to mention iced Frappuccino’s (Mmmm, peanut butter coffee!)

Sandwiched between cookies


Mixed with a little granola

Used for a fruit dip, especially apples

Or the guilty pleasure of dipping your finger into the jar when nobody is looking!


Oh, I can go on but I think you get the hint. If you love peanut butter, then the possibilities of this whipped cream are endless. The best part is it only takes minutes to whip up and it taste so much better than anything store bought.

And the peanut butter love doesn’t stop here. So keep your hands and feet in the wagon, grab a spoon (preferably with this peanut butter whipped cream), and enjoy yourselves as we travel deeper into peanut butter land....


Peanut Butter Whipped Cream

Ingredients

1 cup heavy cream

¼ cup confectioner’s sugar

2 Tablespoons creamy peanut butter

½ teaspoon vanilla extract

Directions

Add all ingredients into a large mixing bowl and using your stand mixer (or hand mixer) whip at medium-high to high speed until mixture thickens and soft peaks form.

Place into an airtight container and refrigerate.

Can store up to 1 week in refrigerator.

Recipe from ~ Food Network

*Helpful Hints*

- All measurements are US

All content and images are property of Sweet and Spicy Monkey. Please do not reprint this content without my permission. If you wish to include this recipe on your site, please re-write in your own words and use your own photographs and link back to this post for original recipe.
Follow Julie's board Sweet and Spicy Monkey on Pinterest.

Shared with: The Southern Special 28, Tasty Tuesday Recipe Link Up, Lou Lou Girls Fabulous Party #28, On Display Thursday Linky Party #17

Thursday, September 25, 2014

Soft & Chewy Peanut Butter Cookies


It’s finally here, my favorite season of the year, Fall! I love the cooler temperatures and the changing colors of the leaves during this time, not to mention it’s football season..Yaay!

And while everyone else is making everything pumpkin and apple right now, I’m off in another direction, marching to the beat of a different drummer, going towards….wait for it…..peanut butter! Ah yes, the creaminess and peanutty deliciousness of peanut butter.


Even though you can enjoy peanut butter all year round, Fall always reminds me of this easily available creamy delight. You think it might have something to do with my mom always making me peanut butter and jelly sandwiches for school lunches? Nah, I didn’t think so either {smile}.

What’s not to love about peanut butter? The way it sticks to the top of your mouth when you eat it, how easy it is to walk around the house doing your chores while you lick it off a spoon (I know you do!), and it’s good for you too.

Peanut butter is my favorite workout supplement as its high in protein and low in sugar, 7 grams of protein and 3 grams of sugar per 2 Tablespoons. Compared to non-fat vanilla yogurt which has about 17 grams of sugar per 6 ounce serving. Another reason I quit buying flavored yogurts and only buy Fage plain non-fat Greek yogurt or make my own, but that’s a whole ‘nother blog post.

Today, it’s all about peanut butter! Well, peanut butter cookies, but they’re made with peanut butter! And instead of plain peanut butter cookies, I added another taste of Fall with candy corn M&M’s. How much more Fall do these cookies need to be? The candy corn M&M’s and peanut butter are the perfect blend of Fall flavors.


These cookies are soft and chewy and just melt in your mouth. Seriously.


So while everyone else is on the pumpkin and apple wagon, jump on over with me and enjoy a little creamy peanut butter goodness while watching the leaves change colors…


 Soft & Chewy Peanut Butter Cookies

Ingredients

1 cup unsalted butter, room temperature

½ cup granulated sugar

1 cup brown sugar, packed

2 teaspoons vanilla extract

2 large eggs

1 cup creamy peanut butter (can also use chunky peanut butter)

2 cups flour, sifted

¼ teaspoon salt

½ teaspoon baking Soda

½ teaspoon baking powder

1 tablespoon cornstarch

1 bag of Candy Corn M&M’s (9.90 ounces)

Directions

Preheat oven to 350F degrees.

Spray cookie sheets with non-stick spray. Set aside.

In a large mixing bowl, combine softened butter with white and brown sugars until creamy.

Add vanilla, eggs, and peanut butter until well blended.

Sift together flour, salt, baking soda, and cornstarch in a separate bowl.

Mix dry ingredients a little at a time with peanut butter mixture until blended thoroughly.

Mixing by hand, add in candy corn M&M’s, blending throughout dough mixture.

Drop tablespoon size balls onto prepared cookie sheet.

Using a wetted fork, gently press cookie with fork tines. You don't want to make too flat as these cookies will spread while baking. You should have a criss cross design on top of each cookie.

Place cookie sheet in oven for 10 minutes. Or until cookies show a little bit of browning around the edges.

Remove cookies from oven and let cool on cookie sheet for 5 minutes before placing them on a wire rack to cool completely.

After cookies have completely cooled, store in an airtight container.

Will stay fresh for about 1 week (if they last that long).

*Helpful Hints*

- All measurements are US

All content and images are property of Sweet and Spicy Monkey. Please do not reprint this content without my permission. If you wish to include this recipe on your site, please re-write in your own words and use your own photographs and link back to this post for original recipe.
Follow Julie's board Sweet and Spicy Monkey on Pinterest.

Featured at ~ Wake Up Wednesday "Linky" Party #39

Shared with: Wake Up Wednesday "Linky" #38, The Wednesday Roundup #47, On Display Thursday Linky Party #16, Inspire Us Thursday Link Party #71, Pin It Thursday, Wonderful Wednesday Blog Hop #95, Busy Monday 136, Inspiration Monday