Sweet and Spicy Monkey has moved to: www.sweetandspicymonkey.com

Showing posts with label pudding. Show all posts

Tuesday, August 11, 2015

Banana Pudding - GF, Dairy-free, Soy-free


I have been obsessed this past week with banana pudding. And not just your ordinary banana pudding, but a dairy free banana pudding.

It just so happens as I was putting my carton of Silk coconut milk in the fridge the other day, I saw a recipe on the back for banana pudding. This is what started my crazy banana pudding search. I decided to try the recipe and I opted for Splenda instead of sugar, because I wanted a refined sugar- free pudding.

Now I don't know if it was the Splenda, or if I stirred it too long or at too high a temperature, or maybe this is what it's supposed to look and taste like. But according to the reviews it got, I think either I messed up somewhere along the way or those reviews are all falsified! Because my coconut milk banana pudding didn't look anything like the photo! Gasp!

While their coconut banana pudding looked fluffy and creamy and Oh So delicious, mine was clumpy, not at all fluffy cloud-like, and had a very mild vanilla taste, even after I added more vanilla than the recipe called for.

Now don't get me wrong, for a sugar-free alternative, it was edible (but I threw out the rest), but nothing like the creamy vanilla pudding I remember as a kid.

Needless to say, I started looking at ways to improve my dairy free pudding. I wanted a creamy pudding that tasted like bananas. After all, there’s a reason they don't call banana pudding vanilla pudding. It's supposed to be banana pudding with sliced bananas, vanilla wafers, and whipped cream.

Banana. Mania!


So off I went to search for the ultimate dairy free banana pudding recipe. It wasn't easy and I don't recommend it to anyone. Long sleepless nights, weary, tired eyes, endless cups of coffee, after searching endless hours, maybe even days, on Pinterest.

Did you know you there are lots of recipes for banana pudding on Pinterest? And I love how they put pins on your search page that don't even have the ingredient you're searching for. Somehow I got lost in the chocolate and peanut butter search. I didn't even know I was looking for a chocolate and peanut butter recipe!

They must know I have a short attention span. Oh look butterflies.....
squirrel....oooh, pretty red bird!

Hello, I'm back!

So after my search, I finally found this dairy free pudding recipe using coconut milk and honey. I love how it uses honey and not refined sugar.

I tweaked it a bit and came up with my own version of dairy free banana pudding. A rich and creamy, banana-ey pudding that has no refined sugar and is dairy free. I hope you like it as much as I do. (Pssst, I even tried it with vanilla wafers and it is A-M-A-Z-I-N-G!).

If you don't like this version, you can always try the recipe on the back of the Silk coconut milk carton. But if you do, please let me know how yours turned out, clumpy like mine or like a whipped cloud of vanilla yumminess as pictured on the carton.

Oh, look at the shiny spoon....

Banana Pudding - GF, Dairy-free, Soy free

Prep time: 5 minutes
Cook time: 8 to 10 minutes
Total time: 15 minutes
Yield: 4 servings
Ingredients
  • 2 ripe bananas, pureed
  • 1/2 teaspoon sea salt
  • 1 teaspoon vanilla extract
  • 2 teaspoons Banana Royale Fountain Flavor
  • 4 egg yolks
  • 1/4 cup + 1 Tablespoon honey
  • 1/4 cup + 2 Tablespoons cornstarch
  • 2 cups canned coconut milk, full fat
  • extra bananas for garnish
Cooking Directions
  1. Puree 2 bananas in a blender.
  2. Pour bananas into a small bowl and add salt, vanilla, and banana flavoring. Mix together and set aside.
  3. In a separate bowl, whisk together egg yolks, honey, and cornstarch. Set aside.
  4. In a medium sauce pan, heat coconut milk over medium heat for about 5 minutes, whisking occasionally. Do not let it boil.
  5. Remove coconut milk from heat.
  6. Using a ladle, pour about 1 cup of warmed coconut milk into egg yolk mix. Making sure you stir constantly as you do this so you don't end up with scrambled eggs. Stir in another small ladle of coconut milk into egg yolk mixture.
  7. Add egg yolk mixture back into sauce pan and stir together.
  8. Place pan back over medium heat and continue to stir while cooking for another 3 to 4 minutes. Mixture will become thicker the longer you cook it. Continue to stir while not letting it boil. If it starts to boil, turn down heat or remove pan from heat and then replace back on burner and continue cooking until it reaches desired thickness. Keep in mind, it will be less thick after adding banana mixture.
  9. After mixture thickens, remove from heat and stir in banana mixture, mixing well.
  10. Transfer into a large bowl. Cover top with wax paper. Place into refrigerator for at least 4 hours.
  11. After pudding chills, serve in small bowls or cups.
  12. Garnish with fresh, sliced bananas, whipped cream (dairy-free, of course), and/or granola.

*Helpful Hints*
 
- I purchased Banana Royale Flavor Fountain online at Olive Nation. It's Kosher, sugar free, gluten-free, calorie free, and water soluble.

- If you don't have a blender, you can mash the bananas by hand with a fork. But they will make your pudding clumpy instead of smooth.

- Depending how ripe your bananas are, pudding might turn out tan in color. It's perfectly ok like this as it does not affect the taste. Also pudding will darken during storage in refrigerator due to bananas.

- If you want to make this Paleo friendly, use arrowroot powder in place of cornstarch. However, measurements might not be the same for arrowroot as  they are for the cornstarch. This recipe was made for using cornstarch.
 
Inspired by ~ Rebecca at Paleo Grubs.

Disclaimer ~ I was not paid for this post to endorse Olive Nation. I just purchased their product and thought I would share it with you, as its an excellent flavoring for many things.
 
All content and images are property of Sweet and Spicy Monkey. Please do not reprint this content without my permission. If you wish to include this recipe on your site, please re-write in your own words and use your own photographs and link back to this post for original recipe.
Follow Julie's board Sweet and Spicy Monkey on Pinterest.

Shared with: Savoring Saturdays
Wednesday, April 8, 2015

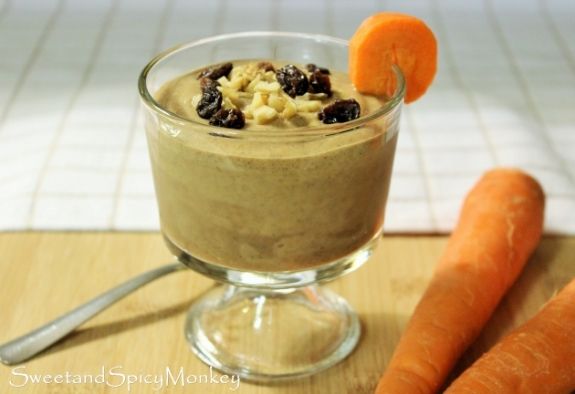
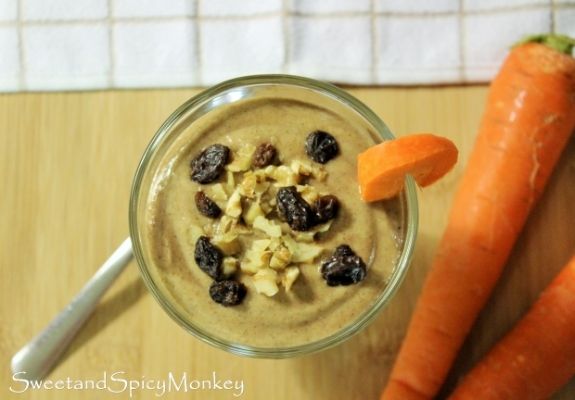
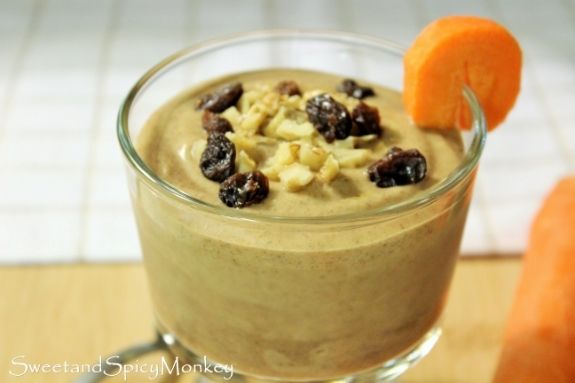
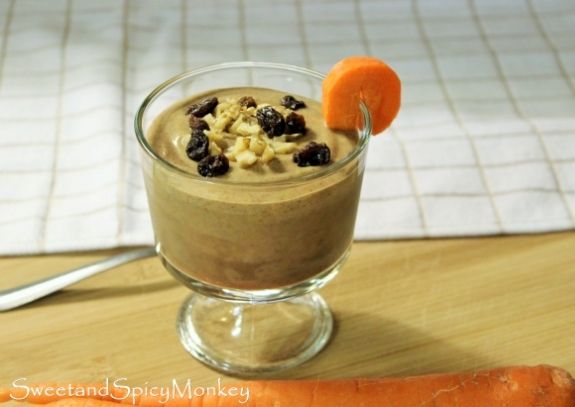
Carrot Cake Chia Pudding


I'm near the end of my Sugar Crush Challenge so I'm still experimenting with sugar free sweets. And I'm so happy I've stumbled upon this idea of Carrot Cake Chia Pudding, inspired by Ali's smoothie over at Gimme Some Oven.

I used Medjool dates for natural sweetness and instead of a smoothie, I made mine a pudding. If you would like this as a smoothie, just use two tablespoons of chia seeds instead of three.


Oh my, it's everything a carrot cake is - a lightly spiced, sweet delight! All in a healthy chia pudding without all the sugar and calories that comes with a slice of cake.

It even has the same coloring as a slice of carrot cake!
So go ahead and make yourself some of this today and indulge in every bite because....well, because you deserve it after all you've done {smile}!


------------------------------------------------------------
Carrot Cake Chia Pudding
Recipe by Julie Murphy
Prep time: 5 minutes
Total time: 5 minutes
-------------------------------------------------------------
Ingredients
  • 1 cup coconut milk
  • 1/4 cup plain Greek yogurt
  • 1 frozen banana, sliced
  • 2 carrots, peeled and sliced
  • 3 Medjool dates, pitted
  • 2 Tablespoons unsweetened, flaked coconut
  • 1 scoop Vanilla protein powder
  • 1/4 + 1/8 teaspoon ground cinnamon
  • 1/16 teaspoon ground ginger
  • dash ground nutmeg
  • 3 Tablespoons chia seeds
 
Directions
  1. Add coconut milk, yogurt, frozen banana, carrot slices, and dates into a blender.
  2. Pulse on High setting for no more than 10-12 seconds, repeating until all ingredients are pureed.
  3. Remove lid and add remaining ingredients. Repeat pulsing on High setting, should take no more than 3-5 times to have all ingredients blended together smoothly.
  4. Pour into a medium bowl, cover, and refrigerate overnight.
  5. Can serve with flaked, unsweetened coconut, raisins, chopped walnuts, fresh or dried pineapple, and/or carrot slices or peelings sprinkled over the top as shown.
       

*Helpful Hints*

- If you're not using a high speed blender, use carrot peelings instead of carrot slices, so you do not damage your blender.

- Easy way of how to prepare your banana - peel, chop into slices, place in Ziploc bag, and freeze overnight.
 
All content and images are property of Sweet and Spicy Monkey. Please do not reprint this content without my permission. If you wish to include this recipe on your site, please re-write in your own words and use your own photographs and link back to this post for original recipe.
Follow Julie's board Sweet and Spicy Monkey on Pinterest.

Shared with: Savoring Saturdays, Munching Mondays #86, Totally Terrific Tuesday Link Party #28

Tuesday, March 24, 2015

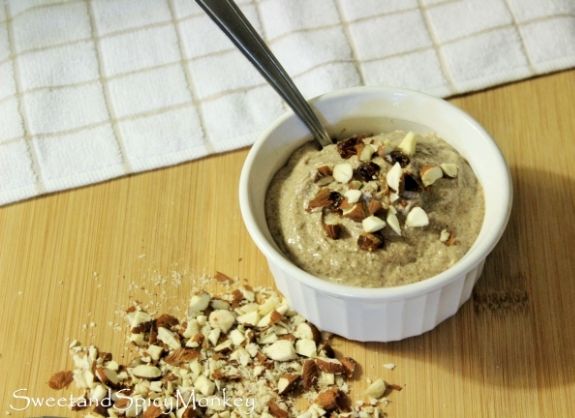
Almond Date Chia Pudding


If you've been following me, y'all know that I've been on the Sugar Crush Sugar-Free Challenge since the beginning of March. Mainly because I have a huge sweet tooth that had has gotten out of control. I mean I was eating cookies, pancakes with sweet syrups, and more cookies! And my thinking was this challenge would help me regain control of my sweet tooth once again.

Over the last few weeks, I'm slowly starting to regain control of my sweet tooth {smile}. And it really wasn't that difficult to do.

The first five days, I kept a food journal and kept tabs on the sugar content of the foods I ate. Most of my sugar was in my breakfast meals, hidden in my orange juice and milk. Since then, I've learned ways to cut my sugar down in my breakfast.


I've also started eating other foods that I had never tried before like chia seeds and matcha (recipes coming soon for matcha too!). So in all, I'm just trying to get back to my " healthy" and keep cutting out the sugar in my diet so my overzealous sweet tooth doesn't take over again!

And in doing so, I've learned how to make chia pudding. I know, if you've seen photos of chia pudding before, it doesn't look appetizing at all, with those little seeds covered in what some may call, er, slime. But really, if you grind those little seeds up, not only will you get more nutrients from them, but they don't have the slimy texture either. And you're left with a creamy, pudding- like mixture that is also good for you.


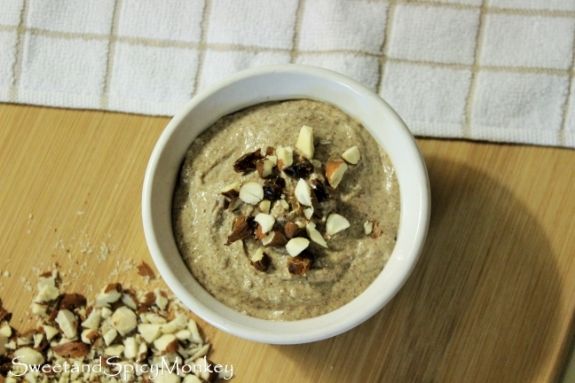
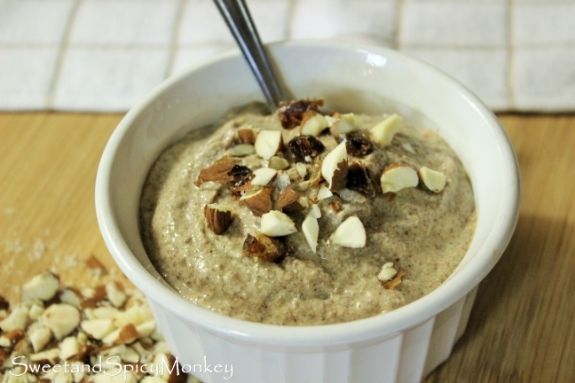
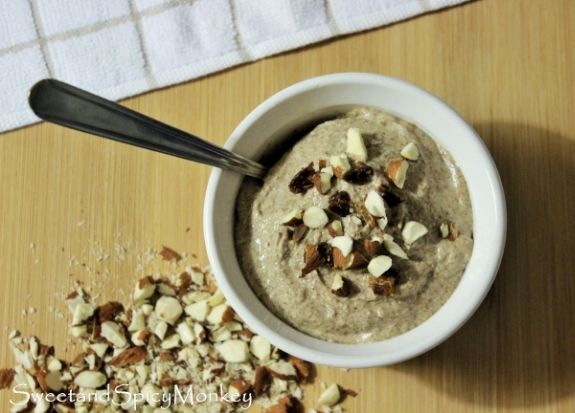
To make this, I ground up my almonds, used unsweetened almond milk, a little agave nectar along with dates for sweetener, some cinnamon, vanilla and almond extract, and wa-la, Almond Date Chia Pudding was born.

The best thing about this pudding is you don't even have to refrigerate to let it set up before eating as the texture is pudding-like as soon as you're done making it! Even though it does taste better after its chilled and the flavors mingle together.

After a bite of this, I'm like "sugar? Who needs sugar anymore when I've got this Almond Date Chia Pudding!


BAM!
------------------------------------------------------------

Almond Date Chia Pudding

Makes 17.6 ounces (500 grams)
------------------------------------------------------------
Ingredients
  • 2 cups Almond milk. unsweetened
  • 6 Tablespoons Chia seeds
  • 1 teaspoon ground cinnamon
  • 1 teaspoon Almond extract
  • 2 teaspoons vanilla extract
  • 2 Tablespoons coconut butter
  • 1 cup whole, raw almonds
  • 12 dates, chopped
  • 2 Tablespoons agave nectar
 
Directions
  1. Add almonds, chopped dates, and chia seeds into a high speed blender and turn on High setting. Blend until almonds, dates, and chia seeds are a fine powder, about 5 minutes or less.
  2. Add in remaining ingredients until all ingredients are mixed and ingredients resemble a thick pudding-like mixture, about 3-5 minutes.
  3. Place into a bowl, cover, and refrigerate or you can serve immediately.
 
Serve topped with chopped dates, chopped almonds, or both as pictured above. 
Store in refrigerator for up to 5-7 days.

*Helpful Hints*

- When cutting your almonds, make sure you use a clean cutting board and not one that's used for meats. Here's a helpful link brought to you by CustomMade that tells you how to care for your cutting board and what makes the best type of cutting board, one that is easily cleaned and doesn't harbor bacteria from foods

- Also make sure you use a sharp knife that's made to chop the almonds. Here's a helpful link brought to you by Fix that tells you what type of knives work best with what you're cutting, how to care for your knives, plus how to properly store knives so they will last a lifetime in your kitchen.

*Disclaimer - This post contains affiliate links.*

All content and images are property of Sweet and Spicy Monkey. Please do not reprint this content without my permission. If you wish to include this recipe on your site, please re-write in your own words and use your own photographs and link back to this post for original recipe.
Follow Julie's board Sweet and Spicy Monkey on Pinterest.

Shared with: Savoring Saturdays, Munching Mondays #84

Thursday, October 2, 2014

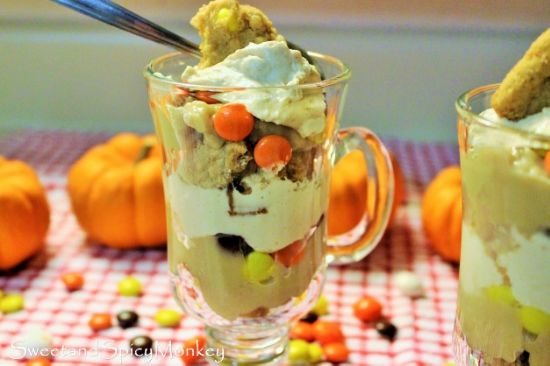
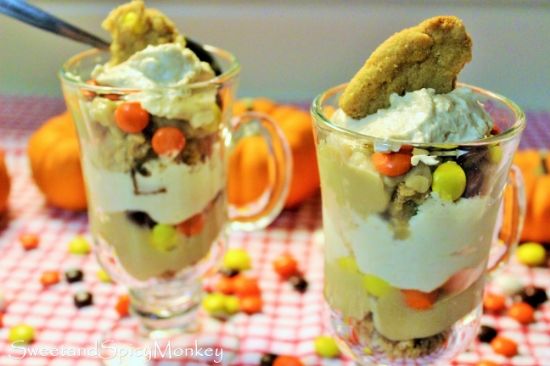
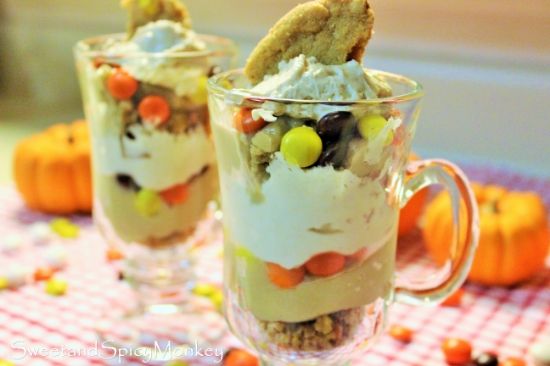
Homemade Peanut Butter Pudding Parfaits


I hope you didn’t have too much of a bumpy ride this week as we finally reach our final destination at Peanut Butter Land! That’s right, anything and everything peanut butter! So all you peanut butter lover’s grab your spoons as we are about to dig into some…


wait for it…


Peanut butter pudding! It tastes just like it sounds, creamy, peanut buttery pudding. I’m drooling right now just thinking of it!

And what’s better than peanut butter pudding, you ask? Well, grab some of the peanut butter cookies and peanut butter whipped cream I made a few days ago…


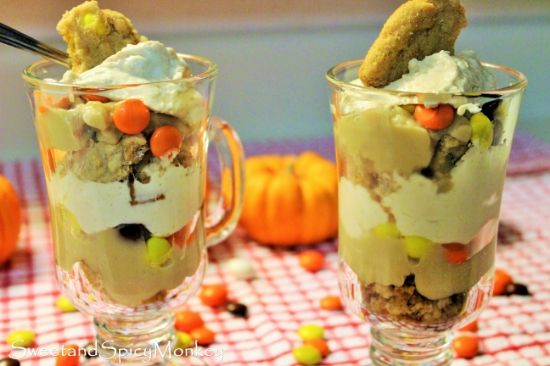
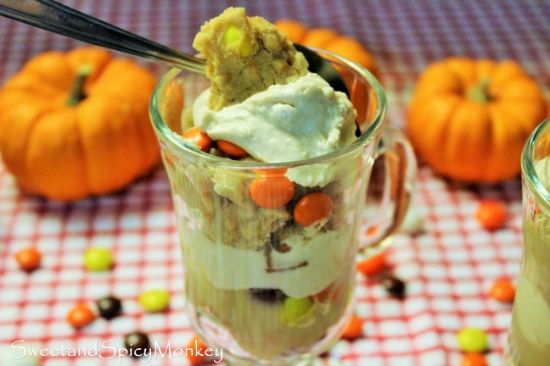
combine them all together, sprinkle a few Reese’s pieces and candy corn M&M’s in between, and you have a peanut butter lover’s creamy dream in this peanut butter parfait!

Ah yes, our travels are complete here in Peanut Butter Land…and my taste buds and tummy are happy {smile}.

Ingredients for Peanut Butter Pudding

2 cups Almond-Coconut milk (can use any type of milk you prefer)

2 Tablespoons Creamy peanut butter

1 cup granulated sugar

3 Tablespoons cornstarch

¼ teaspoon sea salt

3 egg yolks, in a separate bowl

1 teaspoon vanilla extract

2 Tablespoons unsalted butter

Directions for Peanut Butter Pudding

Without placing on burner, add your sugar, cornstarch, and salt in a medium saucepan and mix together. Set aside.

Separate egg yolks from egg whites and place in a small bowl and beat the yolks until they are blended. Set aside egg yolks. *You will not be needing the egg whites for this recipe so place the whites in refrigerator for another use.*

In a small saucepan, add milk and peanut butter. Over medium to high heat, melt peanut butter in milk, stirring often. You do not want milk to burn.

Once peanut butter is melted. Slowly add milk mixture to dry ingredients in medium saucepan.
Continue cooking over medium heat until mixture boils.

After it becomes thick, cook an additional 2 minutes longer.

Remove from heat.

Add 1 Tablespoon of hot mixture into beaten egg yolks, stirring constantly. Once combined, add in another Tablespoon of hot pudding mix into egg yolks, stirring until mixed completely. Add egg yolk mixture into pudding mixture, stirring well.

Return to medium heat and cook for another 2 minutes, while gently boiling and continuously stirring.

Remove from heat.

Add in butter and vanilla. Mix well until all ingredients are combined.

Pour pudding into bowl and cover with wax paper. Place in refrigerator and let cool.

Best if it sits overnight so flavors can combine.

Directions for making Parfaits

Place peanut butter cookie crumbs in the bottom of dishes, layer with peanut butter pudding, peanut butter whipped creampeanut butter cookie crumbs, and Reese’s pieces and/or Candy corn M&M’s.

Can top with chopped peanuts, M&M’s, peanut butter syrup, salted caramel coconut sauce, or chocolate syrup. Enjoy!


*Helpful Hints*

- All measurements are US

All content and images are property of Sweet and Spicy Monkey. Please do not reprint this content without my permission. If you wish to include this recipe on your site, please re-write in your own words and use your own photographs and link back to this post for original recipe.
Follow Julie's board Sweet and Spicy Monkey on Pinterest.

Saturday, July 19, 2014

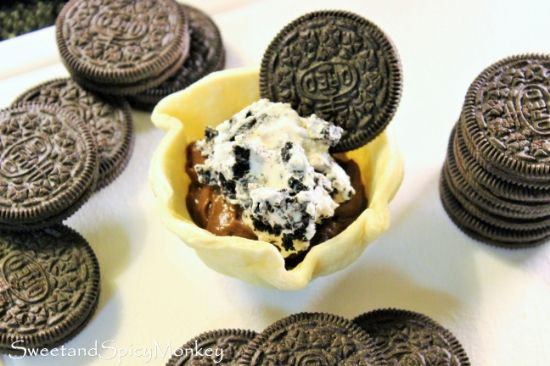
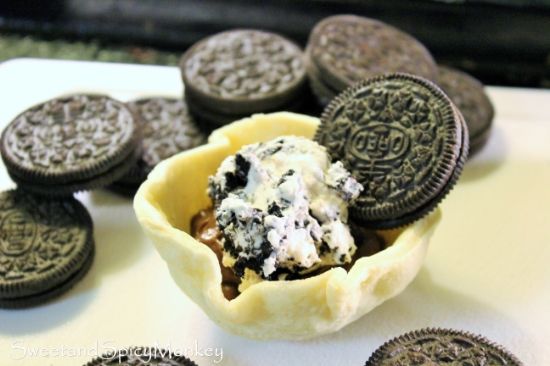
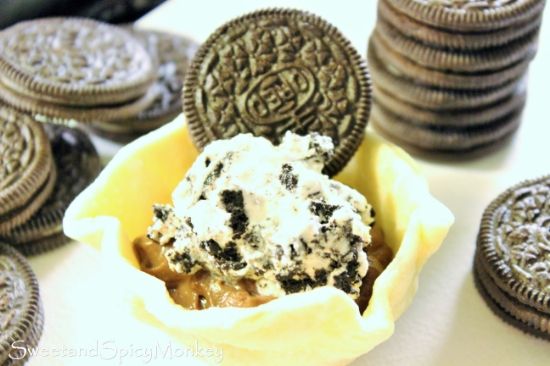
Mini Chocolate Oreo Pies


I came across this cool little trick on Pinterest by Dorothy at Crazy for Crust for making miniature pie shells that I’ve been wanting to try but it’s just been so hot here lately and I haven’t wanted to turn my oven on. All’s I’m saying is this weekend was the perfect trifecta because it’s been raining and a nice cool 70 degrees here in Georgia today. Perfect Fall-like weather for baking!

Once I made these mini pie shells, I needed something to go inside of them. And ever since I made my Double Stuff Oreo pancakes, I have been craving chocolate! And not just chocolate, but that little cream filled chocolate morsel, America’s favorite, the Oreo cookie!


I still had some left over Oreo whipped cream topping from my Double Stuff Oreo pancakes  and wanted to use that up. And I’ve been wanting to make a chocolate pudding recipe using coconut milk instead of regular milk, which turned out deliciously creamy and perfect for filling these little pies!


So I actually got to finally do two things I’ve been wanting to try and use up the rest of the Oreo whipped topping. A win-win for everyone!

Not only are these mini pies creamy delicious and chocolatey, but they’re also portion controlled because they come in their own little edible dish. Making it the perfect dessert for any get together.

And the best part is, it looks like you’ve spent all day in the kitchen baking (but that will be our little secret {wink}).


Mini Chocolate Oreo Pies  

Ingredients and Directions for making mini pie crusts

You only need one ingredient for this and that is your favorite store bought pie crust. One pie crust makes 6 mini pie crusts.

Using a regular sized muffin or cupcake pan, turn over and spray the bottom with non-stick spray.
We will be using the bottom of the pan. Set aside.

Unroll the pie crust and place on lightly floured counter. Cut circles of pie crust. For this, I used the bottom of a glass for direction but cut a little larger than the glass bottom since I wanted my pie crust to have depth.

Place circles of pie crust over the bottom of the muffin/cupcake pan and bake per instructions on pie crust packaging. I baked mine at 450F degrees for 10-12 minutes.

Remove from oven and let cool while still on muffin pan. After they have cooled, carefully remove from pan and place on wire rack to cool completely.


Ingredients for Chocolate Pudding

2 cups milk (you can also use coconut milk as I did)

2 ounces unsweetened chocolate squares (I used 100% cocoa which is a dark cocoa)

1 cup granulated sugar

3 to 3 ½ Tablespoons cornstarch

¼ teaspoon sea salt

3 egg yolks, place in a separate bowl

1 teaspoon vanilla extract

2 Tablespoons unsalted butter

Directions for preparing chocolate pudding

Without placing on burner, add your sugar, cornstarch, and salt in a medium saucepan and mix together. Set aside.

Separate egg yolks from egg whites and place in a small bowl and beat the yolks until they are blended. Set aside egg yolks. *You will not be needing the egg whites for this recipe so place the whites in refrigerator for another use.*

In a small saucepan, add milk and chocolate squares. Over medium to high heat, melt chocolate in milk, stirring often. You do not want milk to burn.

Once chocolate is completely melted. Slowly add milk mixture to dry ingredients in medium saucepan while stirring.

Continue cooking over medium heat until mixture boils.

After mixture becomes thick, cook an additional 2 minutes longer.

Remove from heat.

Add 1 Tablespoon of hot mixture into beaten egg yolks, stirring constantly. Once combined, add in another Tablespoon of pudding mix into egg yolks, stirring until mixed completely.

Add egg yolk mixture back into pudding mixture, stirring well so you don't get lumps.

Continue to cook for another 2 minutes at low to medium heat, while continuously stirring and mixture gently boils.

Remove from heat.

Add in butter and vanilla. Mix well until all ingredients are combined.

Pour pudding into medium bowl and cover with wax paper. Place in refrigerator and let cool.

Recipe and directions for Oreo Whipped topping can be found here.

To prepare mini pies ~

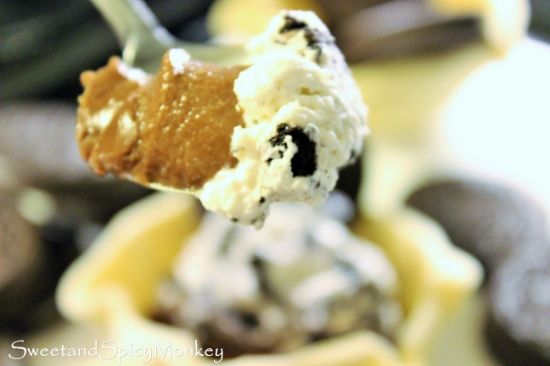
Simply place a dollop of pudding in pie crust and top with Oreo whipped topping and an Oreo cookie. Enjoy!

Chocolate pudding recipe adapted from ~ Best Homemade Chocolate Pudding

*Helpful Hints*

- a wire whisk works best for preparing pudding.

- Best if Oreo whipped topping and pudding are prepared ahead of time so flavors can combine and cool. Overnight is best.

- Best if you prepare mini pie shells at least 3 hours before filling so they can cool.

- All measurements are US

All content and images are property of Sweet and Spicy Monkey. Please do not reprint this content without my permission. If you wish to include this recipe on your site, please re-write in your own words and use your own photographs and link back to this post for original recipe.
Follow Julie's board Sweet and Spicy Monkey on Pinterest.
Follow on Bloglovin


Shared with ~ The Wednesday Roundup #37, Freedom Fridays with All My Bloggy Friends #39, #GetHimFed Fridays {46}, Pin Junkie Pin Party #78, Foodie Friends Friday Recipes Linky Party , Anything Goes Linky #165, Pretty Pintastic Party #14, Snickerdoodle Sunday #40, Share it Sunday {39}, Sweet and Savoury Sunday #73, Mix it up Monday!, Busy Monday 125, Munching Mondays #50, Motivational Mondays Linkup Party, Tasty Tuesday, Simple Supper Tuesday #73, Lou Lou Girls Fabulous Party #18, The Southern Special Week 18, Tickle My Tastebuds #12, Wine'd Down Wednesday 47, Wonderfully Creative Wednesdays #32, Wake Up Wednesday "Linky" #28, On Display Thursday (No. 6), Great Idea Thursday's - 63, Pin it Thursday, Inspire Us Thursday Link Party #62, Let's Get Real Friday Party #51

Sunday, April 13, 2014

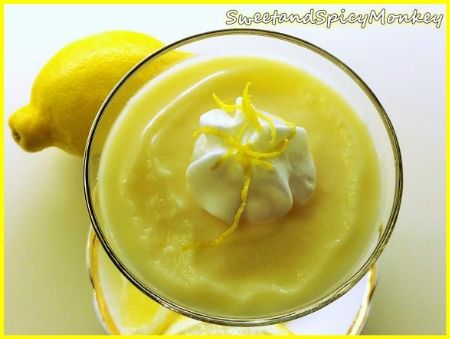
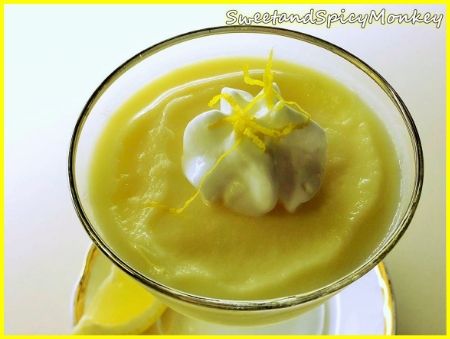
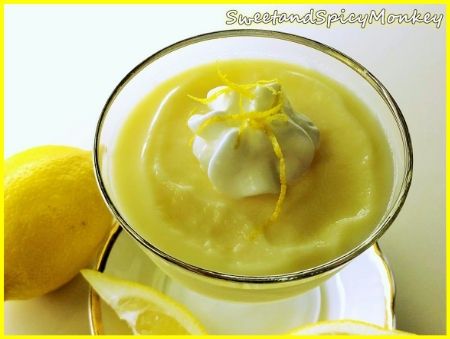
Homemade Lemon Pudding

 
I love the warm months with all the varieties of fruit and vegetables available during this time. Right now, I’m loving the strawberries, oranges, and lemons. Especially the lemons with their refreshingly citrus taste that can be added to anything and everything from meats to sweet treats.

Lemons remind me of summers when I was growing up. My BFF and I would use lemons for everything from lightening our hair and freckles, adding it to our iced tea or water, and just eating them raw, peel and all! Yep, we loved our lemons! Maybe that’s why lemons always remind me of the warmer weather months.

I’ve been wanting to make a homemade pudding recipe since I came across a homemade vanilla pudding recipe on Pinterest and it looked so easy to make and so yummy. Plus, I have never made homemade pudding before. This is true, never have I made a homemade pudding {shocked}!
I’m kinda ashamed to admit this, but the closest I’ve come to making homemade pudding is pouring the instant pudding into a bowl with milk and blending it with an electric mixer….at home. To me, that was homemade pudding!

Imagine my surprise when I finally did make this homemade pudding recipe and found out how easy it is to make and with no added preservatives or artificial coloring. Now since I’ve been on a lemon craze, instead of vanilla pudding, I decided to make lemon pudding, and I’m glad I did.

The creaminess of this pudding with the sweet lemon taste takes me back to my childhood summers on a hot, sunny day with my BFF. If we had this pudding growing up, I could picture us laying around the pool eating this refreshingly, sweet lemon pudding while working on our tans all summer long {smile}.

I hope y’all enjoy this lemon pudding and it brings back childhood memories for you too!

Homemade Lemon Pudding

Ingredients

¾ cup granulated sugar

¼ cup cornstarch

2 cups + 2 tablespoons milk

½ cup of half & half

3 large egg yolks, beaten

1 teaspoon vanilla extract

1 teaspoon lemon extract

Pinch of fine lemon zest

Dash of sea salt

½ cup fresh lemon juice

2 tablespoons unsalted butter, cut into 4 pieces

Directions

Separate egg yolks from whites. Lightly beat yolks and set aside.

Combine sugar and cornstarch into a medium saucepan. Do not turn on the heat just yet. Blend the 2 ingredients together.

With the heat still off, add milk and half & half into the pan and whisk until mixture becomes smooth in texture.

Place saucepan over Low heat setting. While the pan is warming up, add the egg yolks, vanilla, lemon extract, salt, and lemon zest.

Once ingredients are blended, turn heat up to a medium-high setting and stir constantly.

Continue to stir pudding mix. You know it’s going to be ready when you lift the spoon up and the pudding sticks to the back of the spoon.

When pudding sticks to back of the spoon, remove pan from heat.

Add in lemon juice and butter, stirring until butter is melted.

Pour into serving dishes and cover with wax paper, to help prevent film from forming on top of pudding.

Place into refrigerator and chill for at least 3-4 hours before eating.
Garnish as desired.

Featured on #GetHimFed Friday 04/25/2014 at Dizzy, Busy, and Hungry, The Southern Special #5

 
Shared with ~ Pin it Thursday, Let's Get Real Link Party #35, Strut Your Stuff Saturday Link Party Week #143, Weekend Potluck #114, Share it One More Time Party 4/19/2014, Boost Your Facebook Post Party, From the Farm Blog Hop, Sweet & Savoury Sundays #58, Inspiration Monday Party #32, Savoring Saturdays #11, Gingham & Roses Social Media Hop #16, The Sunday Social Blog Hop #11, The Southern Special , Simple Supper Tuesday #60, Wednesday Roundup #22


All content and images are property of Sweet and Spicy Monkey. Please do not reprint this content without my permission. If you wish to include this recipe on your site, please re-write in your own words and use your own photographs and link back to this post for original recipe.